HP SG3-100 Upgrading and Servicing Guide
HP SG3-100 - Desktop PC Manual
 |
View all HP SG3-100 manuals
Add to My Manuals
Save this manual to your list of manuals |
HP SG3-100 manual content summary:
- HP SG3-100 | Upgrading and Servicing Guide - Page 1
Upgrading and Servicing Guide - HP SG3-100 | Upgrading and Servicing Guide - Page 2
Vista are U.S. registered trademarks of Microsoft Corporation. The Windows logo and Windows Vista are trademarks or registered trademarks of Microsoft Corporation in the United States and/or other countries/regions. HP supports lawful use of technology and does not endorse or encourage the use - HP SG3-100 | Upgrading and Servicing Guide - Page 3
Table of Contents Upgrading and Servicing Guide 1 Safety Information 1 Opening and Closing the Computer 1 Preparing Disk Drive 15 Removing a Second Hard Disk Drive 16 Adding Memory 18 Removing a Memory Module 18 Installing a Memory Module 19 Removing or Installing an Add-In Card 20 Removing - HP SG3-100 | Upgrading and Servicing Guide - Page 4
iv Upgrading and Servicing Guide - HP SG3-100 | Upgrading and Servicing Guide - Page 5
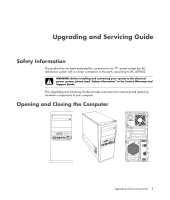
connecting your system to the electrical power system, please read "Safety Information" in the Limited Warranty and Support Guide. This Upgrading and Servicing Guide provides instructions for removing and replacing hardware components of your computer. Opening and Closing the Computer Upgrading and - HP SG3-100 | Upgrading and Servicing Guide - Page 6
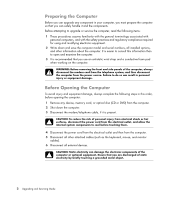
damage, always complete the following steps in this order, before opening the computer: 1 Remove any device, memory card, or optical disc (CD or DVD) from the computer. 2 Shut down the computer. 3 static electricity by briefly touching a grounded metal object. 2 Upgrading and Servicing Guide - HP SG3-100 | Upgrading and Servicing Guide - Page 7
to the equipment, do not plug telecommunications or telephone cables into the network interface card (NIC) (labeled as an Ethernet connector). 2 Reconnect the modem/telephone cable and all other cables (such chassis. WARNING: Beware of sharp edges inside the chassis. Upgrading and Servicing Guide 3 - HP SG3-100 | Upgrading and Servicing Guide - Page 8
After Closing the Computer" on page 3. Removing the Front Panel This procedure is necessary only when you are removing or replacing an optical drive, memory card reader, HP Media Drive bay, or the primary and secondary hard disk drives. 1 Pull the three tabs away from the outside edge of the chassis - HP SG3-100 | Upgrading and Servicing Guide - Page 9
right side of the front panel into the three holes on the right side of the chassis until the panel snaps into place. Upgrading and Servicing Guide 5 - HP SG3-100 | Upgrading and Servicing Guide - Page 10
or a CD-ROM, CD-RW, DVD-ROM, DVD+RW/+R, combination drive, or HP Personal Media Drive bay (select models only) C Primary hard disk drive D Memory card reader (select models only) E Front connector panel (no replacement instructions) F Space for a second hard disk drive (a second hard drive must be - HP SG3-100 | Upgrading and Servicing Guide - Page 11
it is compatible with the computer operating system. Also, ensure that you have the correct software and drivers for the optical drive to work with the operating system. Removing an Optical Drive 1 Prepare the computer or two optical drives, depending on your model. Upgrading and Servicing Guide 7 - HP SG3-100 | Upgrading and Servicing Guide - Page 12
the knockout plate slot (B), and then rotate the screwdriver to break the knockout plate out of the front panel. Discard the knockout plate. B B 8 Upgrading and Servicing Guide - HP SG3-100 | Upgrading and Servicing Guide - Page 13
Ensure that the jumper on the new optical drive or the new Parallel ATA hard disk drive is in the CS (Cable Select) position. Your drive may vary from the illustration. NOTE: The Serial ATA hard disk drive be unable to locate the hard disk drives and data may be lost. Upgrading and Servicing Guide 9 - HP SG3-100 | Upgrading and Servicing Guide - Page 14
the two screws on the side of the drive, and then slide the drive partway out of the front of the chassis. 10 Upgrading and Servicing Guide - HP SG3-100 | Upgrading and Servicing Guide - Page 15
it. See "Removing the Primary Hard Disk Drive" on page 10. 2 Slide the hard disk drive partway into the front of the chassis. Upgrading and Servicing Guide 11 - HP SG3-100 | Upgrading and Servicing Guide - Page 16
the two screws. 6 Replace the front and side panels, and then close the computer. See "Opening and Closing the Computer" on page 1. 12 Upgrading and Servicing Guide - HP SG3-100 | Upgrading and Servicing Guide - Page 17
partway out through the front of the chassis. CSommIa/prIaItx/McMDtFelDdaisah/ MMMCSPS//rDRPoS/R//MODPiu/lnuDoisu/oM/obile 3 Disconnect the cable from the back of the memory card reader. 4 Pull the memory card reader out through the front of the chassis. Upgrading and Servicing Guide 13 - HP SG3-100 | Upgrading and Servicing Guide - Page 18
If necessary, remove the knockout plate on the front cover. To do this, press the release button (A), and then pull the plate out. A A 3 Slide the memory card reader partway into the front of the chassis. 4 Attach the data cable to the back of the memory card reader. 14 Upgrading and Servicing Guide - HP SG3-100 | Upgrading and Servicing Guide - Page 19
is aligned with the screw hole on the right side of the memory card reader, and then attach the screw to secure the memory card reader to the chassis. 6 Replace the front and side panels a secondary hard disk drive (select models only). C - Connect to the motherboard. Upgrading and Servicing Guide 15 - HP SG3-100 | Upgrading and Servicing Guide - Page 20
panel of the chassis. NOTE: If you are replacing an old drive with a new drive, remove the four guide screws from the old drive, and use them to install the new drive. If you are installing a second hard screws that secure the second hard disk drive to the chassis. 16 Upgrading and Servicing Guide - HP SG3-100 | Upgrading and Servicing Guide - Page 21
the connector out of the drive connector. Disconnecting the Serial ATA hard disk drive cables Disconnecting the Parallel ATA hard disk drive cables Upgrading and Servicing Guide 17 - HP SG3-100 | Upgrading and Servicing Guide - Page 22
information and specifications, go to the Web site listed in your Limited Warranty and Support Guide, and click the Support link. WARNING: Using the wrong type of memory module could damage your computer. Removing a Memory Module 1 Prepare the computer to be opened, and then remove the side panel - HP SG3-100 | Upgrading and Servicing Guide - Page 23
the new module in the same memory socket from which you removed the old module. Or If you are adding a memory module, install the new module in the nearest memory socket to the preinstalled module, and then install additional modules in the next available sockets. Upgrading and Servicing Guide 19 - HP SG3-100 | Upgrading and Servicing Guide - Page 24
the Computer" on page 1. NOTE: If a blank screen is displayed after you replace or add a memory module, the module is installed incorrectly, or it is the wrong type of module. Remove and reinstall the for the add-in card slots, and then remove the bracket cover. 20 Upgrading and Servicing Guide - HP SG3-100 | Upgrading and Servicing Guide - Page 25
are not replacing the old add-in card with a new add-in card, insert the metal slot cover into the open card slot. Upgrading and Servicing Guide 21 - HP SG3-100 | Upgrading and Servicing Guide - Page 26
. See "Opening and Closing the Computer" on page 1. NOTE: If the new add-in card or device does not work, read the card manufacturer's installation instructions and recheck all connections, including those to the card, power supply, keyboard, and monitor. 22 Upgrading and - HP SG3-100 | Upgrading and Servicing Guide - Page 27
Discard used batteries according to the manufacturer's instructions. 1 Prepare the computer to be Remove any memory modules, if this is necessary in order to reach the battery. See "Adding Memory" on page (+) side facing the latch. 7 Replace any memory modules or cables that you removed. 8 Place - HP SG3-100 | Upgrading and Servicing Guide - Page 28
Part number: 5992-1508
-
 1
1 -
 2
2 -
 3
3 -
 4
4 -
 5
5 -
 6
6 -
 7
7 -
8
-
9
-
10
-
11
-
12
-
13
-
14
-
15
-
16
-
17
-
18
-
19
-
20
-
21
-
22
-
23
-
24
-
25
-
26
-
27
-
28
 |
 |

Upgrading and Servicing Guide