HP SR2020NX Upgrading and Servicing Guide
HP SR2020NX - Compaq Presario Media Center Manual
 |
View all HP SR2020NX manuals
Add to My Manuals
Save this manual to your list of manuals |
HP SR2020NX manual content summary:
- HP SR2020NX | Upgrading and Servicing Guide - Page 1
Upgrading and Servicing Guide - HP SR2020NX | Upgrading and Servicing Guide - Page 2
implied warranties of merchantability and fitness for a particular purpose. HP shall not be liable for errors contained herein or for for limited viewing uses only. Microsoft and Windows are U.S. Registered trademarks of Microsoft Corporation. HP supports lawful use of technology and does not endorse - HP SR2020NX | Upgrading and Servicing Guide - Page 3
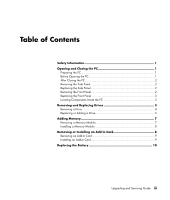
Replacing Drives 3 Removing a Drive 4 Replacing or Adding a Drive 5 Adding Memory 7 Removing a Memory Module 7 Installing a Memory Module 8 Removing or Installing an Add-In Card 8 Removing an Add-In Card 9 Installing an Add-In Card 9 Replacing the Battery 10 Upgrading and Servicing Guide - HP SR2020NX | Upgrading and Servicing Guide - Page 4
iv Upgrading and Servicing Guide - HP SR2020NX | Upgrading and Servicing Guide - Page 5
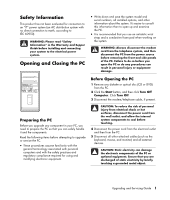
). WARNING: Please read "Safety Information" in the Warranty and Support Guide before installing and connecting your system to the electrical power system. Opening and Closing the PC • Write down and save the system model and serial numbers, all installed options, and other information about the - HP SR2020NX | Upgrading and Servicing Guide - Page 6
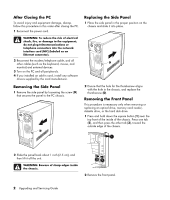
the PC chassis. 2 Ensure that the hole for the thumbscrew aligns with the hole in the chassis, and replace the thumbscrew (D). Removing the Front Panel This procedure is necessary only when removing or replacing an optical drive, memory card reader, diskette drive, or the hard disk drive. 1 Press - HP SR2020NX | Upgrading and Servicing Guide - Page 7
PC A B C D E R L F G CAUTION: Back up your personal files on the hard disk drive to an external storage device, such as a CD, before removing the hard disk drive. Failure to do so will result in data loss. After replacing the hard disk drive, you need to run System Recovery using the recovery discs - HP SR2020NX | Upgrading and Servicing Guide - Page 8
For a second hard disk drive, remove the two screws (3) and then slide the drive part way back out of the bay (4). Disconnecting the Optical Drive Cables Disconnecting the Memory Card Reader Drive Cable Removing the Second Hard Disk Drive 4 Upgrading and Servicing Guide Disconnecting the Diskette - HP SR2020NX | Upgrading and Servicing Guide - Page 9
new drive (two on each side). The screws help guide the drive into its proper position in the bay. For a second hard disk drive, skip this step and go to step 5. 5 Slide the drive part way into the drive bay, making sure to align the guide screws with the guide slots. Upgrading and Servicing Guide - HP SR2020NX | Upgrading and Servicing Guide - Page 10
a second hard disk drive, slide the drive into the bay (with connectors facing out) and align the screw holes (3). Insert the two screws (4). Connecting the Memory Card Reader Drive Cable Connecting the Diskette (Floppy) Drive Cables 6 Reconnect the power and data cables to your drive as indicated - HP SR2020NX | Upgrading and Servicing Guide - Page 11
- Connect to PC motherboard WARNING: For a second Parallel ATA drive, make sure to connect the data cable end labeled Master (A) to the primary hard disk drive, and the connector labeled Slave (B) to the secondary hard disk drive. If the data cable is not connected correctly, the PC will not be able - HP SR2020NX | Upgrading and Servicing Guide - Page 12
each board/card in the computer. The total +5 V current draw in a fully loaded system (one with all add-in card slots filled) must not exceed the total number of slots multiplied by 2 amps. A Phillips screwdriver is needed to remove, replace, or add an add-in card. 8 Upgrading and Servicing Guide - HP SR2020NX | Upgrading and Servicing Guide - Page 13
and close the PC. See "Opening and Closing the PC" on page 1. NOTE: If the new card or device isn't working, read through the card manufacturer's installation instructions, and recheck all connections, including those to the card, power supply, keyboard, and monitor. Upgrading and Servicing Guide 9 - HP SR2020NX | Upgrading and Servicing Guide - Page 14
battery on the motherboard provides backup power for the PC's timekeeping capability. memory modules or cables you removed. 8 Set the chassis upright. 9 Complete the procedures to replace the side panel, and to close the PC. See "Opening and Closing the PC" on page 1. 10 Upgrading and Servicing Guide - HP SR2020NX | Upgrading and Servicing Guide - Page 15
Upgrading and Servicing Guide 11 - HP SR2020NX | Upgrading and Servicing Guide - Page 16
Printed in
-
 1
1 -
 2
2 -
 3
3 -
 4
4 -
 5
5 -
 6
6 -
 7
7 -
8
-
9
-
10
-
11
-
12
-
13
-
14
-
15
-
16
 |
 |

Upgrading and
Servicing Guide