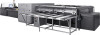
HP Scitex FB7500 TN Replacing the Printing Table
HP Scitex FB7500 Manual
 |
View all HP Scitex FB7500 manuals
Add to My Manuals
Save this manual to your list of manuals |
HP Scitex FB7500 manual content summary:
- HP Scitex FB7500 | TN Replacing the Printing Table - Page 1
FB7x00 Technical Note Product T/N # Revision Subject No. Pages Written by Approved by Edited by Date Confidential HP Scitex FB7x00 emr_na-c04359603 Rev. A Replacing the Printing Table 19 Netta Rozenzwig Oded Inbar Natasha Zaltsman August 4, 2014 No Revision History Revision Date A August - HP Scitex FB7500 | TN Replacing the Printing Table - Page 2
even one (with one set it will take a long time). Required time 5 days Catalog numbers Part number Description CX154-03390 VACUUM TABLE STEP 1 (SERVICE) Quantity 1 Preparation for Upgrade 1. Open the new table crate and check the new table for any mechanical or any other visible damages. 2/17 - HP Scitex FB7500 | TN Replacing the Printing Table - Page 3
for next actions 3. Print the reference files: ▪ Head Signature ▪ Engineer reference file in POP34, POP48 and Prod70 ▪ Perform the TY test for manual and automatic loading 4. Shutdown the machine. Removing the Covers Note: This step should be performed by 2 persons. 1. Remove all bottom covers on - HP Scitex FB7500 | TN Replacing the Printing Table - Page 4
FB7x00 TN # emr_na-c04359603, Replacing the Printing Table 2. Remove the maintenance bath cover and the Perspex plate. 3. Remove UV protector cover. 4/17 - HP Scitex FB7500 | TN Replacing the Printing Table - Page 5
FB7x00 TN # emr_na-c04359603, Replacing the Printing Table 4. Remove the fans beam. Removing the Old Printing Table Note: For better understanding of the procedure, see the machine directions below. Cable connection box Note: This step should be performed by 2 persons. 1. Disconnect all data and - HP Scitex FB7500 | TN Replacing the Printing Table - Page 6
FB7x00 TN # emr_na-c04359603, Replacing the Printing Table 2. Disconnect cable p/n 504000775D from the right side of the cable connection box. 3. Disconnect the pneumatic tube that is connected to the table. 4. Disconnect the 2 VCU pipes from the table. 6/17 - HP Scitex FB7500 | TN Replacing the Printing Table - Page 7
FB7x00 TN # emr_na-c04359603, Replacing the Printing Table 5. Disconnect the Igus chain bracket from the table by opening 4 Allen screws. 6. Disconnect the VCU rod-eye bracket from the vacuum table by opening the 4 Allen screws. 7/17 - HP Scitex FB7500 | TN Replacing the Printing Table - Page 8
FB7x00 TN # emr_na-c04359603, Replacing the Printing Table 7. Remove table extensions on both sides by opening the 12 Allen screws (see the table bottom view below). 8. Disconnect the 2 grease nipples bracket from the table by opening the 2 Allen screws from each bracket. 8/17 - HP Scitex FB7500 | TN Replacing the Printing Table - Page 9
: When removing the screws, be careful not to lose them - you work near the X magnet area. 10. Disconnect the 40 Allen screws from the X motor support/slider. You can use a long ratchet adaptor to access the screws located on the back side of the motor. Back side of the motor 9/17 - HP Scitex FB7500 | TN Replacing the Printing Table - Page 10
FB7x00 TN # emr_na-c04359603, Replacing the Printing Table 11. Disconnect all screws from the 3 table supports - 6 screws on each support. 12. Remove the table from machine. There are 3 ways to lift up the old table from the machine depending on the free space around the - HP Scitex FB7500 | TN Replacing the Printing Table - Page 11
FB7x00 TN # emr_na-c04359603, Replacing the Printing Table 13. After removing the table, turn it upside down. Preparing the New Table 1. Remove the 2 stoppers from old table and install on the new table (16 Allen screws). 2. Remove the X flag from old table and install on the new table (3 Allen - HP Scitex FB7500 | TN Replacing the Printing Table - Page 12
Note: Be careful not to lose the screws when working in the X magnet area. 2. Tighten the screws on the 3 table supports, 6 screws on each support. 3. Tighten the 40 Allen screws on X motor support/slider. You can use a long ratchet adaptor to access the screws located on the back side of the motor - HP Scitex FB7500 | TN Replacing the Printing Table - Page 13
FB7x00 TN # emr_na-c04359603, Replacing the Printing Table 5. Connect 2 grease nipples bracket, by closing 2 Allen screws from each bracket 6. Connect the VCU rod-eye. 7. Connect all data and power cables to the table. 8. Connect all pneumatic tube. 9. Connect the Igus chain by closing 4 Allen - HP Scitex FB7500 | TN Replacing the Printing Table - Page 14
the Printing Table 3. Assemble the fans beam. 4. Place on the fans beam, 8 magnetic legs + 8 indicators. The indicators should touch the table at 0 position. 5. Manually move the table by steps of 20 cm and enter the results into the table. Note: The best way is to use 8 legs + 8 indicators. If - HP Scitex FB7500 | TN Replacing the Printing Table - Page 15
Leveling page for FB7x00 printing table Machine #: Date: 3200 3000 2800 2600 2400 2200 2000 1800 1600 1400 1200 1000 800 600 400 200 0 Measure Support 8 Support 7 6 5 4 Support X motor support 3 2 1 - HP Scitex FB7500 | TN Replacing the Printing Table - Page 16
to minimize the results to minimum difference. 6. If the measurements are not in the tolerance, you need to add shims between the table and table supports (or X motor support/slider). 7. Release the screws on the table supports to allow inserting the shims. Bad Shims Good - HP Scitex FB7500 | TN Replacing the Printing Table - Page 17
the Z-axis calibration procedure. 7. From the machine application, activate the vacuum to the printing table on each zone separately. 8. Perform the TY test for both manual and automatic loading. 9. Print the reference files. 17/17
-
 1
1 -
 2
2 -
 3
3 -
 4
4 -
 5
5 -
 6
6 -
 7
7 -
8
-
9
-
10
-
11
-
12
-
13
-
14
-
15
-
16
-
17
 |
 |

HP Scitex FB7x00
Technical Note
Product
HP Scitex FB7x00
T/N #
emr_na-c04359603
Revision
Rev. A
Subject
Replacing the Printing Table
No. Pages
19
Written by
Netta Rozenzwig
Approved by
Oded Inbar
Edited by
Natasha Zaltsman
Date
August 4, 2014
Confidential
No
Revision History
Revision
Date
Description
A
August, 2013
Initial version