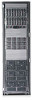
HP StorageWorks 9100 HP StorageWorks ExDS9100c/X9720 Storage System Controller
HP StorageWorks 9100 - Extreme Data Storage System Manual
 |
View all HP StorageWorks 9100 manuals
Add to My Manuals
Save this manual to your list of manuals |
HP StorageWorks 9100 manual content summary:
- HP StorageWorks 9100 | HP StorageWorks ExDS9100c/X9720 Storage System Controller - Page 1
HP StorageWorks ExDS9100c/X9720 Storage System Controller Cache Module Customer Self Repair Instructions Customer self repair (CSR) The . • Verifying component failure-Before replacing a component, confer with HP technical support to verify that the hardware component has failed and that you - HP StorageWorks 9100 | HP StorageWorks ExDS9100c/X9720 Storage System Controller - Page 2
LED is green. Removing an active controller (green LED) may result in data loss. Error codes consist of four characters, but only two characters are displayed For more information on the displayed codes, see the X9700 Storage System controller user guide. nl nl 1. From the servers, stop all access - HP StorageWorks 9100 | HP StorageWorks ExDS9100c/X9720 Storage System Controller - Page 3
Step 2: Replacing the cache module 1. Remove the cache module power-connector hold-down bracket by pulling both edge clips away from the cache module and lifting the bracket up. 3. Install the replacement cache module in the controller: IMPORTANT: Do not allow the cache module to flex during - HP StorageWorks 9100 | HP StorageWorks ExDS9100c/X9720 Storage System Controller - Page 4
display. IMPORTANT: See the netework storage system administration guide for additional software or hardware instructions. Returning the failed component Follow instructions shipped with the replacement part. Additional information HP: http://www.hp.com HP support: http://www.hp.com/support Page 4
-
 1
1 -
 2
2 -
 3
3 -
 4
4
 |
 |

HP StorageWorks
ExDS9100c/X9720 Storage
System Controller Cache Module
Customer Self Repair Instructions
© Copyright 2009 Hewlett-Packard Development Company, L.P.
Second edition: November 2009
The information in this document is subject to change without notice.
Printed in Singapore.
www.hp.com
*448023-003*
Customer self repair (CSR)
The following information is included in all CSR documents:
•
Before you begin
—
Component-specific precautions or notices. Be
sure to read and observe these statements.
•
Verifying component failure
—
Before replacing a component, confer
with HP technical support to verify that the hardware component has
failed and that you are authorized to replace it. Verification proced-
ures may include:
•
Viewing LED illumination patterns on the enclosure and the com-
ponent.
•
Viewing system event logs or other reports generated by systems
management tools.
•
Removing the failed component
—
Procedural steps to properly remove
the component, including illustrations.
•
Installing the replacement component
—
Procedural steps to properly
install the component, including illustrations.
•
Verifying component status
—
After replacing the component, verify
that the replacement component is operating properly. Verification
procedures may include:
•
Viewing LED illumination patterns on the enclosure and the com-
ponent.
•
Viewing system event logs or other reports generated by systems
management tools.
Before you begin
CAUTION:
When handling system components, there is a danger to
equipment from electrostatic discharge (ESD). Use proper
anti-static protection at all times:
•
Keep the replacement component in the ESD bag until needed.
•
Wear an ESD wrist strap grounded to an unpainted surface
of the chassis.
•
If an ESD wrist strap is unavailable, touch an unpainted surface
of the chassis before handling the component.
•
Never touch connector pins.
CAUTION:
Be sure the replacement is available before removing the failed
component. Removing a component impacts airflow and cooling
within the enclosure.
nl
nl
nl
nl
Verifying component failure
Check for an error message on the seven-segment display.
Page 1