HP StorageWorks MSA20 StorageWorks Modular Smart Array 20 User Guide
HP StorageWorks MSA20 Manual
 |
View all HP StorageWorks MSA20 manuals
Add to My Manuals
Save this manual to your list of manuals |
HP StorageWorks MSA20 manual content summary:
- HP StorageWorks MSA20 | StorageWorks Modular Smart Array 20 User Guide - Page 1
HP StorageWorks Modular Smart Array 20 User Guide March 2004 (First Edition) Part Number 347918-001 - HP StorageWorks MSA20 | StorageWorks Modular Smart Array 20 User Guide - Page 2
statements accompanying such products and services. Nothing herein should be construed as constituting an additional warranty. HP shall not be liable for technical or editorial errors or omissions contained herein. HP StorageWorks Modular Smart Array 20 User Guide March 2004 (First Edition) Part - HP StorageWorks MSA20 | StorageWorks Modular Smart Array 20 User Guide - Page 3
Power Supply Unit ...2-3 Controller Module ...2-4 Drive and Drive Blank ...2-5 Fan Assembly ...2-7 Chapter 3 Installing the Enclosure in a Rack Preparing the Rack ...3-1 Removing the Enclosure Components 3-1 Mounting the Enclosure in the Rack 3-2 HP StorageWorks Modular Smart Array 20 User Guide - HP StorageWorks MSA20 | StorageWorks Modular Smart Array 20 User Guide - Page 4
the Enclosure Drives Chapter 5 Replacing Enclosure Components Replacement Procedures 5-1 Disk Drive or Drive Blank 5-2 Fan Assembly...5-3 Power Supply Unit Electrostatic Damage B-1 Grounding Methods to Prevent Electrostatic Damage B-2 iv HP StorageWorks Modular Smart Array 20 User Guide - HP StorageWorks MSA20 | StorageWorks Modular Smart Array 20 User Guide - Page 5
Contents Appendix C Specifications Physical Specifications...C-1 Power Specifications ...C-2 Environmental Specifications C-2 Index HP StorageWorks Modular Smart Array 20 User Guide v - HP StorageWorks MSA20 | StorageWorks Modular Smart Array 20 User Guide - Page 6
- HP StorageWorks MSA20 | StorageWorks Modular Smart Array 20 User Guide - Page 7
-by-step instructions for installation and reference information for operation of the HP StorageWorks Modular Smart Array 20 disk drive enclosure. Audience Assumptions This guide is for the person who installs, administers, and troubleshoots servers. HP assumes you are qualified in the servicing of - HP StorageWorks MSA20 | StorageWorks Modular Smart Array 20 User Guide - Page 8
to cool before touching. These symbols, on power supplies or systems, indicate that the equipment is supplied by multiple sources of power. WARNING: To reduce the risk of injury safety requirements and guidelines for manual material handling. viii HP StorageWorks Modular Smart Array 20 User Guide - HP StorageWorks MSA20 | StorageWorks Modular Smart Array 20 User Guide - Page 9
. Getting Help If you have a problem and have exhausted the information in this guide, you can get further information and other help in the following locations. Technical Support In North America, call the HP Technical Support Phone Center at 1-800-652-6672. This service is available 24 hours a day - HP StorageWorks MSA20 | StorageWorks Modular Smart Array 20 User Guide - Page 10
, call 1-800-345-1518. • In Canada, call 1-800-263-5868. • Elsewhere, see the HP website for locations and telephone numbers. Reader's Comments HP welcomes your comments on this guide. Send your comments and suggestions to [email protected]. x HP StorageWorks Modular Smart Array 20 User - HP StorageWorks MSA20 | StorageWorks Modular Smart Array 20 User Guide - Page 11
enclosure. In either case, replace the failed component as soon as possible to maximize the life expectancy of the remaining power supply or fan. For more information about features of the MSA20 enclosure, refer to the HP website, http://www.hp.com. HP StorageWorks Modular Smart Array 20 User Guide - HP StorageWorks MSA20 | StorageWorks Modular Smart Array 20 User Guide - Page 12
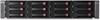
bracket covers (bezel ears) 2 Drive blank in bay 3 3 Drive blank in bay 4 Note: The enclosure is shipped with 10 drive blanks. Insert blanks into unused drive bays in a working enclosure so that the correct enclosure airflow is maintained. HP StorageWorks Modular Smart Array 20 User Guide 2-1 - HP StorageWorks MSA20 | StorageWorks Modular Smart Array 20 User Guide - Page 13
WARNING: Do not use the handles on the power supply units to lift or hold the enclosure. These handles are designed only for holding the power supply units or removing them from the enclosure, not for supporting the weight of the enclosure. 2-2 HP StorageWorks Modular Smart Array 20 User Guide - HP StorageWorks MSA20 | StorageWorks Modular Smart Array 20 User Guide - Page 14
) WARNING: Do not use the handles on the power supply units to lift or hold the enclosure. These handles are designed only for holding the power supply units or removing them from the enclosure, not for supporting the weight of the enclosure. HP StorageWorks Modular Smart Array 20 User Guide 2-3 - HP StorageWorks MSA20 | StorageWorks Modular Smart Array 20 User Guide - Page 15
or amber) 4 VHDCI connector (for connecting to a sixth-generation Smart Array controller or an MSA1500 cs enclosure) 5 Service port (for HP service technicians only) 6 Release lever 7 Controller cache (lower cache battery just visible) 2-4 HP StorageWorks Modular Smart Array 20 User Guide - HP StorageWorks MSA20 | StorageWorks Modular Smart Array 20 User Guide - Page 16
enclosure. This LED also illuminates when the drive or an array containing the drive is selected in a management application such as the HP Array Configuration Utility (ACU). The amber LED on a drive illuminates when the drive has failed or is predicted to fail in the near future. HP StorageWorks - HP StorageWorks MSA20 | StorageWorks Modular Smart Array 20 User Guide - Page 17
the Enclosure Components For MSA20 is connected to a Smart Array controller. For information about interpreting the drive fault LED when the MSA20 is connected to an MSA1500 cs, refer to the release notes at http://www.hp.com/go/msa1500cs. 2-6 HP StorageWorks Modular Smart Array 20 User Guide - HP StorageWorks MSA20 | StorageWorks Modular Smart Array 20 User Guide - Page 18
Fan Assembly Identifying the Enclosure Components Figure 2-6: Fan assembly Item Description 1 Bicolor status LED (green or amber) 2 Release lever HP StorageWorks Modular Smart Array 20 User Guide 2-7 - HP StorageWorks MSA20 | StorageWorks Modular Smart Array 20 User Guide - Page 19
IMPORTANT: The following abbreviated instructions are appropriate for removing the components from an enclosure that is not being used. To remove individual components from a working enclosure, refer to the complete instructions in Chapter 5. HP StorageWorks Modular Smart Array 20 User Guide 3-1 - HP StorageWorks MSA20 | StorageWorks Modular Smart Array 20 User Guide - Page 20
weight by removing the disk drives, power supply units, controller 9 kg (20 lb) empty module, and fan assemblies. 24 kg (53 lb) full Each enclosure requires a vertical rack space of 2U (equivalent to 89 mm, or 3.5 inches). 1. Use the rack mounting template as a guide to indicate where on the rack - HP StorageWorks MSA20 | StorageWorks Modular Smart Array 20 User Guide - Page 21
Installing the Enclosure in a Rack b. Push the template tabs into the holes in the rack uprights to hold the template in place. c. pins for round-hole racks. 3. Identify the left (L) and right (R) rack rails by markings stamped into the rails. HP StorageWorks Modular Smart Array 20 User Guide 3-3 - HP StorageWorks MSA20 | StorageWorks Modular Smart Array 20 User Guide - Page 22
Installing the Enclosure in a Rack 4. Slide the front end of the right rack rail toward the inside front of the rack until the toward the inside rear of the rack until the locking latch engages with the marked hole in the rear rack upright. 3-4 HP StorageWorks Modular Smart Array 20 User Guide - HP StorageWorks MSA20 | StorageWorks Modular Smart Array 20 User Guide - Page 23
on the shipping bracket (1), and move the bracket to the rearmost position on the rail (2). 7. Repeat steps 4 through 6 for the left rack rail. 8. Align the enclosure with the rails, and slide it into the rack. HP StorageWorks Modular Smart Array 20 User Guide 3-5 - HP StorageWorks MSA20 | StorageWorks Modular Smart Array 20 User Guide - Page 24
rack (2). 10. Replace the mounting bracket covers. 11. If you intend to move the rack while the enclosure is installed, adjust the shipping brackets on each rail to secure the enclosure to the rack. a. Loosen the shipping bracket locknut (1). 3-6 HP StorageWorks Modular Smart Array 20 User Guide - HP StorageWorks MSA20 | StorageWorks Modular Smart Array 20 User Guide - Page 25
socket of each power supply unit to separate AC power sources. 4. Press the enclosure power button on the rear of the unit. 5. Confirm that the enclosure components are all critical fault. - It is not seated properly in the enclosure. HP StorageWorks Modular Smart Array 20 User Guide 3-7 - HP StorageWorks MSA20 | StorageWorks Modular Smart Array 20 User Guide - Page 26
Installing the Enclosure in a Rack - In the case of a drive, it is predicted to fail in the near future (assuming that it is seated properly in the enclosure). - In the case of a power supply, it is not plugged in. 3-8 HP StorageWorks Modular Smart Array 20 User Guide - HP StorageWorks MSA20 | StorageWorks Modular Smart Array 20 User Guide - Page 27
Interface (CLI)-A tool for configuring and managing an MSA1500 cs and its attached storage NOTE: Old versions of ACU and ORCA do not support the MSA20. Before using one of these utilities, upgrade the firmware and drivers on the external sixth-generation Smart Array controller. The latest version - HP StorageWorks MSA20 | StorageWorks Modular Smart Array 20 User Guide - Page 28
blank to maintain the correct airflow in the enclosure. CAUTION: Be careful when replacing a drive. The drives in the enclosure are fragile. Replacement Procedures The following general type. 3. Remove the defective component from the enclosure. HP StorageWorks Modular Smart Array 20 User Guide 5-1 - HP StorageWorks MSA20 | StorageWorks Modular Smart Array 20 User Guide - Page 29
, and push it in until it is firmly seated in the enclosure. Installing a Replacement Drive CAUTION: Be careful when replacing a drive. The drives in the enclosure are fragile. 1. Pull out the release lever on the drive as far as it can go. 5-2 HP StorageWorks Modular Smart Array 20 User Guide - HP StorageWorks MSA20 | StorageWorks Modular Smart Array 20 User Guide - Page 30
system. 2. Stop data transfers. 3. Disconnect the VHDCI cable. 4. Squeeze the release lever and the finger hook together while pulling the controller module out of the enclosure. HP StorageWorks Modular Smart Array 20 User Guide 5-3 - HP StorageWorks MSA20 | StorageWorks Modular Smart Array 20 User Guide - Page 31
battery-backed write cache to become fully enabled. To replace the upper battery pack (1): 1. Remove the controller module from the enclosure (for detailed instructions, refer to the Controller Module section). 2. Loosen the thumbscrews (2). 5-4 HP StorageWorks Modular Smart Array 20 User Guide - HP StorageWorks MSA20 | StorageWorks Modular Smart Array 20 User Guide - Page 32
Replacing Enclosure Components 3. Slide the battery unit toward the rear of the controller module and lift it out. 4. On pack to expel it from the battery case (3). To install the replacement upper battery pack, reverse the previous steps. HP StorageWorks Modular Smart Array 20 User Guide 5-5 - HP StorageWorks MSA20 | StorageWorks Modular Smart Array 20 User Guide - Page 33
Replacing Enclosure Components To replace the lower battery pack: 1. Remove the upper battery unit. (You do not need to 4. Lift the battery pack off the cache board. To install the replacement lower battery pack, reverse the previous steps. 5-6 HP StorageWorks Modular Smart Array 20 User Guide - HP StorageWorks MSA20 | StorageWorks Modular Smart Array 20 User Guide - Page 34
to bear a label indicating the interference potential of the device as well as additional operating instructions for the user. The FCC rating label on the device shows the classification (A or corresponding statement in the following sections. HP StorageWorks Modular Smart Array 20 User Guide A-1 - HP StorageWorks MSA20 | StorageWorks Modular Smart Array 20 User Guide - Page 35
radio frequency energy and, if not installed and used in accordance with the instructions, may cause harmful interference to radio communications. Operation of this equipment in dealer or an experienced radio or television technician for help. A-2 HP StorageWorks Modular Smart Array 20 User Guide - HP StorageWorks MSA20 | StorageWorks Modular Smart Array 20 User Guide - Page 36
to this device must be made with shielded cables with metallic RFI/EMI connector hoods in order to maintain compliance with FCC Rules and Regulations. HP StorageWorks Modular Smart Array 20 User Guide A-3 - HP StorageWorks MSA20 | StorageWorks Modular Smart Array 20 User Guide - Page 37
22) - Electromagnetic Interference • EN55024 (IEC61000-4-2, 3, 4, 5, 6, 8, 11) - Electromagnetic Immunity • EN61000-3-2 (IEC61000-3-2) - Power Line Harmonics • EN61000-3-3 (IEC61000-3-3) - Power Line Flicker • EN60950 (IEC950) - Product Safety A-4 HP StorageWorks Modular Smart Array 20 User Guide - HP StorageWorks MSA20 | StorageWorks Modular Smart Array 20 User Guide - Page 38
Japanese Notice Regulatory Compliance Notices Korean Notices HP StorageWorks Modular Smart Array 20 User Guide A-5 - HP StorageWorks MSA20 | StorageWorks Modular Smart Array 20 User Guide - Page 39
only with the designated HP spare. Battery disposal HP, your authorized HP Partners, or their agents. For more information about battery replacement or proper disposal, contact your HP authorized reseller or your authorized service provider. A-6 HP StorageWorks Modular Smart Array 20 User Guide - HP StorageWorks MSA20 | StorageWorks Modular Smart Array 20 User Guide - Page 40
a grounded surface before removing them from their containers. • Avoid touching pins, leads, or circuitry. • Always be properly grounded when touching a static-sensitive component or assembly. HP StorageWorks Modular Smart Array 20 User Guide B-1 - HP StorageWorks MSA20 | StorageWorks Modular Smart Array 20 User Guide - Page 41
on conductive floors or dissipating floor mats. • Use conductive field service tools. • Use a portable field service kit with a folding static-dissipating work mat. If you do with product installation, contact your authorized reseller. B-2 HP StorageWorks Modular Smart Array 20 User Guide - HP StorageWorks MSA20 | StorageWorks Modular Smart Array 20 User Guide - Page 42
Power supply unit Dimensions International (cm) US (in.) 26.8 x 6.0 x 6.0 10.6 x 2.4 x 2.4 18.5 x 11.0 x 2.6 7.3 x 4.3 x 1.0 32.6 x 7.9 x 7.1 12.8 x 3.1 x 2.8 32.0 x 6.4 x 7.7 12.6 x 2.5 x 3.0 Weight 0.50 kg (1.10 lb) 0.75 kg (1.65 lb) 1.4 kg (3.0 lb) 1.80 kg (3.96 lb) HP StorageWorks - HP StorageWorks MSA20 | StorageWorks Modular Smart Array 20 User Guide - Page 43
current Standby current At 240 V: 1.8 A (one power supply) or 1.9 A (two power supplies) At 120 V: 3.7 A (one power supply) or 3.9 A (two power supplies) 0.21 A at 240 V, 60 Hz 0.15 Shipping or Storage -40° to 66°C -40° to 150°F 10% to 80% - - C-2 HP StorageWorks Modular Smart Array 20 User Guide - HP StorageWorks MSA20 | StorageWorks Modular Smart Array 20 User Guide - Page 44
B-1 enclosure dimensions of C-1 installing 3-1 mounting in a rack 3-2 moving while in rack 3-6 operating environment C-2 rack space required for 3-2 specifications of C-1 storage conditions for C-2 weight of 3-2, C-1 environmental requirements C-2 HP StorageWorks Modular Smart Array 20 User Guide - HP StorageWorks MSA20 | StorageWorks Modular Smart Array 20 User Guide - Page 45
and use of 3-6 storing the enclosure C-2 symbols in text ix symbols on equipment vii T technical support ix temperature during normal operation C-2 thermal specifications C-2 W website, HP x weight of components C-1 of enclosure C-1 Index-2 HP StorageWorks Modular Smart Array 20 User Guide
-
 1
1 -
 2
2 -
 3
3 -
 4
4 -
 5
5 -
 6
6 -
 7
7 -
8
-
9
-
10
-
11
-
12
-
13
-
14
-
15
-
16
-
17
-
18
-
19
-
20
-
21
-
22
-
23
-
24
-
25
-
26
-
27
-
28
-
29
-
30
-
31
-
32
-
33
-
34
-
35
-
36
-
37
-
38
-
39
-
40
-
41
-
42
-
43
-
44
-
45
 |
 |

HP StorageWorks
Modular Smart Array 20
User Guide
March 2004 (First Edition)
Part Number 347918-001