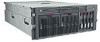
HP StorageWorks b3000 NAS b3000 - Rack Installation Instructions
HP StorageWorks b3000 - NAS Manual
 |
View all HP StorageWorks b3000 manuals
Add to My Manuals
Save this manual to your list of manuals |
HP StorageWorks b3000 manual content summary:
- HP StorageWorks b3000 | NAS b3000 - Rack Installation Instructions - Page 1
U.S.A. Important Safety Information Before installing this product, read the Important Safety Information document provided. StorageWorks NAS B3000 by Compaq Rack Installation Instructions First Edition (February 2002) Part Number: 259123-001 Compaq Computer Corporation 259123- 001 8 9 Identify - HP StorageWorks b3000 | NAS b3000 - Rack Installation Instructions - Page 2
safety requirements and guidelines for manual material handling. · Get in) behind the rack to allow easy servicing and to provide adequate airflow. Power Requirements circuit current load. The overall system AC current load must not exceed a rack-mountable StorageWorks NAS B3000 device or increase - HP StorageWorks b3000 | NAS b3000 - Rack Installation Instructions - Page 3
Screws, washers, clips, and nuts 2 TEMPLATE With a pencil, mark the front and back of the rack using the storage enclosure rack template as a guide. Then, if the rack has square holes, complete steps 4, 5, and 7. If the rack has round holes, complete steps 3, 6, and 8. 3 1 2 For round-hole rail - HP StorageWorks b3000 | NAS b3000 - Rack Installation Instructions - Page 4
the rear vertical rail holes, and then secure the bracket to the rear 5 vertical rail using two washers and two Kep nuts. 8 1 When installing in a square-hole rack, position the left rackmounting bracket 1 just behind the front vertical rail, aligning the middle two rack-mounting bracket holes - HP StorageWorks b3000 | NAS b3000 - Rack Installation Instructions - Page 5
10 1 2 Remove the I/O module/Environmental Monitoring Unit (EMU). 11 1 2 13 1 2 Replace the hard drives. CAUTION: You must insert a hard drive or a drive "blank" into each drive bay. If you have an unoccupied drive bay, the storage enclosure quickly overheats when it is powered up. 14 Remove the - HP StorageWorks b3000 | NAS b3000 - Rack Installation Instructions - Page 6
Installing the Device into the Rack 1 1 2 4 6 7 3 5 8 Identify the device rack-mounting hardware. Item ! " # $ % & Description One pair 26-inch slide rail assemblies Rack-mounting brackets Cable management arm bracket Cable management arm Bag of screws Cable management arm screw-retaining - HP StorageWorks b3000 | NAS b3000 - Rack Installation Instructions - Page 7
6 8 1 2 13 Insert the cage nuts into the rack rails and use the fitting tool to pry the cage nut into position. 14 9 b. Secure the outer bracket rail to the rack-mounting bracket with an 8-32 x 1/4-inch slotted screw. IMPORTANT Do not tighten screws until all three screws have been lined up - HP StorageWorks b3000 | NAS b3000 - Rack Installation Instructions - Page 8
11 14 Attach the handle to the sides of the NAS B3000. 12 WARNING: To reduce the risk of personal injury rails of the mounting bracket and set the handles squarely on the rails. Attach the NAS B3000 to the rails using the screws provided. 13 Attach the cable management arm screw-retaining plate. - HP StorageWorks b3000 | NAS b3000 - Rack Installation Instructions - Page 9
RIB) w LAN connector (for the RIB) e Video connector (not supported) r Mouse connector t Hot-plug keyboard connector y Serial connector A 6 87 6 Number 1 2 3 4 5 6 7 8 9 q Connector Global service indicator External port Port link indicators (2) RS-232 DB-9 serial port RJ-45 Ethernet - HP StorageWorks b3000 | NAS b3000 - Rack Installation Instructions - Page 10
power cord and the adapter to the power port. 3 IMPORTANT Do not connect the storage enclosure until the SAN connection wizard has completed. For instructions concerning the fiber connections, refer to 6 Connect the monitor to the video port on the Remote Insight Lights-Out Edition board. 4 the - HP StorageWorks b3000 | NAS b3000 - Rack Installation Instructions - Page 11
process is complete. For instructions on configuring the system, refer to the StorageWorks NAS B3000 by Compaq Quick Reference to the following corresponding statement. For complete details, see the Hardware Reference Guide on the device Documentation CD. This equipment has been tested and found - HP StorageWorks b3000 | NAS b3000 - Rack Installation Instructions - Page 12
Declaration of Conformity United States only This device complies with Part 15 of the FCC Rules and Regulations. Operation is subject to the following two conditions: (1) this device may not cause harmful interference, and (2) this device must accept any interference received, including interference
-
 1
1 -
 2
2 -
 3
3 -
 4
4 -
 5
5 -
 6
6 -
 7
7 -
8
-
9
-
10
-
11
-
12
 |
 |

StorageWorks by Compaq
NAS B3000
Rack Installation Instructions
Open
Card Completely Before
Beginning Installation Procedures
NOTICE
© 2002 Compaq Information Technologies Group, L.P.
Compaq, the Compaq logo, and StorageWorks are trademarks of
Compaq Information Technologies Group, L.P.
All other product names mentioned herein may be trademarks of their
respective companies.
Compaq shall not be liable for technical or editorial errors or omissions
contained herein. The information is provided “as is” without warranty
of any kind and is subject to change without notice. The warranties for
Compaq products are set forth in the express limited warranty statements
accompanying such products. Nothing herein should be construed as
constituting an additional warranty.
Printed in the U.S.A.
Important Safety Information
Before installing this product, read the
Important Safety
Information
document provided.
StorageWorks NAS B3000 by Compaq
Rack Installation Instructions
First Edition (February 2002)
Part Number: 259123-001
Compaq Computer Corporation
259123- 001
Identify the device and storage enclosure components.
Item
Description
Device
Power cords for device power supplies
Remote Insight Lights-Out Edition board power cable and adapter
"Y" cable for Remote Insight Lights-Out Edition board
Fiber cables
Rack-mounting hardware for the device
Storage enclosure
Power cords for storage enclosure power supplies
Rack-mounting hardware for the storage enclosure
WARNING:
To reduce the risk of personal injury or damage to the
equipment, at least two people are needed to safely remove each
component from the shipping carton.
Installation Tips
Begin installing rack components at the bottom of the rack or
immediately above a previously installed component, and then
work toward the top of the rack.
Have a Phillips screwdriver and a pencil available before
beginning the procedure.
Do not tighten the rack-mounting rail screws completely until
after the component is inserted into the rack. The small amount
of play helps position the rails to the exact width of the
component being installed.
4
2
8
3
6
9
7
1
5