HP TouchSmart 600-1100 Getting Started
HP TouchSmart 600-1100 - Desktop PC Manual
 |
View all HP TouchSmart 600-1100 manuals
Add to My Manuals
Save this manual to your list of manuals |
HP TouchSmart 600-1100 manual content summary:
- HP TouchSmart 600-1100 | Getting Started - Page 1
HP Pavilion All-in-One PC Getting Started - HP TouchSmart 600-1100 | Getting Started - Page 2
services. Nothing herein should be construed as constituting an additional warranty. HP shall not be liable for technical or editorial errors or omissions contained herein. HP in the United States and/or other countries/regions. HP supports lawful use of technology and does not endorse or encourage - HP TouchSmart 600-1100 | Getting Started - Page 3
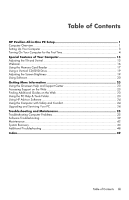
23 Accessing Support on the Web 23 Finding Additional Guides on the Web 23 Using the PC Help & Tools Folder 23 Using HP Advisor Software 24 Using the Computer with Safety and Comfort 24 Upgrading and Servicing Your PC 24 Troubleshooting and Maintenance 25 Troubleshooting Computer Problems 25 - HP TouchSmart 600-1100 | Getting Started - Page 4
iv Getting Started (features vary by model) - HP TouchSmart 600-1100 | Getting Started - Page 5
speakers. HP Pavilion All-in-One features Features and configurations vary by model. Your computer may not exactly match the illustrations and descriptions in this guide. A B C D E F G H I Item A Memory card reader Description Built-in memory card reader to read a memory card. Supported formats - HP TouchSmart 600-1100 | Getting Started - Page 6
Item Description (continued) B Audio line out Connect external 2.0 and 2.1 powered speakers. C Memory card reader LED Indicates card reader activity. D USB 2.0 (2 ports) Connect USB devices (USB 2.0) such as printers, external hard disk drives, digital cameras, and MP3 players. E USB 2.0 - HP TouchSmart 600-1100 | Getting Started - Page 7
. Setting Up Your Computer WARNING: Please read "Safety Information" in the Limited Warranty and Support Guide before installing and connecting the computer to the electrical power system. WARNING: To reduce the On Your Computer for the First Time" on page 4. HP Pavilion All-in-One PC Setup 3 - HP TouchSmart 600-1100 | Getting Started - Page 8
up for updates, and get online. The antivirus software may automatically open. Follow the onscreen instructions to set up this tool, which protects the computer and your privacy. 4 When you see the Windows desktop, the initial setup is complete. For help with getting started using your computer, see - HP TouchSmart 600-1100 | Getting Started - Page 9
the following sound options: Built-in analog stereo speakers Analog 2.0 or 2.1 powered speakers Headphones NOTES: Your computer supports powered speaker systems only. Powered speakers require a separate power supply. By default, the internal speakers are on. HP Pavilion All-in-One PC Setup 5 - HP TouchSmart 600-1100 | Getting Started - Page 10
Connecting analog speakers (Sold separately) To connect active external speakers, such as left/right stereo speakers or a 2.1 system of two speakers and a subwoofer, to the computer: 1 Make sure the speaker system is turned off and unplugged. 2 For 2.0 powered speakers, connect the speaker cable to - HP TouchSmart 600-1100 | Getting Started - Page 11
corner. For help with audio, check the troubleshooting items in "Audio and speakers" on page 31. For more information, open the Help and Support Center or refer to the Support Web site; see "Getting More Information" and moving it. Click OK, and then click OK again. HP Pavilion All-in-One PC Setup 7 - HP TouchSmart 600-1100 | Getting Started - Page 12
connection (Select models only) You can connect the computer to a wireless network supporting IEEE 802.11b or 802.11g. You need an existing wireless LAN with an Internet connection. Consult your Internet Service Provider (ISP) for further information. To verify that the integrated WLAN device is - HP TouchSmart 600-1100 | Getting Started - Page 13
Services: a Click the Start button. b Click All Programs. c Click Online Services and then click Get Online. d Follow the onscreen instructions to select an ISP and set up Internet service. NOTE: Online Services to the Internet, see "Internet access" on page 32. HP Pavilion All-in-One PC Setup 9 - HP TouchSmart 600-1100 | Getting Started - Page 14
then click Network and Sharing Center to open the Network and Sharing Center window. 6 Click Connect to a network, and then follow the onscreen instructions. Using wireless security features When you set up a home WLAN or access an existing public WLAN, always enable security features to protect the - HP TouchSmart 600-1100 | Getting Started - Page 15
Windows security feature. A password set in Windows must be entered at a Windows prompt. For information on Windows passwords: click the Start button, click Help and Support, and then type passwords into the Search Help box and press Enter. See "Using the Onscreen Help and - HP TouchSmart 600-1100 | Getting Started - Page 16
Instructions for using and updating the antivirus software, and for purchasing extended update service, are provided within the program. For more information about computer viruses: click the Start button, click Help and Support attachments. To solve the problem temporarily, disable the firewall, - HP TouchSmart 600-1100 | Getting Started - Page 17
, click the Start button, click Help and Support, and then type User Accounts into the Search Help box and press Enter need help, check the manufacturer documentation or customer service information. For antivirus software, uninstall the existing with a virus. HP Pavilion All-in-One PC Setup 13 - HP TouchSmart 600-1100 | Getting Started - Page 18
Windows. Windows Easy Transfer software guides you to copy files and settings Windows Easy Transfer. 3 Follow the onscreen instructions in the Windows Easy Transfer Wizard to transfer Support, and then type moving files into the Search Help box and press Enter. See "Using the Onscreen Help and Support - HP TouchSmart 600-1100 | Getting Started - Page 19
Special Features of Your Computer Adjusting the Tilt and Swivel For optimal viewing, adjust the screen tilt to your own preference: 1 Face the front of the computer and hold the base so that you do not topple the computer while changing the tilt. 2 Adjust the tilt by moving the top edge of the - HP TouchSmart 600-1100 | Getting Started - Page 20
from the webcam: 1 Click the Start button. 2 Click All Programs, CyberLink YouCam, and then click CyberLink YouCam again. 3 Click Tutorials to view an instructional video. Having a video chat or making conference calls To set up a video chat, you must have a connection to the Internet, an ISP, and - HP TouchSmart 600-1100 | Getting Started - Page 21
program you are using. 3 Send your video call by following the instructions for the video-calling software program. To start a video chat in CyberLink Stick (MS) Memory Stick Pro (MS Pro) Additional media cards can be supported by use of an adapter sleeve: Mini Secure Digital (Mini SD) Micro Secure - HP TouchSmart 600-1100 | Getting Started - Page 22
. NOTE: You must insert media correctly. Note the direction of the notched corner on the media. For more information, open the Help and Support Center or refer to the Support Web site; see "Getting More Information" on page 23. Also, some memory cards, such as CF Ultra/III, are not compatible with - HP TouchSmart 600-1100 | Getting Started - Page 23
Using a Vertical CD/DVD Drive Your computer has an optical disc drive that is installed in a vertical position. The Eject button is just below drive door. The drive will accept either a standard-sized disc or a minidisc. 1 Face the front of the computer. 2 Press the Eject button to open the CD/DVD - HP TouchSmart 600-1100 | Getting Started - Page 24
Using Software NOTE: Some of the programs that are listed may not be included with your model. This is not a complete list of all included software. Your computer includes software to: Record and play CDs. Record data CDs. Import and edit video files. Record video CDs and DVDs. Organize digital - HP TouchSmart 600-1100 | Getting Started - Page 25
Edit video files. Create LightScribe labels for discs using CyberLink LabelPrint. HP Advisor Set up computer functions such as backup or printers. Explore updates. Discover software and service offers from HP and its partners. Access support diagnostics and Help content. Special Features - HP TouchSmart 600-1100 | Getting Started - Page 26
22 Getting Started (features vary by model) - HP TouchSmart 600-1100 | Getting Started - Page 27
on the Web You can find guides for your computer by using the Internet to access the Support Web site: 1 Go to the Support Web site (http://www.hp.com/support) and search for your model number using the previous procedure. 2 Click Manuals. Using the PC Help & Tools Folder The PC Help & Tools folder - HP TouchSmart 600-1100 | Getting Started - Page 28
button, click All Programs, click User Guides, and then click Safety & Comfort Guide. Or Type http://www.hp.com/ergo into the Web browser address box, and then press Enter on the keyboard. Upgrading and Servicing Your PC Refer to the Upgrading and Servicing Guide: Click the Start button, click All - HP TouchSmart 600-1100 | Getting Started - Page 29
Center or access the Support Web site. (See "Getting More Information" on page 23.) Refer to the documentation provided by the product manufacturer for information about peripheral-specific problems, such as issues with a printer. Troubleshooting Computer Problems These tables present some symptoms - HP TouchSmart 600-1100 | Getting Started - Page 30
and Support Guide to contact Support. Test the wall outlet by connecting a different electrical device to it. Incompatible memory (RAM) may have been installed. Reinstall the old memory to return your computer to its original state. For instructions, refer to the Upgrading and Servicing Guide. Use - HP TouchSmart 600-1100 | Getting Started - Page 31
Turn off the computer by using the mouse, unplug and reconnect the keyboard to the back of your computer, and then turn on your computer. Troubleshooting and Maintenance 27 - HP TouchSmart 600-1100 | Getting Started - Page 32
(not paper). Use a mouse pad, white sheet of paper, or other less reflective surface under the mouse. For detailed cleaning instructions, go to: http://www.hp.com/support Select your country/region and language, search on your computer model number, and then search on the keyword cleaning. I cannot - HP TouchSmart 600-1100 | Getting Started - Page 33
solution Wireless keyboard or mouse does not work or is not detected. A Check for these problems: Ensure you are using the wireless keyboard or wireless mouse within range of the receiver, connector on the computer. The receiver may have an LED light (A). A Troubleshooting and Maintenance 29 - HP TouchSmart 600-1100 | Getting Started - Page 34
Wireless keyboard and mouse (continued) Symptom Possible solution Wireless keyboard or mouse does not work or is not detected. (continued) 2 Check that the mouse is on (B), and push and hold the Connect button (C) on the underside of the mouse for 5 to 10 seconds. NOTE: The receiver connection - HP TouchSmart 600-1100 | Getting Started - Page 35
mode, press the Sleep button (select models only), or press the Esc key on the keyboard. Unplug headphones if they are connected to your computer. Troubleshooting and Maintenance 31 - HP TouchSmart 600-1100 | Getting Started - Page 36
and Sharing Center. 3 In the Network and Sharing Center window, click Set up a connection or network to open the wizard. 4 Follow the onscreen instructions. Use Device Manager to verify that the integrated WLAN device is installed on the computer correctly: 1 Click the Start button. 2 Type Device - HP TouchSmart 600-1100 | Getting Started - Page 37
on your computer, and press the Eject button nearest the drive to open the tray. If you suspect a problem with the Eject button itself: 1 Click the Start button, and then click Computer. 2 Right-click the CD on a computer, but not on a home DVD video player. Troubleshooting and Maintenance 33 - HP TouchSmart 600-1100 | Getting Started - Page 38
CD and DVD players (continued) Symptom Possible solution I cannot create (record) Ensure the disc is inserted with the label facing out and a disc. centered in the tray. Verify that you are using the correct disc type (media) for the drive. Try a different brand of disc. Ensure the disc is - HP TouchSmart 600-1100 | Getting Started - Page 39
the video file in a video editor, and then resave the file in a supported format. Codec error messages appear when I try to play certain video files. Open software. 6 Follow the instructions to update the driver. 7 If you are prompted, restart the computer. Troubleshooting and Maintenance 35 - HP TouchSmart 600-1100 | Getting Started - Page 40
Web site. You may need an updated driver for Windows. Contact the device vendor directly for an update. For HP peripheral devices, visit the HP Web site: http://www.hp.com/support Ensure that all cables are properly and securely connected and that the pins in the cable or connector are not bent - HP TouchSmart 600-1100 | Getting Started - Page 41
Device Manager window. 3 Click the plus sign (+) next to the problem device and check for an exclamation point in a yellow circle near the If it is available, click the Troubleshoot button, and follow the onscreen instructions in the device troubleshooter wizard. 7 Restart the computer. Click - HP TouchSmart 600-1100 | Getting Started - Page 42
card. Ensure the amount of stored data does not exceed the storage limit of the memory card. Ensure the memory card is one of the supported types: Memory Stick (MS), Memory Stick Pro (MS Pro), MultiMediaCard (MMC), Secure Digital (SD), Secure Digital High-Capacity (SDHC), or Extreme Digital (xD - HP TouchSmart 600-1100 | Getting Started - Page 43
isopropyl alcohol. Replace the memory card if necessary. Software Troubleshooting Your computer uses the operating system and installed software to an earlier version of the driver if the new one does not solve your problem: 1 Click the Start button. 2 Type Device Manager into the Start Search box - HP TouchSmart 600-1100 | Getting Started - Page 44
also set restore points manually. If you experience a problem that you think may be click Next. 4 Follow the onscreen instructions. To manually add restore points: 1 Close all instructions. For more information about software restore points: 1 Click the Start button, and then click Help and Support - HP TouchSmart 600-1100 | Getting Started - Page 45
Program Reinstallation. 3 Click Next at the Welcome screen. 4 Choose the program you want to install, click Next, and follow the onscreen instructions. 5 When you have finished reinstalling, restart the computer. NOTE: Do not skip this last step. You must restart the computer after recovering - HP TouchSmart 600-1100 | Getting Started - Page 46
Maintenance This section includes information about tasks you can perform to help ensure trouble-free operation of your computer, and to ease the recovery of important information on your computer if problems arise in the future. Maintenance tasks It is important that you perform simple maintenance - HP TouchSmart 600-1100 | Getting Started - Page 47
. Depending on your disc recording software, you may need to manually enable this feature (refer to the software documentation). If you perform while your computer is working properly. If you encounter problems with your computer later, you can restore it to its . Troubleshooting and Maintenance 43 - HP TouchSmart 600-1100 | Getting Started - Page 48
the keyboard and mouse When cleaning the keyboard keys, use a low setting on the battery-powered vacuum cleaner, to avoid removing key caps and springs. 1 Vacuum between the keys of the keyboard and along the grooves. 2 Use a clean, dry cloth and isopropyl alcohol to clean buildup on the keyboard - HP TouchSmart 600-1100 | Getting Started - Page 49
click Yes to allow the program to continue. 3 Follow the onscreen instructions. Label each disc as you make it (for example, Recovery 1, HP Support. To purchase recovery discs, go to http://www.hp.com/support and visit the Software & Driver downloads page for your computer model. Troubleshooting - HP TouchSmart 600-1100 | Getting Started - Page 50
begins. After system recovery is complete, click Finish to restart the computer. 9 Complete the registration process, and wait until you see the desktop. 10 Turn off the computer, reconnect all peripheral devices, and turn the computer back on. 11 Perform the procedure "Performing the post-recovery - HP TouchSmart 600-1100 | Getting Started - Page 51
click Finish to restart the computer. 7 Complete the registration process, and wait until you see the desktop. 8 Turn off the computer, reconnect all peripheral devices, and turn the computer back on. 9 8 If you are prompted to insert the next recovery disc, do so. Troubleshooting and Maintenance 47 - HP TouchSmart 600-1100 | Getting Started - Page 52
setup instructions. 2 Follow the instructions in "Turning On Your Computer for the First Time" on page 4. Additional Troubleshooting For additional troubleshooting solutions, refer to the following: HP Support Assistant HP Support Assistant helps you maintain your PC performance and resolve problems - HP TouchSmart 600-1100 | Getting Started - Page 53
eject a CD/DVD 19 Ethernet connection 8 Index H hardware troubleshooting installation 36-37 headphones connecting 6 Help and Support 23 Hibernate mode 4 HP Advisor 21, 24 I Internet troubleshooting 32 Internet security 12 K keyboard and mouse troubleshooting wired 27-28 wireless 29-30 L LAN (local - HP TouchSmart 600-1100 | Getting Started - Page 54
21 HP Advisor 21 speakers adjust volume 7 connecting 6 Support Web site 23 surge protector 4 swivel computer 15 System 40 System recovery 44 System Restore, Microsoft 40 system recovery discs, making 43, 44 T tilt screen 15 transferring information to your new computer 14 troubleshooting audio - HP TouchSmart 600-1100 | Getting Started - Page 55
- HP TouchSmart 600-1100 | Getting Started - Page 56
Printed in
-
 1
1 -
 2
2 -
 3
3 -
 4
4 -
 5
5 -
 6
6 -
 7
7 -
8
-
9
-
10
-
11
-
12
-
13
-
14
-
15
-
16
-
17
-
18
-
19
-
20
-
21
-
22
-
23
-
24
-
25
-
26
-
27
-
28
-
29
-
30
-
31
-
32
-
33
-
34
-
35
-
36
-
37
-
38
-
39
-
40
-
41
-
42
-
43
-
44
-
45
-
46
-
47
-
48
-
49
-
50
-
51
-
52
-
53
-
54
-
55
-
56
 |
 |

HP Pavilion All-in-One PC
Getting Started