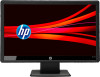
HP V191 V191 LV1911 W1971a W1972a W1952a W1972b LV2011 LV2011q W2071d W2072a W
HP V191 Manual
 |
View all HP V191 manuals
Add to My Manuals
Save this manual to your list of manuals |
HP V191 manual content summary:
- HP V191 | V191 LV1911 W1971a W1972a W1952a W1972b LV2011 LV2011q W2071d W2072a W - Page 1
V191,LV1911,W1971a,W1972a,W1952a,W1972b LV2011,LV2011q,W2071d,W2072a,W2072b,W2052a LV2311,W2371d User Guide - HP V191 | V191 LV1911 W1971a W1972a W1952a W1972b LV2011 LV2011q W2071d W2072a W - Page 2
- HP V191 | V191 LV1911 W1971a W1972a W1952a W1972b LV2011 LV2011q W2071d W2072a W - Page 3
Corporation in the United States and/or other countries. The only warranties for HP products and services are set forth in the express warranty statements accompanying such products and services. Nothing herein should be construed as constituting an additional warranty. HP shall not be liable for - HP V191 | V191 LV1911 W1971a W1972a W1952a W1972b LV2011 LV2011q W2071d W2072a W - Page 4
About This Guide This guide provides information on setting up the monitor, installing drivers, using the on-screen display menu, troubleshooting and technical specifications. WARNING! Text set off in this manner indicates that failure to follow directions could result in bodily harm or loss of life - HP V191 | V191 LV1911 W1971a W1972a W1952a W1972b LV2011 LV2011q W2071d W2072a W - Page 5
Table of Contents About This Guide 1. Product Features HP LCD Monitors 1 2. Safety and Maintenance Guidelines Important Safety 17 Sleep Timer Mode 18 A. Troubleshooting Solving Common Problems 19 Getting Support from hp.com 20 Preparing to Call Technical Support 20 Locating the Rating Label - HP V191 | V191 LV1911 W1971a W1972a W1952a W1972b LV2011 LV2011q W2071d W2072a W - Page 6
Energy Star Compliance 27 Disposal of Waste Equipment by Users in Private Household in the European Union 28 Chemical Substances 28 HP Recycling Program 28 Restriction of Hazardous Substances (RoHS 28 Turkey EEE Regulation 29 Ukraine Restriction of Hazardous Substances 29 2 ENWW - HP V191 | V191 LV1911 W1971a W1972a W1952a W1972b LV2011 LV2011q W2071d W2072a W - Page 7
display • Maximum graphics resolution: 1366 x 768 @ 60Hz (18.5 in.) 1600 x 900 @ 60Hz (20 in.) 1920 x 1080 @ 60Hz (23 in.) Plus full-screen support for lower resolutions • VGA analog signal • DVI digital signal on select models • Easy viewing from a sitting or standing position, or while moving from - HP V191 | V191 LV1911 W1971a W1972a W1952a W1972b LV2011 LV2011q W2071d W2072a W - Page 8
for computer users, and provides important electrical and mechanical safety information. This guide is located on the Web at http://www.hp.com/ergo and/ Use the appropriate and correctly sized furniture designed to properly support your HP LCD monitor. WARNING: LCD monitors that are inappropriately - HP V191 | V191 LV1911 W1971a W1972a W1952a W1972b LV2011 LV2011q W2071d W2072a W - Page 9
performance and extend the life of the monitor: • Do not open the monitor cabinet or attempt to service this product yourself. Adjust only those controls that are covered in the operating instructions. If the monitor is not operating properly or has been dropped or damaged, contact an authorized HP - HP V191 | V191 LV1911 W1971a W1972a W1952a W1972b LV2011 LV2011q W2071d W2072a W - Page 10
monitor. Preparing the monitor for desktop use 1. Set the monitor screen face down on a flat, soft, protected table or desk surface with the support column overhanging the edge. CAUTION: The screen is fragile. Avoid touching or applying pressure to the LCD screen; doing so can cause damage. 2. Press - HP V191 | V191 LV1911 W1971a W1972a W1952a W1972b LV2011 LV2011q W2071d W2072a W - Page 11
that the wall-mounting fixture is adequately installed and secured before attaching the monitor. Refer to the instructions supplied with the wall-mounting fixture and check that it is capable of supporting the monitor. 2. Disconnect the power cable and any other cables from the monitor. 3. Place the - HP V191 | V191 LV1911 W1971a W1972a W1952a W1972b LV2011 LV2011q W2071d W2072a W - Page 12
holes are exposed. These holes are for screws to attach the swing arm or other mounting fixture to the back of the monitor. 6. Follow the instructions included with the mounting fixture to ensure that the monitor is safely attached. The four threaded holes that are on the back of the panel - HP V191 | V191 LV1911 W1971a W1972a W1952a W1972b LV2011 LV2011q W2071d W2072a W - Page 13
Connecting Monitor Cables Connecting the VGA (Analog) Cable or DVI-D (Digital) Cable Use a VGA video cable or a DVI-D cable to connect your monitor to your computer. To use DVI, you must have a DVI-compliant graphic card. Connectors are located on the back of the monitor. Be sure the computer and - HP V191 | V191 LV1911 W1971a W1972a W1952a W1972b LV2011 LV2011q W2071d W2072a W - Page 14
see a blank screen or a lower resolution picture when playing high-definition protected content. Your computer graphics card and monitor must both support HDCP to display protected content. Connecting the Power Cable 1. Follow all Electrical and Power Warnings WARNING! To reduce the risk of electric - HP V191 | V191 LV1911 W1971a W1972a W1952a W1972b LV2011 LV2011q W2071d W2072a W - Page 15
Adjusting the Tilt For optimal viewing, adjust the screen tilt to your own preference, as follows: 1. Face the front of the monitor and hold the base so that you do not topple the monitor while changing the tilt. 2. Adjust the tilt by moving the top edge of the monitor either toward or away from you - HP V191 | V191 LV1911 W1971a W1972a W1952a W1972b LV2011 LV2011q W2071d W2072a W - Page 16
might need to install the digitally signed monitor drivers (INF or ICM files) manually from the CD, in case of an installation error. Refer to the "Driver Software Readme" file on the CD for instructions (in English only). Downloading updated drivers from the Internet To download the latest version - HP V191 | V191 LV1911 W1971a W1972a W1952a W1972b LV2011 LV2011q W2071d W2072a W - Page 17
Front-Panel Controls The monitor buttons are located on the bottom of the front panel Figure 4-1 Front-panel control buttons 5 432 1 No. Icon 1 Power 2 OK 3+ 4- 5 Menu Description Turns the monitor on or puts it in standby or sleep mode. The Power button is located on the bottom or front of the - HP V191 | V191 LV1911 W1971a W1972a W1952a W1972b LV2011 LV2011q W2071d W2072a W - Page 18
Using the On-Screen Display (OSD) The following table lists the On-Screen Display (OSD) menu selections and their functional descriptions. After changing an OSD menu item, and if the menu screen has these options, you may choose to: • Cancel - to return to the previous menu level. • Save and Return - HP V191 | V191 LV1911 W1971a W1972a W1952a W1972b LV2011 LV2011q W2071d W2072a W - Page 19
OSD MENU Icon Main Menu Brightness Contrast Color Image Control OSD Control ENWW Submenu Adjustable scale Adjustable scale Warm (5000K) Standard (6500K) Cool (9300K) Custom (RGB) Description Adjusts the brightness level of the screen. The factory default range is 90. Adjusts the contrast - HP V191 | V191 LV1911 W1971a W1972a W1952a W1972b LV2011 LV2011q W2071d W2072a W - Page 20
OSD MENU Icon Main Menu Management Submenu OSD Transparency OSD Timeout Power Saver Power on Recall Mode Display Monitor Status DDC/CI Support Bezel Power LED Volume Description Adjust to view the background information through the OSD. Sets the time duration in seconds that the OSD Is visible - HP V191 | V191 LV1911 W1971a W1972a W1952a W1972b LV2011 LV2011q W2071d W2072a W - Page 21
Reset Source Control (on select models) Exit Submenu Sleep Timer Current Settings Recommended Settings Serial Number FW Version Backlight Hours Service Support DVI VGA Default Source Auto-Switch Source Description Provides the timer adjustment menu options: • Set Current Time-sets the current - HP V191 | V191 LV1911 W1971a W1972a W1952a W1972b LV2011 LV2011q W2071d W2072a W - Page 22
.5 in.), 1600 x 900 @ 60Hz (20 in.), 1920 x 1080 @ 60Hz (23 in.).Indicates the monitor does not support the input signal because the resolution and/or refresh rate are set higher than the monitor supports. • No Source Signal - Indicates the monitor is not receiving a video signal from the PC on the - HP V191 | V191 LV1911 W1971a W1972a W1952a W1972b LV2011 LV2011q W2071d W2072a W - Page 23
power usage, refer to "Technical Specifications" (Appendix B). The monitor also supports a power-saver mode that is controlled by the computer. When the monitor feature to work. Refer to your computer documentation for instructions on setting energy-saver features (sometimes called power-management - HP V191 | V191 LV1911 W1971a W1972a W1952a W1972b LV2011 LV2011q W2071d W2072a W - Page 24
Sleep Timer Mode The Sleep Timer mode is an energy-saving feature that enables you to set a time for the monitor to power on and off at the same time every day. This also extends the life of the backlight bulbs in the monitor. The Sleep Timer has five settings: • Set Current Time • Set Sleep Time • - HP V191 | V191 LV1911 W1971a W1972a W1952a W1972b LV2011 LV2011q W2071d W2072a W - Page 25
Troubleshooting Solving Common Problems The following table lists possible problems, the possible cause of each problem, and the recommended solutions: Problem Solution Problem at : http://www.hp.com/support) Picture Is Fuzzy & Has Ghosting Shadowing Problem • Adjust the Contrast and Brightness - HP V191 | V191 LV1911 W1971a W1972a W1952a W1972b LV2011 LV2011q W2071d W2072a W - Page 26
you contact customer service, refer to HP Technical Support at: http://www.hp.com/support Select your country/region, and then follow the links to the support page for your monitor. Preparing to Call Technical Support If you cannot solve a problem by using the troubleshooting tips in this section - HP V191 | V191 LV1911 W1971a W1972a W1952a W1972b LV2011 LV2011q W2071d W2072a W - Page 27
B. Technical Specifications All specifications represent the typical specifications provided by HP's component manufacturers; actual performance may vary either higher or lower. HP LCD Monitors Face treatment: Glare polarizer with hard coating Input terminal: VGA connector DVI-D 24-pin D-type - HP V191 | V191 LV1911 W1971a W1972a W1952a W1972b LV2011 LV2011q W2071d W2072a W - Page 28
Preset Video Modes The monitor automatically recognizes many preset video input modes that will appear properly sized and centered on the screen. Table B-2 Factory Preset Video Input Modes, V191,LV1911,W1971a,W1972a,W1952a,W1972b Item 1 2 3 Preset Resolution 640 x 480 720 x 400 800 x 600 - HP V191 | V191 LV1911 W1971a W1972a W1952a W1972b LV2011 LV2011q W2071d W2072a W - Page 29
, manufactured according to high standards, to help guarantee trouble-free performance. Nevertheless, the display may have cosmetic imperfections viewed under normal operating conditions and in normal operating mode at a supported resolution and refresh rate, from a distance of approximately 50 cm - HP V191 | V191 LV1911 W1971a W1972a W1952a W1972b LV2011 LV2011q W2071d W2072a W - Page 30
. This equipment generates, uses, and can radiate radio frequency energy and, if not installed and used in accordance with the instructions, may cause harmful interference to radio communications. However, there is no guarantee that interference will not occur in a particular installation - HP V191 | V191 LV1911 W1971a W1972a W1952a W1972b LV2011 LV2011q W2071d W2072a W - Page 31
Declaration of Conformity for Products Marked with the FCC Logo (United States Only) This device complies with Part 15 of the FCC Rules. Operation is subject to the following two conditions: 1. This device may not cause harmful interference. 2. This device must accept any interference received, - HP V191 | V191 LV1911 W1971a W1972a W1952a W1972b LV2011 LV2011q W2071d W2072a W - Page 32
comprising HP brand computers, keyboards and monitors that bear the "GS" approval mark, meet the applicable ergonomic requirements. The installation guides included with the products provide configuration information. Japanese Notice Korean Notice 26 Appendix C. Agency Regulatory Notices ENWW - HP V191 | V191 LV1911 W1971a W1972a W1952a W1972b LV2011 LV2011q W2071d W2072a W - Page 33
and 12 feet (3.6 m). If you have questions about the type of power cord to use, contact an authorized HP service provider. A power cord should be routed so that it is not likely to be walked on or pinched by items in the energy saver or power management section of the computer manual. ENWW 27 - HP V191 | V191 LV1911 W1971a W1972a W1952a W1972b LV2011 LV2011q W2071d W2072a W - Page 34
to a designated collection point for the recycling of wasre electrocal and electronic equipment.For more informantion,Please contact your household waste disposal service or go to http://www.hp.com/recycle. Chemical Substances HP is committed to providing our customers with information about the - HP V191 | V191 LV1911 W1971a W1972a W1952a W1972b LV2011 LV2011q W2071d W2072a W - Page 35
Turkey EEE Regulation In Conformity with the EEE Regulation EEE Yönetmeliğine Uygundur Ukraine Restriction of Hazardous Substances 3 2008 № 1057. The equipment complies with requirements of the Technical Regulation, approved by the Resolution of Cabinet of Ministry of Ukraine as of December 3,
-
 1
1 -
 2
2 -
 3
3 -
 4
4 -
 5
5 -
 6
6 -
 7
7 -
8
-
9
-
10
-
11
-
12
-
13
-
14
-
15
-
16
-
17
-
18
-
19
-
20
-
21
-
22
-
23
-
24
-
25
-
26
-
27
-
28
-
29
-
30
-
31
-
32
-
33
-
34
-
35
 |
 |

V191,LV1911,W1971a,W1972a,W1952a,W1972b
LV2011,LV2011q,W2071d,W2072a,W2072b,W2052a
LV2311,W2371d
User Guide