HP Z Display Z24i User Guide
HP Z Display Z24i Manual
 |
View all HP Z Display Z24i manuals
Add to My Manuals
Save this manual to your list of manuals |
HP Z Display Z24i manual content summary:
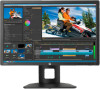
- HP Z Display Z24i | User Guide - Page 1
HP Z24i, Z27i, and Z30i IPS Displays User Guide - HP Z Display Z24i | User Guide - Page 2
trademarks of Microsoft Corporation. The only warranties for HP products and services are set forth in the express warranty statements accompanying such products and services. Nothing herein should be construed as constituting an additional warranty. HP shall not be liable for technical or editorial - HP Z Display Z24i | User Guide - Page 3
About This Guide This guide provides information on monitor features, setting up the monitor, and technical specifications. WARNING! Text set off in this manner indicates that failure to follow directions - HP Z Display Z24i | User Guide - Page 4
iv About This Guide - HP Z Display Z24i | User Guide - Page 5
...1 HP IPS Monitors ...1 2 Setting Up and Using the Monitor ...3 Installing the Stand ...3 Rear Components ...4 Z24i Model Guides ...25 Product Support ...25 Appendix A Technical Specifications ...26 Z24i Model ...26 Z27i Model ...26 Z30i Model ...28 Recognizing Preset Display Resolutions 29 Z24i - HP Z Display Z24i | User Guide - Page 6
Z27i Model ...30 Z30i Model ...31 Entering User Modes ...32 vi - HP Z Display Z24i | User Guide - Page 7
1 Product Features HP IPS Monitors The LCD (liquid crystal display) monitors have an active matrix, In-Plane Switching (IPS) panel. The monitor models and features include: ● Z24i model, 60.96 cm (24-inch) diagonal viewable area display with 1920 x 1200 resolution, plus full-screen support for lower - HP Z Display Z24i | User Guide - Page 8
setup and screen optimization ● HP Display Assistant for adjusting monitor settings and enabling theft deterrence features ● HDCP (High-Bandwidth Digital Content Protection) copy protection on all digital inputs ● Software and documentation CD that includes monitor drivers and product documentation - HP Z Display Z24i | User Guide - Page 9
the monitor, computer system, and other attached devices, then follow the instructions below. NOTE: Be sure the master power switch, located on the rear occurs the screen will not recover to its normal condition. The displays use the HP Quick Release 2 for easy moving of the monitor. To mount the - HP Z Display Z24i | User Guide - Page 10
Rear Components Z24i Model Component 1 USB 2.0 Downstream Connectors (side panel) 2 Master Power Switch 3 AC Power Connector 4 DisplayPort the monitor's USB hub connector and to a host USB port/hub. Connects optional USB devices to the monitor. 4 Chapter 2 Setting Up and Using the Monitor - HP Z Display Z24i | User Guide - Page 11
monitor. 6 DVI-D Connects the DVI-D cable to the monitor. 7 HDMI Connects an HDMI cable to the monitor. 8 Audio Out Connects headphones or optional HP Speaker Bar to the monitor. 9 USB 3.0 Upstream Connector Connects the USB hub cable to the monitor's USB hub connector and to a host USB - HP Z Display Z24i | User Guide - Page 12
between the PC and the monitor. NOTE: The monitor is capable of supporting either analog or digital input. The video mode is determined by the by pressing the Input button on the front panel or through the On-Screen Display (OSD) feature by pressing the Menu button. ● For analog operation, connect - HP Z Display Z24i | User Guide - Page 13
● For DVI digital operation, connect the DVI-D signal cable to the DVI connector on the rear of the monitor and the other end to the DVI connector on the computer (cable provided with select models). ● For DisplayPort digital operation, connect the DisplayPort signal cable to the DisplayPort - HP Z Display Z24i | User Guide - Page 14
the USB hub connector on the rear panel of the computer, and the other end to the upstream USB connector on the monitor. NOTE: The Z24i model supports USB 2.0. The Z27i and Z30i models support USB 3.0. 8 Chapter 2 Setting Up and Using the Monitor - HP Z Display Z24i | User Guide - Page 15
5. Connect one end of the power cord to the AC power connector on the back of the monitor, and the other end to an electrical wall outlet. WARNING! To reduce the risk of electric shock or damage to the equipment: Do not disable the power cord grounding plug. The grounding plug is an important safety - HP Z Display Z24i | User Guide - Page 16
on the rear of the monitor is in the ON position to turn on the monitor. NOTE: To view an OSD menu simulator, visit the HP Customer Self Repair Services Media Library at http://www.hp.com/go/sml. 10 Chapter 2 Setting Up and Using the Monitor - HP Z Display Z24i | User Guide - Page 17
Adjusting the Monitor 1. Tilt the monitor's panel forward or backward to set it to a comfortable eye level. 2. Swivel the monitor to the left or right for the best viewing angle. Adjusting the Monitor 11 - HP Z Display Z24i | User Guide - Page 18
3. Adjust the monitor's height to a comfortable position for your individual workstation. The monitor's top bezel edge should not exceed a height that is parallel to your eye height. A monitor that is positioned low and reclined may be more comfortable for users with corrective lenses. The monitor - HP Z Display Z24i | User Guide - Page 19
NOTE: To view information on the screen in portrait mode, you can install the HP Display Assistant software included on the software and documentation CD. The position of the OSD menu can also be rotated to portrait mode. To rotate the - HP Z Display Z24i | User Guide - Page 20
monitor, then select Management > Bezel Power LED > Off. When the monitor is powered on, a Monitor Status message is displayed for five seconds. The message shows which Input. HP Watermark and Image Retention Policy The IPS monitor models are designed with IPS (In-Plane Switching) display technology - HP Z Display Z24i | User Guide - Page 21
24 hours per day that result in image retention damage are not covered under the HP warranty. To avoid image retention damage, always turn off the monitor when it is not in use or use the power management setting, if supported on your system, to turn off the display the USB ports on the monitor - HP Z Display Z24i | User Guide - Page 22
HP Quick Release 2 mounting bracket. NOTE: This apparatus is intended to be supported by UL or CSA Listed wall mount bracket. CAUTION: This monitor supports compliant with the VESA standard and is rated to support the weight of the monitor display panel. For best performance, it is important to use - HP Z Display Z24i | User Guide - Page 23
Mounting the Monitor Using the Quick Release 2 Mounting Bracket To mount the monitor panel to a mounting fixture using the Quick Release 2 mounting bracket: 1. Remove the four screws holding the mounting plate to the head of the stand. 2. Remove the four screws from the mounting plate to separate - HP Z Display Z24i | User Guide - Page 24
3. Remove the four screws from the VESA holes located on the rear of the monitor panel. 4. Install the mounting plate to the wall or swing arm of your choice using the four screws that were removed from the VESA holes on the rear of the monitor panel. 18 Chapter 2 Setting Up and Using the Monitor - HP Z Display Z24i | User Guide - Page 25
5. Place the monitor panel on the mounting bracket you've installed by aligning its recess with the mounting bracket, then sliding it down over the top of the bracket and pressing it back into place against the bracket. The release latch on the monitor will pop up when the monitor is safely locked - HP Z Display Z24i | User Guide - Page 26
Mounting the Monitor Without Using the Quick Release 2 Mounting Bracket To mount the monitor panel directly to a mounting fixture without using the HP Quick Release 2 mounting bracket, use the four screws removed from the VESA holes on rear of the monitor panel and install them to attach the - HP Z Display Z24i | User Guide - Page 27
number and product number are located on a label on the rear panel of the display head. You may need these numbers when contacting HP about the monitor model. NOTE: You may need to partially pivot the display head to read the label. Locating the Information Card Identifying information is located on - HP Z Display Z24i | User Guide - Page 28
optional cable lock available from HP. Power Saving Features The monitors support a reduced power state. mode. Refer to the computer manual for instructions on setting energy saver features ( Saver function serves primarily to reduce LED backlight current (display brightness) in stages to enable - HP Z Display Z24i | User Guide - Page 29
for the USB ports. Auto-Sleep Mode These displays support an OSD (On-Screen Display) option called the backlight is turned off and the power LED indicator turns amber. The monitor draws less than that the time is displayed in a 24-hour clock format. For example, 1:15 p.m. is displayed as 13 hours 15 - HP Z Display Z24i | User Guide - Page 30
selection, Sleep Now, turns the monitor backlights off immediately and stays in sleep mode until the next On Time activates or a monitor button is pressed. 24 Chapter 2 Setting Up and Using the Monitor - HP Z Display Z24i | User Guide - Page 31
from the Web ● Agency regulatory information ● Troubleshooting and recommended solutions to common problems For information on theft deterrence, refer to the HP Display Assistant User Guide included on the CD with your monitor. Product Support For additional information on using and adjusting your - HP Z Display Z24i | User Guide - Page 32
go to http://www.hp.com/go/productbulletin and search for your specific display model to find the model-specific QuickSpecs. Z27i Model Display Type Viewable Image Size Maximum Weight (Unpacked) 68.58 cm wide screen IPS LCD 68.58 cm diagonal 7.6 kg 27 inches wide screen 27-inch diagonal 16.74 lbs - HP Z Display Z24i | User Guide - Page 33
1200 (60 Hz) analog input 2560 x 1440 (60 Hz) digital input 21.28 inches 16.55 inches 9.55 inches 25.24 inches Operating Temperature Storage Temperature 5 to 35° C -20 to 60° C 41 to 95 , go to http://www.hp.com/go/productbulletin and search for your specific display model to find the model - HP Z Display Z24i | User Guide - Page 34
IPS LCD 76.2 cm diagonal 9.96 kg 60.1 cm 48.1 cm 26.648 cm 69.03 cm 1920 x 1200 (60 Hz) analog input 2560 x 1600 (60 Hz) digital input 1920 x 1200 (60 Hz) analog input 2560 x 1600 (60 Hz) digital input 30 inches wide screen 30-inch .hp.com/go/productbulletin and search for your specific display - HP Z Display Z24i | User Guide - Page 35
Recognizing Preset Display Resolutions The display resolutions listed below are the most commonly used modes and are set as factory defaults. This monitor automatically recognizes these preset modes and they will appear properly sized and centered on the screen. Z24i Model Preset Pixel Format 1 - HP Z Display Z24i | User Guide - Page 36
Z27i Model Preset Pixel Format 1 640 × 480 2 720 × 400 3 800 × 600 4 1024 × 768 5 1280 × 720 6 1280 × 800 7 1280 × 1024 8 1366 × 768 9 1440 × 900 10 1600 × 900 11 1680 × 1050 12 1920 × 1080 13 1920 × 1200 14 1600 × 1200 15 1920 × 1200 16 2560 × 1440 Horz Freq (kHz) - HP Z Display Z24i | User Guide - Page 37
× 1080 Horz Freq (kHz) 31.469 31.25 37.5 45 56.25 67.5 Vert Freq (Hz) 59.94 50 50 60 50 60 Recognizing Preset Display Resolutions 31 - HP Z Display Z24i | User Guide - Page 38
. ● You are not using a preset mode. It this occurs, you may need to readjust the parameters of the monitor screen by using the on-screen display. Your changes can be made to any or all of these modes and saved in memory. The monitor automatically stores the new setting, then recognizes
-
 1
1 -
 2
2 -
 3
3 -
 4
4 -
 5
5 -
 6
6 -
 7
7 -
8
-
9
-
10
-
11
-
12
-
13
-
14
-
15
-
16
-
17
-
18
-
19
-
20
-
21
-
22
-
23
-
24
-
25
-
26
-
27
-
28
-
29
-
30
-
31
-
32
-
33
-
34
-
35
-
36
-
37
-
38
 |
 |

HP Z24i, Z27i, and Z30i IPS Displays
User Guide