HP ZR2240w User Guide
HP ZR2240w Manual
 |
View all HP ZR2240w manuals
Add to My Manuals
Save this manual to your list of manuals |
HP ZR2240w manual content summary:
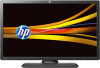
- HP ZR2240w | User Guide - Page 1
HP ZR2040w, ZR2240w, ZR2440w and ZR2740w LCD Monitors User Guide - HP ZR2240w | User Guide - Page 2
and/or other countries. The only warranties for HP products and services are set forth in the express warranty statements accompanying such products and services. Nothing herein should be construed as constituting an additional warranty. HP shall not be liable for technical or editorial errors - HP ZR2240w | User Guide - Page 3
About This Guide This guide provides information on setting up the monitor and technical specifications. WARNING! Text set off in this manner indicates that failure to follow directions could result - HP ZR2240w | User Guide - Page 4
iv About This Guide - HP ZR2240w | User Guide - Page 5
Model ...11 ZR2240w, ZR2440w, and ZR2740w Models 13 Mounting the Monitor to User-Supplied Support Hardware 14 Mounting the ZR2040w Panel 15 Mounting a Quick-Release Panel 16 Locating the Information Card (Select Models 18 Installing a Cable Lock ...19 Turning on the Monitor ...19 Adjusting - HP ZR2240w | User Guide - Page 6
ZR2240w Model ...30 ZR2440w Model ...31 ZR2740w Model ...32 Preset Display Resolutions ...33 ZR2040w Model Preset Modes 33 ZR2240w Model Preset Modes 33 ZR2440w Model Preset Modes 34 ZR2740w Model Preset Modes 36 Energy Saver Feature ...36 vi - HP ZR2240w | User Guide - Page 7
● Support for the optional HP speaker bar (purchased separately) ● Plug and play capability when supported by and documentation CD that includes monitor drivers, utilities, and product documentation with the European Union RoHS Directive ZR2040w Model Features of the ZR2040w model include: ● 50.8 cm - HP ZR2240w | User Guide - Page 8
release ● Easy access pull-out information card with the information needed for a support call ● On-Screen Display (OSD) adjustments in several languages for ease of setup and screen optimization ● HP Display Assistant utility software for adjusting monitor settings and enabling the theft deterrence - HP ZR2240w | User Guide - Page 9
release ● Easy access pull-out information card with the information needed for a support call ● On-Screen Display (OSD) adjustments in several languages for ease of setup and screen optimization ● HP Display Assistant utility software for adjusting monitor settings and enabling the theft deterrence - HP ZR2240w | User Guide - Page 10
Video signal input to support DVI digital with DVI-Dual Link signal cable provided ● Video signal input to support DisplayPort digital with DisplayPort ● 8-way comfort adjust including Height, Tilt, Pivot and Swivel adjustments ● HP Quick Release 2 is now a flush mount solution that lets you quickly - HP ZR2240w | User Guide - Page 11
computer system, and other attached devices, then follow the instructions below. NOTE: Be sure the master power switch, fixture; instead see Mounting the Monitor to User-Supplied Support Hardware on page 14 in this chapter. CAUTION: Whenever the ZR2040w, slide the pedestal upright into its base, - HP ZR2240w | User Guide - Page 12
2 latch pops up when the monitor is locked in place. Figure 2-2 Mounting the Panel onto the HP Quick Release 2 Rear Components ZR2040w Model Figure 2-3 ZR2040w Rear Components Component 1 AC Power Connector 2 Cable Lock Provision 3 DisplayPort Connector 4 DVI-D Connector 5 VGA Connector - HP ZR2240w | User Guide - Page 13
ZR2240w Model Figure 2-4 ZR2240w Rear Components 10 11 2 321 42 52 62 27 8 9 Component 1 Cable Lock Provision 2 Master Power Switch 3 AC Power Connector 4 DisplayPort Connector 5 HDMI Connector 6 DVI-D Connector 7 VGA Connector 8 USB Upstream Connector 9 USB Downstream - HP ZR2240w | User Guide - Page 14
Component 10 Information Card 11 USB Downstream Connectors (side panel) Function Provides information needed for a support call. Connects optional USB devices to the monitor. ZR2440w Model Figure 2-5 ZR2440w Rear Components Component 1 Cable Lock Provision 2 Master Power Switch 3 AC - HP ZR2240w | User Guide - Page 15
Component 5 Analog Audio Output 6 DisplayPort Connector 7 HDMI Connector 8 DVI-D Connector 9 USB Upstream Connector 10 USB Downstream Connectors 11 Information Card 12 USB Downstream Connectors (side panel) Function Connects an audio cable with 3.5 mm L/R mini-plug to the monitor. - HP ZR2240w | User Guide - Page 16
to the monitor. Connects the monitor USB hub cable to a host USB port/ hub. Connects optional USB devices to the monitor. Provides information needed for a support call. Connects optional USB devices to the monitor. 10 Chapter 2 Setting Up the Monitor - HP ZR2240w | User Guide - Page 17
the bar away from the pedestal (1). When it is free, the bar can be removed (2). 2. Connect the video cables provided to the connectors shown in ZR2040w Model on page 6. You do not have to connect them all. 3. For each cable you've attached, plug the other end into the appropriate connector - HP ZR2240w | User Guide - Page 18
electrical outlet, grasp the cord by the plug. 5. Gather the video cables and replace the cable-restraining bar so as to contain the cables. Figure 2-8 ZR2040w Model Cable Routing 12 Chapter 2 Setting Up the Monitor - HP ZR2240w | User Guide - Page 19
ZR2240w, ZR2440w, and ZR2740w Models 1. Remove the cable routing cover by pulling it straight off the front of the column. Figure 2-9 Cable Routing Cover 2. Before connecting the cables, route them through the cable routing hole in the column (1) and replace the cable routing cover (2). Figure 2-10 - HP ZR2240w | User Guide - Page 20
. For each one, plug in one end of the appropriate cable. Attach the other end to your computer or other video source. The ZR2440w model supports audio output from the HDMI and DisplayPort inputs. Use the RCA jack for digital output and the 3.5 mm mini-jack for analog 2.0 Sound. NOTE: It - HP ZR2240w | User Guide - Page 21
panel, use the four holes surrounding the HP logo on the back of the monitor. Figure 2-12 Mounting the ZR2040w Model CAUTION: This monitor supports the VESA industry standard 100 mm mounting Portrait Orientation on page 22 for instructions. Mounting the Monitor to User-Supplied Support Hardware 15 - HP ZR2240w | User Guide - Page 22
support mounting to VESA-compliant hardware in two ways: ● Remove the HP stand and use the 4 VESA mount threaded holes (100 x 100 pattern) that are in the Quick Release 2 recess. Screws of the appropriate length are provided. Figure 2-13 Mounting a VESA Arm ● Alternatively, follow the instructions - HP ZR2240w | User Guide - Page 23
four screws to separate the mounting plate from its cover: Figure 2-16 Removing the Cover from the Mounting Plate Mounting the Monitor to User-Supplied Support Hardware 17 - HP ZR2240w | User Guide - Page 24
(Select Models) Figure 2-18 The Pull-out Information Card The ZR2240w, ZR2440w, and ZR2740w models provide a card with the information you will need when contacting HP for support. The card pulls out from behind the USB connectors on the left side of the panel. 18 Chapter 2 Setting Up the Monitor - HP ZR2240w | User Guide - Page 25
of on labels on the back of the monitor). Warranty support information (model number, serial number, product number) is printed can secure the monitor to a fixed object with an optional cable lock available from HP. Figure 2-19 Installing a Cable Lock Turning on the Monitor 1. If your monitor has - HP ZR2240w | User Guide - Page 26
Adjusting the Monitor 1. Tilt the monitor's panel forward or backward to set it to a comfortable eye level. Figure 2-20 Adjusting the Tilt 2. If your monitor has the ability to swivel, adjust it to the left or right for the best viewing angle. Figure 2-21 Adjusting the Viewing Angle (Select Models) - HP ZR2240w | User Guide - Page 27
push down on the display head (1). c. While pushing down the display head, press the lock-down/release button on the back of the column (2). d. Guide the display head up to the desired height (3). 4. The default orientation of the monitor is landscape. If you want to change to portrait, follow the - HP ZR2240w | User Guide - Page 28
Portrait Orientation The ZR2040w must be mounted in the orientation you wish to use. NVIDIA Control Center). Refer to the Online Help of your workstation video driver for more information. For other models, use the HP Display Assistant software (included on the software and documentation CD) to - HP ZR2240w | User Guide - Page 29
HP Performance monitors, read this section for an overview of how they operate. This will help you locate specific information elsewhere in this manual. software utility, an auto-adjust function, and options in the OSD. ZR2040w and ZR2240w Model The order in which these monitors scan the inputs - HP ZR2240w | User Guide - Page 30
, press to navigate backward through the OSD menu and decrease adjustment levels. If the OSD menu is inactive, resets OSD choices to their factory defaults, ZR2040w model only. If the OSD menu is on, press to navigate forward through the OSD menu and increase adjustment levels. If the OSD menu is - HP ZR2240w | User Guide - Page 31
ZR2440w Model The default input on the ZR2440w is DisplayPort and the scan order is initially set to DisplayPort, DVI-D, HDMI. You can change the current input, the default and the scan order through the OSD. Pressing the + button on the front of the monitor will take you directly to the OSD source- - HP ZR2240w | User Guide - Page 32
low-power mode. Continuously-flashing blue indicates signal input in a nonsupported mode. (See ZR2740w Model Preset Modes on page 36 for supported modes.) Three blue flashes while you are adjusting brightness indicate the limit of the screen's brightness range. No light indicates normal operation - HP ZR2240w | User Guide - Page 33
to analog images. The ZR2740w does not use an OSD. Models that use an OSD have a menu ( ) button on the front. NOTE: If there is a problem with the display settings, try resetting the settings to the factory defaults by opening the OSD and selecting Factory Reset from the OSD menu. NOTE - HP ZR2240w | User Guide - Page 34
common problems For additional information on using and adjusting your monitor, go to http://www.hp.com/support. Select your country or region, select Product Support & Troubleshooting, and then enter your monitor model in the SEARCH window. NOTE: The monitor user guide, reference guide, and drivers - HP ZR2240w | User Guide - Page 35
manufacturers. Performance specifications represent the highest specification of all HP's component manufacturers' typical level specifications for performance and actual performance may vary either higher or lower. ZR2040w Model Display Type Viewable Image Size Tilt Maximum Weight (Unpacked - HP ZR2240w | User Guide - Page 36
Power Consumption (maximum) Low-power mode Input Terminal 33 watts 0.3 watts One DVI connector with cable included; one DisplayPort connector with cable included; one VGA connector with cable ZR2240w Model Table A-1 ZR2240w Specifications Display Type Viewable Image Size Tilt range Swivel range - HP ZR2240w | User Guide - Page 37
Table A-1 ZR2240w Specifications (continued) Altitude: Operating Storage 0 to 5000 m 0 to 12,192 m 0 to 16,400 feet 0 to 40,000 feet Power Consumption (maximum) Low-power mode 46 watts 0.3 watts Input Terminal One VGA connector with cable included; one DVI connector with cable included; one - HP ZR2240w | User Guide - Page 38
Power Source Altitude: Operating Storage Power Consumption (maximum) Low-power mode Input Terminal ZR2740w Model Display Type Viewable Image Size Tilt Swivel Maximum Weight (Unpacked) Dimensions (including base) Height (highest position) Height (lowest position) Depth Width Maximum Graphic - HP ZR2240w | User Guide - Page 39
these preset modes and they will appear properly sized and centered on the screen. ZR2040w Model Preset Modes Preset 1 2 3 4 5 6 7 8 Resolution (pixels) 59.94 63.981 60.02 55.935 59.887 60 60 Table A-2 ZR2040w High Definition Video Formats Preset Timing Name Pixel Format 1 480p 720 x - HP ZR2240w | User Guide - Page 40
1 640 x 480 31.469 59.940 2 720 x 400 31.469 70.087 3 800 x 600 37.879 60.317 4 1024 x 768 48.363 60.004 5 1280 x 720 45.00 59.94 6 1280 x 960 60.0 60.0 7 1280 x 1024 63.981 60.020 8 1440 x 900 55.935 59.887 9 1600 x 900 60.0 60.0 10 1680 x 1050 65.290 59.954 - HP ZR2240w | User Guide - Page 41
7 1280 x 720 45.00 59.94 8 1280 x 768 47.396 59.995 9 1280 x 800 49.702 59.810 10 1280 x 960 60.00 60.00 11 1280 x 1024 63.981 60.020 12 1366 x 768 47.712 59.790 13 1440 x 900 55.935 59.887 14 1440 x 900 55.469 59.901 15 1600 x 900 60.000 60.00 16 1600 x 1000 61 - HP ZR2240w | User Guide - Page 42
Table A-4 ZR2440w High Definition Video Formats (continued) 13 1080p25 1920 x 1080 28.125 25 14 1080p29.97 1920 x 1080 33.750 30 74.250 74.250 33 1080p-25Hz 34 1080p-30Hz ZR2740w Model Preset Modes Preset Pixel Format 1 640 x 480 2 1280 x 720 3 2560 x 1400 Horizontal Frequency
-
 1
1 -
 2
2 -
 3
3 -
 4
4 -
 5
5 -
 6
6 -
 7
7 -
8
-
9
-
10
-
11
-
12
-
13
-
14
-
15
-
16
-
17
-
18
-
19
-
20
-
21
-
22
-
23
-
24
-
25
-
26
-
27
-
28
-
29
-
30
-
31
-
32
-
33
-
34
-
35
-
36
-
37
-
38
-
39
-
40
-
41
-
42
 |
 |

HP ZR2040w, ZR2240w, ZR2440w and
ZR2740w LCD Monitors
User Guide