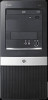
HP dx2390 Service Reference Guide: HP Compaq dx2390 Business PC
HP dx2390 - Microtower PC Manual
 |
View all HP dx2390 manuals
Add to My Manuals
Save this manual to your list of manuals |
HP dx2390 manual content summary:
- HP dx2390 | Service Reference Guide: HP Compaq dx2390 Business PC - Page 1
Service Reference Guide HP Compaq dx2390 Business PC - HP dx2390 | Service Reference Guide: HP Compaq dx2390 Business PC - Page 2
, L.P. The information contained herein is subject to change without notice. Microsoft and Windows are trademarks of Microsoft Corporation in the U.S. and other countries. The only warranties for HP products and services are set forth in the express warranty statements accompanying such products and - HP dx2390 | Service Reference Guide: HP Compaq dx2390 Business PC - Page 3
or Upgrading Device Drivers 1 HP Backup and Recovery Manager ...2 2 Computer Setup (F10) Utility Computer Setup (F10) Utilities ...3 Using Computer Setup (F10) Utilities 3 Computer Setup-Main ...4 Computer Setup-Advanced 5 Computer Setup-Power ...6 Computer Setup-Boot ...7 Computer Setup - HP dx2390 | Service Reference Guide: HP Compaq dx2390 Business PC - Page 4
Security Devices ...27 Cable Lock ...27 Padlock ...27 HP Business PC Security Lock 28 Computer Access Panel ...30 Front Bezel ...31 Removing Bezel Blanks ...32 Cable Management ...33 Cable Connections ...34 Memory ...35 Expansion Cards ...38 Drives ...42 System Board Drive Connections 44 Drive - HP dx2390 | Service Reference Guide: HP Compaq dx2390 Business PC - Page 5
65 Type 2 Battery Holder ...65 Type 3 Battery Holder ...66 Appendix A Connector Pin Assignments Keyboard ...67 Mouse ...67 Ethernet RJ-45 ...68 Parallel Interface ...69 Serial Interface, Powered and Non-Powered 69 USB ...70 Microphone ...70 Headphone ...70 Line-in Audio ...70 Line-out Audio ...70 - HP dx2390 | Service Reference Guide: HP Compaq dx2390 Business PC - Page 6
Japanese Power Cord Requirements 78 Country-Specific Requirements ...79 Appendix C Troubleshooting Safety and Comfort ...80 Before You Call for Technical Support 80 Helpful Hints ...81 Solving General Problems ...82 Solving Hardware Installation Problems 85 Interpreting POST Audible Codes ...87 - HP dx2390 | Service Reference Guide: HP Compaq dx2390 Business PC - Page 7
system to the appropriate drivers. Obtain the latest support software , including support software for the operating system from http://www.hp.com/support. Select your country and language, select Download drivers and software, enter the model number of the computer, and press Enter. Installing - HP dx2390 | Service Reference Guide: HP Compaq dx2390 Business PC - Page 8
can be copied to CD or DVD discs, while all backups can be copied to network or secondary hard disks. HP highly recommends that you create a Recovery Disc Set immediately before using the computer and schedule regular automatic Recovery Point backups. To create the Recovery Disc Set: 1. Click Start - HP dx2390 | Service Reference Guide: HP Compaq dx2390 Business PC - Page 9
Computer Setup (F10) Utility to do the following: ● Change factory default settings. ● Set the system date and time. ● Set, view, change, or verify the system configuration, including settings for graphics, audio, storage, communications, and input devices. ● View settings for processor and memory - HP dx2390 | Service Reference Guide: HP Compaq dx2390 Business PC - Page 10
Mode ◦ SATA Speed ◦ NCQ ● Smart Support - run HDD self-test for selected channel: ◦ SMART Status Check ◦ SMART Short Self-Test ◦ SMART Extended Self-Test System Information (view only) ● Installed Memory ● Memory Bank 1 ● Memory Bank 2 ● BIOS Revision 4 Chapter 2 Computer Setup (F10) Utility - HP dx2390 | Service Reference Guide: HP Compaq dx2390 Business PC - Page 11
NOTE: Support for specific Computer Setup options may vary depending on the hardware configuration. WARNING! Setting items on this menu to incorrect values may cause your system to malfunction. Table 2-2 Computer Setup-Advanced Option Description CPU Type (view only) CPU Speed (view - HP dx2390 | Service Reference Guide: HP Compaq dx2390 Business PC - Page 12
audio to: ● Auto ● Disabled ● Enabled Internal Speaker Allows you to set the internal speaker to: ● Disabled ● Enabled Supervisor Password Allows you to change supervisor password. User Password Allows you to change the user password. Computer Setup-Power NOTE: Support for specific - HP dx2390 | Service Reference Guide: HP Compaq dx2390 Business PC - Page 13
Drive Group Boot Specifies boot device priority within hard drives. Priority Network Group Boot Priority Specifies boot device priority within bootable network devices. Computer Setup-Exit NOTE: Support for specific Computer Setup options may vary depending on the hardware configuration. Table - HP dx2390 | Service Reference Guide: HP Compaq dx2390 Business PC - Page 14
To reset all BIOS Setup options to their default values (including options for ctrl+F10), you must enter F10 Setup mode and press F5. This does not include updates to system date, system time, supervisor password, user password, and CPU frequency multiplier. 8 Chapter 2 Computer Setup (F10) Utility - HP dx2390 | Service Reference Guide: HP Compaq dx2390 Business PC - Page 15
a set of recovery discs (Recommended) and click Next. 3. Follow the instructions in the wizard to create a Recovery Disc Set. 4. Use Windows Explorer to search the Recovery Disc Set for the CD with the compaq\hpdiags directory. 5. While the computer is on, insert the CD into an optical drive on the - HP dx2390 | Service Reference Guide: HP Compaq dx2390 Business PC - Page 16
, plus USB and network controller information. Graphics-Shows information about the graphics controller of the computer. Input Devices-Shows information about the keyboard, mouse, and other input devices connected to the computer. Memory-Shows information about all memory in the computer. This - HP dx2390 | Service Reference Guide: HP Compaq dx2390 Business PC - Page 17
Test mode allows you to specifically select which devices, tests, and test parameters are run. For each test type, there are two test modes whether the device passed or failed. 7. If errors are found, go to the Log tab and click the Error Log to display more detailed information and recommended - HP dx2390 | Service Reference Guide: HP Compaq dx2390 Business PC - Page 18
Repair action that should help solve the problem. To find an error code description quickly, enter the code in the box at the top of the tab and click the Find Error Codes button. The Test Components tab displays low-level information on tests that are run. 12 Chapter 3 Computer Diagnostic Features - HP dx2390 | Service Reference Guide: HP Compaq dx2390 Business PC - Page 19
or USB 2.0 HP Drive Key (capacity must be 64MB or higher). USB 1.0 Drive Keys are not supported. specific computer model. 5. Select your OS. 6. Click the Diagnostic link. 7. Click HP Insight Diagnostics Offline Edition. 8. Select a language and click Download. NOTE: The download includes instructions - HP dx2390 | Service Reference Guide: HP Compaq dx2390 Business PC - Page 20
channel, device 1 Color Dark blue Light Blue White Orange Port SATA 0 SATA 2 SATA 1 SATA 3 Attachment Sequence 1 4 2 3 NOTE: If there is an error on the application of the attach rules, a POST error message may be displayed. 14 Chapter 4 Serial and Parallel ATA Drive Guidelines and Features - HP dx2390 | Service Reference Guide: HP Compaq dx2390 Business PC - Page 21
SATA 3.0 Gb/s cable as it is fully backwards compatible with the SATA 1.5 Gb/s drives. Current HP desktop products ship with SATA 3.0 Gb/s hard drives. SATA data cables are susceptible to damage if overflexed. Never crease a SATA data cable and never bend it - HP dx2390 | Service Reference Guide: HP Compaq dx2390 Business PC - Page 22
computer specification. Drive size calculations by drive manufacturers are bytes to the base 10 while calculations by Microsoft are bytes to the base 2. File System FAT 32 NTFS Drive/Partition Capacity Limits Controller Type ATA ATA Operating System Windows 2000/XP/Vista Windows 2000/XP/Vista - HP dx2390 | Service Reference Guide: HP Compaq dx2390 Business PC - Page 23
proper service. CAUTION: When the computer is plugged into an AC power source, voltage is always applied to the system board. You must disconnect the power cord from the power source before opening the computer to prevent system board or component damage. Chassis Designation Microtower (MT) Chassis - HP dx2390 | Service Reference Guide: HP Compaq dx2390 Business PC - Page 24
may not appear to be affected at all and can work perfectly throughout a normal cycle. The device may function the internal layers, reducing its life expectancy. Networks built into many integrated circuits provide some protection containers until they arrive at static-free stations. ● Place items on - HP dx2390 | Service Reference Guide: HP Compaq dx2390 Business PC - Page 25
straps/Boot straps can be used at standing workstations and are compatible with most types of shoes or boots. On conductive floors or dissipative floor mats, use them ● Keep work area free of nonconductive materials such as ordinary plastic assembly aids and Styrofoam. ● Use field service tools, - HP dx2390 | Service Reference Guide: HP Compaq dx2390 Business PC - Page 26
mats with hard tie to ground ● Field service kits ● Static awareness labels ● Wrist the desktop unit as this also restricts airflow. ● Occasionally clean the air vents on all vented sides of the computer. the computer and keyboard. ● Never cover the ventilation slots on the monitor with any type - HP dx2390 | Service Reference Guide: HP Compaq dx2390 Business PC - Page 27
always wipe the unit with a clean, lint-free cloth. ● Occasionally clean the air vents on the computer. Lint and other foreign matter can block the the procedures described in Cleaning the Computer Case on page 21. When cleaning debris from under the keys, review all rules in General Cleaning Safety - HP dx2390 | Service Reference Guide: HP Compaq dx2390 Business PC - Page 28
disconnect the power cord from the power source before opening the computer to prevent system board or component damage. Tools and Software Requirements To service the computer, you need the following: ● Torx T-15 screwdriver (HP screwdriver with bits, PN 161946-001) ● Torx T-15 screwdriver with - HP dx2390 | Service Reference Guide: HP Compaq dx2390 Business PC - Page 29
from the computer, it should be placed away from the work area to CAUTION: When servicing this computer, ensure that cables CPU. ● Avoid dropping drives from any height onto any surface. ● If you are inserting or removing a hard drive, turn off the computer. Do not remove a hard drive while the computer - HP dx2390 | Service Reference Guide: HP Compaq dx2390 Business PC - Page 30
chapter for the chassis you are working on in this guide for instructions on the replacement procedures. WARNING! This computer contains a lithium battery. There use the public collection system or return them to HP, their authorized partners, or their agents. 24 Chapter 5 Identifying the - HP dx2390 | Service Reference Guide: HP Compaq dx2390 Business PC - Page 31
Not all features listed in this guide are available on all computers. Serial Number Location Each computer has a unique serial number and product ID number that are located on the top of the computer. Keep these numbers available for use when contacting customer service for assistance. Serial Number - HP dx2390 | Service Reference Guide: HP Compaq dx2390 Business PC - Page 32
should always be disconnected before servicing a unit. 6. Disconnect the power cord from the electrical outlet and then from the computer. 7. Disconnect all peripheral device cables from the computer. 8. Lay the computer down on its side to achieve a safe working position. NOTE: During disassembly - HP dx2390 | Service Reference Guide: HP Compaq dx2390 Business PC - Page 33
External Security Devices The following security devices are used to prevent unauthorized access to the internal components of the computer and/or secure the computer to a fixed object. Cable Lock Padlock External Security Devices 27 - HP dx2390 | Service Reference Guide: HP Compaq dx2390 Business PC - Page 34
HP Business PC Security Lock 1. Fasten the security cable by looping it around a stationary object. 2. Thread the keyboard and mouse cables through the lock. 28 Chapter 6 Removal and Replacement Procedures Microtower (MT) Chassis - HP dx2390 | Service Reference Guide: HP Compaq dx2390 Business PC - Page 35
3. Screw the lock to the chassis using the screw provided. 4. Insert the plug end of the security cable into the lock (1) and push the button in (2) to engage the lock. Use the key provided to disengage the lock. External Security Devices 29 - HP dx2390 | Service Reference Guide: HP Compaq dx2390 Business PC - Page 36
computer for disassembly (Preparation for Disassembly on page 26). CAUTION: Before removing the computer access panel, ensure that the computer electrical outlet. 2. Loosen the screw (1) that secures the access panel to the computer chassis. 3. Slide the access panel back (2) about 1.3 cm (1/2 inch), - HP dx2390 | Service Reference Guide: HP Compaq dx2390 Business PC - Page 37
for disassembly (Preparation for Disassembly on page 26). 2. Remove the computer access panel (Computer Access Panel on page 30). 3. Press outward on the three latches on the right side of the bezel (1), then rotate the right side of the - HP dx2390 | Service Reference Guide: HP Compaq dx2390 Business PC - Page 38
of the blank (2) toward the right, and then pull the blank inward to remove it (3). 3. Replace the front bezel. 32 Chapter 6 Removal and Replacement Procedures Microtower (MT) Chassis - HP dx2390 | Service Reference Guide: HP Compaq dx2390 Business PC - Page 39
Cable Management Always follow good cable management practices when working inside the computer. ● Keep cables away from major heat sources like the heatsink. ● Do not jam cables on top of expansion cards or memory modules. Printed circuit cards like these are not designed to take excessive pressure - HP dx2390 | Service Reference Guide: HP Compaq dx2390 Business PC - Page 40
black Description Power supply, 24-pin Power supply, 4-pin Diskette drive Heatsink fan Chassis fan Front power button/LED Front I/O USB Media card reader Front I/O audio Memory slots PCI 2.3 full-height slot PCI Express X16 slot PCI Express X1 slot PCI Express X1 slot Processor Clear CMOS/password - HP dx2390 | Service Reference Guide: HP Compaq dx2390 Business PC - Page 41
timing), and CAS latency 6 DDR2 800 Mhz (6-6-6 timing) ● contain the mandatory JEDEC SPD information In addition, the computer supports: ● 512Mbit and 1Gbit non-ECC memory technologies ● single-sided and double-sided DIMMs ● DIMMs constructed with x8 and x16 DDR devices; DIMMs constructed with x4 - HP dx2390 | Service Reference Guide: HP Compaq dx2390 Business PC - Page 42
mode if the memory capacity of the DIMM in Channel A is equal to the total memory capacity of the memory capacity of the DIMM in Channel B. In flex mode, the channel populated with the least amount of memory describes the total amount of memory one channel will have more memory than the other, the - HP dx2390 | Service Reference Guide: HP Compaq dx2390 Business PC - Page 43
. When upgrading the memory, it is important to use memory modules with gold metal contacts to prevent corrosion and/or oxidation resulting from having incompatible metals in contact with each other. Static electricity can damage the electronic components of the computer or optional cards. Before - HP dx2390 | Service Reference Guide: HP Compaq dx2390 Business PC - Page 44
on page 26). 2. Remove the computer access panel (Computer Access Panel on page 30). 3. Locate the correct vacant expansion socket on the system board and the corresponding expansion slot on the back of the computer chassis. 38 Chapter 6 Removal and Replacement Procedures Microtower (MT) Chassis - HP dx2390 | Service Reference Guide: HP Compaq dx2390 Business PC - Page 45
4. On the rear of the computer, a slot cover lock secures the expansion card brackets in place. Remove the screw from the slot cover lock then slide the slot cover lock up to remove it from the chassis. 5. Before installing an expansion card, remove the expansion slot cover or the existing expansion - HP dx2390 | Service Reference Guide: HP Compaq dx2390 Business PC - Page 46
expansion card, install an expansion slot cover to close the open slot. CAUTION: After removing an expansion card, you must replace it with a new card or expansion slot cover for proper cooling of internal components during operation. 40 Chapter 6 Removal and Replacement Procedures Microtower (MT - HP dx2390 | Service Reference Guide: HP Compaq dx2390 Business PC - Page 47
that was previously removed. 10. Connect external cables to the installed card, if needed. Connect internal cables to the system board, if needed. 11. Reconfigure the computer, if necessary. Refer to Computer Setup (F10) Utility on page 3 for instructions on using Computer Setup. Expansion Cards 41 - HP dx2390 | Service Reference Guide: HP Compaq dx2390 Business PC - Page 48
FDD1. ● Connect a media card reader to the USB connector labeled JUSB2. ● The system does not support Parallel ATA (PATA) optical HP-supplied M3 metric guide screws (1) are black. The HP-supplied 6-32 standard screws (2) are silver. 42 Chapter 6 Removal and Replacement Procedures Microtower (MT - HP dx2390 | Service Reference Guide: HP Compaq dx2390 Business PC - Page 49
CAUTION: To prevent loss of work and damage to the computer or drive: If you are inserting or removing a drive, shut down the operating system properly, turn off the computer, and unplug the power cord. Do not remove a drive while the computer is on or in standby mode. Before handling a drive, - HP dx2390 | Service Reference Guide: HP Compaq dx2390 Business PC - Page 50
white black dark blue light blue white orange To verify the type, size, and capacity of the storage devices installed in the computer, run Computer Setup. Refer to Computer Setup (F10) Utility on page 3 for more information. 44 Chapter 6 Removal and Replacement Procedures Microtower (MT) Chassis - HP dx2390 | Service Reference Guide: HP Compaq dx2390 Business PC - Page 51
bay for optional drive (media card reader shown) 3 Primary 3.5-inch internal hard drive bay 4 Secondary 3.5-inch internal hard drive bay for optional hard drive To verify the type and size of the storage devices installed in the computer, run Computer Setup. Refer to Computer Setup (F10) Utility on - HP dx2390 | Service Reference Guide: HP Compaq dx2390 Business PC - Page 52
the drive from the computer. To remove an optical drive: 1. Prepare the computer for disassembly (Preparation for Disassembly on page 26). 2. Remove the computer access panel (Computer Access Panel on page the chassis (2). 46 Chapter 6 Removal and Replacement Procedures Microtower (MT) Chassis - HP dx2390 | Service Reference Guide: HP Compaq dx2390 Business PC - Page 53
plate out of the chassis. Discard the knockout plate. 6. If the new drive has screws installed on the sides of the drive, remove the screws the chassis (1) until the bezel on the drive is evenly aligned with the computer front bezel and install the M3 metric retainer screws (2) as shown in the - HP dx2390 | Service Reference Guide: HP Compaq dx2390 Business PC - Page 54
a media card reader. 1. Prepare the computer for disassembly (Preparation for Disassembly on page 26). 2. Remove the computer access panel (Computer Access Panel on page 30). 3. Remove the front bezel (Front Bezel on page 31). 48 Chapter 6 Removal and Replacement Procedures Microtower (MT) Chassis - HP dx2390 | Service Reference Guide: HP Compaq dx2390 Business PC - Page 55
4. Disconnect the drive cables, as indicated in the following illustrations: a. If you are removing a diskette drive, disconnect the data cable (1) and power cable (2) from the back of the drive. b. If you are removing a media card reader, disconnect the USB cable from the system board. Drives 49 - HP dx2390 | Service Reference Guide: HP Compaq dx2390 Business PC - Page 56
computer can be configured with a media card reader or a diskette drive. 1. Prepare the computer for disassembly (Preparation for Disassembly on page 26). 2. Remove the computer access panel (Computer chassis. Discard the knockout plate. 6. If the new drive has screws installed on the sides of the - HP dx2390 | Service Reference Guide: HP Compaq dx2390 Business PC - Page 57
(1) until the bezel on the drive is evenly aligned with the computer front bezel and install the M3 metric retainer screws (2) as shown labeled FDD1. b. If installing a media card reader, connect the USB cable from the media card reader to the USB connector on the system board labeled JUSB2. NOTE - HP dx2390 | Service Reference Guide: HP Compaq dx2390 Business PC - Page 58
new hard drive. Also, if you are replacing the primary hard drive, make sure you have created a Recovery Disc Set to restore the operating system, software drivers, and any software applications that were preinstalled on the computer 6 Removal and Replacement Procedures Microtower (MT) Chassis - HP dx2390 | Service Reference Guide: HP Compaq dx2390 Business PC - Page 59
5. Lift the hard disk drive cage out of the chassis. 6. Disconnect the power cable (1) and data cable (2) from the back of the hard drive. Drives 53 - HP dx2390 | Service Reference Guide: HP Compaq dx2390 Business PC - Page 60
3.5-inch Hard Drive on page 52 to remove the hard drive cage and, if necessary, the existing hard drive. 54 Chapter 6 Removal and Replacement Procedures Microtower (MT) Chassis - HP dx2390 | Service Reference Guide: HP Compaq dx2390 Business PC - Page 61
2. Slide the new drive into the hard disk drive cage (1), aligning the drive with the four the drive cage. NOTE: If you are replacing an old drive with a new drive, use the four retainer screws from the old drive to install the new drive. NOTE: If you are installing a second hard drive, use four of - HP dx2390 | Service Reference Guide: HP Compaq dx2390 Business PC - Page 62
disk drive cage to the chassis. 6. If installing a new drive, connect the opposite end of the data cable connector labeled SATA0 to avoid any hard drive performance problems. If you are adding a second hard drive, SATA1, SATA3, SATA2. 7. Replace the computer access panel. 8. Lock any security devices - HP dx2390 | Service Reference Guide: HP Compaq dx2390 Business PC - Page 63
to restore the operating system, software drivers, and any software applications that were preinstalled on the computer. Front USB Panel 1. Prepare the computer for disassembly (Preparation for Disassembly on page 26). 2. Remove the computer access panel (Computer Access Panel on page 30). 3. Remove - HP dx2390 | Service Reference Guide: HP Compaq dx2390 Business PC - Page 64
for disassembly (Preparation for Disassembly on page 26). 2. Remove the computer access panel (Computer Access Panel on page 30). 3. Remove the front bezel (Front Bezel on page 31). 4. Remove on the side of the drive cage. 58 Chapter 6 Removal and Replacement Procedures Microtower (MT) Chassis - HP dx2390 | Service Reference Guide: HP Compaq dx2390 Business PC - Page 65
for disassembly (Preparation for Disassembly on page 26). 2. Remove the computer access panel (Computer Access Panel on page 30). 3. Unplug the fan cable from the system board (CPU FAN1). 4. Using a screwdriver with a narrow shaft, loosen the four silver T15 captive screws that secure the heatsink - HP dx2390 | Service Reference Guide: HP Compaq dx2390 Business PC - Page 66
Disassembly on page 26). 2. Remove the computer access panel (Computer Access Panel on page 30). 3. Remove locking lever. If reusing the existing heatsink, go to step 3. If using a new heatsink, go to step 5. 3. If reusing the existing heatsink, apply the thermal Procedures Microtower (MT) Chassis - HP dx2390 | Service Reference Guide: HP Compaq dx2390 Business PC - Page 67
board. NOTE: After installing a new processor onto the system board, always update the system ROM to ensure that the latest version of the BIOS is being used on the computer. The latest system BIOS can be found on the Web at: http://h18000.www1.hp.com/support/files. Rear Chassis Fan 1. Prepare - HP dx2390 | Service Reference Guide: HP Compaq dx2390 Business PC - Page 68
for disassembly (Preparation for Disassembly on page 26). 2. Remove the computer access panel (Computer Access Panel on page 30). 3. Disconnect all power cables from the drives the power supply, reverse the removal procedure. 62 Chapter 6 Removal and Replacement Procedures Microtower (MT) Chassis - HP dx2390 | Service Reference Guide: HP Compaq dx2390 Business PC - Page 69
for disassembly (Preparation for Disassembly on page 26). 2. Remove the computer access panel (Computer Access Panel on page 30). 3. Remove all expansion boards (Expansion Cards on page 38). 4. Disconnect all cables connected to the system board, noting their location for reinstallation. 5. Remove - HP dx2390 | Service Reference Guide: HP Compaq dx2390 Business PC - Page 70
card to gain access to the battery. 3. Locate the battery and battery holder on the system board. 4. Depending on the type of battery holder on your system board, complete the following instructions to replace the battery: 64 Chapter 6 Removal and Replacement Procedures Microtower (MT) Chassis - HP dx2390 | Service Reference Guide: HP Compaq dx2390 Business PC - Page 71
system setups using Computer Setup. Refer to Computer Setup (F10) Utility on page 3. Type 2 Battery Holder 1. To release the battery from its holder, squeeze the metal clamp (1) that extends above one edge of the battery. When the battery pops up, lift it out. 2. To insert the new battery, slide one - HP dx2390 | Service Reference Guide: HP Compaq dx2390 Business PC - Page 72
. 3. Replace the computer access panel. 4. Plug in the computer and turn on power to the computer. 5. Reset the date and time and any special system setups using Computer Setup. Refer to Computer Setup (F10) Utility on page 3. 66 Chapter 6 Removal and Replacement Procedures Microtower (MT) Chassis - HP dx2390 | Service Reference Guide: HP Compaq dx2390 Business PC - Page 73
A Connector Pin Assignments This appendix contains the pin assignments for many computer and workstation connectors. Some of these connectors may not be used on the product being serviced. Keyboard Connector and Icon Pin Signal 1 Data 2 Unused 3 Ground 4 +5 VDC 5 Clock 6 Unused - HP dx2390 | Service Reference Guide: HP Compaq dx2390 Business PC - Page 74
Ethernet RJ-45 Connector and Icon Pin Signal 1 (+) Transmit Data 2 (-) Transmit Data 3 (+) Receive Data 4 Unused 5 Unused 6 (-) Receive Data 7 Unused 8 Unused 68 Appendix A Connector Pin Assignments - HP dx2390 | Service Reference Guide: HP Compaq dx2390 Business PC - Page 75
Data Bit 4 7 Data Bit 5 8 Data Bit 6 9 Data Bit 7 Pin Signal 10 Acknowledge 11 Busy 12 Paper End 13 Select 14 Auto Linefeed 15 Error 16 Initialize Printer 17 Select IN 18-25 Signal Ground Serial Interface, Powered and Non-Powered Connector and Icon Pin Signal 1 Carrier - HP dx2390 | Service Reference Guide: HP Compaq dx2390 Business PC - Page 76
USB Connector and Icon Microphone Connector and Icon (1/8" miniphone) 1 23 Headphone Connector and Icon (1/8" miniphone) 1 23 Line-in Audio Connector and Icon (1/8" miniphone) 1 23 Line-out Audio Connector and Icon (1/8" miniphone) 1 23 70 Appendix A Connector Pin Assignments Pin Signal 1 +5 VDC - HP dx2390 | Service Reference Guide: HP Compaq dx2390 Business PC - Page 77
External Infrared Transceiver Connector and Icon Monitor Connector and Icon Pin Signal 1 Transmit 2 Receive 3 Ground 4 5V 5 Mode 6 Not Used 7 Not Used 8 Not Used Pin Signal 1 Red Analog 2 Green Analog 3 Blue Analog 4 Not used 5 Ground 6 Ground 7 Ground 8 Ground - HP dx2390 | Service Reference Guide: HP Compaq dx2390 Business PC - Page 78
15 GND 16 +5V 17 +5V 18 +3.3V Pin Signal 19 GND 20 +3.3V 21 Sense 22 +3.3V 23 +3.3V 24 GND 4-Pin Power (for CPU) Connector and Icon Pin Signal 1 GND 2 GND 3 +12V CPU 4 -12V CPU 72 Appendix A Connector Pin Assignments - HP dx2390 | Service Reference Guide: HP Compaq dx2390 Business PC - Page 79
6-Pin Power (for CPU) Connector and Icon 4 6 Pin Signal 1 GND 2 GND 3 GND 4 12V CPU 5 12V CPU 6 +12V 6-Pin Power (for CPU) 73 - HP dx2390 | Service Reference Guide: HP Compaq dx2390 Business PC - Page 80
SATA Data and Power Drive Connector Pin Signal S1 Ground S5 BP1 Ground P5 BP9 V 5 P13 V 12 S = Data, P = Power Pin Signal S2 A+ S6 B+ P2 V 3.3 P6 Ground P10 Ground P14 V12 PCI Express x1, x4, x8, and x16 PCI Express Connector Pin Signal S3 AS7 Ground P3 V 3.3 P7 V 5 P11 Reserved P15 V 12 Pin - HP dx2390 | Service Reference Guide: HP Compaq dx2390 Business PC - Page 81
52 PERp8 57 PERn9 53 PERN8 58 GND 54 GND 59 GND 55 GND 60 PERp10 76 PERp14 81 PERn15 77 PERn14 82 GND 78 GND 79 GND 80 PERp15 NOTE: x1 PCI Express uses pins 1-18 x4 PCI Express uses pins 1-32 x8 PCI Express uses pins 1-49 x16 PCI Express uses pins 1-8 62 GND 63 GND 64 PERp11 65 - HP dx2390 | Service Reference Guide: HP Compaq dx2390 Business PC - Page 82
pins 1-32 x8 PCI Express uses pins 1-49 x16 PCI Express uses pins 1-8 62 PETp11 63 PETn11 64 GND 65 GND PCI Express Mini Card PCI Express Mini Card Connector 67 PETn12 68 GND 69 GND 70 PETp13 72 GND 73 GND 74 PETp14 75 PETn14 Pin Signal 1 WAKE# 2 3.3V 3 Reserved** 4 GND - HP dx2390 | Service Reference Guide: HP Compaq dx2390 Business PC - Page 83
40 GND 46 LED_WPAN# 36 GND 41 Reserved* 47 Reserved* 36 USB_D- 42 LED_WWAN# 48 +1.5V NOTE: *Reserved for future second PCI Express LAN (if needed) **Reserved for future wireless coexistence control interface (if needed) ***Reserved for future UIM interface (if needed) 49 Reserved* 50 GND - HP dx2390 | Service Reference Guide: HP Compaq dx2390 Business PC - Page 84
are equipped with internal switches that sense the incoming voltage and automatically switch to the proper voltage. The power cord set received with the computer meets the requirements for use in the country where you purchased the equipment. Power cord sets for use in other countries must meet the - HP dx2390 | Service Reference Guide: HP Compaq dx2390 Business PC - Page 85
mark and registration number in accordance with the Japanese Dentori Law. Flexible cord must be Type VCT or VCTF, 3-conductor, 0.75 mm2 conductor size. Wall plug must be a two-pole grounding type with a Japanese Industrial Standard C8303 (7A, 125V) configuration. Country-Specific Requirements 79 - HP dx2390 | Service Reference Guide: HP Compaq dx2390 Business PC - Page 86
monitor with a monitor that you know is functioning properly. ● If you are working on a network, plug another computer with a different cable into the network connection. There may be a problem with the network plug or cable. ● If you recently added new hardware, remove the hardware and see if the - HP dx2390 | Service Reference Guide: HP Compaq dx2390 Business PC - Page 87
upgrades (Care Packs), call your local authorized service provider or dealer. Helpful Hints If you encounter problems with the computer, monitor, or software, see the following list of general suggestions before taking further action: ● Check that the computer and monitor are plugged into a working - HP dx2390 | Service Reference Guide: HP Compaq dx2390 Business PC - Page 88
be able to easily resolve the minor problems described in this section. If a problem persists and you are unable to resolve it yourself or if you feel uncomfortable about performing the operation, contact your HP authorized reseller or service provider. Computer will not turn on. Cause Solution - HP dx2390 | Service Reference Guide: HP Compaq dx2390 Business PC - Page 89
First, reset the date and time under Control Panel (Computer Setup can also be used to update the RTC date and time). If the problem persists, replace the RTC battery. See the Hardware Reference Guide for instructions on installing a new battery, or contact an authorized dealer or reseller for RTC - HP dx2390 | Service Reference Guide: HP Compaq dx2390 Business PC - Page 90
go to Start > Run (Microsoft Windows XP) or Start > All Programs > Accessories > Run (Microsoft Windows Vista) and type msconfig. On the Startup tab of in the application. 2. Add more memory. Cause unknown. 3. Upgrade the graphics solution. Restart the computer. Blank screen (no video). Cause - HP dx2390 | Service Reference Guide: HP Compaq dx2390 Business PC - Page 91
on page 87 to interpret the error code. Solving Hardware Installation Problems You may need to reconfigure the computer when you add or remove hardware, such as an additional drive or expansion card. If you install a plug and play device, the Windows operating system automatically recognizes the - HP dx2390 | Service Reference Guide: HP Compaq dx2390 Business PC - Page 92
if you are using the correct memory modules and to verify the proper installation. 2. Listen for beeps from the computer. See Interpreting POST Audible Codes on page 87 to determine possible causes. 3. If you still cannot resolve the issue, contact Customer Support. 86 Appendix C Troubleshooting - HP dx2390 | Service Reference Guide: HP Compaq dx2390 Business PC - Page 93
configuration error or invalid CPU 1. detected before graphics card initialized. 2. Upgrade the BIOS to proper version. Change the processor. 1 short beep followed by a one No legacy floppy drive or optical drive second pause found. 1. Check cable connections. 2. Run the Computer Setup utility - HP dx2390 | Service Reference Guide: HP Compaq dx2390 Business PC - Page 94
you take the computer to an authorized reseller, dealer, or service provider for service, remember to provide the setup and power-on passwords if they are set. Refer to the number listed in the warranty or in the Support Telephone Numbers guide for technical assistance. 88 Appendix C Troubleshooting - HP dx2390 | Service Reference Guide: HP Compaq dx2390 Business PC - Page 95
Designators These reference designators are used on most but not all HP system and riser boards. Designator BAT CR1 CR2 CR3 CR4 CR35 Password header/jumper Clear CMOS header RJ45 jack Stacked RJ45/Dual USB Quad stacked USB First IEEE 1394 connector Second IEEE 1394 connector SPDIF input SPDIF - HP dx2390 | Service Reference Guide: HP Compaq dx2390 Business PC - Page 96
slot x16 PCI Express slot for graphics First parallel port Second parallel port Double audio jack (line in, line out/headphone, microphone) Security board connector - for security card PCI slots on riser card PCI express slots on riser card Clear password header/jumper USB front port choke (1st) USB - HP dx2390 | Service Reference Guide: HP Compaq dx2390 Business PC - Page 97
or primary CPU heatsink fan P9 Secondary chassis fan header P10 Diskette drive connector P11 Auxiliary Audio connector P12 Alert on LAN connector P13 Header for front panel audio P24 Header for front panel USB P25 Internal USB connector 1 P26 Internal USB connector 2 P27 MultiBay - HP dx2390 | Service Reference Guide: HP Compaq dx2390 Business PC - Page 98
Serial ATA (SATA) connector VSFF expansion connector Graphics option connector Fifth Serial ATA (SATA) connector ATA (SATA) connector Primary (CPU) fan header for fansink Secondary CPU fan header for fansink Primary header Security hood switch on riser card Clear CMOS switch/push button Single chip - HP dx2390 | Service Reference Guide: HP Compaq dx2390 Business PC - Page 99
Super I/O Clock chip 64 bit Bridge LOM1 LOM1 EEPROM LOM1 PHY Audio Codec Audio amplifier LOM2 LOM2 EEPROM LOM2 PHY SPI ROM - SOIC-8 footprint Fan USB front port power switch First USB rear port power switch Second USB rear port power switch Third USB rear port power switch Battery retainer Memory - HP dx2390 | Service Reference Guide: HP Compaq dx2390 Business PC - Page 100
Y4 Y5/H5 Secondary NIC clock crystal RTC clock crystal/tie-down 94 Appendix D System Board and Riser Board Reference Designators - HP dx2390 | Service Reference Guide: HP Compaq dx2390 Business PC - Page 101
E Specifications Table E-1 Specifications Desktop Dimensions Height 16.37 in 41.58 cm sustained sunlight. Maximum rate of change is 10° C/Hr. The upper limit may be limited by the type and number of options installed. Heat Dissipation Maximum 1575 BTU/hr 397 kg-cal/hr Typical (idle) 307 - HP dx2390 | Service Reference Guide: HP Compaq dx2390 Business PC - Page 102
Table E-1 Specifications (continued) Rated Input Current (maximum)1 8A @ 100 VAC 4A @ 200 VAC 1 This system utilizes a passive power factor corrected power supply. countries of the European Union. This supply requires the use of an input voltage range select switch. 96 Appendix E Specifications - HP dx2390 | Service Reference Guide: HP Compaq dx2390 Business PC - Page 103
47 K keyboard cleaning 21 pin assignments 67 L line-in audio pin assignments 70 line-out audio pin assignments 70 locks cable lock 27 HP Business PC Security Lock 28 padlock 27 M media card reader installing 50 removing 48 memory removal and replacement 35 microphone pin assignments 70 monitor pin - HP dx2390 | Service Reference Guide: HP Compaq dx2390 Business PC - Page 104
lock 27 HP Business PC Security Lock 28 padlock 27 serial interface pin assignments 69 serial number location 25 service considerations 22 software backing up 13 servicing computer 22 spare part number tamper-resistent wrench 23 Torx T-15 screwdriver 22 specifications computer 95 memory 35 static
-
 1
1 -
 2
2 -
 3
3 -
 4
4 -
 5
5 -
 6
6 -
 7
7 -
8
-
9
-
10
-
11
-
12
-
13
-
14
-
15
-
16
-
17
-
18
-
19
-
20
-
21
-
22
-
23
-
24
-
25
-
26
-
27
-
28
-
29
-
30
-
31
-
32
-
33
-
34
-
35
-
36
-
37
-
38
-
39
-
40
-
41
-
42
-
43
-
44
-
45
-
46
-
47
-
48
-
49
-
50
-
51
-
52
-
53
-
54
-
55
-
56
-
57
-
58
-
59
-
60
-
61
-
62
-
63
-
64
-
65
-
66
-
67
-
68
-
69
-
70
-
71
-
72
-
73
-
74
-
75
-
76
-
77
-
78
-
79
-
80
-
81
-
82
-
83
-
84
-
85
-
86
-
87
-
88
-
89
-
90
-
91
-
92
-
93
-
94
-
95
-
96
-
97
-
98
-
99
-
100
-
101
-
102
-
103
-
104
 |
 |

Service Reference Guide
HP Compaq dx2390 Business PC