HP ep9012 HP ep9010 Series Instant Cinema Digital Projector - User's Guide
HP ep9012 - Instant Cinema Digital Projector Manual
 |
View all HP ep9012 manuals
Add to My Manuals
Save this manual to your list of manuals |
HP ep9012 manual content summary:
- HP ep9012 | HP ep9010 Series Instant Cinema Digital Projector - User's Guide - Page 1
HP ep9010 Series Instant Cinema Digital Projector User's Guide - HP ep9012 | HP ep9010 Series Instant Cinema Digital Projector - User's Guide - Page 2
HP products and services are set forth in the express warranty statements accompanying such products and services. Nothing herein should be construed as constituting an additional warranty. HP IIS and Thomson. Hewlett-Packard Company Digital Projection and Imaging 1000 NE Circle Blvd. Corvallis - HP ep9012 | HP ep9010 Series Instant Cinema Digital Projector - User's Guide - Page 3
on and off 29 Turning the projector on 29 Turning the projector off 30 Moving the projector 30 Making basic adjustments 31 Selecting a source 31 Aiming the projector 31 Adjusting the focus and zoom 32 Changing the picture mode 33 Adjusting the shape of the picture 34 User's Guide 3 - HP ep9012 | HP ep9010 Series Instant Cinema Digital Projector - User's Guide - Page 4
45 Adjusting the projector setup 46 Using the on-screen menu 46 Changing settings using the on-screen menu 46 Input menu 47 Picture menu 47 Sound menu 49 Setup menu 49 Help menu 49 5 Maintaining the projector Getting the projector status 51 Cleaning the projector lens 51 4 User's Guide - HP ep9012 | HP ep9010 Series Instant Cinema Digital Projector - User's Guide - Page 5
59 Sound problems 60 Interruption problems 61 Remote control problems 62 Testing the projector 62 7 Support and warranty Support 63 Contacting HP support 63 Obtaining HP repair 65 Limited warranty 65 HP digital projector limited warranty statement. . . . . 65 8 Reference Specifications 69 - HP ep9012 | HP ep9010 Series Instant Cinema Digital Projector - User's Guide - Page 6
Contents 6 User's Guide - HP ep9012 | HP ep9010 Series Instant Cinema Digital Projector - User's Guide - Page 7
See "Cleaning the projector lens" on page 51. Use a soft, dry cloth to clean the projector case. ■ Do not open the projector except as instructed by this manual, and only after allowing the projector to cool down. ■ If the projector is damaged in any way, contact HP for assistance. User's Guide 7 - HP ep9012 | HP ep9010 Series Instant Cinema Digital Projector - User's Guide - Page 8
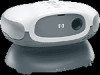
the contents of the box Item 1 Projector Function Displays images. 2 Remote control (includes two AAA Controls projector. batteries) 3 SCART-to-S-Video adapter Connects a SCART source output to an S-video or composite-video cable. ✎ Included only with certain models. 8 User's Guide - HP ep9012 | HP ep9010 Series Instant Cinema Digital Projector - User's Guide - Page 9
-VGA adapter Connects a VGA cable to the DVI port on the projector. 5 User Guide package Contains documentation for the setup and use of the projector. 6 Quick Setup Guide Provides instructions to help get started. 7 Power cord Connects projector to power source. Identifying common features - HP ep9012 | HP ep9010 Series Instant Cinema Digital Projector - User's Guide - Page 10
control buttons and indicator lights. Protects the lens. Projects the image. Produce stereo sound. Plays a DVD or CD. Produces low-frequency sound effects. Levels the projector. Projector buttons and lights 10 User's Guide - HP ep9012 | HP ep9010 Series Instant Cinema Digital Projector - User's Guide - Page 11
previous item on a DVD or CD. Adjusts picture to eliminate slanted sides. Blanks picture, mutes sound, pauses internal DVD player. Turns the projector on or off. A Lamp indicator light Warns if the lamp is bad. B Temperature indicator light Warns if the projector is too hot. User's Guide 11 - HP ep9012 | HP ep9010 Series Instant Cinema Digital Projector - User's Guide - Page 12
. 6 Power cord socket Connects power cord to projector. 7 Component-video input port Connects component-video source. (YPbPr) 8 Audio-in port Connects stereo audio source. 9 Audio-out port Connects to stereo sound system. : Service port For service use only. 12 User's Guide - HP ep9012 | HP ep9010 Series Instant Cinema Digital Projector - User's Guide - Page 13
Identifying features of the remote control Item Function 1 Power button Turns the projector on or off. 2 Keystone adjustment Adjusts the picture to eliminate slanted sides customized. Control the DVD player. See "Projector buttons and lights" on page 10. 6 DVD menu button Opens the menu on - HP ep9012 | HP ep9010 Series Instant Cinema Digital Projector - User's Guide - Page 14
carry and set up anywhere you need them. ■ HP power cables-allow you to connect in any region. ■ HP cables-allow you to connect all audio-video equipment. ■ HP replacement lamp-brings your projector up to factory-fresh brightness. Setting up the projector Planning your layout Consider the following - HP ep9012 | HP ep9010 Series Instant Cinema Digital Projector - User's Guide - Page 15
try to locate devices to minimize the lengths of cables connecting them to the projector. If any cable is more than 3 m (10 ft), consider using , consider including a 5.1 surround sound system, such as a Dolby Digital system. This system has five speakers and a subwoofer. ■ For . User's Guide 15 - HP ep9012 | HP ep9010 Series Instant Cinema Digital Projector - User's Guide - Page 16
Setting up ✎ For best picture quality, place the projector 1.5 to 5 m (5 to 16 ft) from the screen. 16 User's Guide - HP ep9012 | HP ep9010 Series Instant Cinema Digital Projector - User's Guide - Page 17
6.1 180 4.6 200 5.1 240 6.1 144 3.7 160 4.1 192 4.9 248 to 288 276 to 320 331 to 384 6.3 to 7.3 7.0 to 8.1 8.4 to 9.8 270 6.9 216 5.5 372 to 396 9.5 to 10.0 User's Guide 17 - HP ep9012 | HP ep9010 Series Instant Cinema Digital Projector - User's Guide - Page 18
10 m (3 to 33 ft) in front of the screen. Ideally, the platform should be lower than the bottom of the screen. ✎ Do not place the projector on a soft surface, such as carpet or loose cloth. This will severely limit the sound from the subwoofer. 2. Connect one end of the power cord - HP ep9012 | HP ep9010 Series Instant Cinema Digital Projector - User's Guide - Page 19
projector. If you do not have an external audio system, you can connect the audio output from the external video source to the projector audio input. ✎ If you already have a home theater system with a TV, you can probably connect the projector in place of the TV as the viewing device. User's Guide - HP ep9012 | HP ep9010 Series Instant Cinema Digital Projector - User's Guide - Page 20
or YCbCr. ■ If possible, configure the video source to use progressive scan output, such as 480p, 575p, or 720p. For additional information, refer to the user documentation provided with the video source. . 20 User's Guide - HP ep9012 | HP ep9010 Series Instant Cinema Digital Projector - User's Guide - Page 21
Setting up Connecting an S-video source Examples: DVD players, VCRs, cable boxes, camcorders, and video gaming devices Requires: ■ S-video cable User's Guide 21 - HP ep9012 | HP ep9010 Series Instant Cinema Digital Projector - User's Guide - Page 22
Setting up Connecting a composite-video source Examples: VCRs, DVD players, audio-video receivers, and video gaming devices Requires: ■ Composite-video cable 22 User's Guide - HP ep9012 | HP ep9010 Series Instant Cinema Digital Projector - User's Guide - Page 23
Connecting a DVI source Examples: Cable boxes, satellite receivers, and some computers Requires: ■ DVI cable Setting up User's Guide 23 - HP ep9012 | HP ep9010 Series Instant Cinema Digital Projector - User's Guide - Page 24
Setting up Connecting a SCART source Examples: VCRs and DVD players Requires: ■ S-video cable (or composite-video cable if source does not provide S-video output) ■ S-video-to-SCART adapter (included with certain models) 24 User's Guide - HP ep9012 | HP ep9010 Series Instant Cinema Digital Projector - User's Guide - Page 25
. No connections are required when using the internal DVD player. If you connect an external video source to the projector, you can also connect its audio output to the projector's audio input. ✎ If you want to listen to the audio in private, connect a stereo headphone to the headphone output - HP ep9012 | HP ep9010 Series Instant Cinema Digital Projector - User's Guide - Page 26
an ordinary audio cable. Or you can connect a stereo sound system to the projector (connection 2 in the following illustration). ✎ If you connect an external sound system, turn off the internal speakers. Press the menu button, go to Sound > Internal speakers, and turn them off. 26 User's Guide - HP ep9012 | HP ep9010 Series Instant Cinema Digital Projector - User's Guide - Page 27
connect the video output from the receiver or switch box to the projector using the highest quality connection available. Also connect the audio outputs from the receiver, switch box, or sound system. ✎ Connect the projector's digital audio output or stereo audio output to the receiver, switch box - HP ep9012 | HP ep9010 Series Instant Cinema Digital Projector - User's Guide - Page 28
display does not appear on the projector, you might have to press a combination of keys on the computer to turn on the computer's VGA output. For example, on some computers you must press Fn+F4 or Fn+F5. For instructions, refer to the user documentation provided with your computer. 28 User's Guide - HP ep9012 | HP ep9010 Series Instant Cinema Digital Projector - User's Guide - Page 29
a minute or so to warm up. The power button blinks during warm-up. ✎ It is normal for parts of the projector and the air coming out of the projector to be very warm. If the projector starts to overheat, the temperature warning light will turn on and the projector will shut down. User's Guide 29 - HP ep9012 | HP ep9010 Series Instant Cinema Digital Projector - User's Guide - Page 30
lamp. 3. If you must unplug or remove the projector, wait until the power light stops blinking, then unplug the power cord. If you try to turn on the projector limits (see "Specifications" on page 69). If the projector is cold, allow it to warm gradually to avoid condensation. 30 User's Guide - HP ep9012 | HP ep9010 Series Instant Cinema Digital Projector - User's Guide - Page 31
adjustments Setting up This section provides instructions for making basic adjustments to the projector. Selecting a source If the is turned on and playing video. Aiming the projector ■ To raise or lower the projected picture on the screen, tilt the projector body on the base 1. ■ To level - HP ep9012 | HP ep9010 Series Instant Cinema Digital Projector - User's Guide - Page 32
Setting up Adjusting the focus and zoom 1. Rotate the focus ring until the image becomes clear. The projector can be focused at distances of 1 to 10 m (3 to 33 ft). 2. Rotate the zoom ring to adjust the picture size from 100 to 116%. If - HP ep9012 | HP ep9010 Series Instant Cinema Digital Projector - User's Guide - Page 33
and go to Picture > Customize picture mode. 3. Adjust the settings until you are satisfied with the picture. 4. Press menu to close the on-screen menu. User's Guide 33 - HP ep9012 | HP ep9010 Series Instant Cinema Digital Projector - User's Guide - Page 34
not always look correct or fit on the screen: ■ If the active video device sends widescreen output to the projector, press menu, go to Picture > Shape settings, and set Widescreen input to Yes. See 1 in the picture mode, and set Stretch to Reduced. See 2 in the following diagram. 34 User's Guide - HP ep9012 | HP ep9010 Series Instant Cinema Digital Projector - User's Guide - Page 35
on the projector or remote control. ■ To change the volume of only the subwoofer, press menu, go to Sound > Subwoofer, and make the adjustment. ■ To turn the sound on or off, press the mute button on the remote control, or press menu, go to Input > Mute, and mute the sound. User's Guide 35 - HP ep9012 | HP ep9010 Series Instant Cinema Digital Projector - User's Guide - Page 36
Setting up 36 User's Guide - HP ep9012 | HP ep9010 Series Instant Cinema Digital Projector - User's Guide - Page 37
not supported. Type of disc DVD video VCD SVCD JPG disc Kodak Picture CD Digital audio CD MP3 on CD Comments Standard video, single- and dual-layer. For full effect of Dolby Digital lamp off. Any other information stored on the CD is ignored. Songs can be played only with the lamp - HP ep9012 | HP ep9010 Series Instant Cinema Digital Projector - User's Guide - Page 38
are supported: DVD-ROM, DVD-R, DVD+R, DVD-RW, DVD+RW, CD-R, and CD-RW. Recording conditions might affect whether individual discs are playable. Playing a DVD 1. Press the DVD eject button on the projector or 's code, the DVD does not play and the projector displays an error message. 38 User's Guide - HP ep9012 | HP ep9010 Series Instant Cinema Digital Projector - User's Guide - Page 39
resume the show. Opening the DVD menu Many DVDs contain a menu in which you can select viewing options. 1. Press the DVD menu button on the projector or remote control. 2. Press the navigation buttons to make a selection, then press ok. User's Guide 39 - HP ep9012 | HP ep9010 Series Instant Cinema Digital Projector - User's Guide - Page 40
show. ✎ If the picture disc contains a supported sound track in addition to the pictures, the projector: ❏ If you want to see a list of songs on the screen, turn on the projector. ❏ If you have a standard music CD and want the lamp to be off during play, turn off the projector. 40 User's Guide - HP ep9012 | HP ep9010 Series Instant Cinema Digital Projector - User's Guide - Page 41
DVD eject button again to close the tray. The projector selects the internal DVD player as the active source and begins playing the first track. If the lamp is on, the projector shows the list of songs on the CD. 5. speed. Left one or more times. Press play/pause for normal speed. User's Guide 41 - HP ep9012 | HP ep9010 Series Instant Cinema Digital Projector - User's Guide - Page 42
Playing DVDs and CDs 42 User's Guide - HP ep9012 | HP ep9010 Series Instant Cinema Digital Projector - User's Guide - Page 43
again and turn on the projector speakers. Showing a computer screen 1. Be sure the computer is connected to the projector and turned on. See "Connecting a computer" on page 28. 2. Be sure the projector is set up, turned on, and adjusted. See "Making basic adjustments" on page 31. User's Guide 43 - HP ep9012 | HP ep9010 Series Instant Cinema Digital Projector - User's Guide - Page 44
select the DVI port. 4. If the computer display is not shown on the projector, you might have to turn on the computer's video output port. For example, a key combination, such as Fn+F4 or Fn+F5. See the user documentation provided with your computer. If you want to adjust the picture, see "Changing the - HP ep9012 | HP ep9010 Series Instant Cinema Digital Projector - User's Guide - Page 45
4 Adjusting the projector Adjusting the picture and sound Adjusting the picture The on-screen menu provides many settings that allow you to fine-tune the as mute, volume, and speaker operation. To get descriptions for all available audio adjustments, see "Sound menu" on page 49. User's Guide 45 - HP ep9012 | HP ep9010 Series Instant Cinema Digital Projector - User's Guide - Page 46
Set the setup adjustments as needed. From the Setup menu, you can select settings, such as menu language, projector position, and menu timeout. To get descriptions for all available setup adjustments, see "Setup menu" on page any on-screen menu or adjustment, press the menu button. 46 User's Guide - HP ep9012 | HP ep9010 Series Instant Cinema Digital Projector - User's Guide - Page 47
visual aid, see "Back panel" on page 12. Adjusting the projector Input menu Internal DVD Component S-Video Composite DVI Shows the video . Corrects the slanted sides of the picture. This compensates for a projector that is too high or low relative to the screen. Resets the keystone correction to zero - HP ep9012 | HP ep9010 Series Instant Cinema Digital Projector - User's Guide - Page 48
change in the signal. Frequency Adjusts the timing of the projector relative to the computer. Tracking Adjusts the phase of the projector relative to the computer. Vertical offset Adjusts the picture up picture mode Restores the current picture mode to its default settings. 48 User's Guide - HP ep9012 | HP ep9010 Series Instant Cinema Digital Projector - User's Guide - Page 49
image, use VGA only. For a new lamp, resets the hours of use. Restores all menu settings to factory default settings. Help menu Help Diagnostics... Displays information and status for the projector. Show tests for checking the operation of the projector and the remote control. User's Guide 49 - HP ep9012 | HP ep9010 Series Instant Cinema Digital Projector - User's Guide - Page 50
Adjusting the projector 50 User's Guide - HP ep9012 | HP ep9010 Series Instant Cinema Digital Projector - User's Guide - Page 51
go to Help. This screen shows information and status for the projector. Cleaning the projector lens You can clean the front lens of the projector using the following recommendations. You cannot clean any of the internal cloth. The cloth can be contaminated if left in the open air. User's Guide 51 - HP ep9012 | HP ep9010 Series Instant Cinema Digital Projector - User's Guide - Page 52
projector and allow it to cool for 30 minutes. 2. Unplug the power cord. 3. Loosen the 3 screws 1 on the front cover and pull out the front cover until the tab 2 at the right end comes out of the projector 3. 4. Loosen the two screws 4 on the lamp module, and pull out the module 5. 52 User's Guide - HP ep9012 | HP ep9010 Series Instant Cinema Digital Projector - User's Guide - Page 53
Maintaining the projector 5. Insert the new lamp module into the projector and tighten the two screws. 6. Insert the tab on the front cover into the slot in the projector and close the cover. 7. Tighten the screws that hold the cover. 8. Turn on the projector. If the lamp does not turn on after the - HP ep9012 | HP ep9010 Series Instant Cinema Digital Projector - User's Guide - Page 54
Maintaining the projector 54 User's Guide - HP ep9012 | HP ep9010 Series Instant Cinema Digital Projector - User's Guide - Page 55
that the vents are free of lint and other objects. Remove any sources of excess heat in the room. Observe temperature and altitude limits (see "Specifications" on page 69). If the warning light turns on or blinks after you restart the projector, contact HP for assistance. User's Guide 55 - HP ep9012 | HP ep9010 Series Instant Cinema Digital Projector - User's Guide - Page 56
turns on or blinks after you restart the projector, install a new lamp. If this occurs after you install a new lamp module, remove and reinstall the lamp module. If a new lamp does not fix the problem, contact HP for assistance. If the red lamp light is flickering quickly: ❏ Check that the cover - HP ep9012 | HP ep9010 Series Instant Cinema Digital Projector - User's Guide - Page 57
problems to 10 m (3 to 33 ft) from the projector. ❏ Check the projection lens to see if it of the monitor assigned to the projector. ❏ For a computer connected projector. ❏ Move the projector closer to or farther from the screen. ❏ On the projector projector so that it is centered on the screen and below - HP ep9012 | HP ep9010 Series Instant Cinema Digital Projector - User's Guide - Page 58
Fixing problems If the image is stretched: ❏ On the projector or remote control, press the picture mode button one or more times to see if one of the picture modes is not displayed when the DVI port is selected: ❏ Press menu, go to Setup > DVI compatibility, and select Standard DVI. 58 User's Guide - HP ep9012 | HP ep9010 Series Instant Cinema Digital Projector - User's Guide - Page 59
problems everything off. Then power on the projector first and power on the notebook of the monitor assigned to the projector. If the image is flickering built-in screen. See the computer manual. If text or lines from a computer with standard DVI devices. DVD player problems If a message shows an error - HP ep9012 | HP ep9010 Series Instant Cinema Digital Projector - User's Guide - Page 60
❏ You pressed a button that is not supported by the disc or by the DVD player in the current situation. The button is ignored. Sound problems If no sound is coming out of the projector: ❏ If you are playing an external > Internal speakers, and be sure the speakers are turned on. 60 User's Guide - HP ep9012 | HP ep9010 Series Instant Cinema Digital Projector - User's Guide - Page 61
does not affect the digital audio output and the lamp shuts off during a show: ❏ A minor power surge might cause the lamp to shut off. This is normal. Wait a few minutes, then power on the projector. ❏ If a red warning light is on or blinking, see "Warning light problems" on page 55. User's Guide - HP ep9012 | HP ep9010 Series Instant Cinema Digital Projector - User's Guide - Page 62
makes a popping sound: ❏ If the lamp burns out and makes a popping sound, the projector will not turn back on until the lamp module has been replaced. ❏ If the lamp breaks, contact HP about repairs that might be required due to glass fragments. Remote control problems If the remote control does not - HP ep9012 | HP ep9010 Series Instant Cinema Digital Projector - User's Guide - Page 63
problems with your digital projector. Support options and availability vary by product, country/region, and language. The HP support process works most effectively if you seek assistance in the following order: Step 1: HP digital projector documentation Use this owner's manual and the setup guide - HP ep9012 | HP ep9010 Series Instant Cinema Digital Projector - User's Guide - Page 64
Support 800-360-999 Sweden: + 46 (0)77 120 4765 Colombia: 01-800-51-HP-INVENT Switzerland: 0848 672 672 Costa Rica: 0-800-011-4114 + Ukraine: + 3 3335 9800 Korea, Republic of : +82 1588-3003 Malaysia: 1 800 805 405 New Zealand: +64 (9) 356 6640 Philippines: +63 (2) 867 3551 Singapore: +65 6272 - HP ep9012 | HP ep9010 Series Instant Cinema Digital Projector - User's Guide - Page 65
HP repair If your HP digital projector must be repaired, call HP support by phone. A trained HP service technician will diagnose the problem and coordinate the repair process. HP support will direct you to the best solution, whether it is an authorized service provider or an HP facility. Repair - HP ep9012 | HP ep9010 Series Instant Cinema Digital Projector - User's Guide - Page 66
not provided or supported by HP ❏ Operation outside the product's specifications 4. If HP receives notice of a defect in any hardware product covered by HP's warranty during the applicable warranty period, HP shall either repair or replace the defective product at HP's option. 5. If HP is unable to - HP ep9012 | HP ep9010 Series Instant Cinema Digital Projector - User's Guide - Page 67
Support and warranty Local law 1. This Warranty Statement gives the customer specific legal rights. The customer may also on the duration of implied warranties. 3. FOR CONSUMER TRANSACTIONS IN AUSTRALIA AND NEW ZEALAND, THE TERMS IN THIS WARRANTY STATEMENT, EXCEPT TO THE EXTENT LAWFULLY PERMITTED - HP ep9012 | HP ep9010 Series Instant Cinema Digital Projector - User's Guide - Page 68
Support and warranty 68 User's Guide - HP ep9012 | HP ep9010 Series Instant Cinema Digital Projector - User's Guide - Page 69
latest specifications, visit the HP website at http://www.hp.com. Projector specifications Size 524 × 400 × 320 mm (20.6 × 15.7 × 12.6 in.) Weight 10.5 kg (23.0 lb) Resolution SVGA (800 × 600) Technology DLP Internal DVD player Compatibility: DVD-video (including Dolby Digital and Dolby - HP ep9012 | HP ep9010 Series Instant Cinema Digital Projector - User's Guide - Page 70
specifications (Continued) Video compatibility NTSC 3.58 MHz and 4.43 MHz PAL B, D, G, H, I, M, N SECAM B, D, G, K, K1, L HDTV (480i/p, 575i/p, 720p, 1080i) DVI with HDCP PC video up to SXGA (by DVI-I connector) IR receiver Front and back of projector Lamp 210-watt lamp 4000-hour average lamp - HP ep9012 | HP ep9010 Series Instant Cinema Digital Projector - User's Guide - Page 71
400 SVGA 800 x 600 832 x 624 XGA 1024 x 768 1152 x 870 1280 x 960 SXGA 1280 x 1024 SXGA+ 1400 x 1050 Digital VGA 640 x 350 640 x 400 640 x 480 720 x 400 SVGA 800 x 600 XGA 1024 x 768 SXGA 1280 x 1024 SXGA+ 85 70, 85 56, 60, 72, 75, 85 60, 70, 75 60, 75 60 User's Guide 71 - HP ep9012 | HP ep9010 Series Instant Cinema Digital Projector - User's Guide - Page 72
on the digital projector and remote control are classified as Class 1 LED devices according to International Standard IEC 825-1 (EN60825-1). This device is not considered harmful, but the following precautions are recommended: ■ If the unit requires service, contact an authorized HP service center - HP ep9012 | HP ep9010 Series Instant Cinema Digital Projector - User's Guide - Page 73
Commission, How to Identify and Resolve Radio-TV Interference Problems. This booklet is available from the U.S. Government Printing Office, Washington, DC 20402, Stock Number 004-000-00345-4. At the first printing of this manual, the telephone number was 202-512-1800. User's Guide 73 - HP ep9012 | HP ep9010 Series Instant Cinema Digital Projector - User's Guide - Page 74
Reference Canada This Class B digital apparatus complies with Canadian ICES-003. Japan Korea International For regulatory identification purposes, your product is assigned a declaration of conformity. This regulatory number is different from the marketing name and product number. 74 User's Guide - HP ep9012 | HP ep9010 Series Instant Cinema Digital Projector - User's Guide - Page 75
Digital Projection & Imaging 1000 NE Circle Blvd. Corvallis, OR 97330-4239 Declares, that the product(s): Product name: Instant Cinema Model number: ep9010 series Regulatory model: CRVSB-04ZO Conforms to the following product specifications CA 94304. Phone: (650) 857-1501. User's Guide 75 - HP ep9012 | HP ep9010 Series Instant Cinema Digital Projector - User's Guide - Page 76
Reference 76 User's Guide - HP ep9012 | HP ep9010 Series Instant Cinema Digital Projector - User's Guide - Page 77
45 subwoofer 35 aiming projector 31 analog video mode compatibility 71 audio adjusting 35, 45 connecting 25 ports 12 troubleshooting 60 B buttons location 10 S-video source 21 D diagnostics 62 digital audio. See audio DVD player audio output 26 troubleshooting 59 using external 31, 43 using internal 38 - HP ep9012 | HP ep9010 Series Instant Cinema Digital Projector - User's Guide - Page 78
focus 9, 32 H home theater 15 HP support 63 I image. See picture internal DVD player troubleshooting 59 using 37 J JPG pictures, showing 40 L lamp, replacing 52 language, changing 46 13 installing batteries 53 opening menu 46 troubleshooting 62 repair service 65 replacing lamp 52 room layout 14 78 - HP ep9012 | HP ep9010 Series Instant Cinema Digital Projector - User's Guide - Page 79
S safety information 7, 72 SCART 24 screen locating 17 selecting 15 service 65 setting up 14 sound. See audio specifications 69 subwoofer adjusting 35 location 9 support 63 S-video connecting source 21 port 12 T troubleshooting audio 60 internal DVD player 59 interruptions 61 picture 56 remote - HP ep9012 | HP ep9010 Series Instant Cinema Digital Projector - User's Guide - Page 80
Index 80 - HP ep9012 | HP ep9010 Series Instant Cinema Digital Projector - User's Guide - Page 81
- HP ep9012 | HP ep9010 Series Instant Cinema Digital Projector - User's Guide - Page 82
- HP ep9012 | HP ep9010 Series Instant Cinema Digital Projector - User's Guide - Page 83
- HP ep9012 | HP ep9010 Series Instant Cinema Digital Projector - User's Guide - Page 84
© 2004 Hewlett-Packard Development Company, L.P. Printed in China www.hp.com 5990-3664 - HP ep9012 | HP ep9010 Series Instant Cinema Digital Projector - User's Guide - Page 85
Mercury Safety WARNING: This digital projector lamp contains a small amount of mercury. If the lamp breaks, adequately ventilate the area where the breakage occurred, discard any nearby food and drink, and thoroughly clean the table surface around the projector. Wash your hands after cleaning the
-
 1
1 -
 2
2 -
 3
3 -
 4
4 -
 5
5 -
 6
6 -
 7
7 -
8
-
9
-
10
-
11
-
12
-
13
-
14
-
15
-
16
-
17
-
18
-
19
-
20
-
21
-
22
-
23
-
24
-
25
-
26
-
27
-
28
-
29
-
30
-
31
-
32
-
33
-
34
-
35
-
36
-
37
-
38
-
39
-
40
-
41
-
42
-
43
-
44
-
45
-
46
-
47
-
48
-
49
-
50
-
51
-
52
-
53
-
54
-
55
-
56
-
57
-
58
-
59
-
60
-
61
-
62
-
63
-
64
-
65
-
66
-
67
-
68
-
69
-
70
-
71
-
72
-
73
-
74
-
75
-
76
-
77
-
78
-
79
-
80
-
81
-
82
-
83
-
84
-
85
 |
 |

HP ep9010 Series Instant Cinema
Digital Projector
User’s Guide