HP iPAQ h1900 iPAQ H1910 user guide
HP iPAQ h1900 - Pocket PC Manual
 |
View all HP iPAQ h1900 manuals
Add to My Manuals
Save this manual to your list of manuals |
HP iPAQ h1900 manual content summary:
- HP iPAQ h1900 | iPAQ H1910 user guide - Page 1
reference guide hp iPAQ Pocket PC h1910 Document Part Number: 311757-001 November 2002 - HP iPAQ h1900 | iPAQ H1910 user guide - Page 2
. Some Web content may require installation of additional software. Ä CAUTION: Text set off in this manner indicates that failure to follow directions could result in damage to equipment or loss of information. reference guide hp iPAQ Pocket PC h1910 First Edition November 2002 Document Part Number - HP iPAQ h1900 | iPAQ H1910 user guide - Page 3
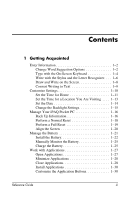
1-2 Type with the On-Screen Keyboard 1-4 Write with the Stylus and iPAQ Pocket PC 1-16 Back Up Information 1-16 Perform a Normal Reset 1-18 Perform a Full Reset 1-19 Align the Screen 1-20 Manage the Battery 1-21 Install the Battery 1-22 Manually Monitor the Battery 1-25 Charge the Battery - HP iPAQ h1900 | iPAQ H1910 user guide - Page 4
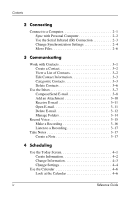
Notes 3-17 Create a Note 3-17 4 Scheduling Use the Today Screen 4-1 Create Information 4-2 Change Information 4-3 Change Settings 4-4 Use the Calendar 4-6 Look at the Calendar 4-6 iv Reference Guide - HP iPAQ h1900 | iPAQ H1910 user guide - Page 5
16 5 Using Software Use Pocket Word 5-1 Create a New Document 5-2 Open a Word Document 5-4 Change the Pocket Word Options 5-4 Use Pocket Excel 5-6 Create a Workbook 5-7 Open an Excel File 5-8 Change Excel Options 5-9 Use the Windows Media Player 5-10 Copy Music to Your iPAQ Pocket PC 5-12 - HP iPAQ h1900 | iPAQ H1910 user guide - Page 6
A-2 Cables A-2 Declaration of Conformity for Products Marked with the FCC Logo-United States Only A-2 Battery Warning A-3 Airline Travel Notice A-4 B Hardware Specifications System Specifications B-1 Physical Specifications B-2 Operating Environment B-2 Index vi Reference Guide - HP iPAQ h1900 | iPAQ H1910 user guide - Page 7
an HP iPAQ Pocket PC h1910. This Reference Guide will help you set up your Pocket PC and familiarize you with how it works. To use your HP iPAQ Pocket PC h1910 most effectively, start by learning how to: s Enter information s Customize settings s Manage your iPAQ Pocket PC s Manage the battery - HP iPAQ h1900 | iPAQ H1910 user guide - Page 8
Calendar, Contacts, and Tasks applications. ✎ As you type or write, the iPAQ Pocket PC suggests words for you in a box above the Keyboard, Letter Recognizer, or Block Recognizer. You can determine when the suggestions occur per entry s If you do not want any words suggested 1-2 Reference Guide - HP iPAQ h1900 | iPAQ H1910 user guide - Page 9
tap the down arrow associated with letters. 4 5 5. Determine how many words you want suggested, then tap the down arrow associated with words. 6. Tap OK. Reference Guide 1-3 - HP iPAQ h1900 | iPAQ H1910 user guide - Page 10
On-Screen Keyboard You can enter typed text directly on the screen by tapping letters, numbers, and symbols on the keyboard. To type with the keyboard: 1. From any application, tap the up arrow next to the Input Panel icon. 2. Tap Keyboard to display a keyboard on the screen. 1-4 Reference Guide - HP iPAQ h1900 | iPAQ H1910 user guide - Page 11
Getting Acquainted 3. Tap a letter, symbol, or number to enter information. ✎ To see the symbols, tap the 123 or Shift key. 4. Tap OK. Reference Guide 1-5 - HP iPAQ h1900 | iPAQ H1910 user guide - Page 12
symbols on the screen using the stylus and the Letter Recognizer. You create words and sentences by writing in upper case (ABC), lower case (abc), and symbols (123) in specific areas. To write with the stylus and letter recognizer: 1. From any application, tap the up arrow next to the Input Panel - HP iPAQ h1900 | iPAQ H1910 user guide - Page 13
dashed line and baseline. a. Write a letter between the hatch marks labeled ABC to display in upper case. b. Write a letter between the hatch marks labeled abc to display in lower case. c. Write a number or symbol between the line. 4. What you write will be converted to text. Reference Guide 1-7 - HP iPAQ h1900 | iPAQ H1910 user guide - Page 14
screen: 1. From the Start menu, tap Notes. 2. Tap New. ✎ Otherwise, tap the Notes tab in Calendar, Contacts, or Tasks, then tap the Pen icon. 1-8 Reference Guide - HP iPAQ h1900 | iPAQ H1910 user guide - Page 15
: s Calendar s Contacts s Tasks To convert writing to text: 1. From the Start menu, tap Notes. ✎ Otherwise, tap the Notes tab in Calendar, Contacts, or Tasks. Reference Guide 1-9 - HP iPAQ h1900 | iPAQ H1910 user guide - Page 16
. The unrecognized word will remain written. . 4. Tap OK. Customize Settings You can navigate through the iPAQ Pocket PC interface in three ways: s Tap s Tap and hold s Press application buttons Tap the screen with the the screen and open your Calendar, Contacts, or Inbox. 1-10 Reference Guide - HP iPAQ h1900 | iPAQ H1910 user guide - Page 17
ActiveSync. You will need to set the time again if: s The battery completely discharges. s You perform a full reset of your iPAQ Pocket PC. See "Perform a Full Reset." the host computer is synchronized with the iPAQ Pocket PC each time the two devices connect using ActiveSync. Reference Guide 1-11 - HP iPAQ h1900 | iPAQ H1910 user guide - Page 18
by moving the hands of the clock with the stylus. 6. Tap AM or PM. 7. Tap OK. 8. Tap Yes to save the clock settings. 1-12 Reference Guide - HP iPAQ h1900 | iPAQ H1910 user guide - Page 19
time by moving the hands of the clock with the stylus. 6. Tap AM or PM. 7. Tap OK. 8. Tap Yes to save the clock settings. Reference Guide 1-13 - HP iPAQ h1900 | iPAQ H1910 user guide - Page 20
Getting Acquainted Set the Date You must set the date again if: s The battery discharges completely s You perform a full reset of your iPAQ Pocket PC ✎ You can set the date from the Today screen. Tap the Clock icon 5. Tap a day. 6. Tap OK. 7. Tap Yes to save the date settings. 1-14 Reference Guide - HP iPAQ h1900 | iPAQ H1910 user guide - Page 21
You can change the backlight settings to match your environment or to conserve battery power. ✎ The backlight settings on your iPAQ Pocket PC are synchronized with the settings on your personal computer when they connect using ActiveSync. To change the backlight settings: 1. From the Start menu, tap - HP iPAQ h1900 | iPAQ H1910 user guide - Page 22
most power. Manage Your iPAQ Pocket PC You can effectively manage your iPAQ Pocket PC by learning how to: s Back up and restore information s Perform full and normal resets s Align the screen Back Up Information You can back up information to the personal computer using ActiveSync. Back Up/Restore - HP iPAQ h1900 | iPAQ H1910 user guide - Page 23
back up/restore using ActiveSync: 1. Make sure your iPAQ Pocket PC is connected to your computer. 2. From your computer, open Microsoft ActiveSync. From the Start menu, click Programs, then click Microsoft ActiveSync. 3. From the Tools menu, click Backup/Restore. 4. Click the Backup or Restore tab - HP iPAQ h1900 | iPAQ H1910 user guide - Page 24
or saved data. To perform a normal reset: 1. Locate the Reset button on the side panel of the iPAQ Pocket PC. 2. Lightly press the Reset button with a stylus for two seconds. ✎ The iPAQ Pocket PC will restart in approximately five seconds and display the Today screen. 1-18 Reference Guide - HP iPAQ h1900 | iPAQ H1910 user guide - Page 25
will return to your default settings and lose all information. 1. Press and hold the Power button 1. 2. Press the Reset button 2 on the side panel of the iPAQ Pocket PC with the stylus. 3. Hold all buttons until the displayed image begins to fade (approximately four seconds). Reference Guide 1-19 - HP iPAQ h1900 | iPAQ H1910 user guide - Page 26
the screen of your iPAQ Pocket PC for the first time, you are guided through the alignment process. Realign your screen if: s The iPAQ Pocket PC does not respond accurately to your taps s You performed a restore following a data backup s You performed a hard reset of your iPAQ Pocket PC To align the - HP iPAQ h1900 | iPAQ H1910 user guide - Page 27
to know how to: s Install the battery s Monitor the battery s Charge the battery ✎ You should recycle and dispose of the lithium ion battery properly. Ä CAUTION: The iPAQ Pocket PC has a small backup battery, which allows you to change the main battery without losing data. However, it is strongly - HP iPAQ h1900 | iPAQ H1910 user guide - Page 28
Getting Acquainted Install the Battery 1. Locate the removable/rechargeable battery. 2. Remove the battery cover by sliding the Battery Cover Release button up 1 and pulling the battery cover away from the unit 2. 1-22 Reference Guide - HP iPAQ h1900 | iPAQ H1910 user guide - Page 29
Getting Acquainted 3. Slide in the battery (with the label side up) so that the connectors on the right side are fully seated on the pins 1. Then push the left side of the battery in place 2. Reference Guide 1-23 - HP iPAQ h1900 | iPAQ H1910 user guide - Page 30
cover is not installed. ✎ You will need to fully charge your iPAQ Pocket PC within the next 12 hours. The amber charge light is flashing (blinking) when your iPAQ Pocket PC is recharging the battery. The charge light turns solid amber when the battery is fully charged. 1-24 Reference Guide - HP iPAQ h1900 | iPAQ H1910 user guide - Page 31
Monitor the Battery You can manually monitor the battery power. 1. From the Start menu, tap Settings. 2. Tap System, then Power. 3. Tap OK. Charge the Battery Because your iPAQ Pocket PC uses some power to maintain files in memory and the clock, you need to recharge the battery regularly. The - HP iPAQ h1900 | iPAQ H1910 user guide - Page 32
plug into the connector on the bottom of the iPAQ Pocket PC can damage the connector pins. To avoid damage to the connector pins when removing the charger adapter from the bottom of the iPAQ Pocket PC, push the release buttons located on each side of the adapter and pull. 1-26 Reference Guide - HP iPAQ h1900 | iPAQ H1910 user guide - Page 33
and close applications. Open Applications Most applications on your iPAQ Pocket PC are only two taps away from any screen. Open any application on your iPAQ Pocket PC from the Start menu. Ä CAUTION: If an application logo. 2. Tap Programs. 3. Tap the application title or icon. Reference Guide 1-27 - HP iPAQ h1900 | iPAQ H1910 user guide - Page 34
may close automatically as you open new applications. This will depend on the amount of memory being used. If your iPAQ Pocket PC is running slowly, you can manually close applications. To close an application: 1. From the Start menu, tap Settings. 2. Tap System, then Memory. 1-28 Reference - HP iPAQ h1900 | iPAQ H1910 user guide - Page 35
3. Tap the Running Programs tab. Getting Acquainted 4. Tap Stop All or select a particular application, then tap Stop. Reference Guide 1-29 - HP iPAQ h1900 | iPAQ H1910 user guide - Page 36
folder on your iPAQ Pocket PC. 2. Follow the instructions in the installation wizard to install the program on your iPAQ Pocket PC. 3. If your application does not run, insert the stylus for two seconds into the Reset button on the side panel of your iPAQ Pocket PC. Customize the Application - HP iPAQ h1900 | iPAQ H1910 user guide - Page 37
3. Tap the button you want to change. Getting Acquainted 4. Tap the button-assignment down arrow. 5. Tap an application. 6. Tap OK. Reference Guide 1-31 - HP iPAQ h1900 | iPAQ H1910 user guide - Page 38
Outlook to operate your iPAQ Pocket PC using Microsoft ActiveSync on your computer. If you do not have Outlook, install the Microsoft Outlook software from the HP iPAQ Pocket PC Companion CD. Microsoft Outlook Express will not work with the iPAQ Pocket PC and ActiveSync. Reference Guide 2-1 - HP iPAQ h1900 | iPAQ H1910 user guide - Page 39
Connecting With Microsoft ActiveSync, you can: s Synchronize information manually or automatically s Synchronize information with your server while connected to your personal computer s Move files to and from your personal computer s Install applications on your iPAQ Pocket PC s Back up and restore - HP iPAQ h1900 | iPAQ H1910 user guide - Page 40
Connecting To Sync with a Personal Computer: 1. Insert the HP iPAQ Pocket PC companion CD into your computer. 2. Follow the instructions in the installation wizard. For more help, click the ActiveSync Help button during installation. The information you select will automatically synchronize when - HP iPAQ h1900 | iPAQ H1910 user guide - Page 41
for Microsoft ActiveSync to: s Change when your iPAQ Pocket PC synchronizes with your computer s Change when your iPAQ Pocket PC synchronizes with your server s Change the type of connection from your iPAQ Pocket PC to your computer (for example, USB or infrared connections) 2-4 Reference Guide - HP iPAQ h1900 | iPAQ H1910 user guide - Page 42
(for example, e-mail attachments) s Determine how conflicts between information on your iPAQ Pocket PC and information on your computer are handled To change synchronization settings: 1. From your computer, open Microsoft ActiveSync. 2. From the Tools menu, click Options. a. On the Sync Options tab - HP iPAQ h1900 | iPAQ H1910 user guide - Page 43
Files You can move files to and from your computer using Explore in ActiveSync and Windows Explorer. To move files: 1. From your computer, open Microsoft ActiveSync. 2. Click Explore. 3. Double-click the My Pocket PC icon. 4. Right-click the Start menu on your personal computer, then select Explore - HP iPAQ h1900 | iPAQ H1910 user guide - Page 44
your Pocket PC and Windows Explorer. ActiveSync converts the files, so that they can be used by the Pocket Office applications, if necessary. Ä CAUTION: You should move your files directly into My Documents or into a folder inside your My Documents folder, so the applications on your iPAQ Pocket PC - HP iPAQ h1900 | iPAQ H1910 user guide - Page 45
3 Communicating Your HP iPAQ Pocket PC h1910 lets you communicate in many ways: s Create and organize contacts s Use the e-mail Inbox s Record edit a contact s Categorize your contacts s Delete a contact ✎ Press the Contact application button to navigate quickly to Contacts. Reference Guide 3-1 - HP iPAQ h1900 | iPAQ H1910 user guide - Page 46
a list of your contacts from the last category selected. 2. Tap the down arrow next to the category name to see the list of categories. 3-2 Reference Guide - HP iPAQ h1900 | iPAQ H1910 user guide - Page 47
edit your contact information. ✎ A category will not display unless a contact has been assigned to it. To categorize contacts: 1. From the Start menu, tap Contacts. Reference Guide 3-3 - HP iPAQ h1900 | iPAQ H1910 user guide - Page 48
Communicating 2. Tap a contact's name. 3. Tap Edit to see the contact information. 4. Tap the Categories field to see a list of available categories. You may have to scroll down to see the Categories field. 3-4 Reference Guide - HP iPAQ h1900 | iPAQ H1910 user guide - Page 49
Communicating 5. Tap the Add/Delete tab to create a category. 6. Enter the name of the new category, then tap Add. 7. Tap OK to place your contact in the category. Reference Guide 3-5 - HP iPAQ h1900 | iPAQ H1910 user guide - Page 50
return to the list of contacts. Delete Contacts Ä CAUTION: If you delete a contact on your iPAQ Pocket PC and synchronize Contacts with your computer, you may delete the contact in Outlook on your computer. To category name to see a list of contacts placed in that category. 3-6 Reference Guide - HP iPAQ h1900 | iPAQ H1910 user guide - Page 51
ActiveSync. Use ActiveSync to send and receive e-mail. You can read and compose e-mail offline using your iPAQ Pocket PC. The e-mail remains in the Outbox until you synchronize with your personal computer. You see the name of the folder you are using at the bottom of the screen. Reference Guide - HP iPAQ h1900 | iPAQ H1910 user guide - Page 52
Communicating The Inbox on your iPAQ Pocket PC is similar to the Inbox on your computer. E-mail is saved in five default folders: s Inbox s Outbox s Deleted Items s Drafts screen. To compose and send e-mail: 1. From the Start menu, tap Inbox. 2. Tap New to compose a new e-mail. 3-8 Reference Guide - HP iPAQ h1900 | iPAQ H1910 user guide - Page 53
Communicating 3. Tap Send to place the e-mail in the Outbox. 4. If you do not want to send your e-mail yet, tap OK to leave your e-mail in the Drafts folder. Reference Guide 3-9 - HP iPAQ h1900 | iPAQ H1910 user guide - Page 54
Communicating Add an Attachment 1. From the Start menu, tap Inbox. 2. Tap New to write a new e-mail. 3. Tap Edit. 4. Tap Add Attachment to see all the folders in My Documents. 4 3 5. Tap the file you want to attach. You may have to scroll to view your document name. 3-10 Reference Guide - HP iPAQ h1900 | iPAQ H1910 user guide - Page 55
Receive e-mail by synchronizing your iPAQ Pocket PC Inbox with your computer using ActiveSync. If you are using ActiveSync, you can synchronize your personal with Inbox on your iPAQ Pocket PC. ✎ You do not receive e-mail attachments by default. You can select this option in ActiveSync. Open E-mail - HP iPAQ h1900 | iPAQ H1910 user guide - Page 56
is not permanently deleted until you tap Empty Deleted Items from the Tools menu. To delete e-mail: 1. From the Start menu, tap Inbox. 3-12 Reference Guide - HP iPAQ h1900 | iPAQ H1910 user guide - Page 57
the e-mail to the Deleted Items folder. 5. Tap Tools, then Empty Deleted Items to permanently delete the e-mail. Ä CAUTION: When you delete e-mail from your iPAQ Pocket PC, you also delete it from your personal computer. Reference Guide 3-13 - HP iPAQ h1900 | iPAQ H1910 user guide - Page 58
an e-mail service. You can create additional folders that you can rename or delete. If you are using ActiveSync, you cannot create additional folders in the Inbox. However, you can synchronize your personal folders from Outlook on your computer with Inbox on your iPAQ Pocket PC. You cannot rename - HP iPAQ h1900 | iPAQ H1910 user guide - Page 59
-alone recordings, which are stored as separate .wav files in File Explorer. ✎ To quickly make a recording, follow the steps in the "Make a Recording" section. Reference Guide 3-15 - HP iPAQ h1900 | iPAQ H1910 user guide - Page 60
button on the side panel of the iPAQ Pocket PC. Press the Record button to begin recording, then release the Record button when you want to stop recording. s Use the software. Follow the procedure below. 1. From the recording, tap Settings, System, Audio, then Microphone AGC. 3-16 Reference Guide - HP iPAQ h1900 | iPAQ H1910 user guide - Page 61
, tap Notes. 2. Tap New. 3. Tap anywhere and enter your note. 4. Tap OK to save your note and place it in the list of notes. Reference Guide 3-17 - HP iPAQ h1900 | iPAQ H1910 user guide - Page 62
4 Scheduling Your iPAQ Pocket PC h1910 helps you keep track of your schedule in many ways. You can: s See information at a glance on the Today screen s Set appointments the Today screen when you turn on your device for the first time each day or after four hours of inactivity. Reference Guide 4-1 - HP iPAQ h1900 | iPAQ H1910 user guide - Page 63
to create a new item. Create Information From the Today screen, create new information, including: s Appointments s Contacts s E-mail s Excel Workbook Information s Notes s Tasks s Word documents 4-2 Reference Guide - HP iPAQ h1900 | iPAQ H1910 user guide - Page 64
need to be completed For more information on changing these items, see the appropriate instructions for each task in this guide. For example, to create a new appointment, see "Schedule Appointments" later in this guide. 1. From the Start menu, tap Today. 2. Tap the information you want to change - HP iPAQ h1900 | iPAQ H1910 user guide - Page 65
of information: 1. From the Start menu, tap Settings. 2. Tap Today. 3. Tap the Items tab to select or reorder the information on the Today screen. 4-4 Reference Guide - HP iPAQ h1900 | iPAQ H1910 user guide - Page 66
screen if device is not used for...hours" check box to determine how many hours must pass before the Today screen displays. 7. Tap OK. Reference Guide 4-5 - HP iPAQ h1900 | iPAQ H1910 user guide - Page 67
in the Agenda view. The Agenda view provides the most detail about your appointments. From the Start menu, tap Calendar to view your appointments. 4-6 Reference Guide - HP iPAQ h1900 | iPAQ H1910 user guide - Page 68
s Month s Year 1. From the Start menu, tap Calendar. 2. Tap the Agenda, Day, Week, Month, or Year icon to see your calendar in that view. Reference Guide 4-7 - HP iPAQ h1900 | iPAQ H1910 user guide - Page 69
about your appointments, including: s Reminder s Recurrence s Note s Location s Attendees s Private You can determine whether to send meeting requests through ActiveSync. To customize the calendar appearance: 1. From the Start menu, tap Calendar. 2. Tap Tools. 3. Tap Options. 4. Select the calendar - HP iPAQ h1900 | iPAQ H1910 user guide - Page 70
are scheduling an appointment or you can do it at a later date. To create reminders: 1. From the Start menu, tap Calendar. 2. Tap an appointment. Reference Guide 4-9 - HP iPAQ h1900 | iPAQ H1910 user guide - Page 71
use categories to filter the appointments in your calendar. To categorize appointments: 1. From the Start menu, tap Calendar. 2. Tap an appointment. 3. Tap Edit. 4-10 Reference Guide - HP iPAQ h1900 | iPAQ H1910 user guide - Page 72
to list the categories you selected in the Categories field. 12. Tap OK to save the category information and return to the Calendar screen. Reference Guide 4-11 - HP iPAQ h1900 | iPAQ H1910 user guide - Page 73
a meeting and send a meeting request through ActiveSync. ✎ You must enter contacts with e-mail 3. Tap Options. 4. Tap the "Send meeting requests via" down arrow. 5. Tap the e-mail service you want to use to send a meeting request, then tap OK. 6. Tap New to create a meeting. 4-12 Reference Guide - HP iPAQ h1900 | iPAQ H1910 user guide - Page 74
-down list. 4. Tap any item to enter additional information. 5. Tap Due to add a due date for the task. 6. Tap Reminder, then select "Remind me." Reference Guide 4-13 - HP iPAQ h1900 | iPAQ H1910 user guide - Page 75
arrow icon. c. For normal priority, do not tap an icon. 6. Tap outside the Entry Bar to add the task to your task list. 4-14 Reference Guide - HP iPAQ h1900 | iPAQ H1910 user guide - Page 76
Start menu, tap Tasks. 2. Tap the down arrow at the top left of the screen to sort the task list by category. 3. Select a category. Reference Guide 4-15 - HP iPAQ h1900 | iPAQ H1910 user guide - Page 77
dates, and set reminders for new items. 1. From the Start menu, tap Tasks. 2. Tap Tools. 3. Tap Options. 4. Select the Tasks options. 5. Tap OK. 4-16 Reference Guide - HP iPAQ h1900 | iPAQ H1910 user guide - Page 78
s Use the Media Player s Use Pocket Internet Explorer Use Pocket Word You can create new Word documents from your iPAQ Pocket PC or synchronize existing Word documents from your computer to your iPAQ Pocket PC. Microsoft ActiveSync converts Word documents into the Pocket Word format and changes the - HP iPAQ h1900 | iPAQ H1910 user guide - Page 79
Using Software Pocket Word does not support items like: s Columns s Numbered lists s Headers and footers s Footnotes s Style sheets ✎ For more help with Pocket Word, tap Help from the Start menu, tap Pocket Word. Create a New Document ✎ Create a new document from the Today screen by tapping New. To - HP iPAQ h1900 | iPAQ H1910 user guide - Page 80
Using Software 4. Tap View, then tap Toolbar to format text. 5. Tap OK to close and save the document. The document is automatically saved as a Pocket Word Document with the first few words of your text as its name. You may want to rename it. Reference Guide 5-3 - HP iPAQ h1900 | iPAQ H1910 user guide - Page 81
a Word document: 1. From the Start menu, tap Programs. 2. Tap Pocket Word. 3. Tap a document to open it. Change the Pocket Word Options You can select: s A default template s Whether documents are stored in main memory or on a storage card s Which types of documents are displayed in the list view - HP iPAQ h1900 | iPAQ H1910 user guide - Page 82
To change Pocket Word options: 1. From the Start menu, tap Programs. 2. Tap Pocket Word. 3. Tap Tools, then Options. Using Software 4. Tap the Default template down arrow to select a default template. 4 5 6 Reference Guide 5-5 - HP iPAQ h1900 | iPAQ H1910 user guide - Page 83
view. 7. Tap OK to save the options. Use Pocket Excel You can create Excel workbooks from your iPAQ Pocket PC or synchronize existing Excel workbooks from your computer to your iPAQ Pocket PC. ActiveSync converts Excel workbooks into the Pocket Excel format and changes the .xls extension to a .pxl - HP iPAQ h1900 | iPAQ H1910 user guide - Page 84
Using Software Pocket Excel does not support items like: s Data validation s Cell notes s Add-ins s Protection s Scenarios s Object charts s Vertical alignment s Text boxes s Embedded OLE objects s Hyperlinks ✎ For more help with Pocket Excel, tap Help from the Start menu, tap Pocket Excel. Create a - HP iPAQ h1900 | iPAQ H1910 user guide - Page 85
Using Software 3. Tap New to create a new workbook. 4. Tap OK to close and save the workbook. The workbook is automatically saved as a Pocket Excel workbook named Book1. Depending on how many workbooks you have created since opening Pocket Excel, you may want to rename it. Open an Excel File Ä - HP iPAQ h1900 | iPAQ H1910 user guide - Page 86
Software Change Excel Options You can change options to select: s A template for new workbooks s Whether workbooks are stored in main memory or on a storage card s Which types of workbooks are displayed in the list view To change Excel options: 1. From the Start menu, tap Programs. 2. Tap Pocket - HP iPAQ h1900 | iPAQ H1910 user guide - Page 87
must install the Windows Media Player software from the HP iPAQ Pocket PC Companion CD. You can use the Windows Media Player to listen to music or play video from your iPAQ Pocket PC by downloading files onto your personal computer and transferring them to your iPAQ Pocket PC. ✎ For more information - HP iPAQ h1900 | iPAQ H1910 user guide - Page 88
Using Software Media Player supports the organization and playback of: s Windows Media content s MP3 audio files s Windows Media audio and video s Streamed content in Windows Media format using WM protocols (HTTP and MMS) ✎ Some Internet music files are protected by licensing technology. Windows - HP iPAQ h1900 | iPAQ H1910 user guide - Page 89
Using Software Copy Music to Your iPAQ Pocket PC You can copy music that is in one of the accepted formats from your personal computer to the iPAQ Pocket PC. You drag and drop the music file into the My Documents folder located in memory or on a storage card. You must have the Windows Media Player - HP iPAQ h1900 | iPAQ H1910 user guide - Page 90
Using Software Play Music on Your iPAQ Pocket PC 1. Tap Start, then Windows Media. 2. Tap Select. 3. Tap the down arrow and Local Content to display media files stored on the iPAQ Pocket PC. 4. Tap and highlight the desired file. Reference Guide 5-13 - HP iPAQ h1900 | iPAQ H1910 user guide - Page 91
Using Software 5. Tap the Play icon. ✎ By default Media Player will play all files stored as local content on the iPAQ Pocket PC. You can repeat a file and shuffle the contents by selecting Tools, then Repeat or Shuffle. Create Playlists You can organize music and video files into - HP iPAQ h1900 | iPAQ H1910 user guide - Page 92
Using Software 3. Tap the down arrow, then Organize Playlists. 4. Tap New to name your playlist, then tap OK. 5. Select the files to include in this playlist. 6. Tap OK to display your new playlist. 7. Tap OK. Reference Guide 5-15 - HP iPAQ h1900 | iPAQ H1910 user guide - Page 93
Using Software Play a Playlist 1. Tap Start, then Windows Media. 2. Tap Select. 3. Tap the down arrow and tap the playlist name to display its contents. 4. Tap OK, then play and manage video files just like music. You must have an Internet connection to play streaming video. 5-16 Reference Guide - HP iPAQ h1900 | iPAQ H1910 user guide - Page 94
Using Software Use Pocket Internet Explorer You can use Pocket Internet Explorer (Pocket IE) to view Web or WAP pages on your iPAQ Pocket PC by downloading pages while connected to the Internet through ActiveSync. ✎ For more information, tap Start, Help, then Pocket Internet Explorer. ✎ Use of dial- - HP iPAQ h1900 | iPAQ H1910 user guide - Page 95
Using Software Use Pocket IE When Disconnected With Pocket IE, you can browse previously viewed and stored information when disconnected from the Internet. This information can be 4. In the General tab, select the number of days to save the history of pages visited. 5. Tap OK. 5-18 Reference Guide - HP iPAQ h1900 | iPAQ H1910 user guide - Page 96
Using Software Synchronize Favorites You can have the URLs of your favorite Web sites at your fingertips. Synchronizing a mobile favorite allows you to view Internet content on your iPAQ Pocket PC while you are disconnected. To synchronize favorites: 1. In ActiveSync on your personal computer, click - HP iPAQ h1900 | iPAQ H1910 user guide - Page 97
radiate radio frequency energy and, if not installed and used in accordance with the instructions, may cause harmful interference to radio communications. However, there is no guarantee that interference the dealer or an experienced radio or television technician for help Reference Guide A-1 - HP iPAQ h1900 | iPAQ H1910 user guide - Page 98
modifications made to this device that are not expressly approved by Hewlett-Packard Company may void the Reference authority to operate the equipment. Cables cause undesired operation. For questions regarding your product, contact: Hewlett-Packard Company P. O. Box 692000, Mail Stop 530113 Houston, - HP iPAQ h1900 | iPAQ H1910 user guide - Page 99
questions regarding this FCC declaration, contact: Hewlett-Packard Company P. O. Box 692000, Mail Stop 510101 Houston, Texas 77269-2000 Or, call (281) 514-3333 To identify this product, refer to the Part, Series, or Model number found on the product. Battery Warning Å WARNING: Danger of explosion if - HP iPAQ h1900 | iPAQ H1910 user guide - Page 100
Regulatory Notices Airline Travel Notice Use of electronic equipment aboard commercial aircraft is at the discretion of the airline. A-4 Reference Guide - HP iPAQ h1900 | iPAQ H1910 user guide - Page 101
B Hardware Specifications System Specifications Specifications System Feature Processor Memory ROM Memory Storage Display LED Backlight Audio Infrared Indicators Battery hp iPAQ Pocket PC h1910 Intel PXA250 (200 MHz) 64 MB SDRAM (46 MB user accessible) 16 MB NAND Flash Secure Digital (SD) card - HP iPAQ h1900 | iPAQ H1910 user guide - Page 102
Hardware Specifications Physical Specifications hp iPAQ Pocket PC h1910 Length Width Depth Weight US 4.46 in 2.75 in 0.50 in 4.23 oz Operating Environment Metric 113.3 mm 69.8 mm ,000 ft 0-15,000 ft Metric 0° to 40° C -20° to 60° C up to 80% up to 80% 0-4,572 m 0-4,572 m B-2 Reference Guide - HP iPAQ h1900 | iPAQ H1910 user guide - Page 103
4-10 delete 4-10 schedule 4-9 AvantGo 2-2 B back up Pocket PC 1-16 backlight 1-15 battery charge 1-25 install 1-22 monitor manually 1-25 Index C Calendar 4-6 change backlight settings 1-15 charge the battery 1-25 charging the Pocket PC 1-25 contacts 3-1 categorize 3-3 create 3-2 delete 3-6 edit - HP iPAQ h1900 | iPAQ H1910 user guide - Page 104
1-25 install 1-22 monitor manually 1-25 monitor the battery 1-25 N normal reset 1-18 notes write 3-17 O onscreen keyboard 1-4 options, change Word 5-4 word suggestions 1-2 P Pocket Excel 5-6 Pocket Word 5-1 R record voice 3-15 reminders, set 4-9, 4-13 reset full 1-19 hard 1-19 normal 1-18 soft - HP iPAQ h1900 | iPAQ H1910 user guide - Page 105
T tasks 4-13 time set for home 1-11 set for visiting location 1-13 Today screen 4-1 V view contacts 3-2 voice recording 3-15 Index W Windows Explorer 2-6 Word 5-1 word suggestions, change options 1-2 write on screen 1-8 writing, convert to text 1-9 Reference Guide Index-3
-
 1
1 -
 2
2 -
 3
3 -
 4
4 -
 5
5 -
 6
6 -
 7
7 -
8
-
9
-
10
-
11
-
12
-
13
-
14
-
15
-
16
-
17
-
18
-
19
-
20
-
21
-
22
-
23
-
24
-
25
-
26
-
27
-
28
-
29
-
30
-
31
-
32
-
33
-
34
-
35
-
36
-
37
-
38
-
39
-
40
-
41
-
42
-
43
-
44
-
45
-
46
-
47
-
48
-
49
-
50
-
51
-
52
-
53
-
54
-
55
-
56
-
57
-
58
-
59
-
60
-
61
-
62
-
63
-
64
-
65
-
66
-
67
-
68
-
69
-
70
-
71
-
72
-
73
-
74
-
75
-
76
-
77
-
78
-
79
-
80
-
81
-
82
-
83
-
84
-
85
-
86
-
87
-
88
-
89
-
90
-
91
-
92
-
93
-
94
-
95
-
96
-
97
-
98
-
99
-
100
-
101
-
102
-
103
-
104
-
105
 |
 |

reference guide
hp iPAQ Pocket PC h1910
Document Part Number: 311757-001
November 2002