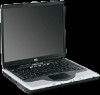
HP nx9020 Reference Guide
HP nx9020 - Notebook PC Manual
 |
View all HP nx9020 manuals
Add to My Manuals
Save this manual to your list of manuals |
HP nx9020 manual content summary:
- HP nx9020 | Reference Guide - Page 1
Reference Guide HP Notebook Series Document Part Number: 370697-001 June 2004 This guide explains how to set up, operate, maintain, and troubleshoot your notebook. It also provides information on battery pack and power management, external device connections, and modem and network connections. The - HP nx9020 | Reference Guide - Page 2
© Copyright 2004 Hewlett-Packard Development Company, L.P. Microsoft and Windows are U.S. registered trademarks of Microsoft Corporation. The information contained herein is subject to change without notice. The only warranties for HP products and services are set forth in the express warranty - HP nx9020 | Reference Guide - Page 3
Up Your Notebook 1-7 Step 1: Insert the Battery Pack 1-7 Step 2: Connect AC Power 1-8 Step 3: Connect a Phone Line 1-9 Step 4: Turn On the Notebook 1-10 Step 5: Set Up Windows 1-11 2 Basic Operation Operating Your Notebook 2-1 Default Power Settings 2-2 To Reset the Notebook 2-3 To Change - HP nx9020 | Reference Guide - Page 4
To Lock the Hard Drive 2-15 Taking Care of Your Notebook 2-15 To Protect Your Hard Drive 2-15 To Maintain Your Notebook 2-16 To Safeguard Your Data 2-16 To Extend the Life of the Display 2-17 To Clean Your Notebook 2-17 3 Battery Packs and Power Management Managing Power Consumption 3-1 How - HP nx9020 | Reference Guide - Page 5
5-9 To Remove a RAM Expansion Module 5-10 Replacing the Hard Drive 5-12 To Replace the Hard Drive 5-12 To Replace the Hard Drive Holder 5-13 To Prepare a New Hard Drive 5-14 6 Troubleshooting Troubleshooting Your Notebook 6-1 Audio Problems 6-2 CD-ROM and DVD Problems 6-3 Reference Guide v - HP nx9020 | Reference Guide - Page 6
Problems 6-4 Hard Drive Problems 6-5 Heat Problems 6-6 Infrared Problems 6-6 Keyboard and Pointing Device Problems 6-7 Local Area Network (LAN) Problems 6-8 Memory Problems 6-9 Modem Problems 6-10 PC Card (PCMCIA) Problems 6-13 Performance Problems 6-14 Power and Battery Pack Problems - HP nx9020 | Reference Guide - Page 7
included with the notebook may vary by geographical region and the features you selected. The following tables identify the standard external components included with most notebook models. Find the illustrations that closely match your notebook to identify your components. Reference Guide 1-1 - HP nx9020 | Reference Guide - Page 8
Power button: turns the notebook on and off 4 Keyboard status lights 5 One-Touch buttons 6 Notebook open/close latch 7 CD-ROM, DVD, or other drive 8 Battery pack 9 Wireless on-off button and indicator light (select models only) - Infrared port (select models only) q Hard drive 1-2 Reference Guide - HP nx9020 | Reference Guide - Page 9
with Your Notebook Left Panel PC Card and CardBus slot and button (select models only; location varies by model) q IEEE 1394 port (select models only) w Audio jacks (left to right): external microphone, audio out (headphones) e Volume control r Audio mute button and audio mute light t Diskette drive - HP nx9020 | Reference Guide - Page 10
Getting Started with Your Notebook Bottom Panel Components 1 Hard drive 2 Battery latch 3 RAM (memory) cover 4 Reset button 5 Mini PCI cover (no user parts inside) Ä CAUTION: To prevent an unresponsive system and the display of a warning message, install only a Mini PCI device - HP nx9020 | Reference Guide - Page 11
main status lights on the front of the notebook. 1 Power mode ■ On-notebook is on (even if the display is off) ■ Blinking-notebook is in Standby ■ Off-notebook is off or in Hibernation 2 Hard drive activity On-notebook is accessing the hard drive 3 Battery status ■ Green-AC adapter is connected and - HP nx9020 | Reference Guide - Page 12
Getting Started with Your Notebook The keyboard status lights, located above the keyboard, indicate the states of the keyboard locks. 1 Caps Lock On: Caps Lock is active. 2 Num be on for the numeric keys. Otherwise, cursor control is active (as marked on an external keyboard). 1-6 Reference Guide - HP nx9020 | Reference Guide - Page 13
guide is located on the Web at http://www.hp.com/ergo and on the hard drive or on the Documentation CD that is included with the product. When you set up your notebook for the first time, you will connect the AC adapter, charge the battery pack, turn on the notebook, and run the Microsoft® Windows - HP nx9020 | Reference Guide - Page 14
the power cord into a wall outlet. The notebook battery starts charging. ✎ When unplugging the power cord, unplug it from the outlet before unplugging it from the AC adapter. While the battery pack is charging, you can continue with the section "Step 3: Connect a Phone Line." 1-8 Reference Guide - HP nx9020 | Reference Guide - Page 15
Getting Started with Your Notebook Step 3: Connect a Phone Line 1. Make sure the telephone line is an analog line, sometimes called a data jack. 3. Plug the other end of the telephone cord into the RJ-11 modem jack on the notebook. For details about using the modem, see "Using the Modem." Reference - HP nx9020 | Reference Guide - Page 16
button above the left side of the keyboard. The notebook boots up, and Windows starts automatically. ✎ If your notebook does not turn on when operating on battery power, the battery pack may be out of power. Plug in the AC adapter, then press the power button again. Leave the AC adapter plugged in - HP nx9020 | Reference Guide - Page 17
preinstalled on its hard drive. The first time you turn on your notebook, the Windows Setup program runs automatically and includes opportunities to customize your setup. 1. Follow the Setup program instructions on the screen. If the program prompts you to enter the Product ID code, locate the code - HP nx9020 | Reference Guide - Page 18
Your Notebook You can start and stop your notebook by using the power button. At other times, power considerations, types of active connections, and startup time may cause you to use alternative methods to start or stop your notebook. This chapter describes several methods. Reference Guide 2-1 - HP nx9020 | Reference Guide - Page 19
time out. and other components. ■ Maintains current session in RAM. ■ Restarts quickly. ■ Restores network connections. Hibernation-Power If the notebook is already on, ■ Saves maximum status light will briefly press the power power. turn off. button. -or- ■ Saves current session to disk - HP nx9020 | Reference Guide - Page 20
of a paper clip into the reset button on the bottom of the notebook, then press the power button to restart. To Change the Boot Device The notebook normally boots from its internal hard drive. You can also boot the notebook from a diskette drive, a CD-ROM drive, or an internal network interface card - HP nx9020 | Reference Guide - Page 21
(touch-sensitive pointing device). 3 TouchPad on-off button and indicator light. 4 Scroll pad. The scroll pad scrolls vertically to display the contents of the active window. 2-4 Reference Guide - HP nx9020 | Reference Guide - Page 22
The Tap to Click function of your TouchPad is enabled by default. To disable it, follow the instructions included here: 1. Select Start > Control Panel > Printers and Other Hardware > Mouse. The Mouse Properties 4. Select Apply > OK. The Tap to Click function is now disabled. Reference Guide 2-5 - HP nx9020 | Reference Guide - Page 23
numeric functions are active; otherwise, cursor control is active (as marked on an external keyboard). Initiates Hibernation. Toggles Scroll Lock on and off. Increases the audio volume and cancels the mute setting. Decreases the - HP nx9020 | Reference Guide - Page 24
Basic Operation To Use the One-Touch Buttons Your notebook includes 5 One-Touch buttons that can start any application or open a document or Web site by pressing a single label to appear onscreen when you press a One-Touch button, select that option on the Onscreen Display tab. Reference Guide 2-7 - HP nx9020 | Reference Guide - Page 25
Windows key+E Windows key+F1 Windows key+F Windows key+M Shift+Windows key+M Windows key+R Does this Runs Windows Explorer Runs Windows Help Runs Windows Find: Search Minimizes all displayed windows Returns all minimized windows to original size Runs the Windows Run dialog box 2-8 Reference Guide - HP nx9020 | Reference Guide - Page 26
does not have an ALT GR key, you can use the ALT key instead of the ALT GR key to get the same result. Reference Guide 2-9 - HP nx9020 | Reference Guide - Page 27
(label facing up). -orRemove the CD or DVD. 3. Slide the tray back into the module to close it. ✎ If your notebook loses power, you can manually open the drive to remove a CD. Insert a straightened paper clip into the recessed hole on the front of the drive to open it. 2-10 Reference Guide - HP nx9020 | Reference Guide - Page 28
notebook is equipped with a DVD or other DVD readable drive, it also includes DVD player software that lets you play DVD movies. » Select Start > All Programs > Multimedia > DVD Player > InterVideo WinDVD. ✎ For best performance while playing movies on battery power be hard-coded on the DVD drive and - HP nx9020 | Reference Guide - Page 29
notebook is equipped with a DVD+RW/R and CD-RW Combo Drive, you must install your DVD burning software from the CDs included with your notebook before CDs If your notebook is equipped with a DVD/CD-RW Combo Drive, it also includes CD software that lets you copy or create CDs. Follow the instructions - HP nx9020 | Reference Guide - Page 30
is available through Windows and through the BIOS Setup utility. See "Configuring Your Notebook" in the "Troubleshooting" chapter. For complete protection, set passwords in Windows as well as through BIOS Setup. To cancel password protection, set an empty password. Windows 1. Select Start > Control - HP nx9020 | Reference Guide - Page 31
Web. Your notebook comes equipped with Norton AntiVirus software. Because new viruses appear frequently, you will also want to keep the program virus definitions up to date. Norton AntiVirus updates are on the Web at http://www.symantec.com. You can also get detailed instructions from the program - HP nx9020 | Reference Guide - Page 32
BIOS user password (or administrator password if that is the only password set) is encoded on the hard drive. If you move the hard drive to another notebook, you cannot access the drive until you set the user (or administrator) password to match the drive password. After you match the drive password - HP nx9020 | Reference Guide - Page 33
files to diskettes, CDs, DVDs, and other media, or network drives. ■ Use a virus-scanning program (such as the Norton AntiVirus program included with your notebook) to check your files and operating system. ■ Check your disk using the Tools tab in the disk Properties window. 2-16 Reference Guide - HP nx9020 | Reference Guide - Page 34
battery pack operation) to the shortest comfortable interval. ■ Avoid using a screen saver or other software that prevents the notebook from power and have no external monitor attached, put the notebook in Standby mode when not in use. To Clean Your Notebook ■ You can clean the notebook Guide 2-17 - HP nx9020 | Reference Guide - Page 35
performance. Your notebook is designed to help you reduce power consumption and extend battery life. During idle periods, the notebook automatically enters power-saving modes after specified timeout periods. You can adjust these timeouts to suit your working habits. Reference Guide 3-1 - HP nx9020 | Reference Guide - Page 36
Battery Packs and Power Management How the Notebook Manages Power Automatically Your notebook enters Hibernation and Standby automatically, and turns off the hard drive and display based on values set in Windows. When this occurs The result is To resume No keyboard, pointing device, or other - HP nx9020 | Reference Guide - Page 37
Hibernate support in the Power Options settings or you will lose any unsaved data if the battery pack runs down completely. Using Battery Power To Check Battery Status From the battery status light » Check the battery status light on the notebook. From the Windows taskbar The Windows taskbar - HP nx9020 | Reference Guide - Page 38
. The Alarms and Advanced tabs provide additional power information options. On the battery pack 1. Remove the battery pack from the notebook. See the "Getting Started with Your Notebook" chapter in this guide. 2. Press the contact pad on the side of the battery pack. The number of lights that turn - HP nx9020 | Reference Guide - Page 39
the notebook model, power management settings, and level of use. To Get the Most from Your Battery Packs Follow these suggestions to make your battery power last as long as possible: ■ Plug in the AC adapter, especially when using a CD-ROM or DVD-ROM drive, or any external connections such as a PC - HP nx9020 | Reference Guide - Page 40
Battery Packs and Power Management ■ If your notebook has a wireless on-off button, turn off the wireless function when you are not using it. Press the wireless on-off button to turn off the light. ■ If you have a PC Card, such as a network card, remove it when you are not using it. Some PC Cards - HP nx9020 | Reference Guide - Page 41
with the notebook, to contact HP and request information about battery pack disposal. For more information about battery pack precautions and disposal and the complete text of governmental agency notices, refer to the Regulatory and Safety Notices guide on the Documentation CD. Reference Guide 3-7 - HP nx9020 | Reference Guide - Page 42
that support V.90 or V.92. (V.92 enables modem on-hold technology that allows an Internet session to be interrupted to answer a phone call, then resumes the Internet session after the call is complete.) The maximum speed for faxing is 14.4 Kbps, even though the modem is capable of downloading at - HP nx9020 | Reference Guide - Page 43
result in excess electrical voltage and could cause a malfunction in the internal modem. Check your telephone line type prior to connecting your phone line. 4-2 Reference Guide - HP nx9020 | Reference Guide - Page 44
blackout period after a modem repeatedly fails to connect to a service provider. The number of failed attempts and the period you black list." ■ When using a modem, an external surge protector can prevent notebook damage by lightning or other electrical surges. Connect any approved surge protector to - HP nx9020 | Reference Guide - Page 45
. AT commands are special strings of characters sent to the modem to set up specific conditions. Those command strings normally start with "AT." For a list of AT commands for the built-in modem, see the Documentation CD. Open Phone and Modem Options in Control Panel. On the Modems tab, select - HP nx9020 | Reference Guide - Page 46
connect to a LAN: 1. Check that the existing LAN supports Ethernet 10Base-T (10 Mbps) or 100Base TX (100 Mbps) connections. 2. Plug the LAN cable (not supplied) into the built-in LAN port. The cable must have an RJ-45 connector. 3. Windows automatically detects and sets up a LAN connection. To edit - HP nx9020 | Reference Guide - Page 47
network the entire time. Å WARNING: Exposure to Radio Frequency Radiation. The radiated output power of this device is below the FCC radio frequency exposure limits. Nevertheless, the device should inches) during normal operation, including when the notebook display is closed. 4-6 Reference Guide - HP nx9020 | Reference Guide - Page 48
instructions to enable WLAN communications, refer to the Go Wireless booklet included with your notebook turning on your notebook wireless networking. notebook has wireless 802.11 capabilities, the wireless indicator light on the front of the notebook front of the notebook to turn wireless notebook - HP nx9020 | Reference Guide - Page 49
that reside on other network notebooks. 2. To turn off the wireless 802.11 communication without turning off the notebook, press the wireless on -off button. -orRight-click the wireless network connection icon in the taskbar, then select Disable. Putting the notebook - HP nx9020 | Reference Guide - Page 50
Connecting External Devices To Insert or Remove a PC Card The notebook PC Card slot supports standard Type II and Type III PC Cards (PCMCIA and CardBus). ✎ The location and number of the PC Card slots vary by model series. Inserting a PC Card 1. Hold the PC Card label side up and its connectors - HP nx9020 | Reference Guide - Page 51
in the taskbar, or shut down the notebook. Otherwise, you could lose data. 1. Select the Eject Hardware or Safely Remove Hardware icon in the taskbar, select the card you want to remove, then remove the card. This protects your data and helps avoid unexpected problems. If needed, you can restart the - HP nx9020 | Reference Guide - Page 52
of these jacks may damage the notebook. » Attach the audio cable to the corresponding audio port on the notebook. Match your notebook to one of the following illustrations and locate the audio ports on your notebook. 1 External microphone connector (pink) 2 Audio out (headphones) connector (green - HP nx9020 | Reference Guide - Page 53
S-Video in jack on your television. ✎ Although your notebook may have a 7-pin S-Video out jack, the notebook accepts either a 7-pin or 4-pin cable connection. . ✎ If the S-Video cable is not plugged into your notebook and TV, the red button will not be displayed. 4. Select Apply to accept the - HP nx9020 | Reference Guide - Page 54
your keyboard to switch the display to the TV-Out mode. If a TV is not connected to the notebook, your default media application will launch. Adjusting Monitor Resolution and Other Settings 1. Select Start > Control Panel Monitor tab. Set the refresh rate on the Monitor tab. Reference Guide 5-5 - HP nx9020 | Reference Guide - Page 55
your desktop by connecting an external monitor to your notebook. 1. Select Start > Control Panel > Appearance using the Extended Desktop requires video memory for each display. For this reason playing DVDs and running 3D graphics require extra video memory, so you may have to adjust display settings. - HP nx9020 | Reference Guide - Page 56
such as audio and video equipment, disk drives, printers, and other notebooks. Attach the device cable to the 1394 port. Windows automatically recognizes the requires power. ✎ If you have problems making this connection, go to the device manufacturer Web site for the latest version of the driver for - HP nx9020 | Reference Guide - Page 57
, briefly press the power button. Printing to an Infrared Printer Install your printer and assign it to the notebook infrared port. You can notebook infrared port to transfer files by using Wireless Link. See the Windows online Help for instructions on using Wireless Link. 5-8 Reference Guide - HP nx9020 | Reference Guide - Page 58
the RAM module only by its edges. Before installing the memory module, discharge static electricity by touching the metal shielding around the connectors on the back of the notebook. 1. Select Start > Turn Off Computer > Turn Off. 2. Unplug the AC adapter, if present, then remove the battery pack - HP nx9020 | Reference Guide - Page 59
the RAM module only by its edges. Before installing the memory module, discharge static electricity by touching the metal shielding around the connectors on the back of the notebook. 1. Select Start > Turn Off Computer > Turn Off. 2. Unplug the AC adapter, if present, then remove the battery pack - HP nx9020 | Reference Guide - Page 60
Add-On Devices 4. Release the 2 latches at the sides of the RAM board, so the free edge of the board pops up. Match your notebook to the following illustration. 5. Pull the board out of the connector. 6. Replace the cover. 7. Insert the battery pack. Reference Guide 5-11 - HP nx9020 | Reference Guide - Page 61
if connected. 2. Remove the battery pack. 3. Turn the unit bottom side up. 4. Use a pointed tool to remove the plugs from the 2 or 3 screw holes, then remove the screws. The number of screws varies by model. Match your notebook to the following illustration. 5. Gently pull the hard drive out of the - HP nx9020 | Reference Guide - Page 62
Add-On Devices To Replace the Hard Drive Holder If you are installing a new hard drive that does not have a holder, you can remove the holder parts from the hard drive you are removing. You will need a small Phillips screwdriver for this procedure. 1. Remove the 4 screws from the sides of the holder - HP nx9020 | Reference Guide - Page 63
a new hard drive, you also need to prepare it to be able to work with your notebook. If you want to restore the Windows software and operating system that were originally installed on your notebook, follow the system recovery procedures described in the "Troubleshooting" chapter of this guide. 5-14 - HP nx9020 | Reference Guide - Page 64
are some other sources of information for troubleshooting: ■ Use the Windows troubleshooters. Select Start > Help and Support. ■ Select the question mark One-Touch key located at the top of the keyboard. ■ See the Microsoft Windows manual shipped with the notebook. ■ Refer to the Worldwide Telephone - HP nx9020 | Reference Guide - Page 65
Troubleshooting Audio Problems If No Sound is Audible ■ If your model has a volume control, press the + (plus) button to increase the volume. ■ Select the speaker icon on the taskbar (if present). Clear the Mute all check box if selected. If your model has an audio mute button, press it so the - HP nx9020 | Reference Guide - Page 66
Troubleshooting CD-ROM and DVD Problems If You Cannot Boot from a CD or DVD ■ Make sure the CD or DVD is bootable. ■ Make sure the CD-ROM/DVD drive is selected as the boot device. See the "Basic Operation" chapter in this guide to change the boot sequence. ■ Restart the notebook. Select Start > Turn - HP nx9020 | Reference Guide - Page 67
Troubleshooting ■ Restart the system: remove the disc from the drive, and select Start > Turn Off Computer > Restart. ■ If you created the CD on a DVD/CD-RW combo-type drive, try using a different media brand. Read and write quality may vary for media. If a DVD Movie Does Not Fill the Screen Each - HP nx9020 | Reference Guide - Page 68
plugged into a power source and into the back of the notebook. ■ Remove and reinsert the hard drive. If the Hard Disk Makes a Buzzing or Whining Noise ■ See whether the noise is coming from elsewhere, such as from the fan or a PC Card drive. ■ Back up the drive immediately. Reference Guide 6-5 - HP nx9020 | Reference Guide - Page 69
tab. ■ Run the virus-scanning program. ■ If necessary, you can format the hard disk and reinstall the original factory software using the system recovery features described in the "Troubleshooting" chapter of this guide. Heat Problems Your notebook normally gets warm during routine operation. If the - HP nx9020 | Reference Guide - Page 70
Troubleshooting infrared port. Keyboard and Pointing Device Problems ✎ Use these suggestions for built- light. ■ Do not touch the TouchPad while the notebook is rebooting or resuming from Standby mode. If this BIOS Setup utility. See "Configuring Your Notebook" in this chapter. ■ Restart the notebook - HP nx9020 | Reference Guide - Page 71
TX operation. Maximum cable length is 330 feet (100 meters). ■ Select Start > Help and Support > and use the Networking troubleshooter. ■ Open Network Neighborhood or My Network Places Select Start > Search > Notebooks or People to look for a notebook. If You Cannot Log In to Netware Servers If a - HP nx9020 | Reference Guide - Page 72
You Are Out of Memory ■ Make sure drive C is not running low on free space. ■ If you are having memory problems while running MS-DOS programs, use the MS-DOS or Application and Software troubleshooter in Windows Help. Select Start > Help and Support. ■ The full amount of RAM in your notebook is not - HP nx9020 | Reference Guide - Page 73
telephone company about fixing this type of problem. ■ If you are dialing internationally, line noise is often a problem that is difficult or impossible to eliminate. ■ If you have call-waiting, disable it. Your telephone company can provide instructions. Call-waiting can cause symptoms similar to - HP nx9020 | Reference Guide - Page 74
Troubleshooting If you have call-waiting, disable it. Your telephone company can provide instructions. If the Modem Dials, But Does Not Connect ■ Make sure you machine or modem. ■ The modem at the other end may have a problem. Try dialing to a different modem. If the Modem Is Not Detected Guide 6-11 - HP nx9020 | Reference Guide - Page 75
Troubleshooting If the Modem Dials, But You Cannot Hear It ■ If your model has an audio mute light, make sure it is turned off. If it is on, press the audio sure you have selected the fax printer. ■ Try turning off power management features temporarily. If Excessive Line Current Is Detected Make sure - HP nx9020 | Reference Guide - Page 76
(PCMCIA) Problems If the Notebook Does Not Recognize a PC Card ■ Remove and reinsert the PC Card. ■ Restart the notebook. Select Start > Turn Off Computer > Restart. ■ Try the card in another notebook to see whether the card functions properly. ■ Zoomed Video is not supported. ■ If the card requires - HP nx9020 | Reference Guide - Page 77
Troubleshooting If a PC Card Modem Is hard drive light on the front of the notebook) while the notebook appears to be paused or running slowly, Windows is likely spending excess time writing to its swap file on the notebook hard disk. If this occurs frequently, consider installing additional memory - HP nx9020 | Reference Guide - Page 78
work, shut down Windows immediately, and insert a charged battery pack or plug in the AC adapter. If the Battery Pack Does Not Charge ■ Make sure the AC adapter is fully plugged into the power source and the notebook, and that the battery charging light on the notebook is on. Reference Guide 6-15 - HP nx9020 | Reference Guide - Page 79
Troubleshooting ■ If you are using a power strip, remove the AC adapter from the power strip and plug it directly into a wall outlet. ■ Make sure the battery pack is fully installed and locked in place. ■ Make sure you are using only the AC adapter included with your notebook (or other approved - HP nx9020 | Reference Guide - Page 80
on your current task and assumes that you will continue using power at the same rate until the battery pack runs out. So, if you check the Time Remaining while the notebook is performing a task requiring a good deal of power (such as reading from a CD or DVD), the value will probably show less time - HP nx9020 | Reference Guide - Page 81
printing problems by using the Print troubleshooter in Windows Help. Select Start > Help and Support. a printer, try selecting a compatible printer driver for a 300-dpi printer. If an squarely as possible. (The notebook infrared port is located on the front of the notebook.) The ports should be no - HP nx9020 | Reference Guide - Page 82
Troubleshooting Serial, Parallel and USB Problems If a Serial Mouse Does Not Work ■ Make sure you followed the manufacturer's installation instructions completely and have installed the mouse properly. If not, repeat the procedure. ■ Make sure the port connection is secure. ■ Restart the notebook. - HP nx9020 | Reference Guide - Page 83
still does not respond, remove the battery pack and AC adapter, remove any PC Cards, and undock the notebook if docked. Then plug in the AC adapter again, and reset the notebook using the reset button. If the Notebook Will Not Boot from Battery Power ■ Make sure the battery pack is properly inserted - HP nx9020 | Reference Guide - Page 84
Troubleshooting If the Notebook Will Not Boot from the Diskette Drive ■ Make sure the diskette drive is selected as the boot device. See the "Basic Operation" chapter in this guide for directions. ■ If you are using a USB diskette drive, use the BIOS Setup utility to make sure Legacy USB Support is - HP nx9020 | Reference Guide - Page 85
to Ad Hoc mode, you may first have to release and renew the Internet IP address. ■ See "Local Area Network (LAN) Problems" in this chapter. If You Have Trouble Connecting to Another Notebook in the Network Neighborhood or My Network Places ■ Wait a few minutes, then press F5 to refresh the list of - HP nx9020 | Reference Guide - Page 86
(for an Ad Hoc connection). You could be too far away for high-speed communication. Configuring Your Notebook The BIOS Setup utility helps you configure your notebook operation. To Run the BIOS Setup Utility The BIOS (basic input and output system) Setup utility enables you to make changes to the - HP nx9020 | Reference Guide - Page 87
format (except English, which uses mm/dd/yy format). Sets the language for BIOS Setup. Sets the hard drive type and various parameters. Sets the video memory size allocated from total installed memory (RAM). Shows the extended memory size. Displays the serial number as shown on the back of the unit - HP nx9020 | Reference Guide - Page 88
devices when an external pointing device is connected. Enables BIOS support for USB mouse, keyboard, and diskette disk drive during startup. Lets the notebook be turned on via the LAN port. If this option is enabled, the notebook uses increased power while it is shut down. Default Auto Auto Enabled - HP nx9020 | Reference Guide - Page 89
notebook boots. Requires the administrator password for changes. Only if the Boot password option is enabled, encodes the current user password (or administrator password if that is the only password set) on the hard drive. Default Clear Clear Enter Enter Disabled Disabled 6-26 Reference Guide - HP nx9020 | Reference Guide - Page 90
Troubleshooting Boot Menu Setting Hard Drive +Removable Devices CD-ROM Drive Built-in LAN Description Shows the order of boot devices. Move the entries to change the order. If the notebook has more than 1 device in a + category, you can select the one scanned. Built-in LAN provides diskless boot - HP nx9020 | Reference Guide - Page 91
Troubleshooting Updating Software and Drivers from the Web Software and driver updates for your notebook are available for download. For more information, visit the Web site at http://www.hp.com/support. Using System Recovery Features The notebook system recovery process provides several options for - HP nx9020 | Reference Guide - Page 92
point: 1. Select Start > Help & Support. Select the task Use Tools to view your computer information and diagnose problems. Select System Restore. A System Restore window opens. 2. Follow the on-screen directions for setting a restore point. To restore the notebook to a previous date and time when - HP nx9020 | Reference Guide - Page 93
preinstalled operating systems: ■ Microsoft Windows XP Home or Pro (depending on configuration) ■ Appropriate service pack To repair the operating system: 1. Connect the notebook to external power and turn on the notebook. 2. Immediately insert the OS CD into the notebook. 3. Press and hold the - HP nx9020 | Reference Guide - Page 94
your operating system. Visit Help and Support to learn more about backing up your files. To reinstall the operating system: 1. Connect the notebook to external power and turn on the notebook. 2. Immediately insert the OS CD into the notebook. 3. Press and hold the power button for 5 seconds to turn - HP nx9020 | Reference Guide - Page 95
in Windows after the process is complete. ✎ When prompted for the product key, refer to the Microsoft Certificate of Authenticity located on the bottom of the notebook. Reinstalling Drivers After the OS installation process is complete, you must reinstall drivers. Use the Driver Recovery CD with - HP nx9020 | Reference Guide - Page 96
saving power automatically 3-2 saving power manually 3-3 status lights 1-5 troubleshooting 6-15 battery power check status 3-3 low-battery warning 3-4 battery status lights 3-3 BIOS Setup Utility 6-23 blackout periods, modem 4-3 bottom panel components 1-4 brightness, adjusting 2-6 Reference Guide - HP nx9020 | Reference Guide - Page 97
TouchPad) 1-2 power 1-2, 1-10 reset 1-4 TV Now! One-Touch 5-5 wireless on-off 1-2 C cable lock slot 1-3 CardBus slot location 1-3 CD-ROM drive copying/creating CDs 2-12 inserting CD 2-10 location 1-2 removing CD 2-10 troubleshooting 6-3 changing the boot device 2-3 cleaning the notebook 2-17 Click - HP nx9020 | Reference Guide - Page 98
port 5-8 inserting battery pack 1-7 CD 2-10 DVD 2-10 PC Card 5-1 RAM (memory) 5-9 K keyboard status lights 1-2, 1-6 troubleshooting 6-7 keys ALT GR 2-9 Applications 2-8 Fn (Function) 2-6 Windows 2-8 L LAN connection 4-5 troubleshooting 6-8 left panel components 1-3 locking the hard drive 2-15 low - HP nx9020 | Reference Guide - Page 99
2-16 hard drive 2-15 R RAM cover 1-4 installing 5-9 removing 5-10 troubleshooting 6-9 recharging the battery pack 3-5 reinstalling operating system 6-31 software 6-32 reinstalling software 6-28 removing CD 2-10 DVD 2-10 PC Cards 5-2 RAM (memory) 5-10 repairing the operating system 6-30 reset button - HP nx9020 | Reference Guide - Page 100
the hard drive 2-15 locking your notebook 2-13 protecting data 2-16 setting up a password 2-13 virus-protection software 2-14 serial port (COM1) location 1-3 troubleshooting 6-19 setting up the notebook connect phone line 1-9 connect power 1-8 install battery pack 1-7 power on 1-10 set up Windows - HP nx9020 | Reference Guide - Page 101
Index RAM (memory) 6-9 serial 6-19 startup 6-20 USB 6-20 wireless 6-21 turning off notebook 2-2 wireless network connection 4-8 turning on notebook 1-10, 2-2 wireless network connection 4-7 TV Now! One-Touch button 5-5 U updating software 6-28 USB ports location 1-3 troubleshooting 6-20 using BIOS
-
 1
1 -
 2
2 -
 3
3 -
 4
4 -
 5
5 -
 6
6 -
 7
7 -
8
-
9
-
10
-
11
-
12
-
13
-
14
-
15
-
16
-
17
-
18
-
19
-
20
-
21
-
22
-
23
-
24
-
25
-
26
-
27
-
28
-
29
-
30
-
31
-
32
-
33
-
34
-
35
-
36
-
37
-
38
-
39
-
40
-
41
-
42
-
43
-
44
-
45
-
46
-
47
-
48
-
49
-
50
-
51
-
52
-
53
-
54
-
55
-
56
-
57
-
58
-
59
-
60
-
61
-
62
-
63
-
64
-
65
-
66
-
67
-
68
-
69
-
70
-
71
-
72
-
73
-
74
-
75
-
76
-
77
-
78
-
79
-
80
-
81
-
82
-
83
-
84
-
85
-
86
-
87
-
88
-
89
-
90
-
91
-
92
-
93
-
94
-
95
-
96
-
97
-
98
-
99
-
100
-
101
 |
 |

Reference Guide
HP Notebook Series
Document Part Number: 370697-001
June 2004
This guide explains how to set up, operate, maintain, and
troubleshoot your notebook. It also provides information on
battery pack and power management, external device
connections, and modem and network connections. The last
chapter provides additional reference material on modem
commands, safety, and regulatory information.