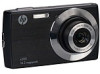
HP s300 HP s300 Digital Camera - User Manual
HP s300 Manual
 |
View all HP s300 manuals
Add to My Manuals
Save this manual to your list of manuals |
HP s300 manual content summary:
- HP s300 | HP s300 Digital Camera - User Manual - Page 1
s300 Digital Camera User Manual - HP s300 | HP s300 Digital Camera - User Manual - Page 2
- HP s300 | HP s300 Digital Camera - User Manual - Page 3
1 About this Manual 1 Safety and Handling Precautions 2 Battery Information 2 Important Notes and Information 2 Photography Terms and Definitions 3 Specifications 5 Package Contents 6 Getting Started 7 Attaching the Camera Strap 7 Inserting the Battery 7 Charging the Battery by USB - HP s300 | HP s300 Digital Camera - User Manual - Page 4
TV Out 67 Setting LCD Brightness 68 Setting Memory Kit 68 Reset All 69 Making Connections 70 Connecting the Camera to a PC 70 Connecting the Camera to a Printer 72 Setting the Print Mode Menu 72 Appendix 74 About Folder and File Names 74 Troubleshooting 75 Product Support 76 II - HP s300 | HP s300 Digital Camera - User Manual - Page 5
your new digital camera. All information presented is as accurate as possible but is subject to change without notice. For the latest reversion, please visit www.hp.com/support. Copyright This manual contains proprietary information protected by copyright. All rights are reserved. No part of this - HP s300 | HP s300 Digital Camera - User Manual - Page 6
of time. • When inserting the battery in this camera, ensure that they are oriented correctly. Please see Inserting the Battery section of this manual for additional details. Inserting the battery incorrectly may cause damage to the camera and battery. • Low battery power level may cause the lens - HP s300 | HP s300 Digital Camera - User Manual - Page 7
. Dynamic range in photography describes the ratio between the maximum and minimum measurable light intensities (white and black, respectively). A compressed file format for digital cameras in which the images are compressed using the baseline JPEG standard, described in ISO 12234-2, and metadata - HP s300 | HP s300 Digital Camera - User Manual - Page 8
StorageID USB White Balance Definitions A device-specific four byte unsigned integer (UINT32) that of a StorageID represents the LogicalStorageID. Universal serial bus, a digital interface for connecting up to 64 devices in a tiered-star topology -- Electronic still-picture cameras -- Terminology 4 - HP s300 | HP s300 Digital Camera - User Manual - Page 9
800, 1600, 3200 (3M, 16:9 , VGA), 6400 (3M, 16:9 , VGA) AVI (Motion JPEG) 1280 x 720p (16:9)_Only SDHC Class 6 memory cards supported, 640 x 480, 320 x 240, 640 x 480 (Web) SD/SDHC (Up to 32GB) NP45 Li-ion rechargeable battery 3.9 x 2.0 x 0.7 inch / 98 x 53 x 19 (mm) 0.22 lb / 100g (without - HP s300 | HP s300 Digital Camera - User Manual - Page 10
Package Contents Please check the contents of your camera package. It should contain: Digital camera Li-ion Battery x 1 USB Adapter USB cable CDROM disc with User Manual and Software installation Quick Start guide Warranty card Wrist strap 6 - HP s300 | HP s300 Digital Camera - User Manual - Page 11
recommended to attach and use the provided camera strap. Inserting the Battery Follow these instructions to insert the battery into the battery/memory card compartment. Please read "Battery Information" on page 2 before inserting/removing battery. 1. If the battery is already installed, make sure to - HP s300 | HP s300 Digital Camera - User Manual - Page 12
/memory card compartment. To remove the SD/SDHC card 1. Make sure to power off the camera before proceeding. Removing the memory card while powered on may damage the card and camera. 2. Open the battery/memory card compartment. 3. Gently push the card until it clicks and pushes out of position - HP s300 | HP s300 Digital Camera - User Manual - Page 13
card inserted in the memory card slot, all images, videos and audio clips recorded are automatically stored in the internal memory. External storage This camera supports SD cards of up to 4GB, and SDHC cards with a maximum capacity of 32GB. It is strongly recommended that Class 4 or above memory - HP s300 | HP s300 Digital Camera - User Manual - Page 14
Camera Views 1 2 5 Front View 1. Flash 2. Self-timer LED / AF Assist Lamp 3. Lens 3 4. Microphone 4 Back View 5. LCD screen 6 6. Zoom toggle 7 7. Menu button 8 8. Function/Delete button 9. LED indicator 9 - HP s300 | HP s300 Digital Camera - User Manual - Page 15
14 18 Bottom View 15 16 17 14. Battery/Memory card compartment 15. USB/TV Out 16. Tripod screw hole 17. Speaker Left/Right View 18. Strap Ring 11 - HP s300 | HP s300 Digital Camera - User Manual - Page 16
Camera Buttons Button Power Description Press the Power button to turn the power on/off. Shutter Zoom Menu Function/ Delete Press to capture an image or - HP s300 | HP s300 Digital Camera - User Manual - Page 17
Power On and Off Press the Power button to power on and off the camera. • If the mode selector switch is set to Photo or Video mode, startup image displays briefly and the startup sound plays if enabled. The camera lens extends and the camera is ready for use. • If the mode selector switch is set - HP s300 | HP s300 Digital Camera - User Manual - Page 18
settings. 3. If necessary, press Menu button to close the menu. At this point, the camera settings are set to the default automatic mode and is ready to take photos and videos. • If the camera is without battery power for more than 48 hours, the initial settings may reset and require another - HP s300 | HP s300 Digital Camera - User Manual - Page 19
important information regarding camera settings as well . Indicates the remaining shots available. Indicates approximate battery level. Please see page 7 for additional details Display the darkest and brightest values, corresponding to black and white respectively. Displays ISO settings. Please see - HP s300 | HP s300 Digital Camera - User Manual - Page 20
balance 23 Metering 24 Sharpness 25 Quality 26 Resolution 27 AF lamp Description Displays shutter speed settings. Displays aperture settings. Indicates that the camera is moving too much that may result in image blur. Use of a tripod or steady hand may be required. Indicates macro is - HP s300 | HP s300 Digital Camera - User Manual - Page 21
Displays zoom. Indicates the remaining time of video available. Indicates battery level. Indicates current storage media in use. Use to frame Displays movie resolution settings. Indicates the buttons to press on the camera to apply the functions. Displays recorded time. Indicates recording status. - HP s300 | HP s300 Digital Camera - User Manual - Page 22
the file number over the total number of files in the internal memory or SD/SDHC memory card. Indicates approximate battery level. Indicates current storage memory. Options are internal camera memory or SD/SDHC memory card. Displays the capture details of the photo. Indicates the file is marked for - HP s300 | HP s300 Digital Camera - User Manual - Page 23
. Indicates the current file number and total files stored in the internal memory or SD/SDHC memory card. Indicates approximate battery level. Indicates current storage memory. Options are internal camera memory or SD/ SDHC memory card. Displays the date and time of the video clip at the time is was - HP s300 | HP s300 Digital Camera - User Manual - Page 24
file number and total files stored in the internal memory or SD/SDHC memory card. Indicates the approximate battery level. Indicates current storage memory. Options are internal camera memory or SD/SDHC memory card. Displays recording information at the time the audio clip was recorded. Indicates - HP s300 | HP s300 Digital Camera - User Manual - Page 25
• The On Screen Display (OSD) information may vary depending on the record mode type. • Use the Gridlines to properly set image for capture. Typically, these guide lines are used to help vertical and horizontal alignment of the photo. In Playback mode, the LCD display can be changed into any of the - HP s300 | HP s300 Digital Camera - User Manual - Page 26
pressing the Shutter button down to the halfway position will start the automatic focus and adjustments to the exposure level. When the camera has successfully completed this automatic routine, the focus bracket will turn green. If the automatic focus and exposure routine is not successful - HP s300 | HP s300 Digital Camera - User Manual - Page 27
lower the video quality settings (See page 48 for details). 1. Power on the camera by pressing the Power button . 2. Slide the Mode switch to Video mode [ 48 for details). • The camera will automatically stop recording when the memory capacity is full. • Digital zoom is not available while recording - HP s300 | HP s300 Digital Camera - User Manual - Page 28
pressing the T side then press again to now initiate the Digital Zoom feature . 4. Pressing the W side will zoom out until and return the camera to optical zoom. • Digital zoom is not available for video recording. • Slight camera movement in digital zoom will make it more difficult to focus on - HP s300 | HP s300 Digital Camera - User Manual - Page 29
camera is set to automatic flash mode which means that it will determine when to use this feature or not. However, is some situations, it may be useful to manually . If Slow Sync flash is not used, the background may appear black or underexposed. Forced off. The flash is turned off and will - HP s300 | HP s300 Digital Camera - User Manual - Page 30
the Macro button repeatedly until the desired focus mode icon is displayed on the lower left corner of the LCD screen. Macro/left button This camera supports the following four focus modes: Normal. With normal focus, the focus range starts from 0.4m (about 16 inches) to near infinity. When the - HP s300 | HP s300 Digital Camera - User Manual - Page 31
, AWB, Metering, and Color mode. Press the FUNC button of your camera to launch the Function Menu. Press the FUNC button again to close the menu. • The Menu bar displays the current status of the camera settings. Only the available functions for the settings are shown as icon on - HP s300 | HP s300 Digital Camera - User Manual - Page 32
The table below shows the Photo Size values for still images: Icon Pixel Size Printing Size Suggestion Icon 4000 x 3000 A2 Size Pixel Size 2048 x 1536 3648 x 2432 A2 Size 1920 x 1080 3264 x 2448 A3 Size 640 x 480 2592 x 1944 A4 Size Printing Size Suggestion 4" x 6" HDTV E-mail - HP s300 | HP s300 Digital Camera - User Manual - Page 33
conditions. Fluorescent 2 Ideally used for indoor photos with bluish fluorescent lighting conditions. Manual Used when light source cannot be specified. Press the Shutter button for the camera to automatically adjust the appropriate white balance setting according to the environment. ISO This - HP s300 | HP s300 Digital Camera - User Manual - Page 34
records normally. Vivid The camera captures with more contrast and saturation emphasizing the bold colors. Sepia Used to add the effect of an "aged" photo or video. B&W Used to remove color and capture in black and white. Vivid Red Images are tinted red. Ideally used to record images like - HP s300 | HP s300 Digital Camera - User Manual - Page 35
is important to note that by selecting a particular scene mode (other that Auto) will take the camera out of it's normal automatic settings capabilities and therefore optimise various settings that match a specific scene. 4. Press the OK button to save and activate the selected scene mode. It is - HP s300 | HP s300 Digital Camera - User Manual - Page 36
will be selected by default. This is recommended for novice photographers. Program The camera automatically adjusts suitable shooting settings like shutter speed and aperture values. However, this mode allows for manual adjustments to EV, Auto White Balance, ISO (gain), Metering, and Color effects - HP s300 | HP s300 Digital Camera - User Manual - Page 37
flash pictures where the subject does not have a black/dark background. Ideally, this will produce photos that pictures of food in vivid colors. The Camera is set to macro mode focus and other background of the LCD live display. Use this as a guide to compose the final photo. Press the shutter again - HP s300 | HP s300 Digital Camera - User Manual - Page 38
speed to match the brightness. Shutter Priority This mode allows manual adjustment to shutter speed. The camera automatically selects the aperture value to match the brightness. Manual Exposure This mode allows manual adjustment to shutter speed and aperture value regardless the brightness - HP s300 | HP s300 Digital Camera - User Manual - Page 39
the Shutter button to focus the subject. The frame turns green to indicate focus is set. 5. Press the Shutter button to take the shot. The camera changed to Landscape mode automatically. Using Kids Mode Many people believe kids are on of the most difficult subject to photograph. They tend to be - HP s300 | HP s300 Digital Camera - User Manual - Page 40
skin mode is activated, it makes wrinkles and lines look less conspicuous, while preserving resolution in areas of the picture outside of the skin. The camera detects skin color area, such as the face and processes the image to make the skin appear smooth. 36 - HP s300 | HP s300 Digital Camera - User Manual - Page 41
Water Using Food Mode How to share your dining experiences and comments of interesting widgets on your blog by close-up images? Just get the camera and set the scene with food mode. This mode features on macro focus and auto flash designed for close-up photography. Using Foliage Mode A scenic - HP s300 | HP s300 Digital Camera - User Manual - Page 42
to save the composed image. 9. Or, press Menu button to go back last shot. 10. The camera saves the image to memory. 11. Use USB cable or memory card reader (Please refer to "Connecting the Camera to a PC" on page 70) to transfer the image to PC and upload it to website - HP s300 | HP s300 Digital Camera - User Manual - Page 43
Mode When facing the camera, especially kids, smiles are always short and hard to seize by manual shutter. Smile capture mode detects every smile all the time and performs Automatic Focus (AF) to capture an image without pressing Shutter button. Follow these instructions to capture a photo by - HP s300 | HP s300 Digital Camera - User Manual - Page 44
take the desired picture by using the semi-transparent screen image as a guide. 3. Move your position until photographer confirm your whole or half body in the frame and in the right place. 4. Press the Shutter button. Camera stores the image produced by this step only. Using Love Portrait Want - HP s300 | HP s300 Digital Camera - User Manual - Page 45
the Shutter button to capture the image. 2. A guidance bar appears after taking the first shot. Follow the direction displayed on LCD screen to pan the camera. Or, press the Menu button to restart shooting. 41 - HP s300 | HP s300 Digital Camera - User Manual - Page 46
OK button to stitch the two shots together. The camera will complete the stitch and display (if auto review is enabled) the final image on the LCD. This mode is designed for control the aperture value by user and let camera decide the shatter speed. The main impact that aperture had on images - HP s300 | HP s300 Digital Camera - User Manual - Page 47
the Shutter button to capture the image. Displays the shutter value Using Manual Exposure When the camera is in the manual exposure mode, you can change either aperture or shutter speed, or both. To activate Manual Exposure 1. Select from the Scene Mode submenu. 2. Press OK button to enter - HP s300 | HP s300 Digital Camera - User Manual - Page 48
To set the Drive Mode 1. From the Record menu, select Drive Mode. 2. Use the or keys to go through the selection. 3. Press the OK button to save and apply changes. The table below shows the available Drive mode settings. Icon Item Description Off Captures an image without time delay. 10 Sec - HP s300 | HP s300 Digital Camera - User Manual - Page 49
selection. 3. Press the OK button to save and apply changes. The table below shows the available AF area settings. Icon Item Description Wide The camera automatically selects focus area within the wide frame. Center The focus area is fixed on the center. Setting the AF Lamp The AF Lamp - HP s300 | HP s300 Digital Camera - User Manual - Page 50
The table below shows the available Sharpness settings: Icon Item Description High Sharpens the image. Normal Medium sharpness. Low Softens the image. Setting Saturation The Saturation function lets you adjust the color saturation in your photos. Use a higher saturation setting for rich - HP s300 | HP s300 Digital Camera - User Manual - Page 51
enlarges an image using the optical zoom first. When the zoom scale exceeds 4x, the camera uses digital zoom. To set Digital Zoom 1. From the Record menu, select Digital Zoom. 2. Use the or keys to go through the selection. 3. Press the OK button to save and apply changes. The table below shows - HP s300 | HP s300 Digital Camera - User Manual - Page 52
keys to go through the selection. 3. Press the OK button to save and apply changes. Setting Auto Review The Auto Review function lets you view the captured image right after shooting it. If Auto review is On, the camera will display the captured image for 1 second on the LCD screen. To set Auto - HP s300 | HP s300 Digital Camera - User Manual - Page 53
settings for easy upload to the Internet website. The Internet supports two file upload standards: • Single File Uploader. The maximum may would have potentially missed. Once this function is enabled, the camera starts recording movie automatically before pressing Shutter button. As soon as - HP s300 | HP s300 Digital Camera - User Manual - Page 54
on the LCD screen at the same time. Searching numerous of images is much easier then single view navigation. To set 9-images mode 1. Set the camera to Playback mode . 2. Press the side of the toggle once to enter 9-images mode. 3. Use the navigation controls to move through the items. 4. Press - HP s300 | HP s300 Digital Camera - User Manual - Page 55
To set calendar mode 1. Set the camera to Playback mode . 2. Press the side of the toggle twice to view thumbnails in calendar mode. 3. Use the navigation controls to move through the items. 4. - HP s300 | HP s300 Digital Camera - User Manual - Page 56
. 3. Press the OK button to play the video. 4. During playback, press and hold the or keys to fast forward or rewind the movie. The camera supports forward and rewind speed of up to 4x. 5. During playback, use the Zoom toggle to control volume. Press the side to increase volume/ Press the - HP s300 | HP s300 Digital Camera - User Manual - Page 57
Memo Voice memo is separately recorded and attached to a captured image. See "Voice Memo" on page 58 on how to record voice memo. 1. Set the camera to Playback mode . 2. Use the navigation controls to scroll through the saved images. An image file with voice memo has a voice memo icon located on - HP s300 | HP s300 Digital Camera - User Manual - Page 58
go back to the single navigation mode, select Cancel. Locked files cannot be deleted at any time. When you try to delete a locked file, the camera displays "File Locked" message on the LCD screen. Playback Menu The Playback menu allows you to edit images, record voice memo, and setup playback - HP s300 | HP s300 Digital Camera - User Manual - Page 59
3. Select Start, then press the OK button to start the slideshow. 4. During slideshow, press the OK button to pause slideshow. 5. Use the or keys to move through the options. Select whether to Continue or Exit the slideshow. 6. Press the OK button to apply selected option. To change slideshow - HP s300 | HP s300 Digital Camera - User Manual - Page 60
To delete attached voice memo: 1. Set the camera to Playback mode . 2. View images/videos/audio clips in Single navigation mode. 3. Use the or keys to scroll until the desired image with voice memo - HP s300 | HP s300 Digital Camera - User Manual - Page 61
Protect Set the data to read-only to prevent images from being erased by mistake. A protected file has a lock icon when viewed on Playback mode. To protect files: 1. From the Playback menu, select Protect. 2. The Protect submenu is displayed on the LCD screen. Available select settings: • Single. - HP s300 | HP s300 Digital Camera - User Manual - Page 62
. Red-eye correction can be applied to an image several times, but the quality may gradually deteriorate. To activate Red-eye Correction: 1. Set the camera to Playback mode . 2. Press the or keys to scroll and select an image. 3. Press the Menu button menu. 4. Select Red-eye Correction. 5. Select - HP s300 | HP s300 Digital Camera - User Manual - Page 63
different colors or tones for a more artistic effect. Edited photos in this function are saved as a new file. To activate Color Mode: 1. Set the camera to Playback mode . 2. Press the or keys to scroll and select an image to edit. 3. Press the Menu button to launch the Playback menu. 4. Select - HP s300 | HP s300 Digital Camera - User Manual - Page 64
available settings. Icon Item Description Normal No effect is added to the image. Sepia Image is saved with a sepia tone. B&W Image is saved in black and white. Negative Image appears to be the opposite of the original image. Mosaic Image is saved with mosaic tiles. Vivid Red Image is - HP s300 | HP s300 Digital Camera - User Manual - Page 65
function allows you to trim an image to another image size. This function is only available for still images. To trim an image: 1. Set the camera to Playback mode. 2. Use the or keys to scroll and select an image to trim. 3. Press the Menu button to launch the Playback menu. 4. Select - HP s300 | HP s300 Digital Camera - User Manual - Page 66
. Resize function is not available for photos with image size set to VGA. Startup Image Specify the startup image from the captured images for camera. 1. Press the Menu button menu. to launch the Playback 2. Select Startup Image. The menu selection appears. 3. Select options: • System. Use - HP s300 | HP s300 Digital Camera - User Manual - Page 67
for Digital Print Order Format, which allows you to embed printing information on your memory card. You can select the images to be printed and how many prints to make with the DPOF menu in the camera and insert the memory card to the card compatible printer. When the printer starts printing - HP s300 | HP s300 Digital Camera - User Manual - Page 68
captured by your camera without connecting the camera to a PC. Print images with a PictBridge compatible printer directly. To activate PictBridge: Connect your camera to a PictBridge compatible printer using the USB cable. See illustration below. If the printer does not support date & time imprint - HP s300 | HP s300 Digital Camera - User Manual - Page 69
you are in Record or Playback mode. The Setup menu allows to configure general camera settings. To go to Setup Menu: 1. Press Menu button Menu. to Sounds Use the Sound menu functions to control the sounds produced by the camera. 1. From the Setup menu, select Sounds. 2. Adjusts sound settings. - HP s300 | HP s300 Digital Camera - User Manual - Page 70
• Playing a slideshow/video/audio file • Using the USB connector Setting LCD Save Enable the LCD Save function to automatically decrease the LCD brightness to conserve battery power. When the camera is idle for 20 seconds, the LCD darkens. Press any button to resume to normal brightness. • The - HP s300 | HP s300 Digital Camera - User Manual - Page 71
sequence even if the folder is changed. • Reset. Starts from 0001 each time the folder is changed. To understand folder and file structure of your camera, see "About Folder and File Names" on page 74. Setting TV Out Use the TV Out function to adjust video output signal to accommodate different - HP s300 | HP s300 Digital Camera - User Manual - Page 72
the photos were saved in the internal memory when inserting memory card into the camera. You can use Copy to Card function in order to copy all photos from . • If there is a memory card inserted in the memory slot, the camera automatically saves all files to the memory card. • If there is no memory - HP s300 | HP s300 Digital Camera - User Manual - Page 73
Reset All Use this function to reset the camera to its factory settings. However, the following settings are exceptions and not affected by Reset. • Date and Time • Language • TV Out • Custom White Balance data 69 - HP s300 | HP s300 Digital Camera - User Manual - Page 74
Making Connections Connect your camera to: computer, or a printer. Connecting the Camera to a PC You can transfer images, videos and audio files to your PC. 1. Connect one end of the USB cable to an available USB port - HP s300 | HP s300 Digital Camera - User Manual - Page 75
6. Connection established after PC MODE appeared on the LCD screen. 7. Access the files in the camera by your PC. • The camera's internal memory and memory card would display as removable drives in PC. • After the connection, no image is displayed on the LCD screen. 71 - HP s300 | HP s300 Digital Camera - User Manual - Page 76
Menu". or key and press the OK Setting the Print Mode Menu Print Mode menu appears on the screen after the connection between a printer and your camera is established. Print Mode includes three major settings: • Print Select. An image can then be selected to print. • Print All. Prints all images - HP s300 | HP s300 Digital Camera - User Manual - Page 77
Press the OK button to enter printer settings. To set Print All and Print Index Repeat the same steps 2 to 4, then enter printer settings. To set Printer Settings 1. Use the or key to stop printing anytime. After the printer has printed all the photos that had been selected, disconnect the - HP s300 | HP s300 Digital Camera - User Manual - Page 78
Appendix About Folder and File Names Your camera automatically creates specific directory of folder in the internal memory cards to organize captured images, videos and audio files. File Naming File names begin with "HPIM" and followed by a 4-digit number that increases in sequence. File numbering - HP s300 | HP s300 Digital Camera - User Manual - Page 79
Troubleshooting Problem Camera does not turn on. Cause and/or Action The battery may be exhausted. Recharge the battery. Camera turns off automatically. Press any button except the Power button to power on the camera. LCD turns blank. Press any button except the Power button to turn on the LCD. - HP s300 | HP s300 Digital Camera - User Manual - Page 80
you have a technical support question or your HP Digital Camera require service within the warranty period, please contact the original point of purchase or an authorized HP reseller in your country. If service is not available at those locations, please contact an HP Branded Product warranty agent - HP s300 | HP s300 Digital Camera - User Manual - Page 81
Contact/phone Support: Country Language Europe Region (EMEA) België Nederlandsk/ Deutsch Deutschland Deutsch España Español France Français Ireland English Italia Italiano Nederland Nederlandsk Schweiz Deutsch/ Franç - HP s300 | HP s300 Digital Camera - User Manual - Page 82
- HP s300 | HP s300 Digital Camera - User Manual - Page 83
P/N: 7525C00269A
-
 1
1 -
 2
2 -
 3
3 -
 4
4 -
 5
5 -
 6
6 -
 7
7 -
8
-
9
-
10
-
11
-
12
-
13
-
14
-
15
-
16
-
17
-
18
-
19
-
20
-
21
-
22
-
23
-
24
-
25
-
26
-
27
-
28
-
29
-
30
-
31
-
32
-
33
-
34
-
35
-
36
-
37
-
38
-
39
-
40
-
41
-
42
-
43
-
44
-
45
-
46
-
47
-
48
-
49
-
50
-
51
-
52
-
53
-
54
-
55
-
56
-
57
-
58
-
59
-
60
-
61
-
62
-
63
-
64
-
65
-
66
-
67
-
68
-
69
-
70
-
71
-
72
-
73
-
74
-
75
-
76
-
77
-
78
-
79
-
80
-
81
-
82
-
83
 |
 |

s300
Digital Camera
User Manual