HP s3720y Upgrading and Servicing Guide - Page 15
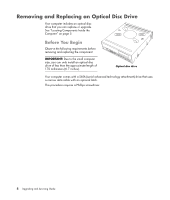
Replacing an Optical Disc Drive
 |
UPC - 884420938309
View all HP s3720y manuals
Add to My Manuals
Save this manual to your list of manuals |
Page 15 highlights
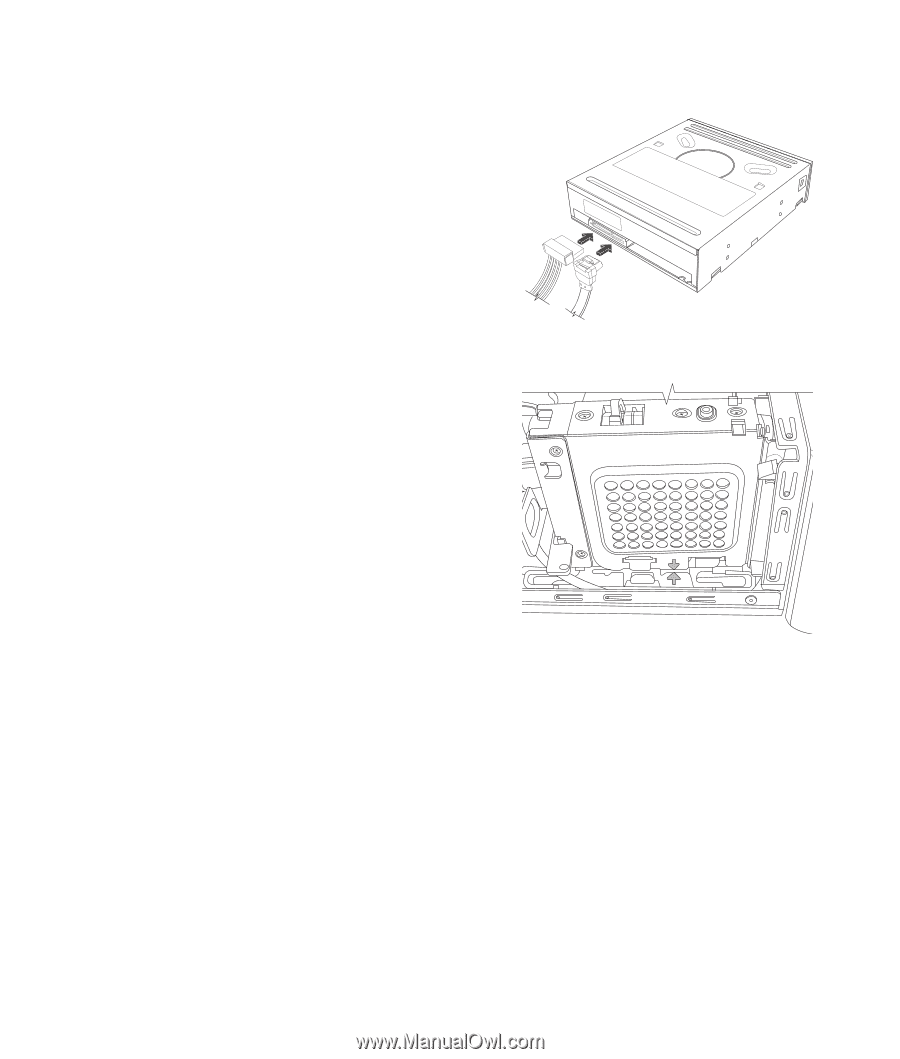
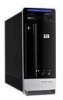
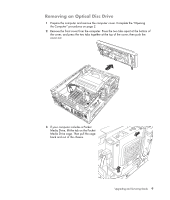
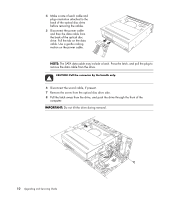
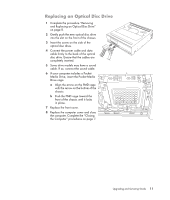
Replacing an Optical Disc Drive 1 Complete the procedure "Removing and Replacing an Optical Disc Drive" on page 8. 2 Gently push the new optical disc drive into the slot on the front of the chassis. 3 Insert the screw on the side of the optical disc drive. 4 Connect the power cable and data cable firmly to the back of the optical disc drive. Ensure that the cables are completely inserted. 5 Some drive models may have a sound cable. If so, connect the sound cable. 6 If your computer includes a Pocket Media Drive, insert the Pocket Media Drive cage: a Align the arrow on the PMD cage with the arrow on the bottom of the chassis. b Push the PMD cage toward the front of the chassis until it locks in place. 7 Replace the front cover. 8 Replace the computer cover and close the computer. Complete the "Closing the Computer" procedures on page 7. Upgrading and Servicing Guide 11
-
 1
1 -
2
-
3
-
4
-
5
-
6
-
7
-
8
-
9
-
 10
10 -
 11
11 -
 12
12 -
 13
13 -
 14
14 -
 15
15 -
 16
16 -
 17
17 -
 18
18 -
 19
19 -
 20
20 -
21
-
22
-
23
-
24
-
25
-
26
-
27
-
28
-
29
-
30
 |
 |