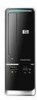
HP s5160f Getting Started
HP s5160f - Pavilion - Slimline Manual
 |
UPC - 884420975267
View all HP s5160f manuals
Add to My Manuals
Save this manual to your list of manuals |
HP s5160f manual content summary:
- HP s5160f | Getting Started - Page 1
快速入門 - HP s5160f | Getting Started - Page 2
HP HP HP HP HP Hewlett-Packard Company P.O. Box 4010 Cupertino, CA 95015-4010 USA Copyright © 2000-2008 Hewlett-Packard Development Company, L.P. Macrovision Macrovision Microsoft 和 Windows Vista 為 Microsoft Corporation Windows 標誌和 Windows Vista 是 Microsoft Corporation Wi-Fi CERTIFIED - HP s5160f | Getting Started - Page 3
目錄 1 1 4 7 8 8 15 16 18 18 20 21 22 Microsoft 23 24 25 26 27 27 CD/DVD 29 使用 LightScribe 30 31 HP Easy Backup ...32 32 33 35 35 35 35 36 使用 PC 36 使用 HP Total Care Advisor 37 37 目錄 iii - HP s5160f | Getting Started - Page 4
39 39 57 維護...60 63 67 索引 ...69 iv - HP s5160f | Getting Started - Page 5
安裝電腦 AC 1 2 HDMI (High-Definition Multimedia Interface 3 4 15 UPS 1 - HP s5160f | Getting Started - Page 6
15 USB 4 8 滑鼠 (PS/2 2 - HP s5160f | Getting Started - Page 7
PS/2 USB) 2.0 USB ETHERNET LAN RJ-45 LAN LAN NIC LED 數據機 (Line In RJ-11 3 - HP s5160f | Getting Started - Page 8
VGA/Monitor VGA/Monitor VGA VGA 轉 DVI DVI HDMI DVI VGA-DVI HDMI HDMI HDMI 轉 DVI DVI HDMI 42 HDMI VGA 轉 DVI 或 HDMI 轉 DVI VGA 轉 DVI HDMI-DVI HDMI 轉 DVI 4 - HP s5160f | Getting Started - Page 9
音訊接頭 Mic Center CD Rear Side 叭系統 (7.1 連接喇叭 35 5 - HP s5160f | Getting Started - Page 10
2.1 1 2 或 2.1 連接耳機 21 6 - HP s5160f | Getting Started - Page 11
NIC 10BaseT 100BaseT LAN 1 RJ-45) (A 2 B ACTIVITY LINK IEEE 802.11b、802.11g 或 802.11n ISP 19 Windows Vista Enter 鍵。 7 - HP s5160f | Getting Started - Page 12
ISP 電腦 USB A 1 A 2 或 S-video 或 8 - HP s5160f | Getting Started - Page 13
S-Video Composite Video S-Video 2 S-Video 輔助 S-video VCR Composite Video 2 VCR A/V In Audio 1 L A/V In Audio 1 R 9 - HP s5160f | Getting Started - Page 14
電視輸出 A/V In Audio 2 L A/V In Audio 2 R Analog Video S-video 電視輸入 ATSC CATV NTSC ATSC (Advanced Television System Committee CATV (Community Antenna Television NTSC (National Television System Committee 10 - HP s5160f | Getting Started - Page 15
B A C A B 分隔器 C D E 電視 F G IR H 電腦的 S-video J B F C IR G IR OUT 13 IR 11 - HP s5160f | Getting Started - Page 16
S-video F S-video S-video 轉 S-video H J IR G IR OUT 13 IR 12 - HP s5160f | Getting Started - Page 17
IR) 傳輸器 IR 1 2 IR OUT 接 頭 (3 1 2 3 IR OUT 1 2 IR 接收器 IR IR IR IN 接頭 (1)。將 IR 接收器 (2 3 IR 3 2 1 IR IN 13 - HP s5160f | Getting Started - Page 18
14 - HP s5160f | Getting Started - Page 19
1 2 3 4 Microsoftt® Windows Vistat®: 30 HP 或 Compaq 隱私。 5 Windows Vista 15 - HP s5160f | Getting Started - Page 20
關閉電腦 Windows Vista 鎖定 按一下 Windows Vista X 16 - HP s5160f | Getting Started - Page 21
休眠 按一下 Windows Vista 或 或 17 1 Windows Vista 2 3 4 17 - HP s5160f | Getting Started - Page 22
5 6 或 a b c d 1 Windows Vista 2 3 或 LAN DSL ISP 1 1 7 19 頁。 8 18 - HP s5160f | Getting Started - Page 23
2 ISP ISP ISP a Windows Vista b c d ISP ISP ISP ISP 3 ISP ISP 4 Microsoft Internet Explorer Internet Explorer: a Windows Vista b 按一下 [Internet Explorer]。 49 Windows Vista 1 Windows Vista 2 視窗。 3 802.11。 4 Windows Vista 5 6 19 - HP s5160f | Getting Started - Page 24
Wi-Fi Protected Access Personal (WPA-Personal) 和 Wired Equivalent Privacy (WEP WPA-Personal 或 WEP SSID Windows Vista 1 2 3 或 1 2 3 X 47 35 HDMI HDMI 42 HDMI 20 - HP s5160f | Getting Started - Page 25
Windows Vista Windows Vista Windows Vista 1 2 3 4 5 在 Windows Vista 1 2 3 4 5 6 7 21 - HP s5160f | Getting Started - Page 26
BIOS Windows Vista 來自 Microsoft 的 Windows Vista 使用密碼 Windows Vista Windows Vista Windows Vista Windows Vista Windows Vista Windows Vista Enter 35 22 - HP s5160f | Getting Started - Page 27
Windows Vista [開 Enter 第 35 Windows Vista Microsoft Microsoft Windows Vista Windows Vista Update Windows Vista Update Windows Vista Update 23 - HP s5160f | Getting Started - Page 28
Microsoft Windows Vista Windows Vista Windows Vista Windows Vista 24 - HP s5160f | Getting Started - Page 29
RAM Temporary Internet Files 1 Windows Vista 2 3 4 Microsoft 25 - HP s5160f | Getting Started - Page 30
連接 USB USB 接頭將 USB PDA CD 或 DVD Windows Microsoft Windows Vista Windows Windows USB Windows USB 1 Windows Vista 2 3 按一下 [Windows 4 遵循 [Windows Windows Vista Enter 35 26 - HP s5160f | Getting Started - Page 31
憶卡及 IBM Microdrive USB Mass Storage Device 27 - HP s5160f | Getting Started - Page 32
A A 1 A 35 CompactFlash 和 Microdrive CF Ultra/III SM 與 xD 媒體。 2 或 Windows Vista 3 28 - HP s5160f | Getting Started - Page 33
CD/DVD 磁碟機 A) 以退出 CD/DVD A 1 2 CD/DVD 托槽。 3 29 - HP s5160f | Getting Started - Page 34
LightScribe LightScribe LightScribe LightScribe 標誌 LightScribe LightScribe 使用 CyberLink LabelPrint 製作 LightScribe LightScribe 標籤: 1 2 3 按一下 Windows Vista CyberLink DVD Suite]。 4 CyberLink LabelPrint]。 5 步驟 1 LightScribe 標籤) 或 LightScribe 標籤) 6 7 步驟 2 a b 或 MP3 資訊。 30 - HP s5160f | Getting Started - Page 35
8 9 步驟 3 a b c 10 11 LightScribe 12 LightScribe LightScribe CyberLink LabelPrint Windows Media Center Windows Media Center Windows Media Center 8 公尺 (26 22.5 度 (共 45 31 - HP s5160f | Getting Started - Page 36
HP Easy Backup (僅限 HP Elite Series 型號) HP Easy Backup HP Easy Backup HP Easy Backup 按鈕 (A HP Easy Backup A 1 CD 或 DVD 放入 CD/DVD 2 按下 [HP Easy Backup 3 CD 和 DVD (僅限 HP Elite Series 型號) 1 2 3 4 32 - HP s5160f | Getting Started - Page 37
使用軟體 CD CD CD 和 DVD DVD/CD Windows Vista CyberLink DVD Suite muvee Reveal 您可以: magicSpot CyberLink DVD Suite CD,或從 WAV、MP3 或 WMA 的音樂 CD。這些 CD CD 或 DVD DVD VCD 和 DVD 33 - HP s5160f | Getting Started - Page 38
HP Total Care Advisor Microsoft Windows Movie Maker HP HP Windows Media wmv。 mp3 mp3、.asf、.wma wmv、 .asf、.avi 或 .mpg jpg 或 .gif avi 和 .wmv (Windows Media Video) 檔案。 34 - HP s5160f | Getting Started - Page 39
或 Windows Vista 1 http://www.hp.com/support。 2 3 4 1 2 3 Adobe Acrobat Reader 或 pdf 35 - HP s5160f | Getting Started - Page 40
1 Windows Vista 2 3 使用 PC [PC PC 1 Windows Vista 2 3 按一下 [PC 4 CPU 36 - HP s5160f | Getting Started - Page 41
使用 HP Total Care Advisor 軟體 HP Total Care Advisor HP Total Care Advisor HP Total Care Advisor: 1 Windows Vista 2 3 按一下 [HP Total Care Advisor]。 Windows Vista 或 http://www.hp.com/ergo Enter。 37 - HP s5160f | Getting Started - Page 42
38 - HP s5160f | Getting Started - Page 43
39 57 60 35 40 41 41 43 44 47 49 50 頁的 「CD 和 DVD 52 53 55 55 56 56 39 - HP s5160f | Getting Started - Page 44
徵兆 41 RAM 使用 [Windows 1 Ctrl-Alt-Delete 鍵。 2 3 1 Ctrl-Alt-Delete 鍵。 2 啟動]。 或 1 5 2 40 - HP s5160f | Getting Started - Page 45
電源 徵兆 按下 [Sleep Esc 到電腦。 41 - HP s5160f | Getting Started - Page 46
徵兆 連接 HDMI HDMI DVI HDMI HDMI 1 Microsoft 2 HDMI Realtek HDMI 輸出]。 3 4 HDMI HDMI Realtek HDMI 5。 5 Realtek HDMI Realtek Digital Output 6 7 勾選 [48.0 KHz Dolby Digital 48.0 KHz。 8 HDMI 調整 Windows Vista 1 2 3 42 - HP s5160f | Getting Started - Page 47
1 Alt 和 Tab 2 Ctrl 和 S (Ctrl+S 3 1 與步驟 2 變更。 4 Ctrl 和 Esc Windows 5 Enter 鍵。 6 43 - HP s5160f | Getting Started - Page 48
徵兆 http://www.hp.com/support Num Lock Num Lock Num Lock 徵兆 A 大約為 10 公尺 (32 30 公分 (12 20 44 - HP s5160f | Getting Started - Page 49
徵兆 B 30 公分 (12 1 USB USB 接頭。 2 LED 燈或是 [Connect LED Connect] 按鈕 (A Connect] 按鈕 (A) (也是 LED 燈) 5 到 10 A 45 - HP s5160f | Getting Started - Page 50
徵兆 3 B Connect] 按鈕 (C) 5 至 10 LED 燈 (A 60 C B 4 5 Connect] 按鈕 (A Connect] 按鈕 (A) 5 到 10 6 Connect] 按鈕 (D) 5 至 10 LED (A D 46 - HP s5160f | Getting Started - Page 51
HDMI 42 HDMI HDMI 或 1 按一下 Windows Vista 2 3 OSD Sleep Esc 鍵。 47 - HP s5160f | Getting Started - Page 52
徵兆 48 - HP s5160f | Getting Started - Page 53
徵兆 ISP NIC NIC LAN NIC NIC。 35 1 按一下 Windows Vista 2 3 4 ISP ISP 49 - HP s5160f | Getting Started - Page 54
CD 和 DVD 播放器 徵兆 CD 或 DVD 30 57 CD 或 DVD。 Eject Eject 1 按一下 Windows Vista 2 CD 或 DVD 3 CD/DVD 1 2 CD/DVD 托槽。 3 50 - HP s5160f | Getting Started - Page 55
CD 和 DVD 徵兆 使用 CD-R CD-R DVD 錄製到 DVD+R/-R 或 DVD+RW/-RW CD 錄製到 CD-R 或 CD-RW 光碟。 CD 或 DVD Windows Vista 51 - HP s5160f | Getting Started - Page 56
CD 和 DVD 徵兆 DVD DVD 影片。 DVD DVD DVD 視訊 徵兆 在 Windows Media Player Windows Media Player Windows Media Player Windows Media Player 1 按一下 Windows Vista 2 3 4 5 6 7 52 - HP s5160f | Getting Started - Page 57
硬體安裝 CD Windows Vista HP HP Windows Vista 53 - HP s5160f | Getting Started - Page 58
徵兆 1 按一下 Windows Vista 2 3 4 5 6 7 8 Windows Vista 54 - HP s5160f | Getting Started - Page 59
效能 徵兆 61 無線裝置 1 按一下 Windows Vista 2 3 4 5 802.11 55 - HP s5160f | Getting Started - Page 60
遙控器 徵兆 USB IR) 連線: 1 按一下 Windows Vista 2 3 4 eHome Windows Vista 5 USB USB 接頭。 6 USB USB 裝置。 讀卡機 徵兆 56 - HP s5160f | Getting Started - Page 61
徵兆 CompactFlash (I、II 和 Microdrive)、Memory Stick、Memory Stick Pro、 MultiMedia、Secure Digital、SmartMedia 或 xD SDHC (Secure Digital High-Capacity 1 18 2 16 3 57 頁。) 4 Microsoft 58 頁。) 5 59 頁。) 6 63 1 按一下 Windows Vista 2 3 DVD/CD-ROM 57 - HP s5160f | Getting Started - Page 62
4 HP DVD Writer 640b)。 5 6 或 Microsoft Microsoft Windows Vista 1 2 按一下 Windows Vista 3 4 1 2 按一下 Windows Vista 3 4 5 6 7 1 按一下 Windows Vista 2 Enter 鍵。 58 - HP s5160f | Getting Started - Page 63
CD 或 DVD 上的 CD 或 DVD 1 按一下 Windows Vista PC 2 3 1 2 a 按一下 Windows Vista b c d 1 按一下 Windows Vista PC 2 3 4 5 59 - HP s5160f | Getting Started - Page 64
維護 維護作業 使用 Windows Update Windows 63 60 - HP s5160f | Getting Started - Page 65
CD 或 DVD Windows Windows Windows Vista 63 Windows Update Windows Vista 35 61 - HP s5160f | Getting Started - Page 66
1 2 3 4 5 6 1 2 USB 1 2 3 1 2 3 4 5 62 - HP s5160f | Getting Started - Page 67
系統復原 CD 64 Windows Vista DVD DVD+R、DVD-R、DVD+R DL 或 DVD-R DL DVD+RW、DVD-RW、DVD+RW DL、DVD-RW DL 或 CD 63 - HP s5160f | Getting Started - Page 68
1 至 3 片 DVD Recovery Disc Creator 1 2 按一下 Windows Vista PC 3 Recovery 1、 Recovery 2)。 4 1 Windows Vista 2 F11 3 4 HP http://www.hp.com/support Windows Vista Windows Vista 1 2 3 4 按一下 Windows Vista PC 5 6 64 - HP s5160f | Getting Started - Page 69
7 66 7。 8 9 10 11 12 執行第 67 Windows Vista 1 2 3 4 F11 5 6 7 8 9 10 執行第 67 65 - HP s5160f | Getting Started - Page 70
63 1 CD 或 DVD 2 1 插入 DVD 3 Windows Vista 或 5 4 5 6 7 8 9 10 11 12 66 - HP s5160f | Getting Started - Page 71
1 Microsoft Windows Windows 桌面。 2 3 4 5 使用 [Windows Update] 取得 Microsoft a 按一下 Windows Vista b c 6 7 使用 「HP Update」取得 HP a 按一下 Windows Vista HP [HP 更新]。 b 8 9 67 - HP s5160f | Getting Started - Page 72
68 - HP s5160f | Getting Started - Page 73
功能 33 CyberLink LabelPrint 製作 LightScribe 標籤 30 H HDMI 42 HP Easy Backup 32 HP Total Care Advisor 34, 37 I IR 接收器 13 56 傳輸器 13 L LAN 7 設定 7 LAN 3 7 19 LightScribe, 製作 LightScribe 30 M muvee Reveal, 功能 33 S S-video 9 W WEP 20 Windows Movie Maker, 功能 34 Windows Vista 更新 23 WLAN 安全性 20 WPA 20 - HP s5160f | Getting Started - Page 74
22 接頭 IR IN 13 IR OUT 13 S-video 輸入 9 耳機 5 5 5 10 電腦 2 數據機 3 9 顯示器 4 清潔 61 57 CyberLink DVD Suite 33 CyberLink LabelPrint 30 HP Total Care Advisor 34 muvee Reveal 33 Windows Movie Maker 34 59 連接 2 裝置 26 電視 8 7 數據機 8 Windows Vista 中選取 21 接頭 5 4 連接 6 21 十二畫 備份 61 喇叭 4 連接 6 59 7 20 - HP s5160f | Getting Started - Page 75
十七畫 1 58 十八畫 16 十九畫 16 二十一畫 57 二十二畫 27 27 二十三畫 4 連接 HDMI 42 索引 71 - HP s5160f | Getting Started - Page 76
72 - HP s5160f | Getting Started - Page 77
Getting Started - HP s5160f | Getting Started - Page 78
and Windows Vista are U.S. registered trademarks of Microsoft Corporation. The Windows logo and Windows specifications and not final. If the final specifications differ from the draft specifications, it may affect the ability of this device to communicate with other 802.11n WLAN devices. HP supports - HP s5160f | Getting Started - Page 79
Information 35 Using the Onscreen Help and Support Center 35 Accessing Support on the Web 35 Finding Guides on the Web 35 Finding Onscreen Guides 36 Using the PC Help & Tools Folder 36 Using HP Total Care Advisor Software 37 Using the Computer with Safety and Comfort 37 Table of Contents - HP s5160f | Getting Started - Page 80
Troubleshooting and Maintenance 39 Troubleshooting Computer Problems 39 Repairing Software Problems 57 Maintenance ...60 System Recovery...63 Performing the Post-Recovery Procedure 67 Index...69 iv Getting Started (features vary by model) - HP s5160f | Getting Started - Page 81
and Support Guide before installing and connecting the computer to the electrical power system. Follow the steps on the setup poster to set up the computer: 1 Connect a keyboard and a mouse to the computer. 2 Connect a display (monitor) to the computer. Your computer may have a graphics card with - HP s5160f | Getting Started - Page 82
or Microphone" on page 4. For television connectors and video input with audio, see "Connecting the Television Signal and Video Cables" on page 8. NOTE: The location, availability, and number of connectors on the computer may vary. Power cord and devices Icon/Label Description and function - HP s5160f | Getting Started - Page 83
Power cord and devices Icon/Label Description and function (continued) Keyboard broadband connection. This wired LAN connector is a network interface adapter (also called a network interface card, or NIC). The green LED indicates a valid connection. Icon/Label Description and function Modem ( - HP s5160f | Getting Started - Page 84
You may need to use a VGA-to-DVI or an HDMI-to-DVI adapter to connect the display to the computer. VGA-DVI VGA-to-DVI adapter, to adapt a TV or a monitor video cable so it can connect to the computer. HDMI-DVI HDMI-to-DVI adapter, to adapt a TV or a monitor video cable so it can connect to the - HP s5160f | Getting Started - Page 85
available separately, or included with the monitor. Your computer supports only active (powered) speaker systems; the speaker system must have its own power source, such as batteries or a separate power cord. For detailed instructions about how to connect and configure other multichannel speakers - HP s5160f | Getting Started - Page 86
speaker system To connect active speakers, such as left/right stereo speakers or a 2.1 system of two speakers and a subwoofer, to the computer: 1 Make sure the computer is turned off. Make sure the speaker system is turned off and unplugged. 2 Connect the speaker system cable to the lime green Audio - HP s5160f | Getting Started - Page 87
network supporting IEEE 802.11b, 802.11g, or 802.11n (select models only) by using the antenna that is included with the computer. Connect the external antenna to the wireless antenna connector on the network card to increase the range and sensitivity of the wireless radio signal. NOTE: For the best - HP s5160f | Getting Started - Page 88
in to the computer. Or Video out from the computer. You may need to purchase cables, a coaxial cable signal splitter, or other accessories separately. Your computer may not include all the cables you need for the computer setup. NOTE: The location and number of connectors on the computer may vary by - HP s5160f | Getting Started - Page 89
video input from a VCR, video camera, or other analog source to the computer. A/V In Audio 1 L A/V In Audio 1 R Primary left audio input from a TV set-top box connector (white). NOTE: You can record audio by using this Audio In connector, which is connected to the motherboard. Some computers - HP s5160f | Getting Started - Page 90
Audio In connector, which is connected to the motherboard and located on the back of the computer, to record audio only (select models only). Television output Icon/Label Analog Video Description and function Analog Video Out: S-video or composite video connector (select models only), to connect - HP s5160f | Getting Started - Page 91
-top box/satellite box G Remote control IR blaster cable (select models only) H Computer S-video In connector J Computer right and left audio (analog) connectors Connecting the TV signal source with a set-top box To connect the computer into an existing setup for the TV signal source with a set-top - HP s5160f | Getting Started - Page 92
-top box and using S-video or composite video cable to the computer To use video output from the set-top box (F), add the cables to route video and audio to the computer: Do not detach any cables from the existing setup. Connect an S-video cable (or you can use an S-video-to-composite cable adapter - HP s5160f | Getting Started - Page 93
a direct line of sight to the remote sensor on the front of the computer, you can use an external IR receiver (select models only) and place the Connect the external receiver to the red IR IN connector on the back of the computer (1). Place the IR receiver (2) in a location with a direct line of - HP s5160f | Getting Started - Page 94
14 Getting Started (features vary by model) - HP s5160f | Getting Started - Page 95
computer.) Follow the onscreen instructions to register with HP or Compaq, sign up for updates, and get online. The antivirus software may automatically open. Follow the onscreen instructions to set up this tool, which protects the computer and your privacy. 5 When you see the Windows Vista desktop - HP s5160f | Getting Started - Page 96
Off the Computer For best results when using Windows Vista, do not shut down the computer except when you must turn off the power for safety reasons: to make repairs, to install new hardware or cards in the computer, or to change a battery. As an alternative to shutting down the computer, you can - HP s5160f | Getting Started - Page 97
to go into Sleep or Hibernate mode automatically when it is idle for a specified number of minutes. To put the computer into a mode automatically, modify the power management settings: 1 Click the Windows Vista start button on the taskbar. 2 Click Control Panel. 3 Click System and Maintenance - HP s5160f | Getting Started - Page 98
modem, a local area network (LAN), or digital subscriber line (DSL). Check with your Internet Service Provider (ISP) for specific information on the connection. 1 Refer to "Setting Up Your Computer" on page 1 to make the hardware connections. You need: For a network connection, see "Connecting - HP s5160f | Getting Started - Page 99
instructions provided by the ISP. If you did not set up the computer for Internet service during the initial setup, do so now by using Online Services: a Click the Windows computer does not have an integrated WLAN device, or the driver for the device is not properly installed. 4 Click the Windows - HP s5160f | Getting Started - Page 100
with the sound level, close the window by clicking the X in the upper-right corner. For help with audio, check the troubleshooting items in "Audio and speakers" on page 47. For more information, open the Help and Support Center or refer to the Support Web site; see "Getting More Information - HP s5160f | Getting Started - Page 101
one microphone connected, select the microphone that you would like to use in Windows Vista. NOTE: When you have a webcam or an audio player connected to the computer, because of the audio input from the device, Windows Vista may recognize each as a microphone input. To select the microphone that - HP s5160f | Getting Started - Page 102
mishandled or stolen. Computer risk Computer feature Unauthorized use of the computer or user User password account Computer viruses Antivirus program Unauthorized access to data Firewall program Windows Vista updates Unauthorized access to Setup Utility, BIOS settings, and other system - HP s5160f | Getting Started - Page 103
an extended update service. Instructions for using and updating the antivirus software, and for purchasing extended update service, are provided within the program. For more information about computer viruses: Click the Windows Vista start button on the taskbar, click Help and Support, and then - HP s5160f | Getting Started - Page 104
for other users, to change passwords, to change system-wide settings, to access all files on the computer, and to install software and drivers that are compatible with Windows Vista. (Windows Vista requires at least one administrator user account.) Limited - Standard User: Is not allowed to change - HP s5160f | Getting Started - Page 105
in the User Account Control window. 3 Click Create a new account, or click the account user name you want to change. 4 Follow the onscreen instructions or click an action to proceed. Guidelines for Installing Software and Hardware Devices After you set up the computer and complete the initial setup - HP s5160f | Getting Started - Page 106
, which is included with Windows Vista. Windows Easy Transfer software guides you to copy files and settings to a storage device or across the Easy Transfer Cable connected to the old computer. The Easy Transfer Cable is a USB cable designed to specifically connect two computers and work with the - HP s5160f | Getting Started - Page 107
other digital imaging devices use memory cards, or media, to store digital picture files. The memory card reader can read from and write to a variety of types of memory cards and the IBM Microdrive disk drive. The card reader is accessible directly on the front of the computer. It has four or two - HP s5160f | Getting Started - Page 108
access your files. You can copy files from or to the media. Or If the AutoPlay window does not open, click the Windows Vista start button on the taskbar, click Computer, and then double-click the Memory Card icon to display the files on the media. You can copy files from or to the media - HP s5160f | Getting Started - Page 109
tray to close it. A To use a minidisc with a vertical drive, you must first place the computer on its right side (select models only) before you insert the minidisc: 1 Face the front of the computer and lay the computer down on its right side. 2 Press the Eject button to open the CD/DVD tray - HP s5160f | Getting Started - Page 110
provides instructions for logo Labeling software that supports LightScribe A writable LightScribe You may burn data, music, and videos to the disc before or after labeling it label) 6 Click the arrow button at the bottom of the window to continue. 7 Under Step 2: Edit Disc Information, design - HP s5160f | Getting Started - Page 111
broadcasts, to record and play TV programs, and to play music, movies, or video. To open Windows Media Center, point the remote control at the remote control sensor on the top front of the computer, and press the Windows Media Center Start button on the remote control. To use the remote control - HP s5160f | Getting Started - Page 112
screen saver, or suspend. A To perform manual backups between scheduled automatic backups: 1 Connect an external storage device to your computer, or place a blank CD or DVD in the CD/DVD drive. 2 Press the HP Easy Backup button. Follow the onscreen instructions. 3 If you are using a CD or - HP s5160f | Getting Started - Page 113
(Select models only) Your computer includes a number of software programs that: Record and play CDs. Record data CDs. Import and edit video files. Record video CDs and DVDs. Organize digital media files. The following table describes the functionality that is specific to each of these programs - HP s5160f | Getting Started - Page 114
want available on your desktop. Comparison-shop using the convenient shopping search engine. Get HP software and driver updates. Get important messages from HP. Access PC Health and Security and PC Help tools. Microsoft Windows Movie Maker (select models only) Import audio, video, and other media - HP s5160f | Getting Started - Page 115
site address listed in the Limited Warranty and Support Guide, or use the following steps: 1 Go to http://www.hp.com/support in your Web browser. 2 Select your country/region and language. 3 Click Support and Drivers. 4 Enter the model number of your computer, and then click Search . Click an item - HP s5160f | Getting Started - Page 116
in the folder, your computer has no onscreen guides. Using the PC Help & Tools Folder The PC Help & Tools folder contains special utilities for computer owners, such as support information and programs. To see the items in the PC Help & Tools folder: 1 Click the Windows Vista start button on the - HP s5160f | Getting Started - Page 117
. PC Help provides simple access to help and support information for your computer. Products Showcase provides a listing of products and services available for your computer, and presents comparison-shopping information about those items. To open HP Total Care Advisor: 1 Click the Windows Vista - HP s5160f | Getting Started - Page 118
38 Getting Started (features vary by model) - HP s5160f | Getting Started - Page 119
Help and Support Center or access the Support Web site. (See "Getting More Information" on page 35). Refer to the documentation provided by the product manufacturer for information about peripheral-specific problems, such as issues with a monitor or a printer. Troubleshooting Computer Problems These - HP s5160f | Getting Started - Page 120
and Support Guide to contact Support. Test the wall outlet by connecting a different electrical device to it. Incompatible memory (RAM) may have been installed. Reinstall the old memory to return your computer to its original state. For instructions, refer to the Upgrading and Servicing Guide. Use - HP s5160f | Getting Started - Page 121
to resume from Sleep mode. Press the On button to turn on the computer. Inspect the monitor video connector for bent pins: If any of the pins are bent, replace the monitor connector cable. If no pins are bent, reconnect the monitor connector cable to the computer. Troubleshooting and Maintenance 41 - HP s5160f | Getting Started - Page 122
card (select models only) to connect your display (monitor) to the computer, because the default setting is the DVI Output. The Realtek Digital Output Properties window opens. 6 Click the Supported Formats tab. 7 Place a setting in Windows Vista: 1 Right-click an empty area on the desktop, and then - HP s5160f | Getting Started - Page 123
all open programs, press the Ctrl and Esc keys on the keyboard simultaneously to display the Windows Start Menu. 5 Use the arrow keys to select the Arrow button next to the Lock button mouse connector to the back of your computer, and then turn on your computer. Troubleshooting and Maintenance 43 - HP s5160f | Getting Started - Page 124
instructions, go to: http://www.hp.com/support Select your country/region and language, search on your computer model number not detected. A Check for these problems: Ensure you are using the inches) during initial setup or for resynchronization. Replace the batteries in the keyboard and mouse; do - HP s5160f | Getting Started - Page 125
from interference from other devices. 1 Unplug and reconnect the receiver into a USB connector on the computer. Your computer model may have a connector dedicated to the receiver. If you have a choice, use a USB 5 to 10 seconds until the A light starts to flash. Troubleshooting and Maintenance 45 - HP s5160f | Getting Started - Page 126
Wireless keyboard and mouse (continued) Symptom Possible solution Wireless keyboard or mouse does not work or is not detected. (continued) 3 Check that the mouse is on (B), and push and hold the Connect button (C) on the underside of the mouse for 5 to 10 seconds until the LED (A) on the - HP s5160f | Getting Started - Page 127
card (select models only) to connect your display (monitor) to the computer, you should also connect analog speakers to the computer the Windows Vista start powered (active) speakers and that they are turned on. Turn off your computer computer (or speaker system). Troubleshooting and Maintenance 47 - HP s5160f | Getting Started - Page 128
the back of the computer. (Additional audio connectors are used for multiple-channel speakers.) Detached non-powered speakers (speakers without a separate power source, such as batteries or a power cord) do not produce satisfactory sound. Replace the non-powered speakers with powered speakers. 48 - HP s5160f | Getting Started - Page 129
onscreen instructions. If your system has an external antenna, try to move the antenna to a better position. If the antenna is internal, try to move the computer. Try to connect again later, or contact your ISP for assistance. Log in to your ISP, and start the desired program. Troubleshooting and - HP s5160f | Getting Started - Page 130
information about restoring and updating drivers, see "Updating drivers" on page 57. I cannot remove a CD or DVD. Turn on your computer, and press the Eject button nearest the drive to open the tray. If you suspect a problem with the Eject button itself: 1 Click the Windows Vista start button, and - HP s5160f | Getting Started - Page 131
. Ensure you have enough available space on your hard disk drive to store a temporary copy of the content. Click the Windows Vista start button, and then click Computer. Right-click the hard disk drive, and then click Properties to view the available space. Troubleshooting and Maintenance 51 - HP s5160f | Getting Started - Page 132
next to Sound, video and game controllers. 4 Right-click TV tuner (select models only), and then click Update Driver Software. 5 Select Search automatically for updated driver software. 6 Follow the instructions to update the driver. 7 If you are prompted, restart the computer. 52 Getting Started - HP s5160f | Getting Started - Page 133
device manufacturer Web site. You may need an updated driver for Windows Vista. Contact the device vendor directly for an update. For HP peripheral devices, visit the HP Web site. For details, refer to the Limited Warranty and Support Guide. Ensure that all cables are properly and securely connected - HP s5160f | Getting Started - Page 134
see whether your device is enabled and working properly. If it is available, click the Troubleshoot button, and follow the onscreen instructions in the device troubleshooter wizard. 8 Restart the computer. Click the Windows Vista start button, click the Arrow button next to the Lock button, and then - HP s5160f | Getting Started - Page 135
is not working. Possible solution Ensure the device and your computer are the correct distance apart-not too far and not too near. For the correct distance, refer to the device instructions. Remove and then reinstall the device: 1 Click the Windows Vista start button, and then click Control Panel - HP s5160f | Getting Started - Page 136
, and then restart the computer. Connect other USB devices after the remote sensor appears in the Device Manager window. Memory card reader Symptom Memory card reader (select models only) cannot read the memory card. Possible solution Do not insert or remove memory cards when the in-use (activity - HP s5160f | Getting Started - Page 137
, such as a printer, hard disk drive, mouse, or keyboard. Complete the following procedure to update a driver, or to revert to an earlier version of the driver if the new one does not solve your problem: 1 Click the Windows Vista start button, right-click Computer, and then click Properties. 2 Under - HP s5160f | Getting Started - Page 138
-click the specific item (for example, HP DVD Writer 640b). 5 Click the Driver tab. 6 To update a driver, click Update Driver, and then follow the onscreen instructions. Or To revert to an earlier version of a driver, click Rollback Driver, and then follow the onscreen instructions. Microsoft System - HP s5160f | Getting Started - Page 139
: 1 Click the Windows Vista start button, click All Programs, click PC Help & Tools, and instructions. 5 When you have finished reinstalling, restart the computer. NOTE: Do not skip this last step. You must restart the computer after recovering software programs or hardware drivers. Troubleshooting - HP s5160f | Getting Started - Page 140
clean the inside and outside of your computer. Using Windows Updates can fix operating system bugs and improve performance. Also, be sure to check for driver updates for your hardware and new versions of your favorite programs. Sometimes a failing hard disk can be caught beforehand, saving you a lot - HP s5160f | Getting Started - Page 141
needed. Remove unused programs, which take up memory space and may slow down the computer. Use Windows Update to check for updates or to schedule automatic updates. Run the Disk Cleanup program to free up file storage space on your computer hard disk drive by removing temporary and unused files. Run - HP s5160f | Getting Started - Page 142
a small battery-powered vacuum cleaner. (A battery-powered vacuum cleaner eliminates the risk of electric shock.) 1 Run the vacuum over the vents in the computer case and the roller ball and rollers are completely dry, replace the ball and ball-cover ring. 62 Getting Started (features vary by model) - HP s5160f | Getting Started - Page 143
disk drive, deleting all data files you have created. System recovery reinstalls the operating system, programs, and drivers. However, you must reinstall any software that was not installed on the computer Windows Vista Start Menu" on page 64. NOTE: The recovery image uses a portion of the hard disk - HP s5160f | Getting Started - Page 144
recovery discs purchased from HP Support. To purchase recovery discs, go to http://www.hp.com/support and visit the Software & Driver downloads page for your computer model. System recovery from the Windows Vista Start Menu If the computer is working, and Windows Vista is responding, use these - HP s5160f | Getting Started - Page 145
to restart the computer. 8 Complete the registration process, and wait until you see the desktop. 9 Turn off the computer, reconnect all peripheral devices, and turn the computer back on. 10 Perform the procedure in "Performing the Post-Recovery Procedure" on page 67. Troubleshooting and Maintenance - HP s5160f | Getting Started - Page 146
the drive tray. CAUTION: All data on the hard disk drive will be deleted. You will lose data if it is not backed up. 2 Insert recovery disc #1 into the DVD drive tray, and close the tray. 3 If the computer works, click the Windows Vista start button, click the Arrow button next to the - HP s5160f | Getting Started - Page 147
computer. (Some updates will not finish installing until you restart.) 7 Use HP Update to get critical updates from HP: a Click the Windows Vista start button, click All Programs, click the HP folder, and then click HP Update. b Follow the onscreen instruction to download driver and software updates - HP s5160f | Getting Started - Page 148
68 Getting Started (features vary by model) - HP s5160f | Getting Started - Page 149
61 buttons Eject, for the CD/DVD drive 29 HP Easy Backup 32 Off, See turning off computer 16 C card reader, memory 27 carpal tunnel syndrome 37 CD minidisc, using 29 CD/DVD drive, using 29 cleaning 61 Composite video connector 9 computer cleaning 61 Help & Tools 36 setting up 1 transferring files - HP s5160f | Getting Started - Page 150
down the computer 16 Sleep mode 16, 17 software programs CyberLink DVD Suite 33 CyberLink LabelPrint 30 HP Total Care Advisor 34 muvee Reveal 33 reinstall 59 Windows Movie Maker 34 software repairs 57 speakers connecting 6 connector type 4 Support Web site 35 surge protector 1 S-video In connector - HP s5160f | Getting Started - Page 151
U update drivers 57 system 23 Windows Vista 23 user accounts, creating 25 V video cables for TV 8 volume, adjusting in Windows Vista 20 W WEP 20 Windows Movie Maker, features 34 Windows Vista update 23 wired network connection 7 wireless LAN connection 7 network device, checking installation 19 - HP s5160f | Getting Started - Page 152
Part number: 517215-AC1
-
 1
1 -
 2
2 -
 3
3 -
 4
4 -
 5
5 -
 6
6 -
 7
7 -
8
-
9
-
10
-
11
-
12
-
13
-
14
-
15
-
16
-
17
-
18
-
19
-
20
-
21
-
22
-
23
-
24
-
25
-
26
-
27
-
28
-
29
-
30
-
31
-
32
-
33
-
34
-
35
-
36
-
37
-
38
-
39
-
40
-
41
-
42
-
43
-
44
-
45
-
46
-
47
-
48
-
49
-
50
-
51
-
52
-
53
-
54
-
55
-
56
-
57
-
58
-
59
-
60
-
61
-
62
-
63
-
64
-
65
-
66
-
67
-
68
-
69
-
70
-
71
-
72
-
73
-
74
-
75
-
76
-
77
-
78
-
79
-
80
-
81
-
82
-
83
-
84
-
85
-
86
-
87
-
88
-
89
-
90
-
91
-
92
-
93
-
94
-
95
-
96
-
97
-
98
-
99
-
100
-
101
-
102
-
103
-
104
-
105
-
106
-
107
-
108
-
109
-
110
-
111
-
112
-
113
-
114
-
115
-
116
-
117
-
118
-
119
-
120
-
121
-
122
-
123
-
124
-
125
-
126
-
127
-
128
-
129
-
130
-
131
-
132
-
133
-
134
-
135
-
136
-
137
-
138
-
139
-
140
-
141
-
142
-
143
-
144
-
145
-
146
-
147
-
148
-
149
-
150
-
151
-
152
 |
 |

快速入門