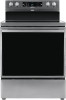
Hisense HBE3501CPS Installation Manual
Hisense HBE3501CPS Manual
 |
View all Hisense HBE3501CPS manuals
Add to My Manuals
Save this manual to your list of manuals |
Hisense HBE3501CPS manual content summary:
- Hisense HBE3501CPS | Installation Manual - Page 1
INSTRUCTIONS FOR INSTALLATION ELECTRIC RANGE - Hisense HBE3501CPS | Installation Manual - Page 2
Contents Before you begin ... 3 For your safety ... 4 Tip-Over hazard ... 4 Anti-Tip Bracket ... 4 Tools and materials ... 4 Steps for installation ... 5 Remove packaging materials ... 5 Prepare the opening ... 5 Electrical installation ... 7 Anti-tip device installation ...11 Level the - Hisense HBE3501CPS | Installation Manual - Page 3
of UL and OSA International and complies with temperatures of 194°F (90°C). Important to the Installer - Be sure to leave these instructions with the consumer. Important to the customer - Keep these instructions for reference. Propper installation is the responsibillity of the installer. EN 3 - Hisense HBE3501CPS | Installation Manual - Page 4
WARNING! • To reduce the risk of tipping the range, the range must be secured by a properly installed anti-tip bracket. • See installation instructions shipped with the bracket for complete details before attempting to install. Tools and materials Tools you may need Flat-blade Drill, awl or Open - Hisense HBE3501CPS | Installation Manual - Page 5
Steps for installation Remove packaging materials Failure to remove packaging materials could result in damage to the appliance. Remove all packing parts from the oven, racks, heating elements and drawer. Also remove protective film and labels on the door, cooktop and control panel. Prepare the - Hisense HBE3501CPS | Installation Manual - Page 6
Minimum dimensions between cooktop, walls and above the cooktop • Provide adequate clearances between the range and adjacent combustible surfaces. These dimensions must be met for the safe use of your appliance. • Make sure the wall covering, countertop, flooring and cabinets around the range can - Hisense HBE3501CPS | Installation Manual - Page 7
Electrical installation Power cord and conduit installation On the back side of the appliance remove the metal cover by removing screws using a screwdriver. Do not discard these screws. INFORMATION! NOTE! Power cord and conduit with strain relief are not included in the appliance. It must be - Hisense HBE3501CPS | Installation Manual - Page 8
Prepare the conduit cord (insulation stripped) as shown in A. Install the conduit cord into the connection plate as shown in B. Insert the strain relief into the conduit hole (1 ¹⁄8''). Then thread the conduit cord through the body (2) of the strain relief and fasten the ring (1). Reinstall the - Hisense HBE3501CPS | Installation Manual - Page 9
Three-Wire Conduit Connection 1. Line 1 2. Ground Strap 3. Neutral terminal 4. Live 2 5. Ground plate 6. Wire tips A. Black B. White C. Red • Loosen the 3 lower terminal screws on the terminal block. Strip wire to expose tip about 3/8'' long. • Insert the center (white/neutral) wire tip through - Hisense HBE3501CPS | Installation Manual - Page 10
• Insert the 3 terminal screws through each power cord terminal ring and back into the terminal block. Be certain the white wire is in the center. • Securely tighten each screw (35 to 50 in-lbs). Four-Wire Conduit Connection 1. Live 1 2. Ground strap 3. Neutral terminal 4. Live 2 5. Ground plate - Hisense HBE3501CPS | Installation Manual - Page 11
bracket by sliding the range back such that the foot is engaged. • Re-engage the anti-tip device if the range is moved. • See installation instructions for details. • Failure to do so can result in death or serious burns to children or adults. • Check to make sure that the rear leveling - Hisense HBE3501CPS | Installation Manual - Page 12
closed or the circuit fuses are replaced. • Be sure power is in service to the building. • Check that all packaging materials and tape have been other and that both operate smoothly. If they do not, see the User Manuals for proper replacement. • Check to make sure that the rear leveling leg is - Hisense HBE3501CPS | Installation Manual - Page 13
Tabla de contenidos Antes de comenzar ...14 Para su seguridad ...15 Riesgo de vuelco ... 15 Soporte antivuelco ...15 Herramientas y materiales ... 15 Pasos para la instalación ... 16 Retire los materiales de embalaje 16 Preparar la abertura ...16 Instalación eléctrica ... 18 Instalación - Hisense HBE3501CPS | Installation Manual - Page 14
Respete los códigos y ordenanzas vigentes. IMPORTANTE: - Antes de conectar la estufa al suministro de luz y gas, retire todo el material de embalaje y los manuales que se encuentran dentro del horno. IMPORTANTE: - Para evitar dañar sus gabinetes, consulte con su constructor o con el proveedor de los - Hisense HBE3501CPS | Installation Manual - Page 15
Para su seguridad Riesgo de vuelco ADVERTENCIA! A. Tanto un niño como un adulto podrían volcar la estufa, con riesgo de muerte. B. Verifique que el dispositivo antivuelco haya sido correctamente instalado y acoplado (Ver más abajo). C. Asegúrese de volver a acoplar el dispositivo antivuelco cuando - Hisense HBE3501CPS | Installation Manual - Page 16
Pasos para la instalación Retire los materiales de embalaje Si no retira todos los materiales de embalaje, el aparato podría sufrir daños. Retire todas las piezas de embalaje del horno, de los estantes, de los elementos calefactores y de la gaveta. También debe retirar la película protectora y las - Hisense HBE3501CPS | Installation Manual - Page 17
la placa y el gabinete adyacente para reducir la exposición al vapor, la grasa y el calor. • Instale sin espacio libre en los lados y en la parte posterior. Para reducir el riesgo de quemaduras o incendios al intentar alcanzar objetos, se debe evitar almacenar cosas en el gabinete que se encuentre - Hisense HBE3501CPS | Installation Manual - Page 18
del horno. Instalación eléctrica Instalación de cables de alimentación y conductos Retire la cubierta metálica que se encuentra en la parte posterior del aparato quitando los tornillos con un destornillador. Guarde estos tornillos. ¡INFORMACIÓN! ¡ADVERTENCIA! El cable de alimentación y el conducto - Hisense HBE3501CPS | Installation Manual - Page 19
¡ADVERTENCIA! El cable de alimentación siempre debe instalarse con un alivio de tensión montado en la placa de conexión. ¡ADVERTENCIA! Los terminales del cable de alimentación deben ser de circuito cerrado o de pala de extremo abierto. Para instalar el conducto Retire la placa de conexión del - Hisense HBE3501CPS | Installation Manual - Page 20
1. Vivo 1 2. Cinta de tierra 3. Terminal neutra 4. Vivo 2 5. Placa de tierra A. Negro B. Blanco C. Rojo • Retire los 3 tornillos de la parte inferior del terminal en el bloque de terminales. No afloje los tornillos superiores. • Instale el kit del cable de tres hilos y el aliviador de tensión - Hisense HBE3501CPS | Installation Manual - Page 21
Conexión del cable de cuatro hilos ADVERTENCIA! El cable neutro del circuito de alimentación debe conectarse al terminal neutro ubicado en el centro inferior del bloque de terminales. Los cables de alimentación deben conectarse a las terminales inferior izquierda e inferior derecha del bloque de - Hisense HBE3501CPS | Installation Manual - Page 22
pestañas de retención y vuelva a colocar los tornillos que quitó antes. Asegúrese de que no queden cables atrapados entre la cubierta y la parte posterior de la estufa. Instalación del dispositivo antivuelco Riesgo de vuelco ADVERTENCIA! • Tanto un niño como un adulto podrían volcar la estufa, con - Hisense HBE3501CPS | Installation Manual - Page 23
• Determine y marque la línea central del espacio de corte (1). El soporte de montaje se puede instalar tanto en el lado izquierdo como en el lado derecho del área cortada. Coloque el soporte de montaje contra la pared en el área cortada, de modo que el centro del recorte del soporte quede a 13 3/8" - Hisense HBE3501CPS | Installation Manual - Page 24
delanteras se pueden ajustar desde la parte superior o inferior de la pata (1). • Las patas traseras se pueden ajustar desde la parte superior de la pata (2) a sí y que funcionan sin problemas. Si no es así, consulte los manuales de usuario para saber cómo colocarlas adecuadamente. • Asegúrese de que - Hisense HBE3501CPS | Installation Manual - Page 25
854935-a14
-
 1
1 -
 2
2 -
 3
3 -
 4
4 -
 5
5 -
 6
6 -
 7
7 -
8
-
9
-
10
-
11
-
12
-
13
-
14
-
15
-
16
-
17
-
18
-
19
-
20
-
21
-
22
-
23
-
24
-
25
 |
 |

INSTRUCTIONS FOR
INSTALLATION
ELECTRIC RANGE