Hitachi 26LD9000TA Owners Guide
Hitachi 26LD9000TA - LCD Direct View TV Manual
 |
View all Hitachi 26LD9000TA manuals
Add to My Manuals
Save this manual to your list of manuals |
Hitachi 26LD9000TA manual content summary:
- Hitachi 26LD9000TA | Owners Guide - Page 1
ENGLISH USER'S MANUAL 26LD9000TA 32LD9000TA Thank you for purchasing the HITACHI LCD Television. Please read this user manual carefully before operating this product. To ensure proper operation, please read and follow ALL the instructions, especially the "IMPORTANT SAFETY INSTRUCTIONS" and "SAFETY - Hitachi 26LD9000TA | Owners Guide - Page 2
openings. z Install the product in accordance with the manufacture's instructions. z Before calling for the technical support or service technician, read "TROUBLESHOOTING" ( 36 ~ 38 ) to determine the symptoms when problems occur during installation or operation of the product. z If serious - Hitachi 26LD9000TA | Owners Guide - Page 3
INSTRUCTIONS Thank you for purchasing the HITACHI LCD Television. We hope that you will enjoy the great performance with this product. This LCD Television have any comments or questions regarding this manual, please contact your local dealer or our Customer Service Center. Ɣ Before operating this set - Hitachi 26LD9000TA | Owners Guide - Page 4
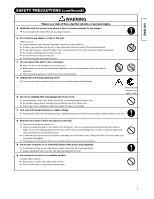
manual and affixed on the unit itself. Please fully understand the meanings of the symbols before reading the precautions in this section. WARNING Never ignore the instruction power cord immediately when serious problems happen. Serious problems such as z Smoke, to perform servicing such as inspection, - Hitachi 26LD9000TA | Owners Guide - Page 5
the surface of the LCD panel. Thus, do not press the panel surface with your fingers or hands. Or do not hit anything against the television. These actions would damage the LCD cells or the panel surface and could cause the failure or personal injuries. z In case that you drop the - Hitachi 26LD9000TA | Owners Guide - Page 6
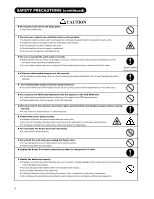
not cover or block any ventilation holes on the product. The television would overheat, and it could cause fire or damage the product which may shorten its service life. Ɣ Install the product in accordance with the instructions in this manual. Ɣ Do not place the unit with ventilation side down. Ɣ Do - Hitachi 26LD9000TA | Owners Guide - Page 7
may stick to the floor face, and surface could come off when the TV is lifted up. Cleaning and Maintenance Please make sure to unplug the power cord before cleaning the television. „ How to clean the LCD panel of the television. Ɣ Wipe the panel with a lint-free and dry cloth in order to - Hitachi 26LD9000TA | Owners Guide - Page 8
Because of the structural characteristics of the LCD panel, the response speed of the LCD panel becomes slower when the ambient temperature around the television becomes too low. In some cases, it may cause the residual image. The residual image will disappear on its own as the temperature goes - Hitachi 26LD9000TA | Owners Guide - Page 9
. • Accept more digital input devices with HDMI terminals. • Great diversity of connecting terminals use On-Screen Display system operating with Remote control. • Low power Remote Control before using. In case of missing or damaged, please contact with dealer immediately. User Manual Remote - Hitachi 26LD9000TA | Owners Guide - Page 10
7 6! 1. Cabinet 1 2. Panel 3. Indicating Lamp 2 4. Remote Control Receiver 5. Speaker 6. Desktop Stand 7. Main Power Switch (on details) Please refer to 14 ~ 18 for the detailed information for the connections. 26LD9000TA 4 32LD9000TA 4 3 2 1 ! Control Panel These buttons are located on the - Hitachi 26LD9000TA | Owners Guide - Page 11
ENGLISH COMPONENT NAMES (Continued) Remote Control 1. Power ON/OFF 2. [Color (Red, Green, Yellow, Blue)] 1 13 3. TV Select (TV) Press this button to change input to TV. 2 4. Input Select (AV1/AV2/AV3/AV4/HDMI/RGB) 3 Press this button to change input mode. 5. Program Select 4 Press - Hitachi 26LD9000TA | Owners Guide - Page 12
period of time. To avoid possible failure, read the following instructions and handle the remote control properly. Ɣ Do not drop or have an impact on the remote control. Ɣ Do not spill water or any liquid on the remote control. Ɣ Do not place the remote control on the wet object. Ɣ Do not place the - Hitachi 26LD9000TA | Owners Guide - Page 13
mount units or improper installation. As for the installation instruction, please read each user manual of the mount units: for Desktop Setup, Wall . Leave more than 10cm of clearance from each side of television and 30cm from the top of television to wall. 10cm or more 30cm or more 10cm or - Hitachi 26LD9000TA | Owners Guide - Page 14
Terminal Positions Rear 1. Power Cord Socket 2. Aerial Socket 3. AV1 4. AV3 5. AV4 6. Monitor Out and Sub Woofer 7. RGB 8. HDMI Side 9. AV2 10. Headphone output Connecting Procedure Your television is ready for various kinds of connections. Make a connection in the following steps. Be sure to turn - Hitachi 26LD9000TA | Owners Guide - Page 15
ENGLISH CONNECTION (continued) Connecting Procedure (continued) 3. Connecting to External Equipment Ɣ Terminals on Rear AV1 can be connected to the equipment with an S-Video output and Composite output. IN OUT (Example) VCR DVD player Set-Top Box If your external device has a S-video terminal, S- - Hitachi 26LD9000TA | Owners Guide - Page 16
(continued) Connecting Procedure (continued) Monitor Out can be used to display same image as main unit on another television. When this output terminal is connected to an external television with a 75 Ohm terminal, the same image from composite (AV1, AV2), or RF signal can be displayed to - Hitachi 26LD9000TA | Owners Guide - Page 17
can produce high quality data without any degradation. If your external device has a HDMI terminal, HDMI connection is recommended for higher output and composite output. (Example) VCR IN OUT Camcorder DVD Player Home video game system If your external device has a S-video terminal, S-VIDEO - Hitachi 26LD9000TA | Owners Guide - Page 18
CONNECTION (continued) Connecting Procedure (continued) Headphone The detail settings can be adjusted from Audio Menu on page 29 . (Mini Stereo Plug) The audio from the speaker will be muted when connecting the headphone to this terminal. 4. Connecting the plug into the wall socket Connect the Power - Hitachi 26LD9000TA | Owners Guide - Page 19
To turn Off the power of the television: 1. Press Sub Power button either on the control panel or on the remote control. Ɣ The image disappears from on the screen at all, or have any problem, see TROUBLESHOOTING on 36 ~ 38 . It may help you to solve the problems. Ɣ You can turn ON the power only - Hitachi 26LD9000TA | Owners Guide - Page 20
Up/Down button Mute button Mute 1. To mute the sound, press button on the remote control. Ɣ The sound of the unit is temporarily turned Off. Ɣ When the left-bottom corner of the TV. 2. To turn the sound back, press button again, or Volume Up button on either remote control or the control panel - Hitachi 26LD9000TA | Owners Guide - Page 21
panel. Each time this button is pressed, the screen displays corresponding mode by following order. TV AV1 AV2 AV3 RGB HDMI AV4 3. To directly go back to TV mode, pressing channel Up/Down buttons on remote control or pressing Program UP/Down on the control panel. Also, you can use the - Hitachi 26LD9000TA | Owners Guide - Page 22
MENU OPERATION How to use the On-Screen Display (OSD) system With the On-Screen Display system, you can access the various kinds of the features and functions in this product. • Basic Operation 1. Press button on the remote control or Menu button on the control panel of the unit. The Main Menu is - Hitachi 26LD9000TA | Owners Guide - Page 23
access various kinds of features relating to TV channel settings. Setup Auto Tuning Manual Tuning Fine Tuning Sort Teletext Language Select Sound System Auto B/G I D/K M Select the sound system from 5 different modes. NOTE When you turn ON the television for the first time, your television is - Hitachi 26LD9000TA | Owners Guide - Page 24
TV mode) (continued) Selected Items Color System Manual Tuning Auto Setup hint NTSC3.58 PAL Select the color system 56 X: Increase the frequency data for the main tuner. W: Decrease the frequency data for the main tuner. You Singapore, Australia, and Malaysia. East Europe : Poland, Sweden, - Hitachi 26LD9000TA | Owners Guide - Page 25
ENGLISH MENU OPERATION (continued) Setup Menu (RGB mode) With this menu, you can adjust the display condition of the image which is inputting from the RGB terminals. Setup Auto Adjust Image Position Horizontal Clock Clock Phase Reset Select ŻŹSet Ź Ź 41 34 Reset Return Selected Items Auto - Hitachi 26LD9000TA | Owners Guide - Page 26
MENU OPERATION (continued) Picture Menu (TV/AV mode) In this menu, you can make specific adjustments for the picture based on your preference. By pressing .button at theźbottom of each - Hitachi 26LD9000TA | Owners Guide - Page 27
ENGLISH MENU OPERATION (continued) Picture Menu (TV/AV mode) (continued) Selected Items NR Film Mode 3D Comb Filter Black Enhancement Reset Off On Off On Off On Off Low Middle High Setup - Hitachi 26LD9000TA | Owners Guide - Page 28
MENU OPERATION (continued) Picture Menu (RGB mode) In this menu, you can make specific adjustments for the RGB picture based on your preference. Picture Contrast 50 Brightness 55 Color Temperature Cool Back Light High Reset Reset Select OK Set Return Contrast Selected Items - Hitachi 26LD9000TA | Owners Guide - Page 29
ENGLISH MENU OPERATION (continued) Audio Menu With this menu, you can adjust and customize the audio condition as you like. Audio Matrix Surround Off Dynamic Bass Off Bass 0 Treble 0 Balance 0 Perfect Volume Off Reset Reset Select ŻŹ On/ Off Return Selected Items Matrix Surround - Hitachi 26LD9000TA | Owners Guide - Page 30
MENU OPERATION (continued) Timer Menu This allows your television to turn Off (Standby mode) at set time automatically, which you may find useful. Timer Off Timer ŻŹ Adjust Off Return Selected Items Off Timer Off - Hitachi 26LD9000TA | Owners Guide - Page 31
FUNCTION ENGLISH About Teletext z What is "Teletext" Teletext is the written information services provided by each TV channel. Most TV channels provide information via Teletext such as: z TV program schedule z Weather forecasts z Sports results z Newsflash Page number Link Page z How to - Hitachi 26LD9000TA | Owners Guide - Page 32
remote control is pressed, the screen display size is switched in sequence, and the status will be displayed at the bottom of the screen. TV/AV signal input TV/AV1/AV2/AV3/AV4 /HDMI HDMI signal of 720p/50,720p/60,1080i/50, 1080i/60. 93 9 4 CAUTION Using a wide-screen television z This television - Hitachi 26LD9000TA | Owners Guide - Page 33
ENGLISH FUNCTION (continued) Size Switching (continued) RGB signal input You can select a suitable size depending on the resolution. Full 4:3 Display Area Selection Diagram Display Full 4:3 640 X 480 (VGA) 800 X 600 (SVGA) 1024 X 768 (XGA) 33 - Hitachi 26LD9000TA | Owners Guide - Page 34
FUNCTION (continued) Audio Switching Sound Multiplex (TV mode) You can make optimum use of available audio by pressing bottom of remote control. Audio can be switched only if receiving sound multiplex signals; otherwise, pressing this button will have no effect, such as when only mono sound - Hitachi 26LD9000TA | Owners Guide - Page 35
Returning to operating status z Operate the personal computer, then input computer's H. sync, V. sync or press the Sub Power button of the control panel or the remote control to restart the television. 35 - Hitachi 26LD9000TA | Owners Guide - Page 36
TROUBLESHOOTING Before calling service technician, check the following tables first. If the problem sound No picture - normal sound The remote control does not work. Normal picture but external equipments is ON. z Check if the TV mode is selected. z Check if the TV is in "Standby mode" or "Power Save - Hitachi 26LD9000TA | Owners Guide - Page 37
external equipments is ON. z Check if the TV/AV mode has been selected correctly. z Check HDMI. z Press button to check if the input signal of the displayed image is compatible with the specification of the television pressing the control. button on the remote z Check if the cables are connected - Hitachi 26LD9000TA | Owners Guide - Page 38
TROUBLESHOOTING(continued) Symptom and Check List (continued) Symptoms z The image on the Horizontal clock". AAAAA z Try "Auto Adjust". z Check the Signal status of the PC by pressing on the remote control. button z If the Vertical Frequency of the PC is set to less than 70Hz, adjust its level - Hitachi 26LD9000TA | Owners Guide - Page 39
conditions Temperature Relative Humidity 26LD9000TA Approx. 26 inches HDMI input terminal Composite video: PAL, SECAM, NTSC3.58, NTSC4.43, PAL60 Component video: 480i, 576i, 480p, 576p, 720p/50, 720p/60, 1080i/50, 1080i/60 Output signals (RF input) Input terminal / Receiving range RF Video System - Hitachi 26LD9000TA | Owners Guide - Page 40
via a graphics board or the like, the television only support H/V separate sync signal. S-input connector pin specifications Pin Input Signal 1 Y 2 Y-GND 3 C 4 C-GND Frame GND HDMI connector Input pin specifications Pin Input Signal Pin Input Signal 1 T.M.D.S. Data2+ 11 - Hitachi 26LD9000TA | Owners Guide - Page 41
ENGLISH PRODUCT SPECIFICATIONS (continued) Recommended Signal List With HDMI INPUT No. Signal Name Signal mode Resolution 1 VGA of Horizontal Position, Vertical Position, Horizontal Clock and Clock Phase. z The television may fail to display an animation image correctly when a signal having a
-
 1
1 -
 2
2 -
 3
3 -
 4
4 -
 5
5 -
 6
6 -
 7
7 -
8
-
9
-
10
-
11
-
12
-
13
-
14
-
15
-
16
-
17
-
18
-
19
-
20
-
21
-
22
-
23
-
24
-
25
-
26
-
27
-
28
-
29
-
30
-
31
-
32
-
33
-
34
-
35
-
36
-
37
-
38
-
39
-
40
-
41
 |
 |

1
ENGLISH
USER'S MANUAL
Thank you for purchasing the HITACHI LCD Television.
Please read this user manual carefully before operating
this product.
To ensure proper operation, please read and follow ALL
the instructions, especially the "IMPORTANT SAFETY
INSTRUCTIONS" and "SAFETY PRECAUTIONS".
Please keep this user manual for future reference.
26LD9000TA
32LD9000TA