Hitachi 32LD8800 Owners Guide
Hitachi 32LD8800 - LCD Direct View TV Manual
 |
View all Hitachi 32LD8800 manuals
Add to My Manuals
Save this manual to your list of manuals |
Hitachi 32LD8800 manual content summary:
- Hitachi 32LD8800 | Owners Guide - Page 1
Color LCD Monitor Model Name 32LD8800TA 37LD8800TA USER MANUAL This is the image of the model 32LD8800TA. Desktop stand is optional for 37LD8800TA. READ THE INSTRUCTIONS INSIDE CAREFULLY. KEEP THIS USER MANUAL FOR FUTURE REFERENCE For future reference, record the serial number of your monitor. - Hitachi 32LD8800 | Owners Guide - Page 2
OSD) system 21 Language Menu 21 Setup Menu (TV mode 22 Setup Menu (AV mode 24 Setup Menu (RGB mode 25 Function Menu 27 Picture Menu (TV/AV instructions. Before calling for the technical support or service technician, read "TROUBLESHOOTING" ( 54 ~ 56 ) to determine the symptoms when problems - Hitachi 32LD8800 | Owners Guide - Page 3
HITACHI LCD Monitor. We hope that you will enjoy the great performance with this product. This LCD the following instructions when installing, operating, and cleaning the product. Keep this manual for future regarding this manual, please contact your local dealer or our Customer Service Center. Before - Hitachi 32LD8800 | Owners Guide - Page 4
manual and affixed on the unit itself. Please fully understand the meanings of the symbols before reading the instructions in this section. WARNING CAUTION Never ignore the instruction to prohibit the users from doing the power cord immediately when serious problems happen. Serious problems - Hitachi 32LD8800 | Owners Guide - Page 5
electrical shock, operate this product only with the power supply voltage indicated on the unit. ■ Beware not to drop or have any impact on the unit. Take extra care while moving the unit. There is no protection glass on the surface of the LCD panel. Thus, do not press the panel surface - Hitachi 32LD8800 | Owners Guide - Page 6
service life. Install the product in accordance with the instructions in this manual. television near the speaker of the LCD monitor. It could cause wall socket. It could cause electrical shock. If the plug is not fitted for the wall socket, contcat your dearly for replacement. ■ Do not handle the Power - Hitachi 32LD8800 | Owners Guide - Page 7
and Maintenance Please make sure to unplug the power cord before cleaning the monitor. ■ How to clean the LCD panel of the monitor. Wipe the panel may cause discoloration and damage the panel surface. Do not wipe with a hard cloth or rub hard. It may hurt the panel surface. In case of the greasy dirt - Hitachi 32LD8800 | Owners Guide - Page 8
the others, or in different colors, etc. Surface on Panel The LCD panel displays images by blinking the fluorescent lamps internally. This could raise In addition, do not impact strongly on the surface of the panel because LCD panel is made with fine processing glass. Residual image When a still image - Hitachi 32LD8800 | Owners Guide - Page 9
the supplied accessories before installation. In case of missing or damaged, please contact the dealer immediately. User Manual Remote Control AA size batteries X2 Power Cord (BS Type)* *The type of power plug provided may be different from this drawing for some countries. OPTION Ask your local - Hitachi 32LD8800 | Owners Guide - Page 10
Switch (on the bottom surface) r u Desktop Stand (optional for 37LD8800TA) t Rear Panel 32LD8800TA 37LD8800TA q q Handgrips w Side Input e Terminal Board (External Device Connection) t t r Power Cord Socket t Control Panel (see below for details) w w Please refer to 13 ~ 17 for the - Hitachi 32LD8800 | Owners Guide - Page 11
COMPONENT NAMES (Continued) ENGLISH Remote Control q w e r t y u i o a s d f g h j q Sub Power w Function Select (TV/DVD/SAT) Press this button to select function mode indicating LED lamp. Normally, select "TV". k e Input Select/DVD Control/Photo Input Control Press this button to change - Hitachi 32LD8800 | Owners Guide - Page 12
going to be used for an extended period of time. To avoid possible failure, read the following instructions and handle the remote control properly. Do not drop or have an impact on the remote control. of the panel. (See the figures below for details.) 32LD8800TA: 37LD8800TA: Handgrips Handgrips 11 - Hitachi 32LD8800 | Owners Guide - Page 13
mount units or improper installation. As for the installation instruction, please read each user manual of the mount units: for Desktop Setup, Wall Mounting, and Ceiling Mounting. In case of using Wall or Ceiling Mounting monitor to wall. Without Function. (32LD8800TA:25cm/ . For 32LD8800TA, please - Hitachi 32LD8800 | Owners Guide - Page 14
Monitor Out and Sub Woofer i Service use only o Power Swivel Terminal d (see 36 ) Power Plug to the Wall Socket. 1. Connecting Power Cord to the Rear Panel Connect Power Cord to the monitor. *Make sure not to connect the Power Plug to the Wall to "ANT" on the LCD screen Socket on marked . - Hitachi 32LD8800 | Owners Guide - Page 15
ENGLISH CONNECTION (continued) Connecting Procedure (continued) 3. Connecting to External Equipment Terminals on Rear AV1 and AV2 can be connected to the equipment with either Component or Composite output. Depending on whether the Y/VIDEO input of your selected equipment is Y signal or Video - Hitachi 32LD8800 | Owners Guide - Page 16
cable is used to transmit all video/audio/control signals, which creates easy connection. Moreover, those digital signals can produce high quality data without any degradation. You are provided two HDMI terminals, one of the most remarkable features. If your external device has a HDMI terminal - Hitachi 32LD8800 | Owners Guide - Page 17
be connected to the equipment with an S-Video output and composite output. [Example] VCR IN OUT Camcorder VIDEO S-VIDEO L/MONO INPUT(AV5) AUDIO DVD player Home video game system R If your external device has a S-video terminal, S-VIDEO connection is recommended for higher quality picture - Hitachi 32LD8800 | Owners Guide - Page 18
. For the LCD panel, a three-core power cord with a ground terminal is used for efficiency protection. Always be sure to connect the Power Cord to a MONO L MONO L MONO L MONO L C C C C R R R R R SERVICE USE ONLY HDMI1 How to fasten the band: To tighten Pull the band in the direction of - Hitachi 32LD8800 | Owners Guide - Page 19
not appear on the screen at all, or have any problem, see TROUBLESHOOTING on 54 ~ 56 . It may help you to solve the problems. You can turn ON the power only by pressing the Sub Power button during the Standby mode. Do not switch the power On/Off repeatedly in a short period of time. It could - Hitachi 32LD8800 | Owners Guide - Page 20
automatically leads to the settings of "Language" and "Auto Tuning." 1. The first screen appeared will ask you to choose the language of your TV's display. 2. Select the language you preferred from the list and press OK button. 3. Once selecting the language, "Auto Tuning" screen appears to start - Hitachi 32LD8800 | Owners Guide - Page 21
signal status can be displayed on the screen by pressing the button of the remote control. The display will go out in approximately 6 seconds. TV 1 TV position ABCDE Name Sound mode Off-timer On-timer OFF -- -- Min VIDEO AV1 Composite Input mode Signal mode Off-timer On-timer RGB OFF - Hitachi 32LD8800 | Owners Guide - Page 22
MENU OPERATION How to use the On-Screen Display (OSD) system With the On-Screen Display system, you can access the various kinds of the features and functions in this product. Basic Operation MENU 1. Press button on the remote control or Menu - Hitachi 32LD8800 | Owners Guide - Page 23
various kinds of features relating to TV channel settings. Setup Auto Tuning Manual Tuning Fine Tuning Sort Teletext Language Auto Off Select OK Set Off Return Selected Items Auto Tuning Mode Search Position Frequency Manual Tuning Name Sound System Setup hint Select the way to display - Hitachi 32LD8800 | Owners Guide - Page 24
TV mode) (continued) Selected Items Setup hint Manual Tuning Color System Skip NR Antenna Att. Auto PAL SECAM Select color system : Increase the frequency data for the main tuner. ◄ : Decrease the frequency data for the main tuner. as Singapore, Australia, and Malaysia. East Europe : Poland, - Hitachi 32LD8800 | Owners Guide - Page 25
System1: Europe/Asia, System2:North America) Composite and S-video input only. Auto PAL SECAM NTSC4.43 NTSC3.58 Auto NTSC-M PAL-M PAL-N Select the color system depending on the input signal. Generally, select [Auto]. In case that the input signal has too much noise, the signal level is too low, or - Hitachi 32LD8800 | Owners Guide - Page 26
is a possibility that the display may not be adjusted in its optimum condition with this function. In that case, please adjust each item manually. Adjust the display position horizontally. When the position exceeds the possible range, the display color will turn into Magenta. Adjust the display - Hitachi 32LD8800 | Owners Guide - Page 27
ENGLISH MENU OPERATION (continued) Setup Menu (RGB mode) (continued) Selected Items Input Level Frequency Display WVGA Type WXGA Mode Vertical Filter Frequency Mode Setup hint 0.7V 1.0V Off On Off On Off 1280x768 1366x768 Off On PC Movie Normally, select [0.7V]. Select [1.0V] only when the - Hitachi 32LD8800 | Owners Guide - Page 28
in details.) Split: half sized images Strobe: thumbnail sized images You can set the display size for TV / AV input screen appearing first when turning the main power On. In case that the image from TV signal (especially CATV) has a blackened gap in either or both side during Panoramic mode, select - Hitachi 32LD8800 | Owners Guide - Page 29
ENGLISH MENU OPERATION (continued) Function Menu (continued) Selected Items Background Slide Effect Slide Interval Slide Music Slide Mode Reset Setup hint 1 This is available only for Photo Input function. Switch the 2 pattern of background. See details on 49 . Off This is available only for - Hitachi 32LD8800 | Owners Guide - Page 30
MENU OPERATION (continued) Picture Menu (TV/AV mode) In this menu, you can make specific adjustments for the picture based on your preference. By pressing ▼button at the bottom of each - Hitachi 32LD8800 | Owners Guide - Page 31
ENGLISH MENU OPERATION (continued) Picture Menu (TV/AV mode) (continued) Selected Items Contrast Mode* Back Light Off Low High Off Low High Off On This is a noise reduction system for picture signal. This is a noise reduction system for color signal. On: Automatically identify if it is the movie - Hitachi 32LD8800 | Owners Guide - Page 32
MENU OPERATION (continued) Picture Menu (TV/AV mode) (continued) Selected Items Setup hint Color Temp. Red On: Turn On to adjust the balance of each colors On Yellow depending on the user's preference. The settings Green reflect in each of the 4 Color Temperature modes. Color Decoding - Hitachi 32LD8800 | Owners Guide - Page 33
ENGLISH MENU OPERATION (continued) Picture Menu (RGB mode) In this menu, you can make specific adjustments for the RGB picture based on your preference. Picture Contrast Brightness : +31 : -31 Color : 0 Tint : +31 Picture Enhancement : Off Color Temperature : Normal Color Temp. Adjust - Hitachi 32LD8800 | Owners Guide - Page 34
MENU OPERATION (continued) Picture menu (RGB mode) (continued) Selected Items Setup hint Color Temp. Adjust.** Amplitude On: When you want to set specific adjustments in each of Red the 4 Color Temperature modes. You can adjust on Green the amplitude and cut off. The settings reflect on the - Hitachi 32LD8800 | Owners Guide - Page 35
the balance of the sound comes out from right and left side of the speakers. Off Normal Wide Off Low High Off Low High This system gives you the dynamic 3D sound. Select it depending on your preference. TruBass gives you the enchanced bass sound. Select it depending on your preference - Hitachi 32LD8800 | Owners Guide - Page 36
Off Timer On Timer Setup hint --Min. 30Min. 60Min. 90Min. 120Min. This function automatically sets the power to Standby mode when the selected time period has elapsed. This function automatically sets the power from standby --:-- mode to On when the specified time period has elapsed. Input the - Hitachi 32LD8800 | Owners Guide - Page 37
Power Swivel With the Desktop stand (included for 32LD8800TA or hang on the TV. These actions may as wall-mounting, disconnect POWER SWIVEL the rear side of the unit. CAUTION When you install the Desktop stand, follow the Instructions of the Manual included with the stand. Turn Off the Main Power - Hitachi 32LD8800 | Owners Guide - Page 38
broadcast at the same time. Press again to watch Teletext on a single screen. Press [TV Text] [Text TV+Text] To display Index page. To access Subtitle service directly (if the channel has the Subtitle service broadcasting). To display Hidden text. ex. The answers of the Quiz or the Game page - Hitachi 32LD8800 | Owners Guide - Page 39
control is pressed, the screen display size is switched in sequence, and the status will be displayed at the bottom of the screen. TV/AV signal input TV/AV1/AV2/AV3/AV4/AV5/HDMI1/HDMI2 4:3 Panoramic Zoom ZOOM button Full Cinema You can display the image at optimum condition by selecting - Hitachi 32LD8800 | Owners Guide - Page 40
a wide-screen monitor This monitor has a screen mode selection feature. If an incompatible screen mode is selected to play certain software, such as a TV program, the image would appear different form the original. Take this into consideration when making screen mode choices. Use of the wide feature - Hitachi 32LD8800 | Owners Guide - Page 41
available signals, please refer to "Recommended Signal List" on 60 . This function is NOT available in HDMI input. To activate Multi Picture mode in either TV, AV, and RGB mode, press on the remote control. 2-picture mode You can watch two different pictures side by side. This mode is available in - Hitachi 32LD8800 | Owners Guide - Page 42
AV1 Each time 2-4-12 is pressed, the picture mode will be switched by following order. AV2 2-Picture 2-Picture (1080i)* 4-Picture 12-Picture (TV mode only) * When receiving 1080i format of component signal, there is a mode (2-Picture(1080i)) which sub-screen is displayed inside of the large - Hitachi 32LD8800 | Owners Guide - Page 43
The channels that are preset in advance (up to 200 channels) will automatically appear in certain intervals. NOTE This mode is available only in TV mode. 1 2 3 4 5 6 7 8 9 10 11 12 1. To EXIT from the Multi Picture mode, press . Next time you press to activate the Multi Picture Mode, it - Hitachi 32LD8800 | Owners Guide - Page 44
speaker icon is on the Sub-screen Change channels. Switch the Input modes (TV and AV1~5) on the Sub-screen. (Main-screen is only for RGB Input lower) RGB AV1 (Subscreen) NOTE When operating Multi Picture mode, the "Power Save mode" is not available even though the Horizontal/Vertical Sync. Signal - Hitachi 32LD8800 | Owners Guide - Page 45
as swinging of golf club and baseball bat. [Split] A AI [Strobe] 1 2 3 4 5 6 7 8 9 10 11 12 ACTIVE This function is also available in AV input mode besides TV mode. Refer to the table as shown in "Recommended Signal List" on 60 . 44 - Hitachi 32LD8800 | Owners Guide - Page 46
operating this function, make sure to turn the power OFF /Standby. 2. Prepare the DSC (Digital to the content about "connecting to PC" in the user manual of DSC. USB Card Reader : Insert only one memory into the slot (Left side). 4. Turn ON the TV after the USB cable is connected or the SD - Hitachi 32LD8800 | Owners Guide - Page 47
ENGLISH DFoUnoNt aClloTw IcOhildNren(ctooplnaytairnouuned dthe) slot. Photo Input Function (continued) Displaying Still Picture in Photo Mode Thumbnail-Size Image (Index) to Full-Size Image 1234 P 5678 9 10 11 12 13 14 15 16 P Photo Index (1st Page). OK 17 18 19 20 21 22 23 24 25 26 27 28 - Hitachi 32LD8800 | Owners Guide - Page 48
MENU button. Press it again to return to the Photo Input page. (Refer to Table 1 as below.) NOTE Contrast will decrease automatically to reduce power consumption if stationary images such as still photos are left on the screen for more than 3 minutes. Please note that it is not malfunction. Table - Hitachi 32LD8800 | Owners Guide - Page 49
can switch the size of movie display between normal and double in full size mode. NOTE In case of displaying movie pictures, 1) If your DSC supports SD card/MMC, insert the card to the monitor directly rather than USB. 2) If your DSC is PictBridge-compatible and has a function to switch between - Hitachi 32LD8800 | Owners Guide - Page 50
taken by q camera. Photo Max number of photo file Max number of pixel 500 8176 x 8176(DCF JPEG format) Max number of movie file 500 Supported Video Format (Extension/Max number of pixel) Motion JPEG (avi.mov/640*480) MPEG1 (mpg/640*480) MPEG4 (avi,mov,mp4,asf/352*288) Movie - Hitachi 32LD8800 | Owners Guide - Page 51
with low battery power may not properly supports still pictures but not movie pictures. Refer to the DSC user manual for PictBridge in details. Do not use this function other than private purposes. It might infringe copyright laws. Back up all of the data in the memory card in case if data - Hitachi 32LD8800 | Owners Guide - Page 52
FUNCTION (continued) Audio Switching NICAM / Sound Multiplex(including A2) (TV mode) You can make optimum use of available audio by pressing bottom of remote control. Audio can be switched only if receiving NICAM and sound - Hitachi 32LD8800 | Owners Guide - Page 53
Save mode (Operation mode : Off) can be set to be activated automatically when the computer is not being used to reduce power consumption by this unit. Horizontal RGB sync signal Vertical PC signal Operation mode Indicating lamp Yes Yes Active (normal display) On Lights green No Yes - Hitachi 32LD8800 | Owners Guide - Page 54
buttons to select the maker and type as shown below. Set up hint Example: HITACHI DVDw 1. Set up the maker. Press button to indicate the DVD LED on . 3. Confirm the setting. After setting the maker and type, press the SUB POWER button on the remote control. If the DVD does not switch ON, repeat step 1 - Hitachi 32LD8800 | Owners Guide - Page 55
TROUBLESHOOTING Before calling service technician, check the following tables first. If the problem is not be solved with the suggested procedures, contact your local dealer. For your safety, NEVER try to repair the product by yourself. When Following Messages Appear on the Screen Message Power - Hitachi 32LD8800 | Owners Guide - Page 56
of the external equipments are connected correctly and firmly. Check if the power of the external equipments is ON. Check if the TV/AV mode has been selected correctly. Check if the PC is in Power Save mode or not. Refer to "Power Save mode" and "When following messages appears on the screen". Check - Hitachi 32LD8800 | Owners Guide - Page 57
ENGLISH TROUBLESHOOTING (continued) Symptom and Check List (continued) Symptoms Check list Cannot display the image from "Photo Input function". Check the connecting equipments and image format. (Please - Hitachi 32LD8800 | Owners Guide - Page 58
Net dimensions Net weight Ambient conditions Power supply Temperature Relative humidity Power consumption/ at standby Audio output (VIDEO input) Input terminals Input signals Output Signal (RF input) Input terminal / Receiving range RF Video System (RGB input) Input terminals Approx. 32 - Hitachi 32LD8800 | Owners Guide - Page 59
DM 3 DP 4 GND HDMI connector pin specifications Pin Input signal Pin 1 TMDS Data2+ 11 2 TMDS Data2 Shield 12 3 TMDS Data2- 13 4 TMDS Data 1+ 14 5 TMDS Data1 Shield 15 6 TMDS Data1- 16 7 TMDS Data0+ 17 8 TMDS Data0 Shield 18 9 TMDS Data0- 19 10 TMDS Clock+ Input - Hitachi 32LD8800 | Owners Guide - Page 60
PRODUCT SPECIFICATIONS (continued) Recommended Signal List With HDMI input Signal mode No. Signal Name Resolution Vertical frequency (Hz) 1 VGA 640 X 480 59.94 2 576i 720(1440) X 576 50.00 3 480i 720(1440) X 480 59.94 4 576p 720 X 576 50.00 5 480p 720 X 480 59.94 6 1080i/ - Hitachi 32LD8800 | Owners Guide - Page 61
720p/50 480p 720p/60 ○ ○ ○ ○ ○ ○ ○ ○ ○ ○ ○ ○ ○ ○ 1080i/50 1080i/60 TELE TEXT ○ (○ : Available) 4-Picture / 2-Picture (1080i)* Input terminal Main Sub TV TV ○ AV1 PAL, SECAM ○ ~AV5 NTSC3.58/4.43 ○ 576i, 576p ○ AV1 480i, 480p ○ AV2 1080i/50, 60* ○ 720p/50, 60 ○ AV1 - Hitachi 32LD8800 | Owners Guide - Page 62
QR65422 Printed in Japan
-
 1
1 -
 2
2 -
 3
3 -
 4
4 -
 5
5 -
 6
6 -
 7
7 -
8
-
9
-
10
-
11
-
12
-
13
-
14
-
15
-
16
-
17
-
18
-
19
-
20
-
21
-
22
-
23
-
24
-
25
-
26
-
27
-
28
-
29
-
30
-
31
-
32
-
33
-
34
-
35
-
36
-
37
-
38
-
39
-
40
-
41
-
42
-
43
-
44
-
45
-
46
-
47
-
48
-
49
-
50
-
51
-
52
-
53
-
54
-
55
-
56
-
57
-
58
-
59
-
60
-
61
-
62
 |
 |

Color LCD Monitor
Model Name
32LD8800TA
37LD8800TA
USER MANUAL
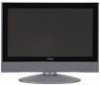
This is the image of the model 32LD8800TA.
Desktop stand is optional for 37LD8800TA.
READ THE INSTRUCTIONS INSIDE CAREFULLY.
KEEP THIS USER MANUAL FOR FUTURE REFERENCE
For future reference, record the serial number of your monitor.
SERIAL NO.
This serial number is located on the rear of the monitor.