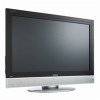
Hitachi 32LD9000TA Owners Guide
Hitachi 32LD9000TA - LCD Direct View TV Manual
 |
View all Hitachi 32LD9000TA manuals
Add to My Manuals
Save this manual to your list of manuals |
Hitachi 32LD9000TA manual content summary:
- Hitachi 32LD9000TA | Owners Guide - Page 1
ENGLISH USER'S MANUAL 26LD9000TA 32LD9000TA Thank you for purchasing the HITACHI LCD Television. Please read this user manual carefully before operating this product. To ensure proper operation, please read and follow ALL the instructions, especially the "IMPORTANT SAFETY INSTRUCTIONS" and "SAFETY - Hitachi 32LD9000TA | Owners Guide - Page 2
INSTRUCTIONS 2 INSTRUCTIONS 3 About This Manual 3 Trademark Credits 3 About Software 3 SAFETY PRECAUTIONS 4 About the Symbols 4 Cleaning and Maintenance 7 ABOUT LCD PANEL 8 Common phenomena of LCD Panel 8 FEATURES 9 SUPPLIED ACCESSORIES 9 COMPONENT NAMES 10 Main Unit 10 Remote Control - Hitachi 32LD9000TA | Owners Guide - Page 3
. In case that you have any comments or questions regarding this manual, please contact your local dealer or our Customer Service Center. Ɣ Before operating this set, please fully understand the prerequisite such as specifications or constraints of the hardware and software. We are not responsible - Hitachi 32LD9000TA | Owners Guide - Page 4
instruction. There are risks of serious injuries or possible death to the user. CAUTION Do not ignore the instruction Unplug the power cord immediately when serious problems happen. Serious problems such as z Smoke, abnormal odor your local dealer to perform servicing such as inspection, adjustment, - Hitachi 32LD9000TA | Owners Guide - Page 5
the unit. z There is no protection glass on the surface of the LCD panel. Thus, do not press the panel surface with your fingers or hands Or do not hit anything against the television. These actions would damage the LCD cells or the panel surface and could cause the failure or personal injuries. - Hitachi 32LD9000TA | Owners Guide - Page 6
damage the product which may shorten its service life. Ɣ Install the product in accordance with the instructions in this manual. Ɣ Do not place the unit „ Do not place the CRT-based television near the speaker of the LCD Television. Ɣ It could cause the partial discoloration or blurring of the image - Hitachi 32LD9000TA | Owners Guide - Page 7
purchased the product. „ Please avoid installing the TV directly on the wooden floor. Depending on the cleaning the television. „ How to clean the LCD panel of the television. Ɣ Wipe the panel Use a lint-free cloth to clean the cabinet and control panel of the television. In case of the heavy dirt - Hitachi 32LD9000TA | Owners Guide - Page 8
others, or in different colors, etc. Ɣ Surface on Panel The LCD panel displays images by blinking the fluorescent lamps internally. This could raise In addition, do not impact strongly on the surface of the panel because LCD panel is made with fine processing glass. Ɣ Residual image When a still - Hitachi 32LD9000TA | Owners Guide - Page 9
convenient functions in your daily life! • Large-screen and high-definition LCD panel. • Improved Digital signal processor. • Accept more digital input from the Remote Control before using. In case of missing or damaged, please contact with dealer immediately. User Manual Remote Control AA size - Hitachi 32LD9000TA | Owners Guide - Page 10
Remote Control Receiver 5. Speaker 6. Desktop Stand 7. Main Power Switch (on the left side) 3! 4 5 Rear Panel 1. Side Input 2. Power Cord Socket 3. Terminal Board (External Device Connection) 4. Control the connections. 26LD9000TA 4 32LD9000TA 4 3 2 1 ! Control Panel These buttons are - Hitachi 32LD9000TA | Owners Guide - Page 11
ENGLISH COMPONENT NAMES (Continued) Remote Control 1. Power ON/OFF 2. [Color (Red, Green, Yellow, Blue)] 1 13 3. TV Select (TV) Press this button to change input to TV. 2 4. Input Select (AV1/AV2/AV3/AV4/HDMI/RGB) 3 Press this button to change input mode. 5. Program Select 4 Press - Hitachi 32LD9000TA | Owners Guide - Page 12
period of time. To avoid possible failure, read the following instructions and handle the remote control properly. Ɣ Do not drop or have an impact on the remote control. Ɣ Do not spill water or any liquid on the remote control. Ɣ Do not place the remote control on the wet object. Ɣ Do not place the - Hitachi 32LD9000TA | Owners Guide - Page 13
or liability for personal injuries or property damages caused by use of other mount units or improper installation. As for the installation instruction, please read each user manual of the mount units: for Desktop Setup, Wall Mounting, and Ceiling Mounting. In case of using Wall or Ceiling Mounting - Hitachi 32LD9000TA | Owners Guide - Page 14
Connect the RF cable from the equipment "Out" to the other equipment "In". 4. Then, connect from the equipment "Out" to "ANT" on the LCD screen Socket on marked . STB VCR [Example: Connecting Antenna through STB and VCR.] Precautions when connecting the aerial Ɣ Please use a coaxial cable which - Hitachi 32LD9000TA | Owners Guide - Page 15
ENGLISH CONNECTION (continued) Connecting Procedure (continued) 3. Connecting to External Equipment Ɣ Terminals on Rear AV1 can be connected to the equipment with an S-Video output and Composite output. IN OUT (Example) VCR DVD player Set-Top Box If your external device has a S-video terminal, S- - Hitachi 32LD9000TA | Owners Guide - Page 16
CONNECTION (continued) Connecting Procedure (continued) Monitor Out can be used to display same image as main unit on another television. When this output terminal is connected to an external television with a 75 Ohm terminal, the same image from composite (AV1, AV2), or RF signal can be displayed - Hitachi 32LD9000TA | Owners Guide - Page 17
HDMI(High Definition Multimedia Interface) is next-generation multimedia I/O interface. Only one cable is used to transmit all video/audio/control signals, which creates easy connection. Moreover, those digital signals can produce high quality data without any degradation. If your external - Hitachi 32LD9000TA | Owners Guide - Page 18
Cord provided. Ɣ Do not use a power supply voltage other than that indicated (AC110-240V, 50/60Hz). It may cause fire or electric shock. Ɣ For the LCD panel, a three-core power cord with a ground terminal is used for efficiency protection. Always be sure to connect the Power Cord to a three-pronged - Hitachi 32LD9000TA | Owners Guide - Page 19
(Standby mode). 2. Press Sub Power button either on the control panel or on the remote control. Ɣ The color of the Indicating Lamp turns into Green, on the screen at all, or have any problem, see TROUBLESHOOTING on 36 ~ 38 . It may help you to solve the problems. Ɣ You can turn ON the power only - Hitachi 32LD9000TA | Owners Guide - Page 20
mode is set to Mute, mute icon will be displayed at the left-bottom corner of the TV. 2. To turn the sound back, press button again, or Volume Up button on either remote control or the control panel. Volume Down button Volume Up button NOTE You can decrease the volume by pressing volume. button - Hitachi 32LD9000TA | Owners Guide - Page 21
Screen Display The input signal status can be displayed on the screen by pressing the button of the remote control. • The display will go out in approximately 5 seconds. TV 1 ABCDE ź TV position Name Sound mode RECALL button VIDEO AV1 Composite Input mode Signal mode RGB RGB H: 48.4 kHz - Hitachi 32LD9000TA | Owners Guide - Page 22
Display system, you can access the various kinds of the features and functions in this product. • Basic Operation 1. Press button on the remote control or Menu button on the control panel of the unit. The Main Menu is displayed on the screen as shown on the right. 2. To select the item, press - Hitachi 32LD9000TA | Owners Guide - Page 23
mode) With this menu, you can access various kinds of features relating to TV channel settings. Setup Auto Tuning Manual Tuning Fine Tuning Sort Teletext Language Select OK Set Return ! Selected Items Auto Tuning Mode Search Position Frequency Position Direct Setup hint Select the way - Hitachi 32LD9000TA | Owners Guide - Page 24
MENU OPERATION (continued) Setup Menu (TV mode) (continued) Selected Items Color System Manual Tuning Auto Setup hint NTSC3.58 PAL Select the color system from 5 different modes. SECAM NTSC4.43 Off It allows you to skip unregistered channels - Hitachi 32LD9000TA | Owners Guide - Page 25
ENGLISH MENU OPERATION (continued) Setup Menu (RGB mode) With this menu, you can adjust the display condition of the image which is inputting from the RGB terminals. Setup Auto Adjust Image Position Horizontal Clock Clock Phase Reset Select ŻŹSet Ź Ź 41 34 Reset Return Selected Items Auto - Hitachi 32LD9000TA | Owners Guide - Page 26
MENU OPERATION (continued) Picture Menu (TV/AV mode) In this menu, you can make specific adjustments for the picture based on Reset Dynamic Natural Cinema 0~100 0~100 0~100 0~12 -45~45 Cool Normal Warm User High Middle Low Setup hint You can make the better selection from 3 modes depending on - Hitachi 32LD9000TA | Owners Guide - Page 27
ENGLISH MENU OPERATION (continued) Picture Menu (TV/AV mode) (continued) Selected Items NR Film Mode 3D Comb Filter Black Enhancement Reset Off On Off On Off On Off Low Middle High Setup - Hitachi 32LD9000TA | Owners Guide - Page 28
Menu (RGB mode) In this menu, you can make specific adjustments for the RGB picture based on your preference. Picture the contrast to meet the lighting environment by using WX. 0~100 Cool Normal Warm User High Middle Low With this function, black is adjusted to change the overall brightness by - Hitachi 32LD9000TA | Owners Guide - Page 29
ENGLISH MENU OPERATION (continued) Audio Menu With this menu, you can adjust and customize the audio condition as you like. Audio Matrix Surround Off Dynamic Bass Off Bass 0 Treble 0 Balance 0 Perfect Volume Off Reset Reset Select ŻŹ On/ Off Return Selected Items Matrix Surround - Hitachi 32LD9000TA | Owners Guide - Page 30
MENU OPERATION (continued) Timer Menu This allows your television to turn Off (Standby mode) at set time automatically, which you may find useful. Timer Off Timer ŻŹ Adjust Off Return Selected Items Off Timer Off 30Min. 60Min. 90Min. 120Min. Setup hint This function automatically sets the - Hitachi 32LD9000TA | Owners Guide - Page 31
services provided by each TV channel. Most TV channels provide information via Teletext such as: z TV program schedule z Weather forecasts z Sports results z Newsflash Page number Link Page z How to operate the Teletext You can display the Teletext simply by pressing the remote control - Hitachi 32LD9000TA | Owners Guide - Page 32
remote control is pressed, the screen display size is switched in sequence, and the status will be displayed at the bottom of the screen. TV/AV signal input TV screen mode is selected to play certain software, such as a TV program, the image would appear different form the original. Take this - Hitachi 32LD9000TA | Owners Guide - Page 33
ENGLISH FUNCTION (continued) Size Switching (continued) RGB signal input You can select a suitable size depending on the resolution. Full 4:3 Display Area Selection Diagram Display Full 4:3 640 X 480 (VGA) 800 X 600 (SVGA) 1024 X 768 (XGA) 33 - Hitachi 32LD9000TA | Owners Guide - Page 34
FUNCTION (continued) Audio Switching Sound Multiplex (TV mode) You can make optimum use of available audio by pressing bottom of remote control. Audio can be switched only if receiving sound multiplex signals; otherwise, pressing this button will have no effect, such as when only mono sound is - Hitachi 32LD9000TA | Owners Guide - Page 35
Lights green Lights orange Returning to operating status z Operate the personal computer, then input computer's H. sync, V. sync or press the Sub Power button of the control panel or the remote control to restart the television. 35 - Hitachi 32LD9000TA | Owners Guide - Page 36
TROUBLESHOOTING Before calling service technician, check the following tables first. If the problem sound No picture - normal sound The remote control does not work. Normal picture but external equipments is ON. z Check if the TV mode is selected. z Check if the TV is in "Standby mode" or "Power Save - Hitachi 32LD9000TA | Owners Guide - Page 37
TROUBLESHOOTING external equipments is ON. z Check if the TV/AV mode has been selected correctly. z Check if of the displayed image is compatible with the specification of the television. z It could happen the signal status by pressing the control. button on the remote z Check if the cables are - Hitachi 32LD9000TA | Owners Guide - Page 38
TROUBLESHOOTING(continued) Symptom and Check List (continued) Symptoms z The image on the screen clock". AAAAA z Try "Auto Adjust". z Check the Signal status of the PC by pressing on the remote control. button z If the Vertical Frequency of the PC is set to less than 70Hz, adjust its level higher - Hitachi 32LD9000TA | Owners Guide - Page 39
ENGLISH PRODUCT SPECIFICATIONS SPECIFICATION Panel Display dimensions Resolution Net dimensions Net weight Ambient conditions Temperature Relative Humidity 26LD9000TA Approx. 26 inches (576 (H) ×324 (V)mm, diagonal 660.5mm) 32LD9000TA Approx. 32inches (698 (H) x 392 (V) mm, diagonal 801mm) - Hitachi 32LD9000TA | Owners Guide - Page 40
via a graphics board or the like, the television only support H/V separate sync signal. S-input connector pin specifications Pin Input Signal 1 Y 2 Y-GND 3 C 4 C-GND Frame GND HDMI connector Input pin specifications Pin Input Signal Pin Input Signal 1 T.M.D.S. Data2+ 11 TMDS - Hitachi 32LD9000TA | Owners Guide - Page 41
ENGLISH PRODUCT SPECIFICATIONS (continued) Recommended Signal List With HDMI INPUT No. Signal Name Signal mode Resolution 1 VGA 640x480 2 480i 720(1440)x480 3 480p 720x480 4 576i 720(1440)x576 5
-
 1
1 -
 2
2 -
 3
3 -
 4
4 -
 5
5 -
 6
6 -
 7
7 -
8
-
9
-
10
-
11
-
12
-
13
-
14
-
15
-
16
-
17
-
18
-
19
-
20
-
21
-
22
-
23
-
24
-
25
-
26
-
27
-
28
-
29
-
30
-
31
-
32
-
33
-
34
-
35
-
36
-
37
-
38
-
39
-
40
-
41
 |
 |

1
ENGLISH
USER'S MANUAL
Thank you for purchasing the HITACHI LCD Television.
Please read this user manual carefully before operating
this product.
To ensure proper operation, please read and follow ALL
the instructions, especially the "IMPORTANT SAFETY
INSTRUCTIONS" and "SAFETY PRECAUTIONS".
Please keep this user manual for future reference.
26LD9000TA
32LD9000TA