Hitachi 55HDT52 Owners Guide
Hitachi 55HDT52 - 55" Plasma TV Manual
 |
View all Hitachi 55HDT52 manuals
Add to My Manuals
Save this manual to your list of manuals |
Hitachi 55HDT52 manual content summary:
- Hitachi 55HDT52 | Owners Guide - Page 1
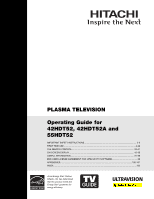
PLASMA TELEVISION Operating Guide for 42HDT52, 42HDT52A and 55HDT52 IMPORTANT SAFETY INSTRUCTIONS 2-3 FIRST TIME USE ...4-22 THE REMOTE CONTROL ...23-41 ON-SCREEN DISPLAY ...42-90 USEFUL INFORMATION...91-98 END USER LICENSE AGREEMENT FOR HITACHI DTV SOFTWARE 99 APPENDIXES ...100-101 INDEX ...102 - Hitachi 55HDT52 | Owners Guide - Page 2
for long periods of time. 14. Refer all servicing to qualified service personnel. Follow all warnings and instructions marked on this plasma television. Servicing is required when the apparatus has been damaged in any way, such as power-supply cord or plug is damaged, liquid has been spilled - Hitachi 55HDT52 | Owners Guide - Page 3
a set-top box. For more information call your local cable company. Note • There are no user serviceable parts inside the plasma television. • Model and serial numbers are indicated on back side of the plasma television. Prevention of screen damages Continuous on-screen displays such as video games - Hitachi 55HDT52 | Owners Guide - Page 4
¶ Power Swivel Cable (42" models only) access our web site at: www.hitachi.us/tv CAUTION: 1. Ceiling mounting is not recommended. Mounting the panel on the ceiling does not provide adequate ventilation for the electronics or proper support for the front glass panel. This plasma television product - Hitachi 55HDT52 | Owners Guide - Page 5
Wall 1. Keep the Plasma television 4 inches away from the wall except when mounted using the wall mount bracket. 2. Secure the television to the wall as shown in fig. (a) or (b). A B LOCATION Select an area where sunlight or bright indoor illumination will not fall directly on the picture screen - Hitachi 55HDT52 | Owners Guide - Page 6
First time use How to set up your new HITACHI Plasma Television VIEWING The best picture is seen by sitting directly in front of the TV and about 10 to 18 feet from the screen. During daylight hours, reflections from outside light may appear on the screen. If so, drapes or screens can be used to - Hitachi 55HDT52 | Owners Guide - Page 7
box and VCR. This connection allows your TV, and the TV Guide On ScreenTM system, to control your cable box and/or VCR. Power Swivel Cable (Provided with 42" Models) This cable is used to connect the swivel stand to the rear panel of the Plasma Television. IEEE1394 Cable This cable is used to - Hitachi 55HDT52 | Owners Guide - Page 8
backlight mode. LEGEND TV - Television CBL - Cable Box STB - Set-Top-Box VCR - Video Cassette Recorder/Player DVD - Digital Video Disc Player SAT - Satellite Receiver NOTES: 1. The TV's remote control sensor is located on the right bottom portion of the TV screen. To control TV functions, please - Hitachi 55HDT52 | Owners Guide - Page 9
̆ INPUT 5 L/MONO AUDIO R ቨ ቢ SIDE POWER button Press this button to turn the Plasma Television ON/OFF. It can also be turned ON/OFF by remote control. The "MAIN POWER" button must be at stand-by mode. ባ MENU/SELECT button This button allows you to enter the MENU, making it possible to set TV - Hitachi 55HDT52 | Owners Guide - Page 10
. NOTES: 1. Your HITACHI Plasma TV will appear to be turned OFF (lights orange) if there is no video input when VIDEO: 1, 2, 3, 4 and 5. Check the Power Light to make sure the Display Monitor is turned off or in Stand-by mode (lights red) when not in use. 2. Remote Control can not turn ON/OFF the - Hitachi 55HDT52 | Owners Guide - Page 11
will allow you to control Use the HDMI input for your external devices such as Set-Top-Boxes or DVD players equipped with an HDMI output connection. the external components with your Plasma Television's remote control in TV mode. The GLINK connection will enable the TV Guide On ScreenTM recording - Hitachi 55HDT52 | Owners Guide - Page 12
the Power Swivel Table Top Stand. OR ቯ IEEE1394 (DV INPUT) These jacks provide a digital interface for your external digital devices, such as a Digital VCR (DVHS), Set-Top-Box or Digital Camcorder by means of a single cable (see page 19). When using IEEE1394 connections, you enable video and audio - Hitachi 55HDT52 | Owners Guide - Page 13
the VCR, camcorder, laserdisc player, DVD player, or HDTV Set Top Box to your Plasma TV is dependent on the model and features of each component. Check the owner's manual of each component for the location of video and audio inputs and outputs. The following connection diagrams are offered as - Hitachi 55HDT52 | Owners Guide - Page 14
On-Screen Display The Remote Control First time use Rear Panel Connections Outside Antenna Cable TV coaxial cable 2-Way signal splitter VCR #1 ANT OUTPUT IN S-VIDEO V L R Optional / G-LINK DIGITAL OUTPUT CAPABILITY DIGITAL OUTPUT AUDIO OUT DVI to HDMI IEEE1394 DV INPUT Optional OUTPUT Y - Hitachi 55HDT52 | Owners Guide - Page 15
to use a 1080i or 720p input signal. MACROVISION NOTES: 1. Video signals fed through a VCR may be affected by copyright protection systems and the picture will be distorted on the television. 2. Connecting the television directly to the Audio /Video output of a Set-Top-Box will assure a more - Hitachi 55HDT52 | Owners Guide - Page 16
On-Screen Display The Remote Control First time use Connecting External Video Sources CONNECTING A VIDEO AND STEREO AUDIO SOURCE TO INPUT1 - INPUT5 1. Connect the cable from the VIDEO OUT of the VCR or the laserdisc player to the INPUT (VIDEO) jack, as shown on the Rear Panel on the right. 2. - Hitachi 55HDT52 | Owners Guide - Page 17
digital output device controls the HDMI interface so proper setup of device user settings determines final video appearance. 5. When using a DVI to HDMI cable, connect the Audio Out L and R cables at the same INPUT (1 or 2) as your HDMI INPUT (1 or 2). / G-LINK IEEE1394 DV INPUT DVI to HDMI - Hitachi 55HDT52 | Owners Guide - Page 18
AND STEREO AUDIO SOURCE TO INPUT 3 OR 4: Y-PBPR. 1. Connect the cable from the Y OUT of the NOTE: 1. Completely insert the connection cord Laserdisc/DVD player or HDTV set top box to plugs when connecting to rear panel jacks. the INPUT (Y) jack, as shown on the Rear The picture and sound that - Hitachi 55HDT52 | Owners Guide - Page 19
video and audio will be received by the TV. It will enable you to control the D-VHS from the TV IEEE1394 menu (see page 29). 2. The IEEE1394 interface contains the copy protection standard called 5C or Digital Transmission Content Protection (DTCP). 2. Press the INPUTS button on the Remote Control - Hitachi 55HDT52 | Owners Guide - Page 20
fixed output. The Volume of the amplifier is controlled by the amplifier, not by the Plasma Television. The OPTICAL OUT terminal outputs all audio sources with Optical IN capability. 1. Connect an optical cable from the Optical out to the Optical input of a separate Stereo System Amplifier as shown - Hitachi 55HDT52 | Owners Guide - Page 21
, Set Top Box, DVD, etc.). Once this is setup, it allows your IR Mouse connector to control your equipment using your Hitachi Plasma TV Remote Control. You can use your HITACHI remote control to control the Audio/Video equipment command without the equipment's remote control. The Plasma Television - Hitachi 55HDT52 | Owners Guide - Page 22
, then you can use your HITACHI Plasma TV Remote Control and the TV Guide On Screen system to control your cable box and VCR recording features. The Plasma Television Rear Panel has IR BLASTER/G-LINK jacks. One IR Mouse cable can connect up to 2 external Audio/Video components. Please see the - Hitachi 55HDT52 | Owners Guide - Page 23
, CATV (Cable TV) converters, set-top-box, satellite receiver, DVD players, and other audio/video equipment with one touch. Basic operation keys are grouped together in one area. To operate your Plasma TV, point the remote control at the remote sensor of the Television and select the TV by pressing - Hitachi 55HDT52 | Owners Guide - Page 24
Remote Control How to Use the Remote to Control Your TV ቢ POWER button Press this button to turn the TV set on or off when the remote is in TV mode. (See page 23 for ቢ instructions on how to set the remote control to TV mode.) ባ ቤ ብ ባ MODE Indicator Turns on or blinks to show remote control - Hitachi 55HDT52 | Owners Guide - Page 25
How to Use the Remote to Control Your TV ቧ ASPECT button Press this button to quickly change the picture format ASPECT ratio. Depending on the input signal format received, the picture format ratio allows you to adjust the images through the following options. 4:3 STANDARD Use this aspect mode to - Hitachi 55HDT52 | Owners Guide - Page 26
ScreenTM interactive display (see page 54). Press this button to access the Channel Guide of the (CBL), and (SAT/STB) while in (CBL)(SAT/STB) mode. ተ INPUTS button When the remote control is in TV mode, press this button to access the INPUTS menu. Use the CURSOR PAD and SELECT button to select the - Hitachi 55HDT52 | Owners Guide - Page 27
to Use the Remote to Control Your TV PHOTO INPUT This feature is useful for viewing digital still pictures from your digital camera, USB Drive or memory cards USB drive using the Photo Input in the left side panel of the TV. 1. Press the INPUTS button to cycle through the INPUTS selections until the - Hitachi 55HDT52 | Owners Guide - Page 28
Remote Control How to Use the Remote to Control Your TV Input Device Supported image types are up to 3072 x 2304; JPEG format should conform with DCF Standard (Design rule for Camera File System). 4. This TV set displays only digital pictures from digital cameras which meet DCF Standard. Pictures - Hitachi 55HDT52 | Owners Guide - Page 29
device is not connected INPUTS Photo Input IEEE 1394 Cable Air Input 1 Move SEL Sel. Device not detected The Remote Control When an IEEE1394 device is connected INPUTS Input 5 Photo Input IEEE 1394 Cable Air Move SEL Sel. IEEE1394 DVHS1 DEVICE NAME, BRAND NAME POWER TV TV RESET Move STD SEL - Hitachi 55HDT52 | Owners Guide - Page 30
again to turn the sound off completely (MUTE). To restore the sound, press the Remote Control Volume 8 Cable 22 / Soft Mute 8 Cable 22 / Mute 8 Closed Captioning will display automatically when MUTE/SOFT MUTE is on and Closed Caption is set to AUTO (see page 88). When the TV power is turned - Hitachi 55HDT52 | Owners Guide - Page 31
The Remote Control Picture-in-Picture (PIP) Your HITACHI Plasma TV incorporates Two Tuner technology designed for improved viewing enjoyment. This Two Tuner feature allows you to view antenna inputs on both the main picture and sub picture simultaneously, with separate tuning control for each. - Hitachi 55HDT52 | Owners Guide - Page 32
The Remote Control Picture-In-Picture (PIP) PIP MODE PICTURE-IN-PICTURE Select AIR from the INPUTS menu. Select a channel that has a 1080i signal. To prevent a pattern burn, occasionally move the sub-picture using the CURSOR PAD. SURF MODE PICTURE-IN-PICTURE Surf Mode PIP automatically scans all - Hitachi 55HDT52 | Owners Guide - Page 33
The Remote Control Picture-In-Picture (PIP) ባ PAUSE button If you wish to freeze the sub-picture, press the PAUSE button. This is convenient when trying to write down the address for a mail order company, recording statistics for a sporting event, etc. To return the picture to motion, press the - Hitachi 55HDT52 | Owners Guide - Page 34
performing the above procedures, please consult your cable box operating guide. 3. The remote control will remember the codes you have programmed until the batteries are removed from the from the remote control. After replacing the batteries repeat the entire programming procedure as stated above - Hitachi 55HDT52 | Owners Guide - Page 35
until the batteries are removed from the from the remote control. After replacing the batteries repeat the entire programming procedure as stated above. MY Satellite RECEIVER/ SET-TOP-BOX CODE IS: NOTE: Refer to instruction manual of the Set-TopBox/Satellite Receiver for operation of the buttons - Hitachi 55HDT52 | Owners Guide - Page 36
operating guide. 3. The remote control will remember the codes you have programmed until the batteries are removed from the from the remote control. After replacing the batteries repeat the entire programming procedure as stated above. MY DVD PLAYER CODE IS: NOTE: Refer to instruction manual of - Hitachi 55HDT52 | Owners Guide - Page 37
performing the above procedures, please consult your VCR/PVR operating guide. 3. The remote control will remember the codes you have programmed until the batteries are removed from the from the remote control. After replacing the batteries repeat the entire programming procedure as stated above - Hitachi 55HDT52 | Owners Guide - Page 38
you have programmed until the batteries are removed from the from the remote control. After replacing the batteries repeat the entire programming procedure as stated above. MY AUDIO COMPONENT CODE IS: NOTE: Refer to instruction manual of the VCR/PVR for operation of the buttons exclusively for the - Hitachi 55HDT52 | Owners Guide - Page 39
3 times to confirm proper setup. 6. The remote will now control the desired device. 7. Pressing the ENTER (ENT) button will now access the video input (1-5) of the desired device. / ᕄ SETUP EXAMPLE (Hitachi DVD with precode 0573 connected to INPUT 1 of the TV) ᕃ Select DVD mode by using your - Hitachi 55HDT52 | Owners Guide - Page 40
Remote Control Codes The Remote Control VCR BRAND CODE Hitachi 0000, 0041, 0042, 0105 Howard Computers............1972 Hughes Network Systems 0042 iBuy Power Video ......0744, 0715, 0783 0833, 0869, 1075 Gradiente 0651 Greenhill 0717 Grundig 0705 Harman/Kardon 0702 Hitachi Polk Audio 0539 - Hitachi 55HDT52 | Owners Guide - Page 41
Remote Control Codes The Remote Control Pioneer 0013, 0300 Polk Audio 0269, 0892 RCA 0110, 0189 Hewlett Packard 1181 Hitachi 0228 Integra 0135 JBL 0110 JVC Pictures 0317, 0351 RCA 0056 SSI 0317 Sansui 0325 Schneider 0376 Sony 0010, 0576 Soundesign 0376 Yorx 0376 SET TOP BOX BRAND ..CODE - Hitachi 55HDT52 | Owners Guide - Page 42
. 3. Press EXIT on the remote control to quickly exit from a menu. This part of the screen shows which selections are available. Video Audio TV Guide On Screen Channel Manager Locks Timers Setup Power Swivel Move SEL Select This part of the screen shows which Remote Control buttons to use. On - Hitachi 55HDT52 | Owners Guide - Page 43
screen burn. Label Video Inputs, VCR, DVD, etc. Set AV NET Wizard Feature to display dialogue/text. Set Monitor Out source. Select to upgrade TV software. Select the Set Stand-By Mode options. Power Swivel Unlocked Locked Power Swivel enabled. Control the motorized Table Top Stand Power Swivel - Hitachi 55HDT52 | Owners Guide - Page 44
the selected input will reset to initial conditions. Video Audio TV Guide On Screen Channel Manager Locks Timers Setup Power Swivel Move SEL Select Picture Mode Video Cable Use this function to choose from automatic picture Picture Mode Day settings to optimize your TV's performance. OR - Hitachi 55HDT52 | Owners Guide - Page 45
VIDEO menu, your Hitachi Plasma Television will activate the circuitry for this special feature to improve video performance when watching film based sources. NOTE: 1. When using a Progressive Scan Component or HDMI Input (480p or 720p), AUTO MOVIE MODE will not be available. 2. All Video settings - Hitachi 55HDT52 | Owners Guide - Page 46
Cable Video Reset Video Settings Select "Reset" to return the video menu settings on this Input to the original factory settings. Reset Select "Yes" to fix the Video Menu Settings to the original factory Settings on all modes after power "ON". No Yes Move SEL Return On-Screen Display - Hitachi 55HDT52 | Owners Guide - Page 47
Audio Audio Video Audio TV Guide On Screen Channel Manager Select AUDIO to adjust the TV to your preference and Locks Timers to improve the sound quality. or Setup Power Swivel 1. Press CURSOR PAD ̆ or ̄ to select menu item. Move SEL Select 2. Press CURSOR PAD ̇ or ̈ to adjust the - Hitachi 55HDT52 | Owners Guide - Page 48
Multi-Channel Television Sound will allow you to select STEREO (a stereo broadcast), MONO (monaural sound) used when receiving a weak stereo broadcast or SECOND AUDIO PROG (SAP) which may be a secondary language, weather report, etc. Internal Speakers This function is useful when setting up the - Hitachi 55HDT52 | Owners Guide - Page 49
you must first setup the Plasma TV as shown on Page 22. To Setup the TV Guide On Screen System: 1. Press the MENU button. Use the CURSOR PAD ̄ to highlight TV GUIDE ON SCREEN, then press the SELECT button. Video Audio TV Guide On Screen Channel Manager Locks Timers Setup Power Swivel Move SEL Select - Hitachi 55HDT52 | Owners Guide - Page 50
continue. Screen 5: Which TV input is the Cable box plugged into? AIR/CABLE: Please see Screen 6. INPUT 1/2: Please see Screen 7. Screen 8: Use then press the SELECT button to continue. Screen 9: To allow the TV Guide On-Screen system to find the correct code for your brand of Cable box, tune the - Hitachi 55HDT52 | Owners Guide - Page 51
10: The TV Guide On Screen system will test the code of your Cable box. No TV, Cable or remote buttons should be pressed while performing the automatic test. After the testing process is complete, the setup procedure will continue, see screen 11. Screen 13: Please confirm your initial settings. Use - Hitachi 55HDT52 | Owners Guide - Page 52
VCR with the G-LINK. Please confirm connection (see Page 22). Press the SELECT button to continue. Screen 19: The TV Guide On Screen system will test the code of your VCR. No TV, VCR or remote buttons should be pressed while performing the automatic test. After the testing process is complete, the - Hitachi 55HDT52 | Owners Guide - Page 53
On-Screen Display TV Guide On Screen Screen 22: Congratulations! The TV Guide On Screen system setup is complete. Press the SELECT button to finalize. Screen 23: The last screen gives tips on using the TV Guide On Screen system. Press the SELECT button to exit the Setup. NOTE: 1. The Plasma TV - Hitachi 55HDT52 | Owners Guide - Page 54
. It does not support satellite services. 3. The Recordings services will not be available until an IEEE1394 HDD recording device is connected to the TV. 4. The Listings services also have a recording function to other devices such as a VCR. 5. The TV Guide On Screen representations shown in this - Hitachi 55HDT52 | Owners Guide - Page 55
, Service or Panel Ad, or Help information for a Panel Menu. Lock/Unlock Icon Video Window On-Screen Display Remote Control Functions of the TV Guide On Screen system Button Function ቢ GUIDE - Press to access the TV Guide On Screen system. - Press again to exit the TV Guide On Screen system - Hitachi 55HDT52 | Owners Guide - Page 56
Screen Display TV Guide On Screen TV Guide On Screen Icons Icon NAME 1. Progress Bar 2. Info Icon 3. HDTV 4. New 5. CC 6. TV when setting a manual reminder). - Program is set to remind every time it airs on the same channel and starts at the same time. - Program is set to so by user. - Hitachi 55HDT52 | Owners Guide - Page 57
Panel Menu. EPISODE OPTIONS Panel Menu: • Go to Service Bar • Watch Now • Set a recording • Set a reminder • Tune to the channel LISTINGS: The LISTINGS service screen is always the first service displayed when accessing the TV Guide On Screen system. Press Menu now for Listings Options Move ̄ to - Hitachi 55HDT52 | Owners Guide - Page 58
TV Guide On Screen SEARCH: The SEARCH service screen allows you to find programs by the following: • Keyword • Alphabetical • Category • HDTV • Movies • Sports • Children • Educational • News • Variety • Series 2. Press the CURSOR PAD ̄ to highlight a - Hitachi 55HDT52 | Owners Guide - Page 59
see page 57). NOTE: The TV Guide On Screen system stores up to 250 Service Bar. EDIT SEARCH: Select to display the keyboard for editing the keyword. DELETE SEARCH: Select to display the Confirmation Panel Menu. Select YES to delete the search or NO to exit the Panel Menu. Locate shows based - Hitachi 55HDT52 | Owners Guide - Page 60
TV Guide On Screen RECORDINGS: The RECORDINGS Service screen displays a list of previously recorded or currently recording programs on an IEEE1394 recording device connected to the TV. NOTE: The RECORDINGS Service will only appear in the Service Bar if an IEEE1394 recording device is connected to - Hitachi 55HDT52 | Owners Guide - Page 61
TV Guide On Screen SCHEDULE: The SCHEDULE Service screen allows you to review, edit and delete Record and Remind events. How to Record: The Record options can be set in the LISTINGS, SEARCH, and SCHEDULE Services. You can also edit record settings for a program in the SCHEDULE Services. There are - Hitachi 55HDT52 | Owners Guide - Page 62
TV Guide On Screen • Use Manual Recording: 1. From the SERVICE bar, use the CURSOR PAD ̇ or ̈ to highlight the SCHEDULE. Press the MENU button to display the Schedule Options Panel Menu. Recording Conflict: A recording conflict message will appear if: • A program set to record overlaps with part of - Hitachi 55HDT52 | Owners Guide - Page 63
TV Guide On Screen How to set a reminder: • Set Manual reminder • Set from the Panel Menu 1. Use the CURSOR PAD ̆ or ̄ to highlight a program and press the MENU button to access the Episode Options Panel Menu. 2. Use the CURSOR PAD ̄ to highlight SET REMINDER and press the SELECT button to access - Hitachi 55HDT52 | Owners Guide - Page 64
button to tune to the program. SETUP: The SETUP Service screen allows you to modify settings that were entered at initial TV Guide On Screen system setup (see page 49). The 3 settings will be the following: • Change System settings • Change channel display • Change default options If no choice - Hitachi 55HDT52 | Owners Guide - Page 65
set cable or over-the-air or change the video input. 2. Use the CURSOR PAD ̆ or ̄ to highlight your selected options, and then press the SELECT button. Follow the On Screen instructions. CHANGE CHANNEL DISPLAY: Use this option to edit channel information that appears in the LISTINGS Service screen - Hitachi 55HDT52 | Owners Guide - Page 66
and Large, and All -default). • AUTO GUIDE: Automatic access into the TV Guide On Screen system when the TV is turned ON (Ondefault and Off). 2. Use the chosen information in the Panel Menu fields (Power On TV, auto-tune, when to display the Remind screen). 4. Press the SELECT button to highlight - Hitachi 55HDT52 | Owners Guide - Page 67
Screen Display TV Guide On Screen IR DEFAULTS IR Defaults lets you modify the channel dialing defaults if your cable box and/or VCR is not changing channels properly. 1. From the SETUP screen key after you enter a channel number with your VCR remote. Choices are Yes and No (default). 4. Press the - Hitachi 55HDT52 | Owners Guide - Page 68
Set Channel List. 1. Press CURSOR PAD ̆, ̄ or CHANNEL WHEEL to highlight function 2. Press the SELECT button or CURSOR PAD ̈ to select. Video Audio TV Guide On Screen Channel Manager Locks Timers Setup Power Swivel since channels will be fixed based on what was agreed upon by you and your - Hitachi 55HDT52 | Owners Guide - Page 69
function allows you to review which channels are LOCK column, input the access code. (Default access code: 0000) or 4. Press the FAV button to set or remove the FAVORITE settings. 5. Press . The Channel List cannot be updated by only changing the cable source. Auto Channel Scan must be performed - Hitachi 55HDT52 | Owners Guide - Page 70
the TV from being viewed for a scheduled time period that you set. The code to enter the Locks feature is a four digit access code number. The factory preset code is 0000. Use the NUMBER buttons to enter the access code. Video Audio Audio Channel Manager Locks Timers Setup Power Swivel Move SEL - Hitachi 55HDT52 | Owners Guide - Page 71
Locks Change Access Code Engage Lock Movie Ratings TV Ratings Canadian Ratings( Television will immediately tune to an EAS channel as directed by the EAS message. Please be advised that if the EAS channel is blocked using the LOCKS feature, you will not be able to tune to that channel. On-Screen - Hitachi 55HDT52 | Owners Guide - Page 72
) Canadian Ratings(Frn) Move SEL Select Locks TV Ratings Status TV-Y TV-Y7 TV-G TV-PG TV-14 TV-MA Sub Rating D L S V FV Move SEL Return TV Parental Guide Ratings Table TV-Y All children. The themes and elements in this program are specifically designed for a very young audience, including - Hitachi 55HDT52 | Owners Guide - Page 73
Code Engage Lock Movie Ratings TV Ratings Canadian Ratings(Eng) Canadian Ratings(Frn) Move SEL Select 2. Press SELECT to block the CANADIAN RATINGS (ENG) that you have selected. Once rating is selected, for example C8+, all movies and television of nudity and/or sex. On-Screen Display 73 - Hitachi 55HDT52 | Owners Guide - Page 74
Once rating is selected, for example 8 ANS+, all movies and television programs rated 8 ANS+ and higher will be blocked automatically. to return to the previous menu. Locks Change Access Code Engage Lock Movie Ratings TV Ratings Canadian Ratings(Eng) Canadian Ratings(Frn) Move SEL Screen Display 74 - Hitachi 55HDT52 | Owners Guide - Page 75
adjusted. 2. Press the SELECT button to select. Video Audio TV Guide On Screen Channel Manager Locks Timers Setup Power Swivel Move SEL Select Timers Set The Clock -- : -- AM PST or Set Sleep Timer 0:00 Set Day/Night Timer Not Set Move SEL Return Set The Clock The Clock must be adjusted - Hitachi 55HDT52 | Owners Guide - Page 76
Timer Move SEL Select -- : -- AM PST 0:00 Not Set Timers Set The Clock Set Sleep Timer Set Day/Night Timer Move SEL Set -- : -- AM PST 0:00 Not Set Set Day/Night Timer Select this feature to activate and set your TV's DAY/NIGHT PICTURE MODE automatically. This feature is not available until the - Hitachi 55HDT52 | Owners Guide - Page 77
select MENU PREFERENCE to return to previous menu. Video Audio TV Guide On Screen Channel Manager Locks Timers Setup Power Swivel Move SEL Select Setup Menu Preference Screen Saver Set The Inputs Set AV NET Set Closed Captions Set Monitor Out Upgrades Set Stand-By Mode Move SEL Select Setup Menu - Hitachi 55HDT52 | Owners Guide - Page 78
by two pixels. Setup Menu Preference Screen Saver Set The Inputs Set AV NET Set Closed Captions Set Monitor Out Upgrades Set Stand-by Mode Move SEL Select Setup Screen Saver Main Picture Moving : Image Power : Screen Wipe : Option 1 Max Wipe Automatic Power Saving Yes No Move SEL Select - Hitachi 55HDT52 | Owners Guide - Page 79
using your Hitachi Plasma TV Remote Control. The IR Mouse cable must be properly connected for the AV NET feature to work. 1. Press the MENU button. 2. Use the CURSOR PAD ̄ or CHANNEL WHEEL to highlight SETUP. Video Audio TV Guide On Screen Channel Manager Locks Timers Setup Power Swivel Move SEL - Hitachi 55HDT52 | Owners Guide - Page 80
proceed to the Learning mode. Brand Name IR Code Set Test Button Hitachi (44/54) 1 (1/12) Learning Mode POWER SOURCE 1 VOL ̆ Move Change IR Code Back Next 11. Use the CURSOR PAD ̇ or ̈ to select the TV Input that connects to the video and audio output of the A/V Receiver. 12. Use the - Hitachi 55HDT52 | Owners Guide - Page 81
the SELECT button to move on to the next SETUP screen. AV Net Setup Wizard : A/V Receiver Setup Brand Name IR Code Set TV Input Monitor Out Optical Out Hitachi (44/54) 3 (3/12) Not Connected Not Connected Not Connected All settings are complete! Move SEL Select Back Next 20. Press - Hitachi 55HDT52 | Owners Guide - Page 82
SETUP screen. AV Net Setup Wizard : Device Settings DVD Settings Brand Name Hitachi (31/77) IR Code Set 1 (1/5) Transmission Test Test Button POWER ̈ CH ̆ Move Back Change Brand Name Next 13. Use the CURSOR PAD ̇ or ̈ to select the TV Input that connects to the video and audio output - Hitachi 55HDT52 | Owners Guide - Page 83
on to the next SETUP screen. AV Net Setup Wizard : A/V Receiver Setup Brand Name IR Code Set Other Other TV Input Settings If you connect the video or audio output of the A/V Receiver to this TV, please select a TV Input. TV Input Not Connected Move Change Input Back SEL Select Next On - Hitachi 55HDT52 | Owners Guide - Page 84
SELECT button to select. 6. Select NEXT to continue. 22. Confirm all settings, then press the SELECT button to move on to the next SETUP screen. AV Net Setup Wizard : A/V Receiver Setup Brand Name IR Code Set TV Input Monitor Out Optical Out Other Other Not Connected Not Connected Not Connected - Hitachi 55HDT52 | Owners Guide - Page 85
the next SETUP screen. AV Net Setup Wizard : Device Settings DVD3 Settings Brand Name Custom IR Code Set Custom Transmission Test Test Button POWER Move SEL IR Out ̈ CH ̆ Back Next 16. Use the CURSOR PAD ̇ or ̈ to select the TV Input that connects to the video and audio output of the - Hitachi 55HDT52 | Owners Guide - Page 86
user the options to either modify or delete the device. 3. When setting up devices that have Monitor Out options (examples: A/V receiver, VCR), the Monitor Out and Audio Out will have default settings of TV Tuner out and Fixed respectively. 4. Before changing or modifying the Video and Audio Inputs - Hitachi 55HDT52 | Owners Guide - Page 87
, and/or sound effects of a television program or home video which are displayed on the TV screen. Your local TV program guide denotes these programs as or . 1. Use the CURSOR PAD ̇, ̈, ̆ and ̄ to highlight and select the function to change. 2. Press EXIT to quit menu or select SET CLOSED CAPTION to - Hitachi 55HDT52 | Owners Guide - Page 88
to a VCR or other A/V device. Setup Menu Preference Screen Saver Set The Inputs Set AV NET Set Closed Captions Set Monitor Out Upgrades Set Stand-by Mode Move SEL Select TV Tuner Out: Select TV TUNER OUT to output the audio Setup Set Monitor Out and video signals of the last watched Antenna OR - Hitachi 55HDT52 | Owners Guide - Page 89
power interruption during the upgrade process will cancel the upgrade. When this happens, repeat the upgrade procedure. Setup Menu Preference Screen Saver Set The Inputs Set AV NET Set Closed Captions Set Monitor Out Upgrades Set Stand-by Mode Move SEL Select Setup Upgrades OR Software Version - Hitachi 55HDT52 | Owners Guide - Page 90
use the IEEE1394 function while in Stand-By, please set the IEEE1394 Stand-By mode. IEEE1394 Stand-By Move SEL Return Power Swivel This feature controls the motorized stand. It allows the customer to turn the plasma display left or right using the remote control. This feature is only available when - Hitachi 55HDT52 | Owners Guide - Page 91
the wall outlet if your Plasma Television will not be used for a long period of time, for instance, when you go on vacation. Avoid repeatedly touching the screen. Do not subject the remote control to shocks such as dropping it on the floor, etc. This may cause damage to the precision parts. Avoid - Hitachi 55HDT52 | Owners Guide - Page 92
Radio receivers by turning off all other equipment other than the television. If you find a problem receiving Radio when using the television, check the instructions mentioned above. BLOCK NOISE (DIGITAL INPUT): Fuzzy blocks may appear in some area or the whole area of the screen. This is usually - Hitachi 55HDT52 | Owners Guide - Page 93
temperature: 5˚F to 140˚F 12 Power ON or OFF Repeatedly turning the plasma television Power ON and OFF at short intervals may result in failure of the television. 2. TV Guide On-ScreenTM System Frequently Asked Questions My Guide listings disappeared after a power failure. You should begin to - Hitachi 55HDT52 | Owners Guide - Page 94
Troubleshooting TV Guide On-ScreenTM Frequently asked quiestions continued If I add a recorder or change my cable service, how do I change my Setup information? 1) Highlight the Setup Service in the Guide. 2) Use the down arrow to select Change System Settings. 3) Follow the on-screen instructions. - Hitachi 55HDT52 | Owners Guide - Page 95
harmful interference to radio or television reception, which can be determined by turning the equipment off and on, the user is encouraged to try to supplied with the system must be replaced with identical cables in order to assure compliance with FCC rules. Order Hitachi spares as replacement - Hitachi 55HDT52 | Owners Guide - Page 96
50%) Supplied Accessories: • Remote Control • Batteries • 6' AC Cable • Table Top Stand (only in 42" models) • IR Mouse Cable (2) • Cleaning Cloth • Power Swivel Cable (only in 42" models) • Ferrite Core (2) Optional Accessories: • For U.S. Models: Please access our website: www.hitachi.us/tv INPUTS - Hitachi 55HDT52 | Owners Guide - Page 97
Set Dimensions 42 Inch Models (Includes Table Top Stand) Weight (lbs./kg): 98/44.5 55 Inch Models (Plasma Television Only) Weight (lbs./kg): 135.6/61.5 97 Useful Information - Hitachi 55HDT52 | Owners Guide - Page 98
, 24 hours a day 1-800-HITACHI (1-800-448-2244) HITACHI AMERICA, LTD. HOME ELECTRONICS DIVISION HITACHI has made every effort to assure you hours of trouble free operation from your unit. However, should you require service, a network of HITACHI Authorized Service Facilities has been established in - Hitachi 55HDT52 | Owners Guide - Page 99
HITACHI DTV Software END USER LICENSE AGREEMENT FOR HITACHI DTV SOFTWARE IMPORTANT - READ CAREFULLY: This End User License Agreement for HITACHI DTV Software (this "Agreement") is a legal agreement between you ("you" or "your"), in your capacity as the owner of a HITACHI brand digital television - Hitachi 55HDT52 | Owners Guide - Page 100
4:3 AUTO ASPECT On/Off On On On On On On Appendix C: IMAGE INPUT INPUT TYPE FORMAT ASPECT INPUT 1 & 2 HDMI 480i/480p 16:9 INPUT 1-5 S-Video3 NTSC 16:9 Video INPUT 3 & 4 Y-PbPr 480i/480p 16:9 3S-Video = Not available in INPUT 3 & 4 VIDEO ID 16:9 16:9 16:9 AUTO ASPECT On On On Appendix - Hitachi 55HDT52 | Owners Guide - Page 101
the Remote Control to access the Main Menu screen. THINGS TO CHECK WHEN USING THE CableCARD / CableCARD Services 1. Check that the CableCARD is properly inserted in the CableCARD slot. 2. Remove the CableCARD by pressing the eject button and pull the CableCARD straight out. Video Audio TV Guide On - Hitachi 55HDT52 | Owners Guide - Page 102
Menu Preference Set the Language 77 Set the Menu Background 78 Monitor Out 88-89 P Perfect Volume 48 Photo Input 27-28 Picture Mode 44 Picture-in-Picture (PIP 31-33 Power Swivel 4, 5, 7, 90 R Remote Control Functions 23-41 Programming Codes 40-41 Installing Batteries 4 S Screen Saver 78 - Hitachi 55HDT52 | Owners Guide - Page 103
Notes 103 - Hitachi 55HDT52 | Owners Guide - Page 104
QR64865
-
 1
1 -
 2
2 -
 3
3 -
 4
4 -
 5
5 -
 6
6 -
 7
7 -
8
-
9
-
10
-
11
-
12
-
13
-
14
-
15
-
16
-
17
-
18
-
19
-
20
-
21
-
22
-
23
-
24
-
25
-
26
-
27
-
28
-
29
-
30
-
31
-
32
-
33
-
34
-
35
-
36
-
37
-
38
-
39
-
40
-
41
-
42
-
43
-
44
-
45
-
46
-
47
-
48
-
49
-
50
-
51
-
52
-
53
-
54
-
55
-
56
-
57
-
58
-
59
-
60
-
61
-
62
-
63
-
64
-
65
-
66
-
67
-
68
-
69
-
70
-
71
-
72
-
73
-
74
-
75
-
76
-
77
-
78
-
79
-
80
-
81
-
82
-
83
-
84
-
85
-
86
-
87
-
88
-
89
-
90
-
91
-
92
-
93
-
94
-
95
-
96
-
97
-
98
-
99
-
100
-
101
-
102
-
103
-
104
 |
 |

PLASMA TELEVISION
Operating Guide for
42HDT52, 42HDT52A and
55HDT52
IMPORTANT SAFETY INSTRUCTIONS
.......................................................................................
2-3
FIRST TIME USE
.......................................................................................................................
4-22
THE REMOTE CONTROL
........................................................................................................
23-41
ON-SCREEN DISPLAY
............................................................................................................
42-90
USEFUL INFORMATION
..........................................................................................................
91-98
END USER LICENSE AGREEMENT FOR HITACHI DTV SOFTWARE
...........................................
99
APPENDIXES
........................................................................................................................
100-101
INDEX
...........................................................................................................................................
102
As an Energy Star
®
Partner,
Hitachi, Ltd. has determined
that this product meets the
Energy Star
®
guidelines for
energy efficiency.