Hitachi 60V715 Owners Guide - Page 7
Side/front Panel Controls - will not turn
 |
View all Hitachi 60V715 manuals
Add to My Manuals
Save this manual to your list of manuals |
Page 7 highlights
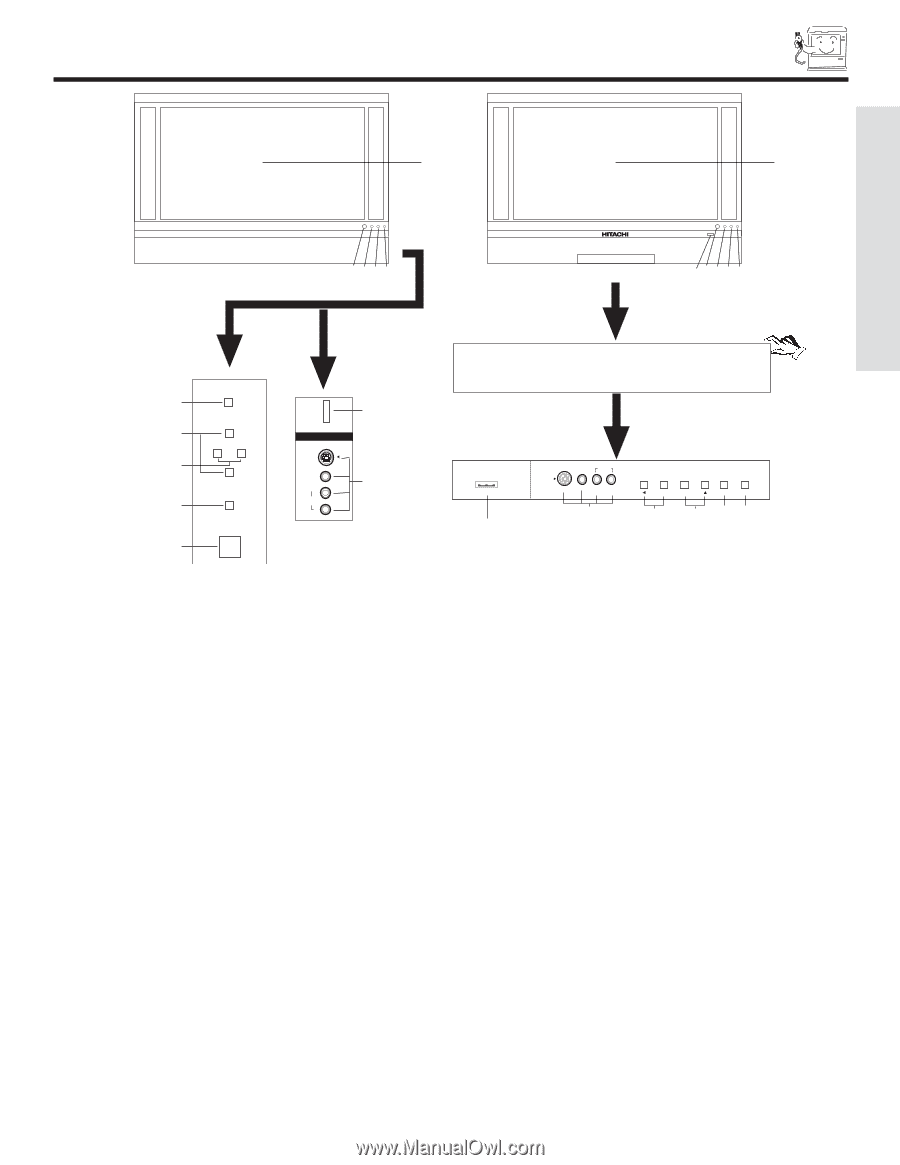
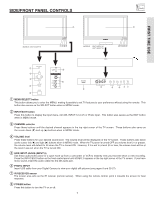
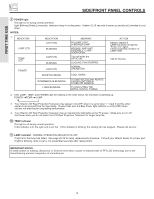
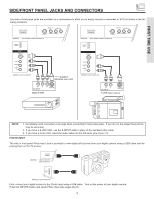
SIDE/FRONT PANEL CONTROLS ቨ ቨ FIRST TIME USE MODELS: 42V710/42V715 ቨቭቫቪ PUSH MODELS: 50V710/50V715 60V710/60V715 PUSH MENU/SELECT ̆ CH+ VOL̇ VOL+ ̈ CH̄ INPUT/EXIT POWER PHOTO INPUT INPUT 5 S-VIDEO ቧ VIDEO L/MONO AUDIO R ቦ PHOTO INPUT ቧ INPUT 5 AUDIO S-VIDEO VIDEO L/MONO R ቦ VOL- VOL+ CH- CH+ INPUT MENU ̈ ብ ̄ ቤ EXIT SELECT ባቢ ቢ MENU/SELECT button This button allows you to enter the MENU, making it possible to set TV features to your preference without using the remote. This button also serves as the SELECT button when in MENU mode. ባ INPUT/EXIT button Press this button to display the input menu, Ant A/B, INPUT:1,2,3,4,5 or Photo Input. This button also serves as the EXIT button when in MENU mode. ቤ CHANNEL selector Press these buttons until the desired channel appears in the top right corner of the TV screen. These buttons also serve as the cursor down (̄) and up (̆) buttons when in MENU mode. ብ VOLUME level Press these buttons for your desired sound level. The volume level will be displayed on the TV screen. These buttons also serve as the cursor left (̇) and right (̈) buttons when in MENU mode. When the TV power is turned OFF at a volume level 31 or greater, the volume level will default to 30 when the TV is turned ON. However, if it is set to a level 30 or less, the volume level will be at the level it was set when the TV is turned ON. ቦ SIDE INPUT JACKS (INPUT 5) Use these audio/video jacks for a quick hook-up from a camcorder or VCR to instantly view your favorite show or new recording. Press the INPUT/EXIT button on the front control panel until VIDEO: 5 appears in the top right corner of the TV screen. If you have mono sound, insert the audio cable into the left audio jack. ቧ PHOTO INPUT Insert USB cable from your Digital Camera to view your digital still pictures (see pages 9 and 25-27). ቨ IR RECEIVER sensor The screen area acts as the IR receiver (remote sensor). When using the remote control, point it towards the screen for best response. ቩ POWER button Press this button to turn the TV on or off. 7
-
 1
1 -
 2
2 -
 3
3 -
 4
4 -
 5
5 -
 6
6 -
 7
7 -
 8
8 -
 9
9 -
 10
10 -
 11
11 -
 12
12 -
13
-
14
-
15
-
16
-
17
-
18
-
19
-
20
-
21
-
22
-
23
-
24
-
25
-
26
-
27
-
28
-
29
-
30
-
31
-
32
-
33
-
34
-
35
-
36
-
37
-
38
-
39
-
40
-
41
-
42
-
43
-
44
-
45
-
46
-
47
-
48
-
49
-
50
-
51
-
52
-
53
-
54
-
55
-
56
-
57
-
58
-
59
-
60
-
61
-
62
-
63
-
64
-
65
-
66
-
67
-
68
-
69
-
70
-
71
-
72
-
73
-
74
-
75
-
76
-
77
-
78
-
79
-
80
-
81
-
82
-
83
-
84
 |
 |