Hitachi DH22PG Instruction Manual
Hitachi DH22PG - 7/8" SDS Plus Rotary Hamer VSR 2-Mode Manual
 |
UPC - 717709011915
View all Hitachi DH22PG manuals
Add to My Manuals
Save this manual to your list of manuals |
Hitachi DH22PG manual content summary:
- Hitachi DH22PG | Instruction Manual - Page 1
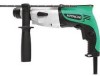
Model Modèle Modelo DH 22PG Rotary Hammer Marteau rotatif Martillo perforador INSTRUCTION MANUAL AND SAFETY INSTRUCTIONS WARNING Improper and unsafe use of this power tool can result in death or serious bodily injury! This manual contains important information about product safety. Please read - Hitachi DH22PG | Instruction Manual - Page 2
6 ACCESSORIES 14 STANDARD ACCESSORIES 14 FUNCTIONAL DESCRIPTION 7 OPTIONAL ACCESSORIES 15 NAME OF PARTS 7 PARTS LIST 50 ACCESSOIRES 30 DOUBLE ISOLATION POUR UN ACCESSOIRES STANDARD 30 FONCTIONNEMENT PLUS SUR ........ 22 ACCESSOIRES SUR OPTION 31 DESCRIPTION FONCTIONNELLE - Hitachi DH22PG | Instruction Manual - Page 3
to prevent bodily injury or machine damage are identified by WARNINGS on the power tool and in this Instruction Manual. NEVER use this power tool in a manner that has not been specifically recommended by HITACHI. MEANINGS OF SIGNAL WORDS WARNING indicates a potentially hazardous situations which, if - Hitachi DH22PG | Instruction Manual - Page 4
to follow all instructions listed below, may result in electric shock, fire and/or serious personal injury. SAVE THESE INSTRUCTIONS 1. Work Area (1) Keep your work area clean and well lit. Cluttered benches and dark areas invite accidents. (2) Do not operate power tools in explosive atmospheres - Hitachi DH22PG | Instruction Manual - Page 5
5. Service (1) Tool service must be performed only by qualified repair personnel. Service or maintenance performed by unqualified personnel could result in a risk of injury. (2) When servicing a tool, use only identical replacement parts. Follow instructions in the Maintenance section of this manual - Hitachi DH22PG | Instruction Manual - Page 6
in this Instruction Manual, including not using the power tool in wet environments. To keep the double insulation system effective, follow these precautions: ⅜ Only Hitachi Authorized Service Center should disassemble or assemble this power tool, and only genuine HITACHI replacement parts should be - Hitachi DH22PG | Instruction Manual - Page 7
first read and understood all safety instructions contained in this manual. Some illustrations in this Instruction Manual may show details or attachments that differ from those on your own power tool. NAME OF PARTS Housing Depth gauge Change lever Nameplate Drill bit Front cap Grip Side handle - Hitachi DH22PG | Instruction Manual - Page 8
hammering function ⅜ Drilling anchor holes ⅜ Drilling holes in concrete ⅜ Drilling holes in tile Rotation only function ⅜ Drilling in steel or wood. (with optional accessories) ⅜ Tightening machine screws, wood screws. (with optional accessories) PRIOR TO OPERATION 1. Power the drill bit (Fig - Hitachi DH22PG | Instruction Manual - Page 9
the shank portion of the drill bit. (2) Insert the drill bit in a twisting manner into the tool holder until it latches itself. (Fig. 2) Grip Part of SDS- Front cap plus shank Drill bit Fig. 2 (3) Check the latching by pulling on the drill bit. (4) To remove the drill bit, fully pull the grip in - Hitachi DH22PG | Instruction Manual - Page 10
forcibly is not necessary at all. Pushing slightly so that drill dust comes out gradually is just sufficient. CAUTION: When the drill bit touches an iron reinforcing rod, the bit will stop immediately and the rotary hammer will react to revolve. Therefore please grip the side handle and handle - Hitachi DH22PG | Instruction Manual - Page 11
cap Grip Drill bit Chuck adapter Part of SDS-plus shank Fig. 10 CAUTION: ⅜ Application of force more than necessary will not only reducing drilling efficiency at all, but will deteriorate the tip edge of the drill bit and reduce the service life of the rotary hammer in addition. ⅜ Drill bit may snap - Hitachi DH22PG | Instruction Manual - Page 12
Depth gauge Rests Fig. 14 Knob on side handle Fig. 12 7. How to use the drill bit (taper shank) and the taper shank adaptor. (1) Mount the taper shank adaptor to the rotary hammer. (Fig. 13) (2) Mount the drill bit (taper shank) to the taper shank adaptor. (Fig. 13) (3) Turn the switch ON, and - Hitachi DH22PG | Instruction Manual - Page 13
service and repairs must be performed by a Hitachi Authorized Service Center, ONLY. 7. Service parts list A: Item No. B: Code No. C: No. Used D: Remarks CAUTION: Repair, modification and inspection of Hitachi Power Tools must be carried out by an Hitachi Authorized Service Center. This Parts List - Hitachi DH22PG | Instruction Manual - Page 14
: ALWAYS use Only authorized HITACHI replacement parts and accessories. NEVER use replacement parts or accessories which are not intended for use with this tool. Contact HITACHI if you are not sure whether it is safe to use a particular replacement part or accessory with your tool. The use of any - Hitachi DH22PG | Instruction Manual - Page 15
OPTIONAL ACCESSORIES (sold separately) Tool ⅷ Drilling holes in concrete or tile Adapters Drill bit (Slender shaft) ⅷ Drilling holes in concrete or tile Adapter for slender shaft (SDS-plus shank) Use on jobs facing upwards Rotation + Hammering Drill bit ⅷ Drilling anchor holes Drill bit (Taper - Hitachi DH22PG | Instruction Manual - Page 16
SDS-plus Drill bit Outer drill bit 7/16" (11 mm) 1/2" (12.3 mm) Drill bit (Taper shank) 1/2" (12.7 mm) 9/16" (14.3 mm) 9/16" (14.5 mm) 11/16" (17.5 mm) Drill bit (Taper shank) 7/8" (21.5 mm) Taper shank adaptor formed A-taper or B-taper is provided as an optional accessory, but drill bit - Hitachi DH22PG | Instruction Manual - Page 17
English ⅷ Drilling holes in concrete Rotary hammer chuck Capacity 2.5-13mm Code No. 303332 ⅷ Anchor setting Anchor setting adaptor (for Rotary hammer) Anchor size Overall Length Code No. W 1/4" (6.3 mm) 10-1/4" (260 mm) 302976 W 5/16" (8 mm) 10-1/4" ( - Hitachi DH22PG | Instruction Manual - Page 18
de ce mode d'emploi et dans les sections qui contiennent les instructions de fonctionnement et d'entretien. Les dangers qui doivent être évités manière qui n'est pas spécifiquement recommandée par HITACHI. SIGNIFICATION DES MOTS D'AVERTISSEMENT AVERTISSEMENT indique des situations potentiellement - Hitachi DH22PG | Instruction Manual - Page 19
un incendie et/ou de sérieuses blessures personnelles. CONSERVER CES INSTRUCTIONS 1. Zone de travail (1) Garder la zone de travail outils à double isolation sont équipés d'une fiche polarisée (une lame est plus large que l'autre). Cette fiche ne pénétrera dans une prise secteur polarisée que - Hitachi DH22PG | Instruction Manual - Page 20
Utiliser l'outil correct pour l'application souhaitée. L'outil correct réalisera un meilleur et plus sûr travail dans le domaine pour lequel il a été conçu. (3) Ne pas utiliser de pièces non autorisées ou un non respect des instructions d'entretien peut créer un risque d'électrocution ou de - Hitachi DH22PG | Instruction Manual - Page 21
, fait des bruits étranges ou sans cela paraît défectueux, arrêter de l'utiliser immédiatement et le faire réparer par un centre de service Hitachi autorisé. 17. NE JAMAIS laisser fonctionner l'outil sans surveillance. Le mettre hors tension. Ne pas abandonner l'outil avant qu'il ne soit compl - Hitachi DH22PG | Instruction Manual - Page 22
UN FONCTIONNEMENT PLUS SUR Pour assurer un fonctionnement plus sûr de cet outil motorisé, HITACHI a adopté : ⅜ Seuls le centre de service après-vente Hitachi agréé peuvent démonter et remonter cet outil motorisé et de se dissoudre. CONSERVER CES INSTRUCTIONS ET LES METTRE A LA DISPOSITION DES AUTRES - Hitachi DH22PG | Instruction Manual - Page 23
et un entretien de l'outil motorisé. NE JAMAIS utiliser ni entreprendre une révision de l'outil sans avoir d'abord lu et compris toutes les instructions de sécurité contenues dans ce manuel. Certaines illustrations dans ce mode d'emploi peuvent montrer des détails ou des accessoires différents de - Hitachi DH22PG | Instruction Manual - Page 24
le foret en le tournant dans le porte-outil jusqu'à ce qu'il se verrouille. (Fig. 2) Attache coulissante Capuchon Elément de la avant tige SDS plus Foret de perçage Fig. 2 (3) Vérifier que le foret est bien verrouillé en tirant dessus. (4) Pour retirer le foret de perçage, tirer compl - Hitachi DH22PG | Instruction Manual - Page 25
re Utiliser la capuchone à poussière en la fixant au foret comme montré dans la Fig. 4. Lors de l'utilisation d'un foret avec un diamètre plus grand, agrandir le trou central de la capuchon à poussière avec ce marteau perforateur. Godet à poussière Fig. 4 ⅜ Pose du collecteur à poussière (B) Lors de - Hitachi DH22PG | Instruction Manual - Page 26
avec laquelle on appuie sur l'interrupteur à détente. La vitesse est faible si on exerce une légère pression et augmente si la pression est plus forte. On peut obtenir un fonctionnement continu en pressant la détente et en relâchant le cliquet d'arrêt. Pour mettre l'interrupteur sur ARRET, presser - Hitachi DH22PG | Instruction Manual - Page 27
SDS plus Fig. 10 PRECAUTION: ⅜ Si l'on applique une force excessive, cela donnera un travail bâclé et abîmera la pointe du foret de perçage, réduisant ainsi la durée de service fixés. Cela risquerait d'abréger considérablement la durée de service de chaque élément de la perceuse. 4. Lors du vissage - Hitachi DH22PG | Instruction Manual - Page 28
raccord de queue conique et frapper la tête de la clavette avec un marteau alors que le perceuse est placée sur le support. (Fig. 14) Clavette Raccord de queue conique Support Fig. 14 Bouton sur la poignée latérale Fig. 12 7. Comment utiliser la mèche (queue conique) et le raccord de queue - Hitachi DH22PG | Instruction Manual - Page 29
et les réparations doivent être effectués uniquement par un centre de service après-vente Hitachi agrée. 7. Liste des pièces de rechange A : Article no B : Code fuit d'une vis desserrée, contacter l'agent chargé de l'entretien le plus proche afin qu'il change la graisse. Si l'on utilise le marteau - Hitachi DH22PG | Instruction Manual - Page 30
être dangereux et peut causer des blessures ou des dommages mécaniques. REMARQUE: Les accessoires sont sujets à changement sans obligation de la part de HITACHI. ACCESSOIRES STANDARD (1) Boîtier en plastique (No. de code 327883 1 (2) Poignée latérale (No. de code 324548 1 (3) Jauge de profondeur - Hitachi DH22PG | Instruction Manual - Page 31
Foret de perçage (Tige fine) ⅷ Percer des trous dans du béton ou un carreau Foret de perçage Adaptateur pour tige fine (Tige SDS plus) Utiliser pour les travaux redressés Capuchon anti Collecteur à poussière poussière (B) Rotation + percussion ⅷ Perçage de trous d'ancrage Foret de perçage - Hitachi DH22PG | Instruction Manual - Page 32
3-35/64" (90 mm) 3-35/64" (90 mm) No. de code 306369 306368 Adaptateur pour tige fine No. de code 306370 Foret de perçage SDS-plus Dia. extérieur 5/32" (4.0 mm) 3/16" (5.0 mm) 7/32" (5.5 mm) 1/4" (6.5 mm) 9/32" (7.0 mm) 5/16" (8.0 mm) 11/32" (8.5 mm) 3/8" (9.0 mm) 15/32" (12.0 mm) 1/2" (12.7 mm - Hitachi DH22PG | Instruction Manual - Page 33
du bois Vis spéciale Mandrin porte-foret Porte-mandrin 981122 321814 303623 REMARQUE: Les spécifications sont sujettes à modification sans aucune obligation de la part de HITACHI. 33 - Hitachi DH22PG | Instruction Manual - Page 34
, los riesgos están identificados con ADVERTENCIAS en dicha herramienta y en este Manual de instrucciones. No utilice NUNCA esta herramienta eléctrica de ninguna forma que no esté específicamente recomendada por HITACHI. SIGNIFICADO DE LAS PALABRAS DE SEÑALIZACIÓN ADVERTENCIA indica situaciones - Hitachi DH22PG | Instruction Manual - Page 35
de alimentación para transportar la herramienta ni para desconectarla del tomacorriente. Mantenga el cable alejado del calor, aceite, bordes cortantes, o partes móviles. Reemplace inmediatamente cualquier cable dañado. Un cable dañado puede ser la causa de descargas eléctricas. (5) Cuando utilice - Hitachi DH22PG | Instruction Manual - Page 36
antes de poner en funcionamiento la herramienta. Una llave dejada en una parte móvil de la herramienta podría resultar en lesiones. (5) No sobrepase ón de mantenimiento de este manual. La utilización de piezas no autorizadas, o el no seguir las indicaciones del Manual de instrucciones puede crear el - Hitachi DH22PG | Instruction Manual - Page 37
móviles. NO coloque NUNCA sus manos, dedos, ni demás partes del cuerpo cerca de las piezas móviles de la herramienta. 7. éctrica para aplicaciones no especificadas en este Manual de instrucciones. 10. Maneje correctamente la un centro de reparaciones autorizado por Hitachi. 17. NO deje NUNCA la - Hitachi DH22PG | Instruction Manual - Page 38
seguridad eléctrica ofrecidas en este Manual de instrucciones, incluyendo la no HITACHI. ⅜ Limpie el exterior de la herramienta eléctrica solamente con un paño suave humedecido en agua jabonosa, y después séquela bien. No utilice disolventes, gasolina, ni diluidor de pintura para limpiar las partes - Hitachi DH22PG | Instruction Manual - Page 39
úe el mantenimiento de la herramienta antes de leer y comprender todas las instrucciones de seguridad contenidas en este manual. Algunas ilustraciones de este Manual de Instrucciones pueden mostrar detalles o accesorios diferentes a los de la propia herramienta eléctrica. NOMENCLATURA Calibre de - Hitachi DH22PG | Instruction Manual - Page 40
de taladro. (2) Inserte la broca de taladro girando en el sujetador de la herramienta hasta que se asegure bien. (Fig. 2) Sujetador Parte del SDS más vástago Cubierta frontal Broca Fig. 2 (3) Verifique si esta bien asegurado tirando de la broca de taladro. (4) Para extraer la broca, tire - Hitachi DH22PG | Instruction Manual - Page 41
trabajos de taladrado hacia arriba, extraiga el adaptador de recolección de polvo e instale una copa de polvo o un colector de polvo (B) para recolectar las partículas a fin de facilitar la operación. ⅜ Instalación de la copa de polvo Emplee la copa de polvo instalando la broca como se muestra en la - Hitachi DH22PG | Instruction Manual - Page 42
Español COMO SE USA PRECAUCIÓN: Para evitar accidentes, cerciórese de poner este interruptor en OFF y de desconectar el enchufe del tomacorriente cuando instale o extraiga brocas y otras piezas. El interruptor de alimentación también deberá ponerse en OFF durante un descanso en el trabajo y después - Hitachi DH22PG | Instruction Manual - Page 43
Instale la broca en el adaptador del portabrocas. (2) La parte del SDS plus vástago es igual que una broca. Por lo tanto, Cubo Adaptador (D) del portabrocas Cubierta frontal Sujetador Portabrocas Adaptador del Parte del SDS portabrocas plus vástago Fig. 10 PRECAUCIÓN: ⅜ La aplicación de fuerza - Hitachi DH22PG | Instruction Manual - Page 44
Español PRECAUCIÓN: Tener cuidado al preparar el orificio para que sea apropiado para el tornillo, teniendo en cuenta la dureza de la madera. Si el orificio es excesivamente pequeño o estrecho, se requiere mucha fuerza para atornillar y a veces puede dañarse la rosca. (4) Para quitar la broca ( - Hitachi DH22PG | Instruction Manual - Page 45
eléctricas, la inspección y el reemplazo de las escobillas de esta herramienta deberán realizarse SOLAMENTE por un Centro de Servicio Autorizado de Hitachi. 5. Cambio de grasa A este martillo giratorio deberá aplicársele grasa de baja viscosidad,de esta forma, el martillo podrá usarse durante un - Hitachi DH22PG | Instruction Manual - Page 46
puede resultar peligrosa y causar lesiones o daños mecánicos. NOTA: Los accesorios están sujetos a cambio sin ninguna obligación por parte de HITACHI. ACCESORIOS ESTÁNDAR (1) Caja de plástico (Núm. de código 327883 1 (2) Mango lateral (Núm. de código 324548 1 (3) Calibre de profundidad (Núm. de - Hitachi DH22PG | Instruction Manual - Page 47
recto para taladrar) Montaje de ancla Copa de polvo Colector de polvo (B) + Adaptador cónico Chaveta Portabrocas para martillo perforador (parte del SDS más vástago) Adaptador de montaje de ancla Trabajo de roturación Puntero (tipo redondo) Colocación de tornillos , Punta del - Punta del - Hitachi DH22PG | Instruction Manual - Page 48
45 mm) Longueur totale 3-35/64" (90 mm) 3-35/64" (90 mm) Núm. de código 306369 306368 Adaptador para eje fino Núm. de código 306370 Broca SDS-plus Diám. externo 5/32" (4.0 mm) 3/16" (5.0 mm) 7/32" (5.5 mm) 1/4" (6.5 mm) 9/32" (7.0 mm) 5/16" (8.0 mm) 11/32" (8.5 mm) 3/8" (9.0 mm) 15/32" (12.0 mm - Hitachi DH22PG | Instruction Manual - Page 49
mm) 6-1/4" (160 mm) 10-1/4" (260 mm) 303622 302977 Adaptador de montaje de ancla (para Martillo manual) Medida de están sujetas a cambio sin ninguna obligación por parte de HITACHI. 49 - Hitachi DH22PG | Instruction Manual - Page 50
50 16 17 18 19 20 46 47 48 49 50 1 2 3 4 5 6 7 8 21 22 23 24 25 26 27 12 13 14 28 15 29 30 31 32 34 35 51 36 52 37 53 54 55 38 39 40 41 42 501 56 502 503 62 63 60 64 58 57 65 70 69 68 66 9 10 11 33 43 44 45 71 72 A B 1 306-345 2 306-340 3 325-597 4 327-879 5 324-526 - Hitachi DH22PG | Instruction Manual - Page 51
51 - Hitachi DH22PG | Instruction Manual - Page 52
power sanding, sawing, grinding, drilling diseñados para eliminar las partículas minúsculas. Issued by Hitachi Koki Co., Ltd. Shinagawa Hitachi Koki U.S.A., Ltd. 3950 Steve Reynolds Blvd. Norcross, GA 30093 Hitachi Koki Canada Co. 6395 Kestrel Road Mississauga ON L5T 1Z5 Hitachi Power Tools
-
 1
1 -
 2
2 -
 3
3 -
 4
4 -
 5
5 -
 6
6 -
 7
7 -
8
-
9
-
10
-
11
-
12
-
13
-
14
-
15
-
16
-
17
-
18
-
19
-
20
-
21
-
22
-
23
-
24
-
25
-
26
-
27
-
28
-
29
-
30
-
31
-
32
-
33
-
34
-
35
-
36
-
37
-
38
-
39
-
40
-
41
-
42
-
43
-
44
-
45
-
46
-
47
-
48
-
49
-
50
-
51
-
52
 |
 |

Model
Rotary Hammer
Modèle
Marteau rotatif
Modelo
Martillo perforador
DH 22PG
MODE D’EMPLOI ET INSTRUCTIONS DE SECURITE
AVERTISSEMENT
Une utilisation incorrecte et dangereuse de cet outil motorisé peut entraîner la mort ou
de sérieuses blessures corporelles!
Ce mode d’emploi contient d’importantes informations à propos de la sécurité de ce
produit. Prière de lire et de comprendre ce mode d’emploi avant d’utiliser l’outil
motorisé. Garder ce mode d’emploi à la disponibilité des autres utilisateurs avant qu’ils
utilisent l’outil motorisé.
MANUAL DE INSTRUCCIONES E INSTRUCCIONES DE SEGURIDAD
ADVERTENCIA
¡La utilización inapropiada e insegura de esta herramienta eléctrica puede resultar en
lesiones serias o en la muerte!
Este manual contiene información importante sobre la seguridad del producto.
Lea y
comprenda este manual antes de utilizar la herramienta eléctrica.
Guarde este manual
para que puedan leerlo otras personas antes de que utilicen la herramienta eléctrica.
DOUBLE INSULATION
DOUBLE ISOLATION
AISLAMIENTO DOBLE
INSTRUCTION MANUAL AND SAFETY INSTRUCTIONS
WARNING
Improper and unsafe use of this power tool can result in death or serious bodily injury!
This manual contains important information about product safety. Please read and
understand this manual before operating the power tool. Please keep this manual
available for others before they use the power tool.