Hitachi DH40FR Instruction Manual
Hitachi DH40FR - 1-9/16 Inch Spline Shank Rotary Hammer Manual
 |
UPC - 717709007918
View all Hitachi DH40FR manuals
Add to My Manuals
Save this manual to your list of manuals |
Hitachi DH40FR manual content summary:
- Hitachi DH40FR | Instruction Manual - Page 1
Model Modèle Modelo DH 40FR Rotary Hammer Marteau rotatif Martillo perforador SAFETY INSTRUCTIONS AND INSTRUCTION MANUAL WARNING IMPROPER OR UNSAFE use of this power tool can result in death or serious bodily injury! This manual contains important information about product safety. Please read and - Hitachi DH40FR | Instruction Manual - Page 2
AND OPERATION 10 APPLICATIONS 10 PRIOR TO OPERATION 10 HOW TO USE 12 HOW TO USE THE CORE BIT 14 MAINTENANCE AND INSPECTION 16 FUNCTIONAL DESCRIPTION 9 NAME OF PARTS 9 SPECIFICATIONS 9 Français TABLE DES MATIERES Page Page INFORMATIONS IMPORTANTES DE SÉCURIT 21 SIGNIFICATION DES MOTS - Hitachi DH40FR | Instruction Manual - Page 3
or machine damage are identified by WARNINGS on the power tool and in this Instruction Manual. NEVER use this power tool in a manner that has not been specifically recommended by HITACHI. MEANINGS OF SIGNAL WORDS WARNING indicates a potentially hazardous situations which, if ignored, could result - Hitachi DH40FR | Instruction Manual - Page 4
instructions. Failure to follow all instructions listed below, may result in electric shock, fire and/or serious personal injury. SAVE THESE INSTRUCTIONS . Keep cord away from heat, oil, sharp edges or moving parts. Replace damaged cords immediately. Damaged cords increase the risk of electric - Hitachi DH40FR | Instruction Manual - Page 5
secure and support the workpiece to repair personnel. Service or maintenance performed by unqualified personnel could result in a risk of injury. (2) When servicing a tool, use only identical replacement parts. Follow instructions in the Maintenance section of this manual. Use of unauthorized parts - Hitachi DH40FR | Instruction Manual - Page 6
loss. 3. NEVER touch the tool bit with bare hands after operation. 4. NEVER wear gloves made from materials likely to roll up such as cotton, wool, cloth or string, etc. 5. ALWAYS attach the side handle and securely grip the Rotary Hammer. 6. NEVER touch moving parts. NEVER place your hands, fingers - Hitachi DH40FR | Instruction Manual - Page 7
and the motor may burn out. 16. NEVER use a tool which is defective or operating abnormally. If the tool appears to be operating unusually, making strange noises, or otherwise appears defective, stop using it immediately and arrange for repairs by a Hitachi authorized service center. 17. NEVER leave - Hitachi DH40FR | Instruction Manual - Page 8
in this Instruction Manual, including not using the power tool in wet environments. To keep the double insulation system effective, follow these precautions: ⅜ Only HITACHI AUTHORIZED SERVICE CENTER should disassemble or assemble this power tool, and only genuine HITACHI replacement parts should be - Hitachi DH40FR | Instruction Manual - Page 9
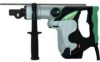
in this Instruction Manual may show details or attachments that differ from those on your own power tool. NAME OF PARTS Drill Bit Stopper Selector Lever Switch Trigger Tool Holder Side Handle Housing Tail Cover Set Screw (Under the Tail Cover) Nameplate Handle Dial Brush Cap (Inside - Hitachi DH40FR | Instruction Manual - Page 10
hammering function ⅜ Drilling anchor holes ⅜ Drilling holes in concrete Hammering function only ⅜ Crushing concrete, chipping, digging, and squaring (by applying optional accessories , the receptacle must be repaired. Contact a licensed electrician to make appropriate repairs. If such a fautly - Hitachi DH40FR | Instruction Manual - Page 11
the groove Fig. 2 For tools such as a drill bit and a bull point, use only Hitachi genuine parts. (1) Clean, then smear the tool shank with the installation. 8. Regulating the number of rotations and hammering (Fig. 4) This Rotary Hammer is equipped with a builtin electronic control circuit that - Hitachi DH40FR | Instruction Manual - Page 12
stoppage of the drill bit could cause the machine body to turn in reaction. Ensure that the main handle and side handle are gripped firmly during operation. 2. How to chisel or crush (Fig. 6) By applying the tool tip to the chiseling or crushing position, operate the rotary hammer by utilizing its - Hitachi DH40FR | Instruction Manual - Page 13
switch the selector lever when the motor is at a complete stop. (1) Switching to "hammering" Selector Lever Lever Holder (a) Push the button, release lock and turn the selector lever be careful not to twist your body by the jammed drill bit. Stopper Side Handle Fig. 9 Fig. 10 13 - Hitachi DH40FR | Instruction Manual - Page 14
anchor tip and drive in the anchor with a manual hammer. (4) To remove the drill bit with taper shank, insert Fig. 11 a cotter into the slot of the taper shank adaptor, place supports under the Rotary Hammer and tap the cotter with a manual hammer. (Fig. 12) Cotter Taper Shank Adaptor HOW TO - Hitachi DH40FR | Instruction Manual - Page 15
force will not only expedite the work, but will deteriorate the tip edge of the drill bit, resulting in reduced service life of the rotary hammer. CAUTION: When removing the center pin and the guide plate, turn OFF the switch and disconnect the plug from the receptacle. 3. Dismounting (Fig. 17 - Hitachi DH40FR | Instruction Manual - Page 16
that they slide freely within the brush holders. CAUTION: Using this Rotary Hammer with a carbon brush which is worn in excess of the wear limit will damage the motor. Wear limit No. of carbon brush 73 0.28" (7 mm) 0.67" (17 mm) Fig. 18 NOTE: Use HITACHI carbon brush No.73 indicated in Fig. 18 - Hitachi DH40FR | Instruction Manual - Page 17
NOTE: The HITACHI Electric Hammer Grease A is of the lower viscosity type. When the supplied grease tube is consumed, purchase from a HITACHI Autorized Service Center. Fig. 19 6. Service and repairs All quality power tools will eventually require servicing or replacement of parts because of wear - Hitachi DH40FR | Instruction Manual - Page 18
18 - Hitachi DH40FR | Instruction Manual - Page 19
19 - Hitachi DH40FR | Instruction Manual - Page 20
20 - Hitachi DH40FR | Instruction Manual - Page 21
de ce mode d'emploi et dans les sections qui contiennent les instructions de fonctionnement et d'entretien. Les dangers qui doivent être évités manière qui n'est pas spécifiquement recommandée par HITACHI. SIGNIFICATION DES MOTS D'AVERTISSEMENT AVERTISSEMENT indique des situations potentiellement - Hitachi DH40FR | Instruction Manual - Page 22
ci-dessous peut entraîner une électrocution, un incendie et/ou de sérieuses blessures personnelles. CONSERVER CES INSTRUCTIONS 1. Zone de travail (1) Garder la zone de travail propre et bien éclairée. Les établis mal rangés et les zones sombres invitent aux accidents. (2) Ne pas - Hitachi DH40FR | Instruction Manual - Page 23
Français (2) S'habiller correctement. Ne pas porter des vêtements larges ou des bijoux. Attacher les cheveux longs. Tenir ses cheveux, vêtements et ses gants éloignés des parties mobiles. Les vêtements larges, les bijoux et les cheveux longs peuvent se prendre dans les parties mobiles. (3) Eviter - Hitachi DH40FR | Instruction Manual - Page 24
de la section d'entretien de ce mode d'emploi. L'utilisation de pièces non autorisées ou un non respect des instructions d'entretien peut créer un risque d'électrocution ou de blessures. REGLES DE SECURITE SPECIFIQUES ET SYMBOLES 1. Tenir les outils par les surfaces de grippage lors - Hitachi DH40FR | Instruction Manual - Page 25
cela risque d'endommager l'outil et le moteur risque de griller. 16. NE JAMAIS utiliser un outil défectueux ou qui fonctionne anormalement. l'utiliser immédiatement et le faire réparer par un centre de service Hitachi autorisé. 17. NE JAMAIS laisser fonctionner l'outil sans surveillance. Le mettre - Hitachi DH40FR | Instruction Manual - Page 26
Seuls les CENTRES DE SERVICE AUTORISES HITACHI peuvent démonter et remonter cet outil motorisé et uniquement des pièces de rechange HITACHI garanties d'origine doivent être le plastique risquerait de se dissoudre. CONSERVER CES INSTRUCTIONS ET LES METTRE A LA DISPOSITION DES AUTRES UTILISATEURS ET PROPRIETAIRES - Hitachi DH40FR | Instruction Manual - Page 27
révision de l'outil sans avoir d'abord lu et compris toutes les instructions de sécurité contenues dans ce manuel. Certaines illustrations dans ce mode Secteur, 120 V 60 Hz, monophasé Courant 9,2 A Capacité Mèche: 1-9/16" (40 mm) Couronne: 4-1/8" (105 mm) Vitesse sans charge 240 - 480 - Hitachi DH40FR | Instruction Manual - Page 28
Français ASSEMBLAGE ET FONCTIONNEMENT APPLICATIONS Fonction de rotation et de percussion ⅜ Perçage de trous d'ancrage ⅜ Perçage de trous dans béton Fonction de percussion uniquement ⅜ Broyage du béton, burinage, creusage et équarrissage (par application des accessoires optionnels) AVANT L' - Hitachi DH40FR | Instruction Manual - Page 29
- Insérer jusqu'à poussière la rainure Fig. 2 PRECAUTION: Pour les outils tels que foret et pointe de broyage n'utiliser que les pièces Hitachi authentiques. (1) Nettoyer, puis graisser la queue de l'outil avec la graisse fournie à cet effet en tube vert. (2) Tirer le porte-outil dans la direction - Hitachi DH40FR | Instruction Manual - Page 30
bouton, libérer le verrou et tourner le levier de sélection dans le sens des aiguilles d'une montre. (b) Aligner du levier de sélection sur du support de levier comme indiqué sur la Fig 7. (c) Relâcher le bouton pour verrouiller le levier de sélection. Sélecteur Bouton Fig. 7 REMARQUE: Tourner le - Hitachi DH40FR | Instruction Manual - Page 31
érer le verrou et tourner le levier de sélection dans le sens inverse des aiguilles d'une montre. (b) Aligner du levier de sélection sur du support de levier comme indiqué sur la Fig 8. (c) Relâcher le bouton pour verrouiller le levier de sélection. Sélecteur Cache inférieur REMARQUE: Tourner le - Hitachi DH40FR | Instruction Manual - Page 32
fente du raccord de queue conique et frapper sur la clavette avec un marteau. (Fig. 12) Clavette Raccord de queue conique COMMENT UTILISER LA COURONNE Support Fig. 12 Utiliser la couronne pour percer de grands trous. L'utiliser avec le goujon central et la queue de couronne fournis en tant qu - Hitachi DH40FR | Instruction Manual - Page 33
plancher. Mettre en marche. (3) Quand on a percé sur une profondeur d'environ 3/16" (5 mm), la position du trou est déterminée. Continuer à percer après avoir la pointe du foret de perçage, réduisant ainsi la durée de service du marteau rotatif. PRECAUTION: Quand on retire le goujon central et la - Hitachi DH40FR | Instruction Manual - Page 34
mêmes numéros que ceux montré sur la figure. En outre, toujours tenir les balais propres et veiller à ce qu'ils coulissent librement dans les supports. PRECAUTION: Utiliser la polisseuse avec un balai en carbone qui est usé au-delà de la limite d'usure endommagera le moterur. Limite d'usure No - Hitachi DH40FR | Instruction Manual - Page 35
⅜ Remplacement du balais en carbone (Pour les noms des parts, voyez la Fig. 1) Desserrer la vis de fixation ès chaque période de 6 moins d'utilisation. Se procurer la graisse chez l'Agence de Service Autorisée HITACHI la plus proche. Procéder au remplacement. ⅜ Plein de graisse PRECAUTION: Avant de - Hitachi DH40FR | Instruction Manual - Page 36
36 - Hitachi DH40FR | Instruction Manual - Page 37
37 - Hitachi DH40FR | Instruction Manual - Page 38
38 - Hitachi DH40FR | Instruction Manual - Page 39
, los riesgos están identificados con ADVERTENCIAS en dicha herramienta y en este Manual de instrucciones. No utilice NUNCA esta herramienta eléctrica de ninguna forma que no esté específicamente recomendada por HITACHI. SIGNIFICADO DE LAS PALABRAS DE SEÑALIZACIÓN ADVERTENCIA indica situaciones - Hitachi DH40FR | Instruction Manual - Page 40
de alimentación para transportar la herramienta ni para desconectarla del tomacorriente. Mantenga el cable alejado del calor, aceite, bordes cortantes, o partes móviles. Reemplace inmediatamente cualquier cable dañado. Un cable dañado puede ser la causa de descargas eléctricas. (5) Cuando utilice - Hitachi DH40FR | Instruction Manual - Page 41
produzcan accidentes. (4) Quite las llaves de ajuste y abra los interruptores antes de poner en funcionamiento la herramienta. Una llave dejada en una parte móvil de la herramienta podría resultar en lesiones. (5) No sobrepase su alcance. Mantenga en todo momento un buen equilibrio. El conservar en - Hitachi DH40FR | Instruction Manual - Page 42
NUNCA las piezas móviles. NO coloque NUNCA sus manos, dedos, ni demás partes del cuerpo cerca de las piezas móviles de la herramienta. 7. NO utilice NUNCA una herramienta eléctrica para aplicaciones no especificadas en este Manual de instrucciones. 10. Maneje correctamente la herramienta. Maneje la - Hitachi DH40FR | Instruction Manual - Page 43
herramienta, y en la quemadura del motor. 16. NO utilice NUNCA una herramienta defectuosa o que un centro de reparaciones autorizado por Hitachi. 17. NO deje NUNCA la deformado, rajado, o dañado. 19. No limpie las partes de plástico con disolvente. Los disolventes, como gasolina, diluidor - Hitachi DH40FR | Instruction Manual - Page 44
seguridad eléctrica ofrecidas en este Manual de instrucciones, incluyendo la no HITACHI. ⅜ Limpie el exterior de la herramienta eléctrica solamente con un paño suave humedecido en agua jabonosa, y después séquela bien. No utilice disolventes, gasolina, ni diluidor de pintura para limpiar las partes - Hitachi DH40FR | Instruction Manual - Page 45
las instrucciones de seguridad contenidas en este manual. Algunas ilustraciones de este Manual de Instrucciones pueden mostrar detalles o accesorios ón 120 V CA, 60 Hz, monofásica Corriente 9,2 A Capacidad Barrena: 1-9/16" (40 mm) Barrena tubulare: 4-1/8" (105 mm) Velocidad sin carga 240 - - Hitachi DH40FR | Instruction Manual - Page 46
Español MONTAJE Y OPERACIÓN APLICACIONES Función de rotación y golpeteo ⅜ Perforación de orificios de anclaje ⅜ Perforación de orificios en hormigón Función de martilleo solamente ⅜ Trituración de hormigón, cincelado, excavación y escuadreo (utilizando accesorios opcionales) ANTES DE LA OPERACIÓN 1. - Hitachi DH40FR | Instruction Manual - Page 47
Para una barrena gruesa insertar la cubierta para polvo por su parte posterior. 7. Montaje de la herramienta Cubierta Inserte hasta la ranura ÓN: Para usar herramientas tales como el puntero y, usar siempre piezas genuinas Hitachi. (1) Limpiar y engrasar la espiga con la grasa provista. (2) Tirar - Hitachi DH40FR | Instruction Manual - Page 48
Español PRECAUCIÓN: No ajuste el dial durante la operación. Si lo hiciese, podría dañarse, porque tendría que sujetar el martillo perforador con una sola mano, y perdería el control estable del mismo. MODO DE UTILIZACIÓN 1. Taladrar orificios (Fig. 5) (1) Oprimir el interruptor de operación luego - Hitachi DH40FR | Instruction Manual - Page 49
comprobar si está completamente bloqueada y cerciorarse de que no gire. Botón Fig. 8 5. Instalar el tope (Fig. 9) (1) Alfojar el mango lateral e insertar la parte recta del tope en el orificio del perno de manija. (2) Aflojar el mango lateral, y mover el tope a la posición especificada y rotar la - Hitachi DH40FR | Instruction Manual - Page 50
Español 6. Calentamiento (Fig. 10) El sistema de lubricación de esta unidad puede requerir calentamiento en ciertas regiones. Coloque el extremo de la broca de forma que entre en contacto con el hormigón, ponga en ON el interruptor de alimentación principal de la unidad, y realice la operación de - Hitachi DH40FR | Instruction Manual - Page 51
la izquierda o hacia la derecha de forma que no se caiga a pesar de estar indicando hacia abajo. (Fig. 15) 2. Modo de taladrar (Fig. 16) (1) Conectar el enchufe a la toma de alimentación. (2) El pasador central se ha instalado un resorte. Presionar ligeramente y sin torcerse hacia la pared o hacia - Hitachi DH40FR | Instruction Manual - Page 52
perforador y golpear fuertemente la cabeza de la espiga de la barrena tubular dos o tres veces con un martillo sujetanto la punta de la barrena. La parte roscada se aflojará y la barrena tubular podrá quitarse. Espiga de barrena Fig. 17 52 - Hitachi DH40FR | Instruction Manual - Page 53
Inspeccionar los escobillas de carbón (Fig. 18) El motor emplea escobillas de carbón que son partes consumibles. Cuando se gastan o están cerca del "limite de desgaste" pueden causar problemas al motor mm) 0,67" (17 mm) Fig. 18 NOTA: Utilice las escobillas HITACHI Núm. 73 indicadas en la Fig. 18. 53 - Hitachi DH40FR | Instruction Manual - Page 54
⅜ Cambio de escobillas de carbón (Para los nombres de las partes, vea la Fig. 1) Quitar la cubierta de cola y luego aflojar la grasa cada 6 meses de uso. Consultar para ello al centro de servicio HITACHI autorizado. Procedimiento de cambio de grasa. ⅜ Rellenado de grasa PRECAUCIÓN: Antes de - Hitachi DH40FR | Instruction Manual - Page 55
55 - Hitachi DH40FR | Instruction Manual - Page 56
56 - Hitachi DH40FR | Instruction Manual - Page 57
57 - Hitachi DH40FR | Instruction Manual - Page 58
58 - Hitachi DH40FR | Instruction Manual - Page 59
59 - Hitachi DH40FR | Instruction Manual - Page 60
Some dust created by power sanding, sawing, grinding, drilling, and other construc- tion activities contains chemicals known las máscares para el polvo especialmente diseñados para eliminar las partículas minúsculas. Issued by Hitachi Koki Co., Ltd. Shinagawa Intercity Tower A, 15-1, Konan 2-chome
-
 1
1 -
 2
2 -
 3
3 -
 4
4 -
 5
5 -
 6
6 -
 7
7 -
8
-
9
-
10
-
11
-
12
-
13
-
14
-
15
-
16
-
17
-
18
-
19
-
20
-
21
-
22
-
23
-
24
-
25
-
26
-
27
-
28
-
29
-
30
-
31
-
32
-
33
-
34
-
35
-
36
-
37
-
38
-
39
-
40
-
41
-
42
-
43
-
44
-
45
-
46
-
47
-
48
-
49
-
50
-
51
-
52
-
53
-
54
-
55
-
56
-
57
-
58
-
59
-
60
 |
 |

DOUBLE INSULATION
DOUBLE ISOLATION
AISLAMIENTO DOBLE
INSTRUCTIONS DE SECURITE ET MODE D’EMPLOI
AVERTISSEMENT
Une utilisation
INCORRECTE OU DANGEREUSE
de cet outil motorisé peut entraîner la
mort ou de sérieuses blessures corporelles!
Ce mode d’emploi contient d’importantes informations à propos de la sécurité de ce
produit. Prière de lire et de comprendre ce mode d’emploi AVANT d’utiliser l’outil
motorisé. Garder ce mode d’emploi à la disponibilité des autres utilisateurs et propriétaires
avant qu’ils utilisent l’outil motorisé. Ce mode d’emploi doit être conservé dans un
endroit sûr.
SAFETY INSTRUCTIONS AND INSTRUCTION MANUAL
WARNING
IMPROPER OR UNSAFE
use of this power tool can result in death or serious bodily
injury!
This manual contains important information about product safety. Please read and
understand this manual BEFORE operating the power tool. Please keep this manual
available for other users and owners before they use the power tool. This manual should
be stored in safe place.
INSTRUCCIONES DE SEGURIDAD Y MANUAL DE INSTRUCCIONES
ADVERTENCIA
¡La utilización
INAPROPIADA O PELIGROSA
de esta herramienta eléctrica puede
resultar en lesiones de gravedad o la muerte!
Este manual contiene información importante sobre la seguridad del producto. Lea y
comprenda este manual ANTES de utilizar la herramienta eléctrica. Guarde este manual
para que puedan leerlo otras personas antes de utilizar la herramienta eléctrica. Este
manual debe ser guardado en un lugar seguro.
Model
Rotary Hammer
Modèle
Marteau rotatif
Modelo
Martillo perforador
DH 40FR