Hitachi DV-RX5000U Owners Guide
Hitachi DV-RX5000U Manual
 |
View all Hitachi DV-RX5000U manuals
Add to My Manuals
Save this manual to your list of manuals |
Hitachi DV-RX5000U manual content summary:
- Hitachi DV-RX5000U | Owners Guide - Page 1
SKIP/FR FF/SKIP DVD VIDEO RECORDER Operating Instructions Model No. DV-RX5000U Region number supported by this unit Region numbers are allocated to instructions carefully. Before connecting, operating or adjusting this product, please read these instructions completely. Please keep this manual - Hitachi DV-RX5000U | Owners Guide - Page 2
. The exclamation point within an equilateral triangle is intended to alert the user to the presence of important operating and maintenance (servicing) instructions in the literature accompanying the appliance. CAUTION: TO PREVENT ELECTRIC SHOCK MATCH WIDE BLADE OF PLUG TO WIDE SLOT, FULLY INSERT - Hitachi DV-RX5000U | Owners Guide - Page 3
. Install in accordance with the manufacturer's instructions. 8) Do not install near any heat periods of time. 14) Refer all servicing to qualified service personnel. Servicing is required when the apparatus has been of recorded or edited material due to a problem with the unit or disc, and accepts - Hitachi DV-RX5000U | Owners Guide - Page 4
INSTRUCTIONS 3 Features 3 Accessories 4 Setting up STEP 1 Antenna and television connections 5 STEP 2 The remote control 6 STEP 3 Plug-in Auto Tuning 6 STEP 4 VCR Plusi guide timer recordings 24 Manually programming timer recordings Troubleshooting guide 52 Maintenance 54 Product Service - Hitachi DV-RX5000U | Owners Guide - Page 5
Setting up 1 STEP Antenna and television connections Preparation ≥Refer to the television's operating instructions. ≥Turn the television off and disconnect its AC power supply cord. Television AUDIO IN R L VIDEO IN To enjoy sound through other audio equipment (➜page 42) - Hitachi DV-RX5000U | Owners Guide - Page 6
Setting up 2 STEP The remote control Batteries R6/LR6, AA, UM-3 + +- ≥Insert so the poles (i and j) match those in the remote control. ≥Do not use rechargeable type batteries. Do not: ≥mix old and new batteries. ≥use different types at the same time. ≥heat or expose to flame. ≥take apart or - Hitachi DV-RX5000U | Owners Guide - Page 7
Clock Setting" screen. Set the time manually (➜page 49). To start Plug-in Auto Tuning again (after relocation, for example) Antenna system, channel caption, and VCR Plusr guide channel settings all revert to the default values when you perform the procedure below. Timer recording settings are also - Hitachi DV-RX5000U | Owners Guide - Page 8
up the guide channels Write down all the stations you for the stations in magazines. can receive. 1 Press [SETUP] to show the menus. SETUP Antenna System CATV Channel Set Up Disc Video Audio Display TV Screen Auto Channel Setting Channel Caption Preset Channel Caption Manual Channel Caption - Hitachi DV-RX5000U | Owners Guide - Page 9
" and press [1]. SETUP Channel Set Up Disc Video Audio Display TV Screen Antenna System Auto Channel Setting Channel Caption Preset Channel Caption Manual Channel Caption E VCR Plus CH Setting CATV SELECT ENTER TAB RETURN Proceed with the steps described below. Preset Channel Caption 3 Press - Hitachi DV-RX5000U | Owners Guide - Page 10
16:9 aspect ratio) ≥ Progressive - Read your television's operating instructions for details. 1 Press [SETUP] to show the menus. Display TV Screen Antenna System Auto Channel Setting Channel Caption Preset Channel Caption Manual Channel Caption E VCR Plus CH Setting CATV TAB SELECT RETURN 2 - Hitachi DV-RX5000U | Owners Guide - Page 11
with other DVD players. Consult the manual for the player to determine compatibility with some operations described in these operating instructions. Read the disc's instructions carefully. ≥This unit can playback of peculiar discs only causes a problem, consult the sales outlets for these discs - Hitachi DV-RX5000U | Owners Guide - Page 12
Setting up Control reference guide Remote control 1 23 4 5 6 78 9 : DVD POWER TV êê DVD TV button (ENTER) . . . 7, 15 ; Functions button (FUNCTIONS 23 < Manual channel adding and deleting button (ADD/DLT 7 = Manual programming and check button (PROG/CHECK 25 > On-screen display button (STATUS - Hitachi DV-RX5000U | Owners Guide - Page 13
Setting up Main unit 1U V / POWER/STANDBY S VIDEO IN LINE 2 (L2) VIDEO IN L (mono) AUDIO IN R G? H F B OPEN/CLOSE REC MODE CHANNEL REC ERASE TIME SLIP STOP PLAY SKIP/FR FF/SKIP W X Y O 7 K 6J Controls such as 1 function the same as the buttons on the remote control. U Remote - Hitachi DV-RX5000U | Owners Guide - Page 14
Recording Recording television programs 42 1 Disc tray 35 ? TV/VIDEO 3 4 1 5 Numbered buttons ? ; CANCEL STOP PAUSE PLAY 3, 4, 2, 1 ENTER 2 F Rec STATUS F Rec INPUT SELECT [RAM] [DVD-R] 1 Press [Í, DVD POWER] to turn the unit on. 2 Press [< OPEN/CLOSE] to open the tray and insert a - Hitachi DV-RX5000U | Owners Guide - Page 15
Inserting discs [RAM] [DVD-R] You can insert a cartridge or non-cartridge disc. Non-cartridge disc Insert label-up. Insert inside the tray's guides. Cartridge disc Insert label-up with the arrow facing in. [Note] ≥Load double-sided discs so the label for the side you want to record/ - Hitachi DV-RX5000U | Owners Guide - Page 16
Playing discs 1 Disc tray 2 ERASE DVD/TV ?3 :/6, 5/9 1 Numbered buttons ? ; CANCEL STOP PAUSE PLAY DIRECT NAVIGATOR, TOP MENU 3, 4, 2, 1 2 ENTER ERASE POSITION MEMORY :, 9 3 MENU RETURN F Rec [RAM] [DVD-R] [DVD-V] [VCD] [CD] [MP3] 1 Press [Í, DVD POWER] to turn the unit on. 2 Press [< - Hitachi DV-RX5000U | Owners Guide - Page 17
may also be able to use the numbered buttons (0, 1j9) to select an item. Other buttons used to operate menus Read the disc's instructions for further details about operation. [9][5]: Shows the next menu. [:][4]: Shows the previous menu. [RETURN]: Shows the menu screen. [VCD] [TOP MENU]: Shows the - Hitachi DV-RX5000U | Owners Guide - Page 18
Playing back Other methods of play DVD POWER TV DVD TV ÍÍ VCR Plus+ TV/VIDEO REC MODE REC Numbered buttons :, 9 ∫ DIRECT NAVIGATOR 3, 4, 2, 1 ENTER 12 45 78 CANCEL 0 SKIP 3 CH 6 VOLUME 9 100 SLOW/SEARCH STOP PAUSE PLAY DIRECT NAVIGATOR PLAY LIST TOP MENU ENTER MENU 6, 5 1, PLAY - Hitachi DV-RX5000U | Owners Guide - Page 19
Playing back Selecting an amount of time to skip- Time Slip [RAM] [DVD-R] 1 During play Press [TIME SLIP]. 0 min 2 Within 5 seconds Press [3, 4] to enter the time and then press [ENTER]. e.g., Go back to 5 minutes -5 min Press to alter in one-minute units. Press and hold to alter in 10-minute - Hitachi DV-RX5000U | Owners Guide - Page 20
Marking places to play again-MARKER Playing back DVD POWER TV êê DVD TV VCR Plus+ TV/VIDEO REC MODE REC CANCEL 3, 4, 2, 1 ENTER 12 45 78 CANCEL 0 SKIP 3 CH 6 VOLUME 9 100 SLOW/SEARCH STOP PAUSE PLAY DIRECT NAVIGATOR PLAY LIST TOP MENU ENTER MENU FUNCTIONS RETURN PROG/CHECK ADD/DLT - Hitachi DV-RX5000U | Owners Guide - Page 21
Playing back Using menus to play MP3 discs DVD POWER TV êê DVD TV VCR Plus+ TV/VIDEO REC MODE REC Numbered buttons TOP MENU 3, 4, 2, 1 ENTER 12 45 78 CANCEL 0 SKIP 3 CH 6 VOLUME 9 100 SLOW/SEARCH STOP PAUSE PLAY DIRECT NAVIGATOR PLAY LIST TOP MENU ENTER MENU FUNCTIONS RETURN PROG/ - Hitachi DV-RX5000U | Owners Guide - Page 22
Playing while you are recording Playing back DVD POWER TV DVD TV ÍÍ VCR Plus+ TV/VIDEO REC MODE REC ∫ DIRECT NAVIGATOR 12 45 78 CANCEL 0 SKIP 3 CH 6 VOLUME 9 100 SLOW/SEARCH STOP PAUSE PLAY DIRECT NAVIGATOR PLAY LIST TOP MENU ENTER MENU 1 3, 4 ENTER FUNCTIONS RETURN PROG/CHECK - Hitachi DV-RX5000U | Owners Guide - Page 23
Changing audio DIRECT NAVIGATOR PLAY LIST TOP MENU ENTER MENU FUNCTIONS RETURN PROG/CHECK ADD/DLT CM SKIP TIME SLIP AUDIO OPEN/CLOSE STATUS FRAME SETUP AUDIO INPUT SELECT DISPLAY ERASE F Rec POSITION MEMORY MARKER Using the FUNCTIONS window 3, 4, 2, 1 ENTER FUNCTIONS 78 CANCEL 0 SKIP - Hitachi DV-RX5000U | Owners Guide - Page 24
≥The set time is cleared if you change the recording mode or chan- nel while recording is paused. Preparation ≥Ensure the clock (and guide channels for VCR Plusr recording, ➜page 8) are set correctly. ≥Release protection (cartridge ➜page 11, disc ➜page 34) before proceeding. [RAM] Using VCR Plusr - Hitachi DV-RX5000U | Owners Guide - Page 25
few seconds when recording with DVD-RAM and approximately 30 seconds when recording with DVD-R). ≥If you set DST (Daylight Saving Time) to ON when manually setting the clock (➜page 49), timer recording may not work when summer switches to winter and vice versa. ≥"F" flashes when the unit couldn't go - Hitachi DV-RX5000U | Owners Guide - Page 26
Timer recording Timer recording ê, DVD POWER DVD POWER TV êê DVD TV VCR Plus+ TV/VIDEO REC MODE REC Numbered buttons CANCEL 3, 4, 2, 1 ENTER ADD/DLT PROG/CHECK 12 45 78 CANCEL 0 SKIP 3 CH 6 VOLUME 9 100 SLOW/SEARCH STOP PAUSE PLAY DIRECT NAVIGATOR PLAY LIST TOP MENU ENTER MENU - Hitachi DV-RX5000U | Owners Guide - Page 27
Editing Entering text DVD POWER TV êê DVD TV VCR Plus+ TV/VIDEO REC MODE REC Numbered buttons ; º 3, 4, 2, 1 ENTER 12 45 78 CANCEL 0 SKIP 3 CH 6 VOLUME 9 100 SLOW/SEARCH STOP PAUSE PLAY DIRECT NAVIGATOR PLAY LIST TOP MENU ENTER MENU FUNCTIONS RETURN PROG/CHECK ADD/DLT CM SKIP TIME - Hitachi DV-RX5000U | Owners Guide - Page 28
procedure. ≥Depending on the state of recording, the actual number of play lists that can be recorded may be less than that specified in this manual. 28 - Hitachi DV-RX5000U | Owners Guide - Page 29
Editing Playing play lists 1 While stopped Press [PLAY LIST]. PLAY LIST 001 002 003 004 --- --- No. 0 ~ 9 SELECT ENTER RETURN ! No 01 DATE 10/23 TOTAL 0:03 SCENE 004 TITLE Dinosaur 02 10/26 0:07 006 USJ 03 10/21 0:06 004 Auto action EDIT 2 Press [3, 4] to select the - Hitachi DV-RX5000U | Owners Guide - Page 30
Editing play lists [RAM] Operation While stopped Press [PLAY LIST]. PLAY LIST 001 002 003 004 --- --- No DATE TOTAL SCENE TITLE EDIT No. 0 ~ 9 3 01 10/23 0:03 004 Dinosaur 02 10/26 0:07 006 USJ 1 1 03 10/21 0:06 004 Auto action 1 SELECT 1 ENTER 1 RETURN 3 1 Press [3, 4] to - Hitachi DV-RX5000U | Owners Guide - Page 31
on the state of recording, the actual number of play lists or scenes that can be recorded may be less than that specified in this manual. 31 - Hitachi DV-RX5000U | Owners Guide - Page 32
3 Editing programs Operation Press [DIRECT NAVIGATOR]. DIRECT NAVIGATOR No CH DATE TIME TITLE EDIT 3 01 4 6/20 WED 10 : 00 AM Dinosaur 1 02 6 6/20 WED 9 : 00 PM Auto action 1 03 13 6/20 WED 11 : 00 PM USJ 1 1 1 TOTAL 3 No 0 ~ 9 SELECT ENTER RETURN Press [3, 4] to select the program - Hitachi DV-RX5000U | Owners Guide - Page 33
Press [2] to select "Erase" and press [ENTER]. The program is erased. [Note] ³ The disc's available recording time may not increase after erasing short programs. ³ Computer data cannot be erased. ³ The available recording time on DVD-R does not increase when you erase programs. Editing Press [2] - Hitachi DV-RX5000U | Owners Guide - Page 34
Disc setting Operation While stopped Press [FUNCTIONS]. 3 4 2 1 Press [ , , , ] to select "DISC SETTING" and press [ENTER]. DISC SETTING e.g., DVD-RAM DISC SETTING Prog # 7 Free 0 : 42 (SP) Used 0 : 58 Total Mark 10 Enter Title Disc Protection Off SELECT ENTER RETURN Erase all programs - Hitachi DV-RX5000U | Owners Guide - Page 35
possible due to the player you are using, the DVD-R, or the condition of the recording. Play the disc using this unit if you experience problems with other equipment. 35 - Hitachi DV-RX5000U | Owners Guide - Page 36
Advanced operation Using on-screen menus DVD POWER TV êê DVD TV VCR Plus+ TV/VIDEO REC MODE REC Numbered buttons 3, 4, 2, 1 ENTER 12 45 78 CANCEL 0 SKIP 3 CH 6 VOLUME 9 100 SLOW/SEARCH STOP PAUSE PLAY DIRECT NAVIGATOR PLAY LIST TOP MENU ENTER MENU FUNCTIONS RETURN PROG/CHECK ADD/ - Hitachi DV-RX5000U | Owners Guide - Page 37
Play menu e.g., DVD-RAM Disc Play Video Repeat play Marker Audio OFF 1s10 Item Repeat play Content Each time you press [3, 4]: [RAM] [DVD-R] [DVD-V] PRG: Program Chapter All Title PL: Play list ([RAM]) OFF OFF [VCD] [CD] Track All OFF [MP3] Track Group OFF Marker To cancel: - Hitachi DV-RX5000U | Owners Guide - Page 38
Using on-screen menus Video menu Not available when playing CDs and MP3 discs. [RAM] [DVD-R] [DVD-V] [VCD] Disc Play Video Audio Picture MPEG-DNR Normal ON Item Picture MPEG-DNR Content Normal: Default setting Soft: Soft picture with fewer video arti- facts Fine: Details are sharper Cinema: - Hitachi DV-RX5000U | Owners Guide - Page 39
On-screen displays STATUS DVD POWER TV êê DVD TV VCR Plus+ TV/VIDEO REC MODE REC 12 45 78 CANCEL 0 SKIP 3 CH 6 VOLUME 9 100 SLOW/SEARCH STOP PAUSE PLAY DIRECT NAVIGATOR PLAY LIST TOP MENU ENTER MENU FUNCTIONS RETURN PROG/CHECK ADD/DLT CM SKIP TIME SLIP OPEN/CLOSE STATUS FRAME - Hitachi DV-RX5000U | Owners Guide - Page 40
Home Theater Refer to the relevant pages for details. Enjoying CATV/Satellite broadcasts What you want to do How to do it Reference pages Enjoying CATV/Satellite broadcasts Connect a cable TV box or 41 satellite receiver. Enjoying more powerful sound Enjoying 5.1channel surround sound with - Hitachi DV-RX5000U | Owners Guide - Page 41
equipment and read the appropriate operating instructions. ≥The signal from the cable satellite TV service, to enjoy viewing their programming. ≥Consult your service provider regarding appropriate setting may not operate properly. Set the clock manually (➜page 49). ≥Change the video input on the - Hitachi DV-RX5000U | Owners Guide - Page 42
Home Theater Connecting an amplifier or system component This model can play Dolby Digital, but only in two channels. This model does not have a DTS decoder. You must connect a unit with a Dolby Digital or DTS decoder to enjoy surround sound. A Digital connection To enjoy multi-channel surround - Hitachi DV-RX5000U | Owners Guide - Page 43
Connecting other video equipment Connecting to the L2 input terminals on the front of the unit Connecting to the input terminals on the rear of the unit, L1 and L3 / POWER/STANDBY S VIDEO IN LINE 2 (L2) VIDEO IN L (mono) AUDIO IN R This unit yellow white red S video cable§ Audio/Video cable - Hitachi DV-RX5000U | Owners Guide - Page 44
to the television Use one of the following connections to suit the antenna terminals on your television. Refer to the television's operating instructions. ∫ A twin lead and coaxial plug terminal VHF/UHF band separator (not included) Television VHF UHF 75 ≠ coaxial cable ∫ A twin lead terminal 75 - Hitachi DV-RX5000U | Owners Guide - Page 45
Press [SETUP] to show the menus. SETUP Antenna System CATV Auto Channel Setting Channel Set Up Disc Video Channel Caption Preset Channel Caption Manual Channel Caption E VCR Plus CH Setting Audio Display TV Screen TAB SELECT RETURN 2 Press [3, 4] to select "Set Up" and press [1]. 3 Press - Hitachi DV-RX5000U | Owners Guide - Page 46
automatically. Preset Channel Caption (➜page 9) You can give preset captions to the channels. Manual Channel Caption (➜page 9) You can set channel captions manually. VCR Plusr CH Setting (➜page 8) Set the guide channels for use with VCR Plusi timer recording. Off Timer ≥2 hr Select how long - Hitachi DV-RX5000U | Owners Guide - Page 47
Advanced operation Tabs Video Audio Display TV Screen Menus Options Still Mode Select the type of picture shown when you pause play. ≥Automatic ≥Field: Less blurred field stills are shown. Select if jittering occurs when "Automatic" is selected. ≥Frame: Sharper frame stills are shown. Select - Hitachi DV-RX5000U | Owners Guide - Page 48
Screen Antenna System Auto Channel Setting Channel Caption Preset Channel Caption Manual Channel Caption E VCR Plus CH Setting CATV TAB SELECT RETURN . ≥Some items require different operations. Follow the on-screen instructions, or read the following explanations. To return to the previous - Hitachi DV-RX5000U | Owners Guide - Page 49
you connect the unit through a cable TV box or DSS receiver (➜page 41), tune to your local PBS station before starting auto clock setting. Use manual clock setting if auto clock setting does not work or if there is no local PBS channel in your area. 1 Press [SETUP] to show the - Hitachi DV-RX5000U | Owners Guide - Page 50
with this ratio will not fit onto a standard television with an aspect ratio of 4:3. Two styles of picture, "Pan&Scan" and "Letterbox", deal with this problem. Pan&Scan: The sides are cut off so the picture fills the screen. Letterbox: Black bands appear at the top and bottom of the picture - Hitachi DV-RX5000U | Owners Guide - Page 51
unit is hot. ➜ The unit switches to standby automatically for safety reasons and you cannot operate it. - Wait for about 30 minutes for the service number to disappear. ➜ Select a position with good ventilation when installing the unit. - ➜ Do not block the cooling fan on the rear of the unit - Hitachi DV-RX5000U | Owners Guide - Page 52
Troubleshooting guide Before requesting service, make the below checks. Power No power. 47 39 47 38 - Progressive video There is ghosting when pro- ≥Set "Progressive" to "OFF". This problem is caused by the editing method or material used on 38 gressive output is on. DVD-Video, but should be - Hitachi DV-RX5000U | Owners Guide - Page 53
Sound No sound. Low volume. Distorted sound. Cannot hear the desired audio type. Cannot switch audio during stereo or SAP broadcasts. ≥Check the connections. Check the input mode on the amplifier if you have connected one. ≥Turn V.S.S. off if it causes distortion. ≥Press [AUDIO] to select the - Hitachi DV-RX5000U | Owners Guide - Page 54
Troubleshooting guide Recording and timer recording Cannot record. VCR Plusr programming chemically treated cloth, read the instructions that came with the cloth carefully. Product Service 1. Damage requiring service-The unit should be serviced by qualified service personnel if: (a)The AC power - Hitachi DV-RX5000U | Owners Guide - Page 55
Specifications Recording system: DVD video recording standards (DVD-RAM), DVD video standards (DVD-R) Optical pick-up: System with 1 lens, 2 integration units (662 nm wavelength for DVDs, 790 nm wavelength for CDs) Recordable discs: 12 cm (5q) 4.7 GB DVD-RAM discs 12 cm (5q) 9.4 GB DVD- - Hitachi DV-RX5000U | Owners Guide - Page 56
Instalación básica Conexiones del televisor y de la antena Televisor AUDIO IN R L VIDEO IN VHF/UHF RF IN A la antena Cable de TV Antena exterior Antena interior Rojo Blanco Amarillo Cable de alimentación de CA (incluido) Conecte por último. Conecte también los cables de alimentación de CA - Hitachi DV-RX5000U | Owners Guide - Page 57
es: ≥De pantalla panorámica (relación del ancho a la altura de la imagen 16:9) ≥ Progresivo - Si desea información más detallada, lea el manual de instrucciones de su televisor. 1 Pulse [SETUP] para visualizar los menús. 2 Pulse [3, 4] para seleccionar "Pantalla TV" y pulse [1]. 3 Pulse [3, 4] para - Hitachi DV-RX5000U | Owners Guide - Page 58
Grabación de programas de televisión 1 4 2 3 5 Bandeja del disco TV/VIDEO ?1 Indicador Time Slip TIME SLIP 3 4 1 5 Botones numerados ? DIRECT NAVIGATOR CANCEL STOP PAUSE PLAY 1 ; 3, 4, 2, 1 ENTER TIME SLIP 2 F Rec [RAM] [DVD-R] 1 Pulse [Í, DVD POWER] para encender el aparato. 2 Pulse [< - Hitachi DV-RX5000U | Owners Guide - Page 59
Introducción de discos [RAM] [DVD-R] Puede introducir un disco con o sin estuche. Disco sin estuche Introduzca la etiqueta mirando hacia arriba. Introduzca dentro de las guías de la bandeja. Disco con estuche Introduzca la etiqueta mirando hacia arriba y con la fecha hacia el interior. [Note] ≥ - Hitachi DV-RX5000U | Owners Guide - Page 60
Reproducción de discos 1 Bandeja del disco 2 ERASE DVD/TV ?3 :/6, 5/9 1 Botones numerados ? ; CANCEL STOP PAUSE PLAY DIRECT NAVIGATOR, TOP MENU 3, 4, 2, 1 2 ENTER ERASE POSITION MEMORY :, 9 3 MENU RETURN F Rec [RAM] [DVD-R] [DVD-V] [VCD] [CD] [MP3] 1 Pulse [Í, DVD POWER] para encender - Hitachi DV-RX5000U | Owners Guide - Page 61
Cuando aparece una pantalla de menús en el televisor [VCD] Interruptor [DVD, TV] a "DVD" y Pulse los botones numerados (0, 1j9) para seleccionar un elemento. por ejemplo., "5": [0] ➜ [5] "15": [1] ➜ [5] [DVD-V] Pulse [3, 4, 2, 1] para seleccionar un elemento y pulse [ENTER]. ≥Puede que también sea - Hitachi DV-RX5000U | Owners Guide - Page 62
and play 22 Sound track 36 Subtitle 36 Time Slip 19, 22 Timer recording 24-26 Transfer 38 TV Type 10 VCR Plusi guide channel 8 timer recording 24 V.S.S 37 Índice Reproducción encadenada 59 Conexión antena, televisor 56 Navegador directo 61 Borrar programa 61 Memoria de posición 61
-
 1
1 -
 2
2 -
 3
3 -
 4
4 -
 5
5 -
 6
6 -
 7
7 -
8
-
9
-
10
-
11
-
12
-
13
-
14
-
15
-
16
-
17
-
18
-
19
-
20
-
21
-
22
-
23
-
24
-
25
-
26
-
27
-
28
-
29
-
30
-
31
-
32
-
33
-
34
-
35
-
36
-
37
-
38
-
39
-
40
-
41
-
42
-
43
-
44
-
45
-
46
-
47
-
48
-
49
-
50
-
51
-
52
-
53
-
54
-
55
-
56
-
57
-
58
-
59
-
60
-
61
-
62
 |
 |

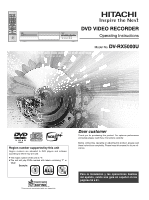
Region number supported by this unit
Region numbers are allocated to DVD players and software
according to where they are sold.
≥
The region number of this unit is “
1
”.
≥
The unit will play DVDs marked with labels containing “
1
” or
“
ALL
”.
1
ALL
2
4
1
Example:
This manual was printed with soy based ink.
DVD VIDEO RECORDER
Operating Instructions
Model No.
DV-RX5000U
Para la instalación y las operaciones básicas
del aparato, existe una guía en español en las
páginas 56 a 61.
RQT7122-P
Dear customer
Thank you for purchasing this product. For optimum performance
and safety, please read these instructions carefully.
Before connecting, operating or adjusting this product, please read
these instructions completely. Please keep this manual for future ref-
erence.
POWER/STANDBY
/
OPEN/CLOSE
REC MODE
TIME SLIP
FF/SKIP
SKIP/FR
PLAY
STOP
CHANNEL
REC
ERASE