Hitachi DZ GX5020A Owners Guide - Page 118
Using ImageMixer 3 for Windows - camcorder manual
 |
UPC - 050585223875
View all Hitachi DZ GX5020A manuals
Add to My Manuals
Save this manual to your list of manuals |
Page 118 highlights
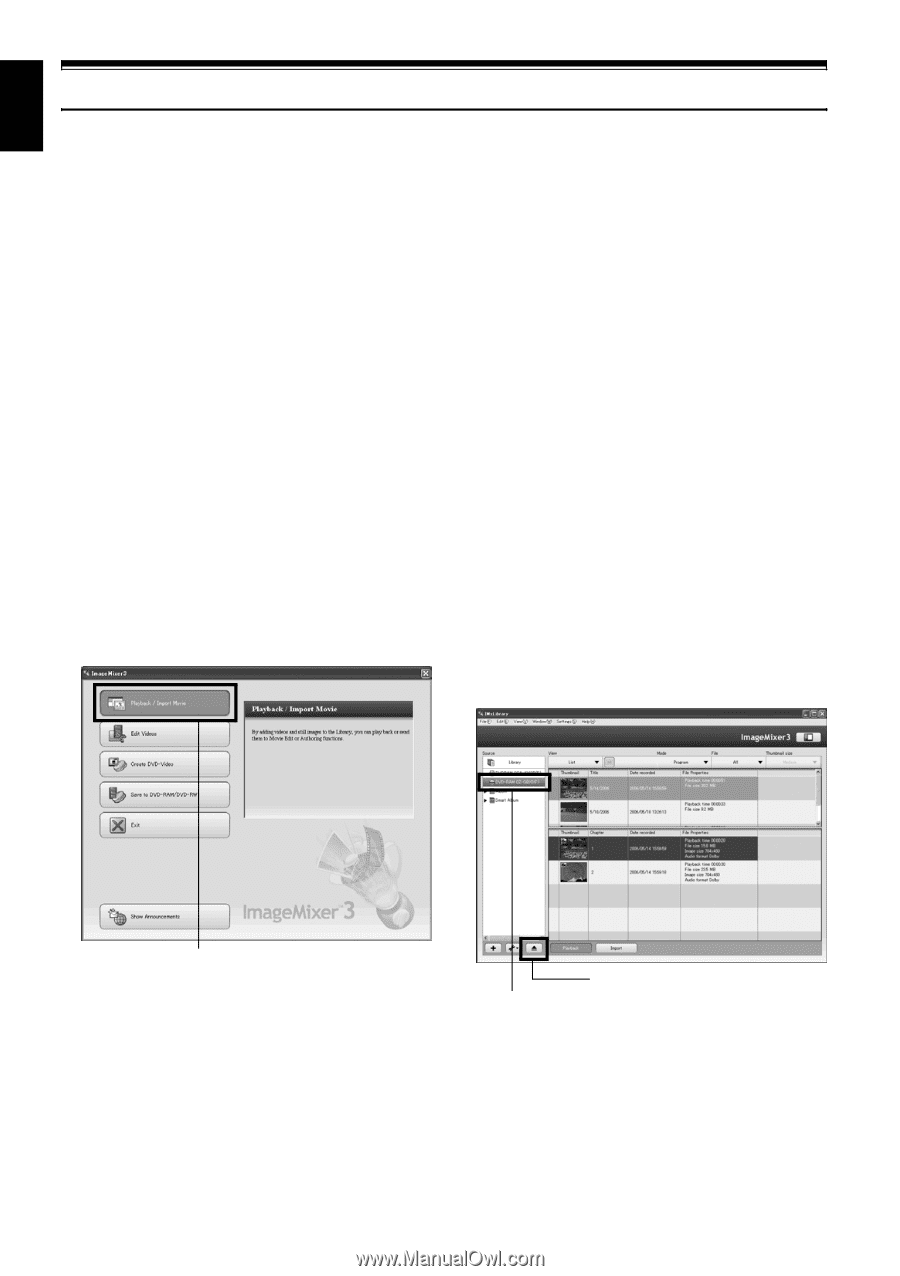
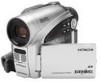
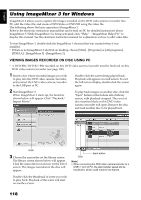
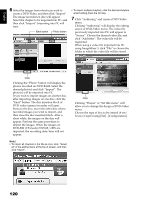
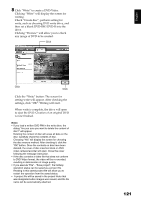
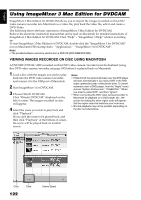
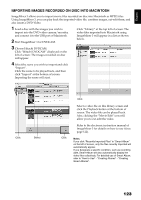
English Using ImageMixer 3 for Windows ImageMixer 3 allows you to capture the images recorded on the DVD video camera/recorder into PC, edit the video file, and create a DVD-Video or DVD-VR using the video file. The following shows the basic operation of ImageMixer 3. Refer to the electronic instruction manual that can be read on PC for detailed instructions about ImageMixer 3: While ImageMixer 3 is being activated, click "Help" - "ImageMixer Help (F1)" to display this manual. See the electronic instruction manual for explanation on how to edit video files. To start ImageMixer 3, double-click the ImageMixer 3 shortcut that was created when it was installed. * If there is no ImageMixer 3 shortcut on desktop, choose [Start] - [Programs] or [All programs] - [PIXELA] - [ImageMixer 3] - [ImageMixer 3]. VIEWING IMAGES RECORDED ON DISC USING PC * A DVD-RW/DVD-R/+RW recorded on this DVD video camera/recorder must be finalized on this DVD video camera/recorder (see page 100). 1 Insert a disc whose recorded images you wish to play into the DVD video camera/recorder, and connect the DVD video camera/recorder to the USB port of PC. Double-click the screen being played back: Playback will appear on a full screen. To exit the full-screen display, double-click the screen again. 2 Start ImageMixer 3. When ImageMixer 3 starts up, the launcher shown below will appear: Click "Playback/ Import Movie". To play back images on another disc, click the "Eject" button at the bottom left of library screen, with playback stopped. The cover of disc insertion block on this DVD video camera/recorder will open: Remove the disc and load another disc to be played back. Click 3 Choose the camcorder on the library screen. The library screen shown below will appear. Click the camcorder icon shown on the left of screen: The images recorded on the disc will appear. Click Eject button Note: • When connecting the DVD video camera/recorder to a USB1.1 port of PC, the data transfer speed will be insufficient, which could result in lost frames. Double-click the thumbnail of scene you wish to play back: Playback of the scene will start on another screen. 118
-
 1
1 -
2
-
3
-
4
-
5
-
6
-
7
-
8
-
9
-
10
-
11
-
12
-
13
-
14
-
15
-
16
-
17
-
18
-
19
-
20
-
21
-
22
-
23
-
24
-
25
-
26
-
27
-
28
-
29
-
30
-
31
-
32
-
33
-
34
-
35
-
36
-
37
-
38
-
39
-
40
-
41
-
42
-
43
-
44
-
45
-
46
-
47
-
48
-
49
-
50
-
51
-
52
-
53
-
54
-
55
-
56
-
57
-
58
-
59
-
60
-
61
-
62
-
63
-
64
-
65
-
66
-
67
-
68
-
69
-
70
-
71
-
72
-
73
-
74
-
75
-
76
-
77
-
78
-
79
-
80
-
81
-
82
-
83
-
84
-
85
-
86
-
87
-
88
-
89
-
90
-
91
-
92
-
93
-
94
-
95
-
96
-
97
-
98
-
99
-
100
-
101
-
102
-
103
-
104
-
105
-
106
-
107
-
108
-
109
-
110
-
111
-
112
-
 113
113 -
 114
114 -
 115
115 -
 116
116 -
 117
117 -
 118
118 -
 119
119 -
 120
120 -
 121
121 -
 122
122 -
 123
123 -
124
-
125
-
126
-
127
-
128
-
129
-
130
-
131
-
132
-
133
-
134
-
135
-
136
-
137
-
138
-
139
-
140
-
141
-
142
-
143
-
144
-
145
-
146
-
147
-
148
-
149
-
150
-
151
-
152
-
153
-
154
-
155
-
156
-
157
-
158
 |
 |