Hitachi DZ GX5020A Owners Guide - Page 95
Arranging Order Of Scenes Move
 |
UPC - 050585223875
View all Hitachi DZ GX5020A manuals
Add to My Manuals
Save this manual to your list of manuals |
Page 95 highlights
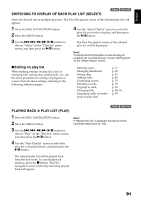
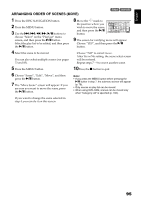
English ARRANGING ORDER OF SCENES (MOVE) 1< 1 Press the DISC NAVIGATION button. 2 Press the MENU button. 3 Use the f/e/d/c/A buttons to choose "Select" on the "PlayList" menu screen, and then press the A button. Select the play list to be edited, and then press the A button. 8 Move the " " mark to the position where you wish to move the scene, and then press the A button. Se l ect I nser t Po i n t 0 06 / 019 ENTER RETURN 9 The screen for verifying move will appear: Choose "YES", and then press the A button. 4 Select the scene to be moved. You can also select multiple scenes (see pages 73 and 85). Choose "NO" to cancel move. After Yes or No setting, the scene select screen will be restored. Repeat steps 7 - 9 to move another scene. 5 Press the MENU button. 10Press the C button to quit. 6 Choose "Scene", "Edit", "Move", and then press the A button. 7 The "Move Scene" screen will appear: If you are sure you want to move the scene, press the A button. Note: • If you press the MENU button before pressing the A button in step 7, the submenu screen will appear (p. 78). • Only scenes on play list can be moved. • When using DVD-RAM, scenes can be moved only when "Category: All" is specified (p. 102). If you want to change the scene selected in step 4, you can do it on this screen. 95
-
 1
1 -
2
-
3
-
4
-
5
-
6
-
7
-
8
-
9
-
10
-
11
-
12
-
13
-
14
-
15
-
16
-
17
-
18
-
19
-
20
-
21
-
22
-
23
-
24
-
25
-
26
-
27
-
28
-
29
-
30
-
31
-
32
-
33
-
34
-
35
-
36
-
37
-
38
-
39
-
40
-
41
-
42
-
43
-
44
-
45
-
46
-
47
-
48
-
49
-
50
-
51
-
52
-
53
-
54
-
55
-
56
-
57
-
58
-
59
-
60
-
61
-
62
-
63
-
64
-
65
-
66
-
67
-
68
-
69
-
70
-
71
-
72
-
73
-
74
-
75
-
76
-
77
-
78
-
79
-
80
-
81
-
82
-
83
-
84
-
85
-
86
-
87
-
88
-
89
-
 90
90 -
 91
91 -
 92
92 -
 93
93 -
 94
94 -
 95
95 -
 96
96 -
 97
97 -
 98
98 -
 99
99 -
 100
100 -
101
-
102
-
103
-
104
-
105
-
106
-
107
-
108
-
109
-
110
-
111
-
112
-
113
-
114
-
115
-
116
-
117
-
118
-
119
-
120
-
121
-
122
-
123
-
124
-
125
-
126
-
127
-
128
-
129
-
130
-
131
-
132
-
133
-
134
-
135
-
136
-
137
-
138
-
139
-
140
-
141
-
142
-
143
-
144
-
145
-
146
-
147
-
148
-
149
-
150
-
151
-
152
-
153
-
154
-
155
-
156
-
157
-
158
 |
 |