Hitachi SB10Y1 Instruction Manual
Hitachi SB10Y1 - Power Tools Bench Top Belt Disc Sander Manual
 |
View all Hitachi SB10Y1 manuals
Add to My Manuals
Save this manual to your list of manuals |
Hitachi SB10Y1 manual content summary:
- Hitachi SB10Y1 | Instruction Manual - Page 1
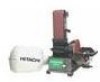
HITACHI Model Modèle Modelo SB10Y Belt/Disc Sander Ponceuse à courroie/disque Lijadora de Correa/Disco INSTRUCTION MANUAL AND SAFETY INSTRUCTIONS WARNING Improper and unsafe use of this power tool can result in death or serious bodily injury! This manual contains important information about - Hitachi SB10Y1 | Instruction Manual - Page 2
English TABLE OF CONTENTS SECTION Page Product Specifications 3 Safety 4 Accessories and Attachments 7 Carton Contents 7 Know Your Sander 9 SECTION Page Assembly and Adjustments 10 Operation 11 Maintenance 14 Troubleshooting Guide 15 Parts List 45 HITACHI AUTHORIZED SERVICE - Hitachi SB10Y1 | Instruction Manual - Page 3
MOTOR Power Source 120 V, AC, 60 Hz, 5.5 AMPS Belt Speed 1850 FPM (Feet Per Minute) Disc speed 3000 RPM Horsepower 1/3 HP (Continuous Duty) TABLE Size 6 x 9″ Tilt 0 - 45° DUST COLLECTION Yes BELT AND DISC Belt size 4″ x 36″ Disc size 8″ dia. NET WEIGHT 50 LB (22.5 kg) NOTE: This tool is - Hitachi SB10Y1 | Instruction Manual - Page 4
DON'T OVERREACH. Keep proper footing and balance at all times. 22. MAINTAIN TOOLS WITH CARE. Keep tools sharp and clean for best and safest performance. Follow instructions for lubricating and changing accessories. 23. DO NOT use power tools in the presence of flammable liquids or gases. 24. DO NOT - Hitachi SB10Y1 | Instruction Manual - Page 5
SAFETY INSTRUCTIONS FOR SANDERS 1. AVOID kickback by sanding in accordance with the directional arrows. 2. KEEP YOUR HANDS CLEAR of abrasive belt, disc and all moving parts. 3. FOR optimum performance, do not stall motor or reduce speed. Do not force the work into the abrasive. 4. ALWAYS support - Hitachi SB10Y1 | Instruction Manual - Page 6
tool's plug. Repair or replace damaged or worn cord immediately. Use a separate electrical circuit for your tools Connected to a Known Ground WARNING This Sander is for indoor use only. Do not line voltage, resulting in loss of power and cause overheating. The table below shows the correct size to - Hitachi SB10Y1 | Instruction Manual - Page 7
may cause hazards. • Use only accessories designed for this Sander to avoid injury from thrown broken parts or workpieces. • Do not use any accessory unless you have completely read the instruction or operator's manual for that accessory. CARTON CONTENTS UNPACKING AND CHECKING CONTENTS Carefully - Hitachi SB10Y1 | Instruction Manual - Page 8
English UNPACKING YOUR SANDER A B D E C G H F -8- - Hitachi SB10Y1 | Instruction Manual - Page 9
English KNOW YOUR SANDER Abrasive belt Miter gauge Belt tracking mechanism Belt tension lever Abrasive disc Angle scale and pointer Table locking knob ON/OFF Switch Dust bag clamp Dust Bag -9- - Hitachi SB10Y1 | Instruction Manual - Page 10
from the back of the abrasive disc (3) 3. Center the abrasive disc onto the aluminum disc and press on firmly and evenly. 4. Replace disc cover. Fig. A ATTACH TABLE The included table is used with both the disc and belt. To use the table with the disc: (Fig. B) 1. Insert support rod (1) into base - Hitachi SB10Y1 | Instruction Manual - Page 11
in a safe place and out of reach of children. WARNING ALWAYS lock the switch OFF when the sander is not in use. Remove the key and keep it in a safe place. In the event of power failure, blown fuse, or tripped circuit breaker, turn the switch OFF and remove the key, preventing - Hitachi SB10Y1 | Instruction Manual - Page 12
position. Secure belt assembly position by tightening socket head bolt in pivot bracket. 3. Adjustable positive stops are provided for both horizontal and vertical positions. NOTE: The horizontal limit stop is located on top of the base. Fig. G 1 ADJUSTING TABLE ANGLE (Fig. H) Table tilts from - Hitachi SB10Y1 | Instruction Manual - Page 13
miter gauge square to belt (disc), adjust to desired angle by repositioning the miter gauge scale and locking it into place with knob (3). Fig. J 4 English REPLACING ABRASIVE BELT (Fig. K) 1. Sanding belt should be replaced when worn, torn, or glazed. 2. Remove table assembly (1) and support rod - Hitachi SB10Y1 | Instruction Manual - Page 14
sander. parts, rubber parts and plastic guards. LUBRICATION The shielded ball bearings in this tool table will make it easier to feed the work while finishing. • Do not apply wax to the belt platen. Belt could pick up wax and deposit it on wheels causing belt to slip. KEEP TOOL IN REPAIR • If power - Hitachi SB10Y1 | Instruction Manual - Page 15
TROUBLESHOOTING GUIDE WARNING • To avoid injury from an accidental start, turn the switch OFF and remove the plug from the power source before making any adjustments. • All electrical or mechanical repairs should be done only by qualified service technicians. Contact Hitachi Authorized Service - Hitachi SB10Y1 | Instruction Manual - Page 16
English - 16 - - Hitachi SB10Y1 | Instruction Manual - Page 17
120 V c.a., 60 HZ, 5,5 A Vitesse de la courroie 1850 pi/min (pieds par minute) Vitesse du disque 3000 tr/min Puissance 1/3 HP (service continu) TABLEAU Dimensions 6 po x 9 po Inclinaison 0 - 45° RÉCUPÉRATION DES COPEAUX .....Oui COURROIE ET DISQUE Dimensions de la courroie ..........4 po x 36 - Hitachi SB10Y1 | Instruction Manual - Page 18
des lunettes de protection. Des lunettes de sécurité sont disponibles chez HITACHI. REMARQUE : Des lunettes ou des lunettes de sécurité non conformes la performance la meilleure et la plus sécuritaire. Suivre les instructions de lubrification et de changement des accessoires. 23. NE PAS utiliser - Hitachi SB10Y1 | Instruction Manual - Page 19
abrasif. 4. TOUJOURS supporter la pièce avec la table ou avec la butée de travail lors du ponçage avec la courroie et avec la table lors du ponçage est usé, coupé ou endommagé, le faire remplacer immédiatement. INSTRUCTIONS DE MISE À LA TERRE AVERTISSEMENT Pour protéger l'opérateur contre - Hitachi SB10Y1 | Instruction Manual - Page 20
(Figure B) pour connecter temporairement cette fiche à une prise à deux contacts sans mise à la terre. L'adaptateur (Figure B) est muni d'une cosse rigide qui part de celui-ci et DOIT être connectée à une prise de terre permanente, comme une boîte de prise de courant correctement mise à la terre - Hitachi SB10Y1 | Instruction Manual - Page 21
és. • Ne pas utiliser d'accessoire avant d'avoir lu toutes les instructions ou le manuel de l'utilisateur pour cet accessoire. CONTENU DU CARTON ES ARTICLE A. B. C. D. E. F. G. H. DESCRIPTION Ponceuse Ensemble table Ensemble guide à onglets Sac de récupération de sciure Collier de sac Disque - Hitachi SB10Y1 | Instruction Manual - Page 22
Français DÉBALLAGE DE LA PONCEUSE A B D E C G H F - 22 - - Hitachi SB10Y1 | Instruction Manual - Page 23
Français CONNAÎTRE SA PONCEUSE Courroie abrasive Guide à onglets Mécanisme d'alignement de courroie Levier de tension de courroie Disque abrasif Contrôle d'inclinaison et index Bouton de verrouillage de table Commutateur de MARCHE/ARRÊT Collier de serrage du sac de récupération de sciure Sac de - Hitachi SB10Y1 | Instruction Manual - Page 24
pas été complétés; vous devez également lire et comprendre les instructions de sécurité et de fonctionnement. MONTAGE DE LA PONCEUSE 1. DE LA TABLE La table incluse est utilisée avec le disque et la courroie. Pour utiliser la table avec le disque : (Fig. B) 1. Insérer la tige de support (1) dans - Hitachi SB10Y1 | Instruction Manual - Page 25
FIXATION DU SAC DE RÉCUPÉRATION DE SCIURE (Fig. D) 1. Placer le collier (1) par-dessus le manchon du sac (2). 2. Faire glisser le manchon muni du collier sur l'orifice d'évacuation de la poussière. 3. Fixer fermement en position en serrant la poignée du collier. Ne pas forcer sur la poignée. Faire - Hitachi SB10Y1 | Instruction Manual - Page 26
COURROIE À L'HORIZONTALE ET BUTÉE DE TRAVAIL (Fig. I) 1. Déposer la table de l'ensemble de la courroie (1). 2. Incliner l'ensemble courroie de la position Desserrer le boulon à tête creuse qui est vissé dans le support articulé. 2. Incliner l'ensemble courroie à la position désirée. Fixer - Hitachi SB10Y1 | Instruction Manual - Page 27
du guide à onglets et en la verrouillant en place avec la petite poignée (3). Fig. J 4 Français REMPLACEMENT DE LA COURROIE ABRASIVE (Fig. K) 1. La courroie de ponçage doit être remplacée lorsqu'elle est usée, déchirée ou givrée. 2. Déposer la table (1) et la tige de support (2). 3. Desserrer - Hitachi SB10Y1 | Instruction Manual - Page 28
est donc inutile de les lubrifier de nouveau. • Lorsque le fonctionnement semble manquer de souplesse, appliquer une mince couche de cire en pâte sur la table pour faciliter l'entrée de la pièce au moment de la finition. • Ne pas appliquer de cire sur la plaque d'appui pour courroie. La courroie - Hitachi SB10Y1 | Instruction Manual - Page 29
Français GUIDE DE DÉPANNAGE AVERTISSEMENT • Afin d'éviter un démarrage intempestif, placer l'interrupteur à doit être effectuée par un technicien d'entretien qualifié. Contacter un centre de service autorisé de Hitachi. GENERAL PROBLÈME Le moteur ne démarre pas. CAUSE PROBABLE 1. Faible tension - Hitachi SB10Y1 | Instruction Manual - Page 30
Français - 30 - - Hitachi SB10Y1 | Instruction Manual - Page 31
Español ADVERTENCIA Parte del polvo producido por las operaciones de lijado, esmerilado, taladrado como máscaras de protección contra el polvo que están especialmente diseñadas para filtrar partículas microscópicas. ESPECIFICACIONES DEL PRODUCTO MOTOR Fuente de alimentación ..........120 V, CA, 60 - Hitachi SB10Y1 | Instruction Manual - Page 32
los visitantes. 7. IMPIDA EL ACCESO AL TALLER POR PARTE DE LOS NIÑOS, mediante candados, interruptores principales Las Gafas de Seguridad pueden obtenerse de HITACHI. AVISO: Los anteojos o las gafas USE LOS ACCESORIOS RECOMENDADOS. Consulte el manual del operador para ver los accesorios recomendados. - Hitachi SB10Y1 | Instruction Manual - Page 33
PARA LIJADORAS 1. EVITE los contragolpes lijando según la dirección de las flechas. 2. MANTENGA LAS MANOS LEJOS de la correa abrasiva, disco y todas las partes o piezas en movimiento. 3. A FIN de lograr un óptimo rendimiento, no detenga el motor ni reduzca su velocidad. No fuerce la pieza de trabajo - Hitachi SB10Y1 | Instruction Manual - Page 34
Español UTILICE UNICAMENTE cordones de extensión trifilares que cuenten con enchufes de conexión a tierra de tres clavijas y tomacorrientes tripolares que funcionen con el enchufe de la herramienta. Repare o reemplace inmediatamente un cordón dañado o desgastado. Utilice un circuito eléctrico - Hitachi SB10Y1 | Instruction Manual - Page 35
accesorio a menos que haya leído completamente el manual de instrucciones o el manual del operador de ese accesorio. CONTENIDO DE LA CAJA falta o está dañada y se haya finalizado el montaje. TABLA DE PARTES SUELTAS ARTICULO A. B. C. D. E. F. G. H. DESCRIPCION CANTIDAD Lijadora 1 Conjunto - Hitachi SB10Y1 | Instruction Manual - Page 36
Español DESEMPAQUE DE SU LIJADORA A B D E C G H F - 36 - - Hitachi SB10Y1 | Instruction Manual - Page 37
Español CONOZCA SU LIJADORA Correa abrasiva Guía de ingletes Mecanismo de alineación de la correa Palanca de tensión de la correa Disco abrasivo Escala angular e indicador Manilla de fijación de la mesa Interruptor de Encendido y Apagado (ON/OFF) Abrazadera de la bolsa de polvo Bolsa para polvo - Hitachi SB10Y1 | Instruction Manual - Page 38
DEL DISCO ABRASIVO (Fig. A) 1. Retire la cubierta del disco (1). Para hacer esto, afloje y extraiga cinco tornillos (2). 2. Retire el recubrimiento de la parte posterior del disco abrasivo (3). 3. Coloque el disco abrasivo en el centro del disco de aluminio y presiónelo con firmeza y de forma pareja - Hitachi SB10Y1 | Instruction Manual - Page 39
INSTALACION DE LA BOLSA RECOLECTORA DE POLVO (Fig. D) 1. Coloque la abrazadera (1) sobre la manga de la bolsa (2). 2. Deslice la manga con la abrazadera sobre el orificio de salida del polvo. 3. Apriete la manija de la abrazadera para fijar la bolsa en posición. No fuerce la manija. Gire la manija - Hitachi SB10Y1 | Instruction Manual - Page 40
conjunto de la correa. 3. Se han suministrado topes positivos ajustables para las posiciones horizontal y vertical. AVISO: El tope limitador horizontal se encuentra ubicado en la parte superior de la base. Fig. G 1 2 - 40 - - Hitachi SB10Y1 | Instruction Manual - Page 41
USO DE LA CORREA ABRASIVA PARA TRABAJOS DE ACABADO 1. Acabado de superficies planas: Sujete la pieza de trabajo firmemente con ambas manos; mantenga los dedos lejos de la correa abrasiva. Use la mesa para situar y sujetar la pieza que se esté lijando. Mantenga el extremo topando contra la mesa y - Hitachi SB10Y1 | Instruction Manual - Page 42
, nafta, acetona, disolvente de lacas ni solventes similares altamente volátiles para limpiar la lijadora. • Para evitar sufrir lesiones oculares debido a partículas sopladas, use gafas de seguridad cuando se sople el aserrín hacia fuera. LIMPIEZA Mantenga la máquina y el taller limpios. No permita - Hitachi SB10Y1 | Instruction Manual - Page 43
o mecánicas deberán ser realizadas únicamente por técnicos de servicio calificados. Póngase en contacto con un Centro de Servicio Autorizado de Hitachi. GENERALIDADES PROBLEMA El motor no arranca. CAUSA PROBABLE 1. Voltaje bajo. 2. Circuito abierto en el motor o conexiones sueltas. El motor no - Hitachi SB10Y1 | Instruction Manual - Page 44
4″ x 8″ BELT/DISC SANDER SCHEMATIC A MODEL NO. SB10Y - 44 - - Hitachi SB10Y1 | Instruction Manual - Page 45
PARTS LIST 4″ x 8″ BELT/DISC SANDER ALWAYS ORDER BY PART NO. AND I.D. NUMBER. PARTS LIST FOR SCHEMATIC A MODEL NO. SB10Y Part No. 327589 327590 327591 327592 327593 327594 327595 327596 327597 327598 327599 327600 327601 327602 327603 327604 327605 327606 327607 327608 327609 327610 327611 I.D. - Hitachi SB10Y1 | Instruction Manual - Page 46
4″ x 8″ BELT/DISC SANDER SCHEMATIC B MODEL NO. SB10Y - 46 - - Hitachi SB10Y1 | Instruction Manual - Page 47
PARTS LIST 4″ x 8″ BELT/DISC SANDER ALWAYS ORDER BY PART NO. AND I.D. NUMBER PARTS LIST FOR SCHEMATIC B MODEL NO. SB10Y Part No. 327634 327635 327636 327637 327638 327639 327640 Table Cr. Re. Pan Hd. Screw Disc Cover Abrasive Disc Disc Pointer Flat Washer Disc Hd. Bolt Ring Power Cord Strain Relief - Hitachi SB10Y1 | Instruction Manual - Page 48
Issued by Hitachi Koki Co., Ltd. Shinagawa Intercity Tower A, 15-1, Konan 2-chome, Minato-ku, Tokyo 108-6020, Japan Distributed by Hitachi Koki U.S.A., Ltd. 3950 Steve Reynolds Blvd. Norcross, GA 30093 Hitachi Koki Canada Co. 6395 Kestrel Road Mississauga ON L5T 1Z5 703 Code No. C99161861 Printed
-
 1
1 -
 2
2 -
 3
3 -
 4
4 -
 5
5 -
 6
6 -
 7
7 -
8
-
9
-
10
-
11
-
12
-
13
-
14
-
15
-
16
-
17
-
18
-
19
-
20
-
21
-
22
-
23
-
24
-
25
-
26
-
27
-
28
-
29
-
30
-
31
-
32
-
33
-
34
-
35
-
36
-
37
-
38
-
39
-
40
-
41
-
42
-
43
-
44
-
45
-
46
-
47
-
48
 |
 |

HITACHI
Model
Modèle
Modelo
SB10Y
Belt/Disc Sander
Ponceuse à courroie/disque
Lijadora de Correa/Disco
INSTRUCTION MANUAL AND SAFETY INSTRUCTIONS
WARNING
Improper and unsafe use of this power tool can result in death or serious bodily injury!
This manual contains important information about product safety. Please read and understand
this manual before operating the power tool. Please keep this manual available for others
before they use the power tool.
Hitachi Koki
MANUEL D’INSTRUCTIONS ET CONSIGNES DE SÉCURITÉ
AVERTISSEMENT
L’utilisation inadéquate et non sécuritaire de cet outil électrique peut entraîner la mort ou des
blessures graves! Ce manuel contient des informations importantes sur la sécurité. Veuillez
lire et comprendre ce manuel avant d’utiliser l’outil électrique. Veuillez garder ce manuel
disponible pour les autres utilisateurs, avant qu’ils utilisent cet outil électrique.
MANUAL DE INSTRUCCIONES E INSTRUCCIONES DE SEGURIDAD
ADVERTENCIA
¡El uso inadecuado y no seguro de esta herramienta eléctrica puede ocasionar la muerte o
lesiones corporales graves! Este manual contiene información importante sobre la seguridad
del producto. Por favor lea y entienda este manual antes de usar la herramienta eléctrica.
Por favor mantenga disponible este manual para que otros puedan leerlo antes de usar la
herramienta eléctrica.