Hitachi WH14DL Instruction Manual
Hitachi WH14DL - 14.4V Impact Driver 3.0Ah Li-Ion 1240 In/Lb TRQ Manual
 |
UPC - 717709011175
View all Hitachi WH14DL manuals
Add to My Manuals
Save this manual to your list of manuals |
Hitachi WH14DL manual content summary:
- Hitachi WH14DL | Instruction Manual - Page 1
•WH 18DL Visseuse à percussion à batterie Atornillador de impacto a battería Cordless Impact Wrench WR 14DMR • WR 14DL•WR 18DMR • WR 18DL Clé à choc à batterie Llave de impacto a batería WH18DL WR18DL SAFETY INSTRUCTIONS AND INSTRUCTION MANUAL WARNING IMPROPER OR UNSAFE use of this power tool can - Hitachi WH14DL | Instruction Manual - Page 2
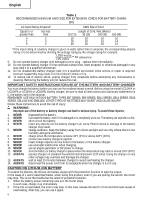
RULES - FOR ALL BATTERY OPERATED TOOLS 3 SPECIFIC SAFETY RULES 4 IMPORTANT SAFETY INSTRUCTIONS FOR USE OF THE CORDLESS IMPACT DRIVER / WRENCH 5 IMPORTANT SAFETY INSTRUCTIONS FOR BATTERY CHARGER 5 IMPORTANT SAFETY INSTRUCTIONS FOR USE OF THE BATTERY AND BATTERY CHARGER 6 CAUTION ON LITHIUM-ION - Hitachi WH14DL | Instruction Manual - Page 3
Instruction Manual. NEVER use this power tool in a manner that has not been specifically recommended by HITACHI Remove adjusting keys or wrenches before turning the tool on. A wrench or a key that is clamps or other practical way to secure and support the workpiece to a stable platform. Holding the - Hitachi WH14DL | Instruction Manual - Page 4
personnel could result in a risk of injury. (2) When servicing a tool, use only identical replacement parts. Follow instructions in the Maintenance section of this manual. Use of unauthorized parts or failure to follow Maintenance Instruction may create a risk of electric shock or injury. WARNING - Hitachi WH14DL | Instruction Manual - Page 5
CORDLESS IMPACT DRIVER / WRENCH WARNING: Death or serious bodily injury could result from improper or unsafe use of the cordless impact driver. To avoid these risks, follow these basic safety instructions: 1. Never use this tool handle for any application other than those in this manual. 2. Never - Hitachi WH14DL | Instruction Manual - Page 6
when service or repair cordless impact wrench. Before using the model UC14YFA or UC24YFA or UC18YG or UC18YRL battery charger, be sure to read all instructions and cautionary statements on it, the battery and in this manual. REMEMBER: USE ONLY HITACHI This is not the trouble but the result of - Hitachi WH14DL | Instruction Manual - Page 7
instructions contained in this manual. Some illustrations in this Instruction Manual may show details or attachments that differ from those on your own power tool. SPECIFICATIONS 1. Cordless Impact use only with battery EBM1830. 2. Cordless Impact Wrench Model Voltage No-Load speed Capacity ( - Hitachi WH14DL | Instruction Manual - Page 8
charger. CAUTION: ● If the batteries are inserted in the reverse direction, not only recharging will become impossible, but it may also cause problems in the charger such as a deformed recharging terminal. 3. Charging When the battery is connected to the battery charger, charging will commence and - Hitachi WH14DL | Instruction Manual - Page 9
on the cord. Make sure to grasp the plug when removing from receptacle to avoid damaging cord. 5. Remove the battery from the battery charger Supporting the battery charger with hand, pull out the battery from the battery charger. CAUTION: ● When the battery charger has been continuously used, the - Hitachi WH14DL | Instruction Manual - Page 10
English OPERATION 1. Using the light equipped hook CAUTION: ● Do not attach the tip tool to the tool main unit when carrying the tool main unit with the light equipped hook suspended from a waist belt. Such action could result in injury. The light equipped hook has the following two functions: - Hitachi WH14DL | Instruction Manual - Page 11
then the bit Hexagonal hole is not installed properly. 3. Removing the bit (Impact driver) in the anvil Guide sleeve Please do the opposite point on the method of installing bit. 4. Selecting the socket matched to the bolt (Impact wrench) Fig. 10 Be sure to use a socket which is matched to the - Hitachi WH14DL | Instruction Manual - Page 12
use the designated attachments which are listed in the operations manual and Hitachi's catalog. Accidents or injuries could result from not doing tightening. In this case, stop impact on the nut and hold the bolt head with a wrench before restarting impact, or manually tighten the bolt and nut to - Hitachi WH14DL | Instruction Manual - Page 13
point is worn or broken, it will be dangerous since it slips. So replace it with a new one. 2. Checking the condition of the socket (Impact wrench) A worn or deformed hex. or a square-holed socket will not give an adequate tightness to the fitting between the nut or anvil, consequently resulting in - Hitachi WH14DL | Instruction Manual - Page 14
carbon brush and may cause motor trouble at an early stage. Fig. service and repairs must be performed by a HITACHI AUTHORIZED SERVICE CENTER, ONLY. 11. Service parts list CAUTION: ● Repair, modification and inspection of Hitachi Power Tools must be carried out by a HITACHI AUTHORIZED SERVICE - Hitachi WH14DL | Instruction Manual - Page 15
and could cause injury or mechanical damage. NOTE: Accessories are subject to change without any obligation on the part of the HITACHI. STANDARD ACCESSORIES 1 Battery Charger (UC14YFA or UC24YFA or UC18YG or UC18YRL) ....... 1 2 Plastic Case (Code No. 323230 1 NOTE: Specifications are subject to - Hitachi WH14DL | Instruction Manual - Page 16
de ce mode d'emploi et dans les sections qui contiennent les instructions de fonctionnement et d'entretien. Les dangers qui doivent être évités manière qui n'est pas spécifiquement recommandée par HITACHI. SIGNIFICATION DES MOTS D'AVERTISSEMENT AVERTISSEMENT indique des situations potentiellement - Hitachi WH14DL | Instruction Manual - Page 17
de la section d'entretien de ce mode d'emploi. L'utilisation de pièces non autorisées ou un non respect des instructions d'entretien peut créer un risque d'électrocution ou de blessures. AVERTISSEMENT: La poussière résultant d'un ponçage, d'un sciage, d'un meulage, d'un perçage - Hitachi WH14DL | Instruction Manual - Page 18
, fait des bruits étranges ou sans cela paraît défectueux, arrêter de l'utiliser immédiatement et le faire réparer par un centre de service Hitachi autorisé. 12. Manipuler l'outil motorisé avec précaution. Si un outil motorisé tombe ou frappe un matériau dur accidentellement, il risque d'être - Hitachi WH14DL | Instruction Manual - Page 19
UC18YRL. 2. Avant d'utiliser le chargeur de batterie, lire toutes les étiquettes d'instruction et de précaution apposées sur (1) le chargeur de batterie, (2) la batterie ou dans ce manuel. BIEN NOTER: UTILISER EXCLUSIVEMENT DES BATTERIES HITACHI DES SERIES EB7, EB9, EB12, EB14, EB18, EBL1430 ET - Hitachi WH14DL | Instruction Manual - Page 20
cas de surcharge de l'outil, actionnez le commutateur de l'outil et éliminez les causes de la surcharge. Vous pouvez ensuite recommencer à utiliser l'outil. CONSERVER CES INSTRUCTIONS 20 - Hitachi WH14DL | Instruction Manual - Page 21
et un entretien de l'outil motorisé. NE JAMAIS utiliser ni entreprendre une révision de l'outil sans avoir d'abord lu et compris toutes les instructions de sécurité contenues dans ce manuel. Certaines illustrations dans ce mode d'emploi peuvent montrer des détails ou des accessoires différents de - Hitachi WH14DL | Instruction Manual - Page 22
Français ASSEMBLAGE ET FONCTIONNEMENT MÉTHODE DE RETRAIT ET D'INSTALLATION DE LA BATTERIE ⅜ Installation de la batterie Poignée Aligner la batterie sur la fente de la poignée de l'outil et la glisser à l'intérieur. Toujours insérer la batterie à fond, jusqu'à ce qu'elle se bloque avec un - Hitachi WH14DL | Instruction Manual - Page 23
Français Avant la recharge Clignote (ROUGE) Tableau 2 Indications of the lamps S'allume pendant 0.5 seconde.Ne s'allume pas pendant 0.5 seconde. (Eteint pendant 0.5 seconde) Pendant la recharge Recharge terminée S'allume (ROUGE) Clignote (ROUGE) S'allume sans interruption S'allume pendant 0.5 - Hitachi WH14DL | Instruction Manual - Page 24
Français ATTENTION: Si la batterie est échauffée à cause de l'exposition directe au soleil, etc. juste apres le fonctionnement, il se peut que la lampe témoin du chargeur ne s'allume pas. Dans ce cas, laissez d'abord refroidir la batterie avant de commencer la charge. 3. Déconnectez le cordon du - Hitachi WH14DL | Instruction Manual - Page 25
Français REMARQUE: Faire attention à l'orientation du ressort. Installer le ressort avec le gros diamètre loin de soi. (Fig. 5) 1.2 Utilisation de la lampe auxiliaire (1) Appuyer sur l'interrupteur pour allumer la lampe. Si on l'oublie, la lampe s'éteint automatiquement 15 minutes plus tard. 3 - Hitachi WH14DL | Instruction Manual - Page 26
mèche Orifice hexagonal de la chabotte Manchon- n'est pas installée correctement. guide 3. Retrait de la mèche (Visseuse à percussion) Fig. 10 Procé spécifiés qui sont énumérés dans le mode d'emploi et le catalogue Hitachi. Sinon il y a risque d'accidents ou de blessures. ● Bien installer - Hitachi WH14DL | Instruction Manual - Page 27
Français ATTENTION: ● En mode économie d'énergie (S), évitez d'utiliser le tournevis en continu. Cette opération fait augmenter la température des composants électroniques du convertisseur. 11. Serrage et desserrage des vis Installer une mèche correspondant à la vis, faire coincider la mèche avec - Hitachi WH14DL | Instruction Manual - Page 28
en 3mm carbone propres et veiller à ce qu'ils coulissent librement dans les 11.5mm supports. Fig. 14 REMARQUE: Lors du remplacement des balais en carbone par des neufs, bien utiliser des balais en carbone Hitachi, No. de code 999054. Clou de balai en carbone 6. Remplacement d'un balai en - Hitachi WH14DL | Instruction Manual - Page 29
seules des pièces de rechange autorisées seront utilisées, tous les entretiens et les réparations doivent être effectués uniquement par UN CENTRE DE SERVICE HITACHI AUTORISE. 11. Liste des pièces de rechange ATTENTION: ● Les réparations, modifications et inspections des outils électriques - Hitachi WH14DL | Instruction Manual - Page 30
, los riesgos están identificados con ADVERTENCIAS en dicha herramienta y en este Manual de instrucciones. No utilice NUNCA esta herramienta eléctrica de ninguna forma que no esté específicamente recomendada por HITACHI. SIGNIFICADO DE LAS PALABRAS DE SEÑALIZACIÓN ADVERTENCIA indica situaciones - Hitachi WH14DL | Instruction Manual - Page 31
piezas de repuesto idénticas. Siga las instrucciones de la sección de mantenimiento de este manual. La utilización de piezas no autorizadas, o el no seguir las indicaciones del Manual de instrucciones puede crear el riesgo de descargas eléctricas u otras lesiones. ADVERTENCIA: Alogunos polvos - Hitachi WH14DL | Instruction Manual - Page 32
utilizarla y solicite su arreglo a un centro de reparaciones autorizado por Hitachi. 12. Maneje con cuidado las herramientas eléctricas. Si una utilice nunca esta herramienta para aplicaciones que no sean las indicadas en este manual. 2. No coloque nunca las manos ni otras partes del cuerpo cerca - Hitachi WH14DL | Instruction Manual - Page 33
DE SEGURIDAD PARA EL CARGADOR DE BATERÍAS 1. Este manual contiene instrucciones importantes de seguridad para el cargador de baterí producto que utiliza la batería. 3. Para reducir el riesgo de lesiones, cargue la batería HITACHI de tipo de la serie EB7, EB9, EB12, EB14, EB18, EBL1430 y EBM1830. - Hitachi WH14DL | Instruction Manual - Page 34
Español RECUERDE: ¡UTILICE SOLAMENTE BATERÍAS HITACHI DE LOS TIPOS DE LA SERIE EB7, LA SERIE EB9, LA SERIE EB12, SERIE EB14 Y LA SERIE EB18, EBL1430 Y EBM1830. LOS DEMÁS TIPOS DE BATERÍ - Hitachi WH14DL | Instruction Manual - Page 35
ni efectúe el mantenimiento de la herramienta antes de leer y comprender todas las instrucciones de seguridad contenidas en este manual. Algunas ilustraciones de este Manual de Instrucciones pueden mostrar detalles o accesorios diferentes a los de la propia herramienta eléctrica. ESPECIFICACIONES - Hitachi WH14DL | Instruction Manual - Page 36
Español MONTAJE Y OPERACIÓN MÉTODO DE EXTRACCIÓN E INSTALACIÓN DE LA BATERÍA ⅜ Forma de instalar la batería Mango Alinee la batería con la ranura de la empuñadura de la herramienta y deslícela en su lugar. Insértela siempre completamente hasta que suene un pequeño chasquido. Si no lo hiciese - Hitachi WH14DL | Instruction Manual - Page 37
Español Antes de la carga Parpadeo (ROJA) Tabla 2 Indicaciones de la lámpara piloto Se encenderá durante 0.5 segundos. No se encenderá durante 0.5 segundos. (Apagada durante 0.5 segundos) Durante la carga Carga completa Iluminación (ROJA) Parpadeo (ROJA) Iluminación permanente Se encenderá - Hitachi WH14DL | Instruction Manual - Page 38
Español 3. Desconectar el cable del cargador de la toma de CA 4. Sujetar el cargador con firmeza y sacarlo de la batería Descarga eléctrica en caso de baterías nuevas, etc. Como la substancia química interna de las baterías nuevas o las que no se hayan utilizado durante mucho tiempo no está - Hitachi WH14DL | Instruction Manual - Page 39
Español 3 Interruptor Resorte Fig. 4 El diámetro más grande queda en dirección opuesta Fig. 5 PRECAUCIÓN: ● No mire directamente hacia la luz. Tal acción podría dañar la vista. Gancho 1.3 Sustitución de las pilas (1) Afloje el tornillo de gancho con un destornillador tipo Phillips (Núm. 1). (Fig. - Hitachi WH14DL | Instruction Manual - Page 40
, extráigalo del yunke. PRECAUCIÓN: Fig. 11 ● Por favor utilice los accesorios especificados en las instrucciones de manejo y en el catálogo de Hitachi. De lo contrario, se podrían producir lesiones o accidentes. ● Asegúrese de instalar firmemente el casquillo adaptador en el yunke. Si no est - Hitachi WH14DL | Instruction Manual - Page 41
a reducir la tensión de apriete. Comprobar por ello la tensión de apriete necesaria atornillando previamente algunos tornillos con una llave de tuercas manual. Factores que afectan a la tensión de apriete. (1) Tensión Cuando se alcance el margen de descarga, la tensión se reducirá y la torsión de - Hitachi WH14DL | Instruction Manual - Page 42
si se mueven libremente dentro de sus portaescobillas. NOTA: Cuando reemplace las escobillas de carbón por otras nuevas, utilice Fig. 16 escobillas Hitachi con número de código 999054. 6. Reemplazar el carbón de contacto Extraiga la escobilla de carbón quitando primero la tapa y despu - Hitachi WH14DL | Instruction Manual - Page 43
. Esta lista de repuestos será de utilidad si es presentada junto con la heramienta al CENTRO DE REPARACIONES AUTORIZADO DE HITACHI para solicitar la reparación o cualquier otro tipo de mantenimiento. En el manejo y el mantenimiento de las herramientas eléctricas, se deberán observar las normas - Hitachi WH14DL | Instruction Manual - Page 44
45 46 47 48 49 501 502 Part Name RETAINING RING WASHER (D) GUIDE SPRING (C) GUIDE SLEEVE (D) FRONT CAP (C) PROTECTOR (D) TAPPING SCREW (W/SP. WASHER) CAP TAPPING SCREW (W/FLANGE) D4×20 NAME PLATE HOUSING (A).(B) SET HITACHI PLATE MACHINE SCREW (W/SP. WASHER) DC-SPEED CONTROL SWITCH PUSHING BUTTON - Hitachi WH14DL | Instruction Manual - Page 45
46 47 48 49 501 502 Part Name RETAINING RING WASHER (D) GUIDE SPRING (C) GUIDE SLEEVE (D) FRONT CAP (C) PROTECTOR (D) TAPPING SCREW (W/SP. BRUSH CAP TAPPING SCREW (W/FLANGE) D4 × 20 NAME PLATE HOUSING (A).(B) SET HITACHI PLATE MACHINE SCREW (W/SP. WASHER) M3 × 5 DC-SPEED CONTROL SWITCH PUSHING - Hitachi WH14DL | Instruction Manual - Page 46
45 46 47 48 49 501 502 Part Name RETAINING RING WASHER (D) GUIDE SPRING (C) GUIDE SLEEVE (D) FRONT CAP (C) PROTECTOR (D) TAPPING SCREW (W/SP. WASHER) CAP TAPPING SCREW (W/FLANGE) D4×20 NAME PLATE HOUSING (A).(B) SET HITACHI PLATE MACHINE SCREW (W/SP. WASHER) DC-SPEED CONTROL SWITCH PUSHING BUTTON - Hitachi WH14DL | Instruction Manual - Page 47
46 47 48 49 501 502 Part Name RETAINING RING WASHER (D) GUIDE SPRING (C) GUIDE SLEEVE (D) FRONT CAP (C) PROTECTOR (D) TAPPING SCREW (W/SP. BRUSH CAP TAPPING SCREW (W/FLANGE) D4 × 20 NAME PLATE HOUSING (A).(B) SET HITACHI PLATE MACHINE SCREW (W/SP. WASHER) M3 × 5 DC-SPEED CONTROL SWITCH PUSHING - Hitachi WH14DL | Instruction Manual - Page 48
SIDE YOKE (A) MAGNET (F) DUST GUARD FIN (B) BRUSH BLOCK CARBON BRUSH 5×6×11.5 BRUSH CAP TAPPING SCREW (W/FLANGE) D4×20 NAME PLATE HOUSING (A).(B) SET HITACHI PLATE MACHINE SCREW (W/SP. WASHER) M3×5 DC-SPEED CONTROL SWITCH PUSHING BUTTON (B) HOOK ASS'Y (W/LIGHT) TAPPING SCREW D2×6 V-LOCK NUT M5 LABEL - Hitachi WH14DL | Instruction Manual - Page 49
MAGNET (F) ASS'Y DUST GUARD FIN (B) BRUSH BLOCK CARBON BRUSH 5 × 6 × 11.5 BRUSH CAP TAPPING SCREW (W/FLANGE) D4 × 20 NAME PLATE HOUSING (A).(B) SET HITACHI PLATE MACHINE SCREW (W/SP. WASHER) M3 × 5 DC-SPEED CONTROL SWITCH PUSHING BUTTON (B) HOOK ASS'Y (W/LIGHT) TAPPING SCREW D2X6 V-LOCK NUT M5 LABEL - Hitachi WH14DL | Instruction Manual - Page 50
SIDE YOKE (A) MAGNET (F) DUST GUARD FIN (B) BRUSH BLOCK CARBON BRUSH 5×6×11.5 BRUSH CAP TAPPING SCREW (W/FLANGE) D4×20 NAME PLATE HOUSING (A).(B) SET HITACHI PLATE MACHINE SCREW (W/SP. WASHER) M3×5 DC-SPEED CONTROL SWITCH PUSHING BUTTON (B) HOOK ASS'Y (W/LIGHT) TAPPING SCREW D2×6 V-LOCK NUT M5 LABEL - Hitachi WH14DL | Instruction Manual - Page 51
(A) MAGNET (F) ASS'Y DUST GUARD FIN (B) BRUSH BLOCK CARBON BRUSH 5 × 6 × 11.5 BRUSH CAP TAPPING SCREW (W/FLANGE) D4 × 20 NAME PLATE HOUSING (A).(B) SET HITACHI PLATE MACHINE SCREW (W/SP. WASHER) M3 × 5 DC-SPEED CONTROL SWITCH PUSHING BUTTON (B) HOOK ASS'Y (W/LIGHT) TAPPING SCREW D2 × 6 V-LOCK NUT M5 - Hitachi WH14DL | Instruction Manual - Page 52
. Con respecto a la RECOLECCIÓN de baterías, póngase en contacto con HITACHI KOKI U.S.A. LTD. número 1-800-59-TOOLS (llamada gratis), o con HITACHI AUTORIZED POWER TOOL SERVICE CENTER. Issued by Hitachi Koki Co., Ltd. Shinagawa Intercity Tower A, 15-1, Konan 2-chome, Minato-ku, Tokyo 108-6020
-
 1
1 -
 2
2 -
 3
3 -
 4
4 -
 5
5 -
 6
6 -
 7
7 -
8
-
9
-
10
-
11
-
12
-
13
-
14
-
15
-
16
-
17
-
18
-
19
-
20
-
21
-
22
-
23
-
24
-
25
-
26
-
27
-
28
-
29
-
30
-
31
-
32
-
33
-
34
-
35
-
36
-
37
-
38
-
39
-
40
-
41
-
42
-
43
-
44
-
45
-
46
-
47
-
48
-
49
-
50
-
51
-
52
 |
 |

INSTRUCTIONS DE SECURITE ET MODE D’EMPLOI
AVERTISSEMENT
Une utilisation
INCORRECTE OU DANGEREUSE
de cet outil motorisé peut entraîner la
mort ou de sérieuses blessures corporelles !
Ce mode d’emploi contient d’importantes informations à propos de la sécurité de ce
produit. Prière de lire et de comprendre ce mode d’emploi AVANT d’utiliser l’outil
motorisé. Garder ce mode d’emploi à la disponibilité des autres utilisateurs et propriétaires
avant qu’ils utilisent l’outil motorisé. Ce mode d’emploi doit être conservé dans un
endroit sûr.
SAFETY INSTRUCTIONS AND INSTRUCTION MANUAL
WARNING
IMPROPER OR UNSAFE
use of this power tool can result in death or serious bodily injury!
This manual contains important information about product safety. Please read and
understand this manual BEFORE operating the power tool. Please keep this manual
available for other users and owners before they use the power tool. This manual should
be stored in safe place.
INSTRUCCIONES DE SEGURIDAD Y MANUAL DE INSTRUCCIONES
ADVERTENCIA
¡La utilización
INAPROPIADA O PELIGROSA
de esta herramienta eléctrica puede
resultar en lesiones de gravedad o la muerte!
Este manual contiene información importante sobre la seguridad del producto. Lea y
comprenda este manual ANTES de utilizar la herramienta eléctrica. Guarde este
manual para que puedan leerlo otras personas antes de utilizar la herramienta
eléctrica. Este manual debe ser guardado en un lugar seguro.
WR18DL
WH18DL
Model
Modèle
Modelo
Cordless Impact Driver
Visseuse à percussion à batterie
Atornillador de impacto a battería
Cordless Impact Wrench
Clé à choc à batterie
Llave de impacto a batería
WH 14DMR
•
WH 14DL
•
WH 18DMR
•
WH 18DL
WR 14DMR
•
WR 14DL
•
WR 18DMR
•
WR 18DL