Honeywell 6160CR-2 Setup Guide
Honeywell 6160CR-2 Manual
 |
View all Honeywell 6160CR-2 manuals
Add to My Manuals
Save this manual to your list of manuals |
Honeywell 6160CR-2 manual content summary:
- Honeywell 6160CR-2 | Setup Guide - Page 1
-2CF 9/08 Rev. B ADEMCO 6160CR-2 Commercial Alpha Keypad INSTALLATION AND SETUP GUIDE Keypad Features • Programmable function keys • Built-in sounder • ARMED, READY, POWER, FIRE ALARM, SILENCED, SUPERVISORY, TROUBLE LEDs (see note 1) • RED keypad for Commercial Fire applications • Supervised by - Honeywell 6160CR-2 | Setup Guide - Page 2
colors (red, blue, green, and white) and may be placed on the appropriate function keys (A, B, or C) for ease of identifying the individual key's function (as determined by the control panel's capability and programming). OPERATING THE KEYPAD For operating instructions, see the User Guide for the
-
 1
1 -
 2
2
 |
 |
K3590-2CF
9/08
Rev. B
ADEMCO 6160CR
ADEMCO 6160CR
ADEMCO 6160CR
ADEMCO 6160CR-2
Commercial Alpha Keypad
Commercial Alpha Keypad
Commercial Alpha Keypad
Commercial Alpha Keypad
INSTALLATION AND SETUP GUIDE
Keypad Features
•
Programmable function keys
•
Built-in sounder
•
ARMED, READY, POWER, FIRE ALARM, SILENCED,
SUPERVISORY, TROUBLE LEDs
(see note 1)
•
RED keypad for Commercial Fire applications
•
Supervised by control panel (required for Commercial Fire
installations)
Supported Control Panels
•
VISTA-32FB (see note 2)
•
VISTA-128FBP (see note 2)
•
VISTA-250FBP (see note 2)
Notes:
1. Trouble and Supervisory LEDs are supported only in the panels listed above.
2. Keypad address
may
be set to address 00 through 30 to operate with these controls (see control's instructions for
details).
GENERAL INFORMATION
The 6160CR-2 is an addressable remote keypad intended for
use in commercial applications with Honeywell control panels
listed above. The 6160CR-2’s address is set locally, via the
keypad’s keys (
see note 2, above)
. The keys are continuously
backlit for convenience. The LCD display is backlit only when
a key is depressed, or when the system is in alarm or trouble
condition.
Note:
On some controls, the LCD may be programmed to
remain on at all times
(see control’s instructions for details)
.
KEYPAD LED INDICATIONS
The keypad’s LEDs will light under the following conditions:
ARMED (Red)
ON
OFF
System is Armed
System is Disarmed
READY (Green)
ON
OFF
System is Ready
System is Not Ready
POWER (Green)
ON
OFF
AC power is O.K.
AC power is removed
FIRE ALARM
(Red)
ON
OFF
Fire Alarm has occurred
Normal
SILENCED
(Yellow)
ON
OFF
Fire Alarm has been silenced
Normal
SUPERVISORY
(Yellow)
ON
OFF
Supervisory condition exists
(see control’s instructions for
details)
Normal
TROUBLE
(Yellow)
ON
OFF
Trouble condition exists
(see
control’s instructions for details)
Normal
SPECIAL FUNCTION KEYS
The keypad also features programmable function keys labeled
A, B, and C. These keys may be programmed to initiate panic
or emergency alarms. Refer to the individual control panel’s
instructions for details.)
These keys
must
be held down for at least 2 seconds to
initiate the assigned function.
WIRING AND INSTALLATION
The keypad may be surface-mounted directly to a dry wall or
to a single- or double-gang electrical box. If this is the primary
Fire Keypad, connect to Keypad Port 2, wire in conduit, and
mount within 20 ft. of the control.
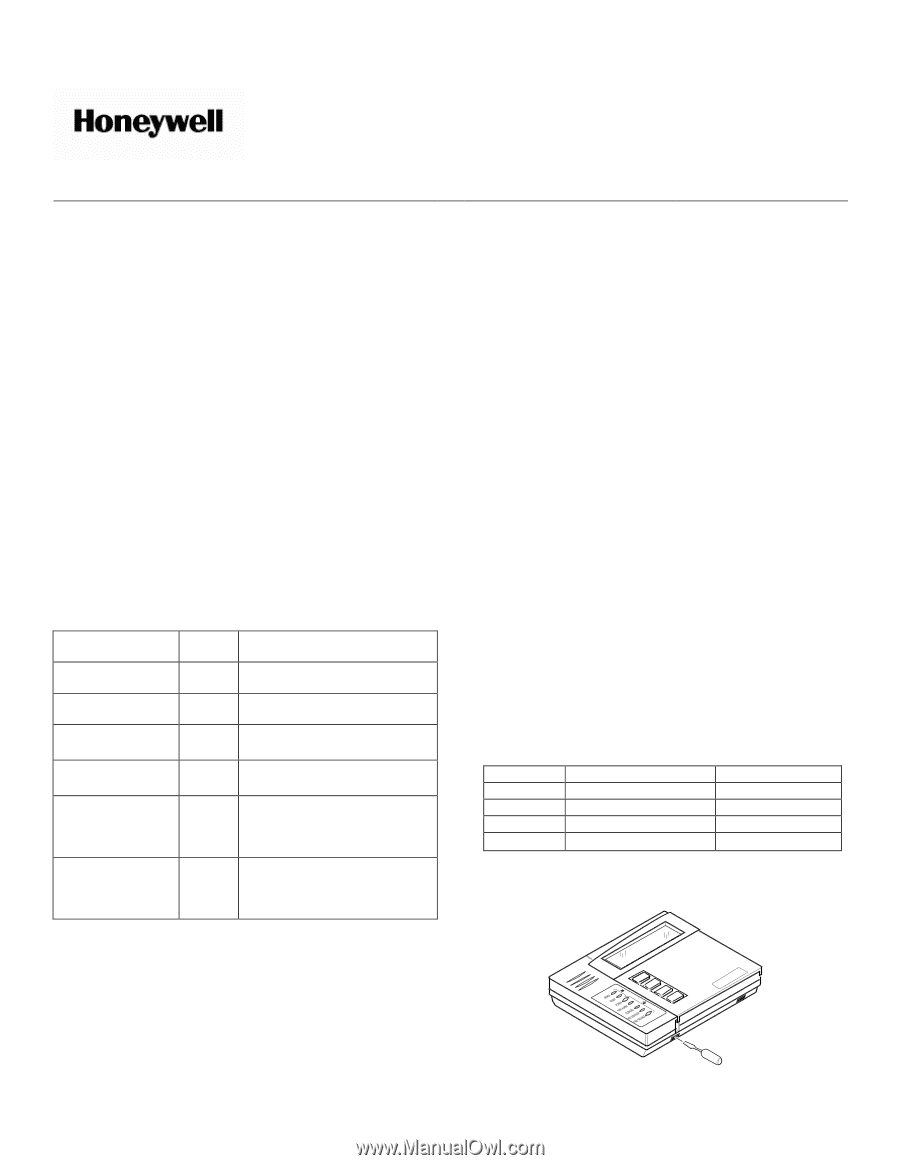
1. Detach the case back by pushing up into one of the two slots
at the bottom of the keypad with the blade of a small
screwdriver (this will push in the release tab), then pull
that side of the case back away. Repeat for the other side.
Refer to Figure 1 for location of the case back release tabs.
2. Route wiring through the large rectangular opening in the
case back.
3. Mount the case back to the wall or electrical box.
4. Wire directly from the keypad’s terminal block (see Figure
2) to the terminal block on the control panel (see control’s
Summary of Connections label for correct terminal
connections).
NOTE:
No more than one wire per terminal may be
connected. If daisy-chained configuration is required, pig-
tail wires together so that only one wire is terminated
under the screw.
Use 16-24
AWG wire only!
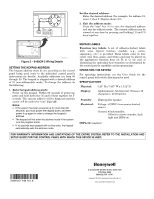
TABLE 1 - Wiring Connections
Keypad
Control Panel
Wire Color
▼
Y
Data Out
Yellow
+
+ Aux. Pwr
Red
–
– Aux Pwr (GND)
Black
▲
G
Data In
Green
5.
Reattach the keypad to its case back.
Attach the top of
the keypad first, and then press the bottom section down
until it snaps into place securely.
6160CR-006-V2
A
B
C
D
Figure 1 – Removing the Case Back