Honeywell CT3200 Owner's Manual - Page 3
Step 1. Prepare for installation - wiring
 |
View all Honeywell CT3200 manuals
Add to My Manuals
Save this manual to your list of manuals |
Page 3 highlights
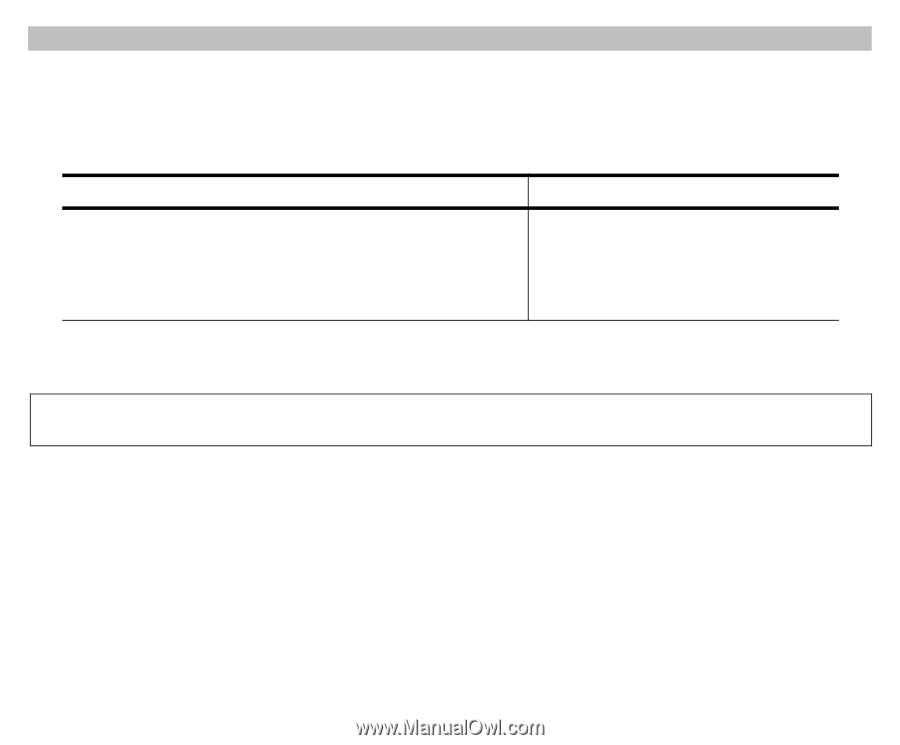
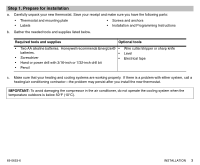
Step 1. Prepare for installation a. Carefully unpack your new thermostat. Save your receipt and make sure you have the following parts: • Thermostat and mounting plate • Labels • Screws and anchors • Installation and Programming Instructions b. Gather the needed tools and supplies listed below. Required tools and supplies Optional tools • Two AA alkaline batteries. Honeywell recommends Energizer® • Wire cutter/stripper or sharp knife batteries. • Level • Screwdriver • Electrical tape • Hand or power drill with 3/16-inch or 7/32-inch drill bit • Pencil c. Make sure that your heating and cooling systems are working properly. If there is a problem with either system, call a heating/air conditioning contractor-the problem may persist after you install the new thermostat. IMPORTANT: To avoid damaging the compressor in the air conditioner, do not operate the cooling system when the temperature outdoors is below 50°F (10°C). 69-0653-6 INSTALLATION 3
-
 1
1 -
 2
2 -
 3
3 -
 4
4 -
 5
5 -
 6
6 -
 7
7 -
 8
8 -
 9
9 -
10
-
11
-
12
-
13
-
14
-
15
-
16
-
17
-
18
-
19
-
20
-
21
-
22
-
23
-
24
 |
 |