Honeywell CT54K Owner's Manual
Honeywell CT54K Manual
 |
View all Honeywell CT54K manuals
Add to My Manuals
Save this manual to your list of manuals |
Honeywell CT54K manual content summary:
- Honeywell CT54K | Owner's Manual - Page 1
below. Old thermostat Cover M23786 ® U.S. Registered Trademark. Patents pending. Copyright © 2009 Honeywell International Inc. All rights reserved. MERCURY NOTICE If your old thermostat contains mercury, contact your local waste management authority for proper disposal instructions. 69-2040EFS - Honeywell CT54K | Owner's Manual - Page 2
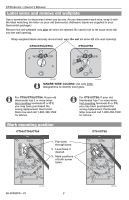
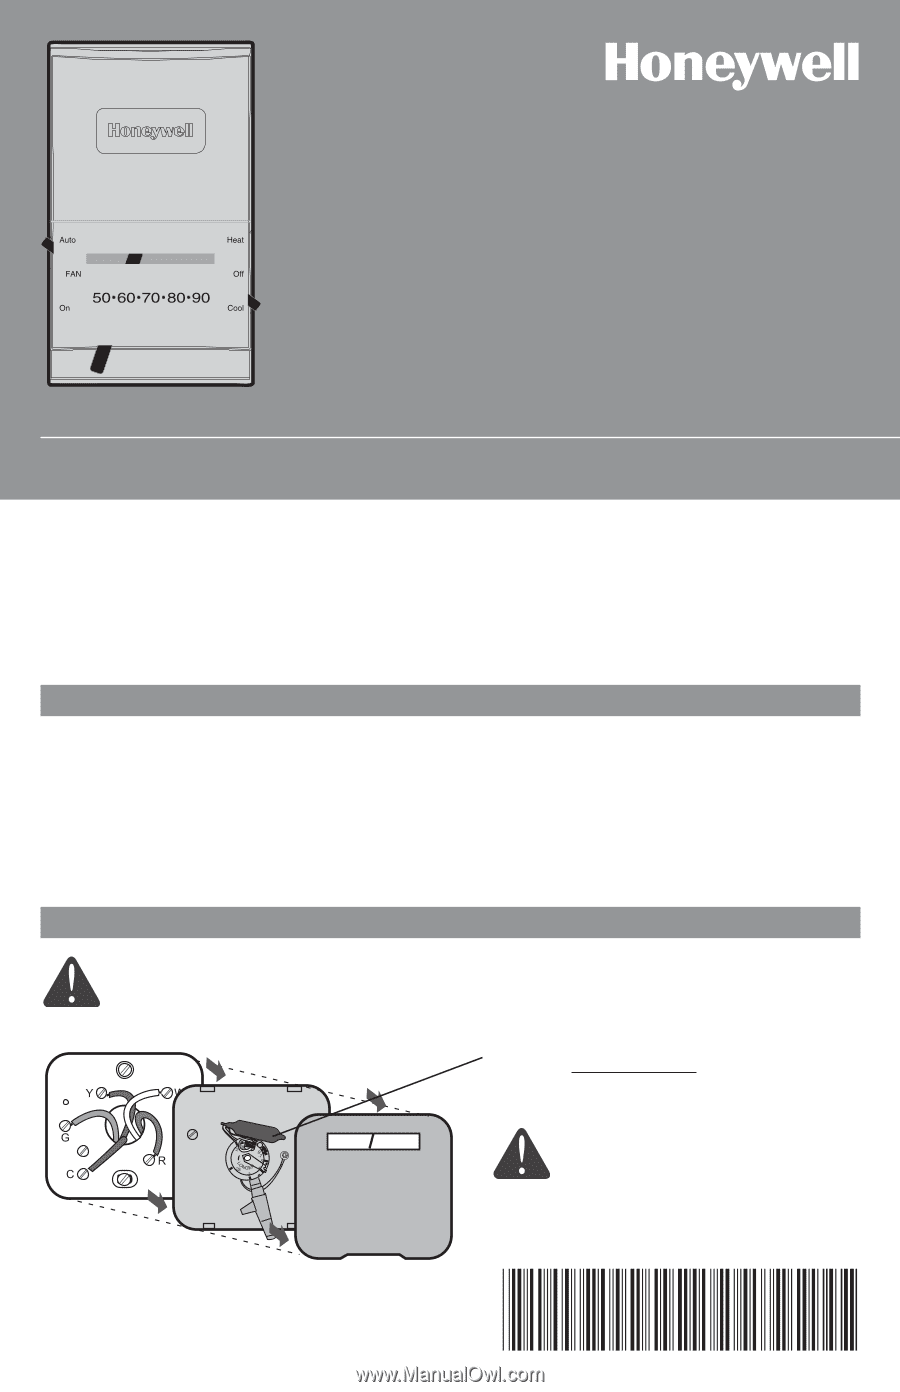
IGNORE WIRE COLORS: Use only letter designations to identify wire types. For CT50/CT53/CT54: If your old thermostat has 3 or more wires (not counting terminals C or C1), you may have purchased the wrong replacement thermostat. Stop now and call 1-800-468-1502 for advice. Mark mounting position CT50 - Honeywell CT54K | Owner's Manual - Page 3
anchors into holes until flush with wall. 3. Pull wires through thermostat base and insert screws. Check level if desired, then tighten • Y1 • M Terminal "Y" C • X • B Do not use [3] CT50/CT53/CT54 Wiring CT50/CT53/CT54 • 2-wire heat-only system: Connect one wire to R terminal, one wire to - Honeywell CT54K | Owner's Manual - Page 4
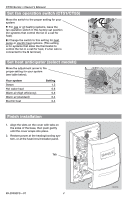
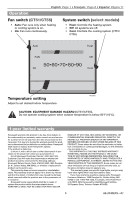
CT50 Series • Owner's Manual Set fan operation switch (CT51/CT55) Move the switch to the the switch to this setting for heat pump or electric heat systems. (This setting is for systems that allow the thermostat to control the fan in a call for heat, if a fan wire is connected to the G terminal.) Set - Honeywell CT54K | Owner's Manual - Page 5
warranty Honeywell warrants this product to be free from defects in the workmanship or materials, under normal use and service, for Honeywell Customer Relations, 1985 Douglas Dr., Golden Valley, MN 55422 or call 1-800-468-1502. In Canada, write Retail Products ON15-02H, Honeywell Limited/Honeywell - Honeywell CT54K | Owner's Manual - Page 6
Manual de Uso Español: Página 11 M2378957 Série CT50 Thermostat Installation à la verticale : CT50 (systèmes de chauffage à 24 V c.a.) CT51 (systèmes de chauffage-refroidissement à 24 V c.a.) CT53 thermostat Couvercle M23786 ® Marque déposée aux É.-U. Brevets en instance. © 2009 Honeywell - Honeywell CT54K | Owner's Manual - Page 7
DE LA COULEUR DES FILS : Tenir compte seulement de la lettre qui identifie le type de fil. CT50/CT53/CT54 : Si l'ancien thermostat a 3 fils ou plus (sans compter C ou C1), le thermostat de rechange ne convient peu-être pas à l'application. Arrêter l'installation et demander conseil au 1 800 468 - Honeywell CT54K | Owner's Manual - Page 8
de niveau avec le mur. 3. Tirer les fils par la base du thermostat et insérer les vis. Vérifier le niveau au besoin et serrer Borne G Borne W Borne Y Ne pas utiliser [3] 69-2040EFS-01 M23791 CT50/CT53/CT54 Câblage CT50/CT53/CT54 • Système de chauffage à 2 fils : Raccorder un fil à la borne - Honeywell CT54K | Owner's Manual - Page 9
chaleur). E : Déplacer le commutateur à cette position si le système est une thermopompe ou un appareil de chauffage électrique. (À cette position, le thermostat commande la mise en marche du ventilateur lors d'une demande de chaleur si un fil du ventilateur est raccordé à la borne G.) Réglage de - Honeywell CT54K | Owner's Manual - Page 10
Honeywell garantit ce produit contre tout vis de fabrication ou de matière dans des conditions d'utilisation et de service Honeywell Customer Relations, 1985 Douglas Dr., Golden Valley, MN 55422 ou appelez 1 800 468-1502. Au Canada, écrivez à Retail Products ON15-02H, Honeywell Limited/Honeywell - Honeywell CT54K | Owner's Manual - Page 11
Page 6 Manual de Uso Español: Página 11 M23785 CT50 Serie Termostato Montaje vertical: CT50 (sistemas de calefacción de 24 V CA) CT51 (sistemas de calefacción y refrigeración de 24 V CA) CT53 (sistemas EE. UU. Patentes en trámite. © 2009, Honeywell International Inc. Todos los derechos reservados. - Honeywell CT54K | Owner's Manual - Page 12
CT50 Serie • Manual de Uso Rotule los cables y retire la vieja placa de montaje Use un alrededor de cada cable ¡No permita que los cables caigan en el hueco de la pared! CT50/CT53/CT54 CT51/CT55 M23787 M23788 IGNORE LOS COLORES DE LOS CABLES: Use sólo letras para identificar los tipos - Honeywell CT54K | Owner's Manual - Page 13
no coinciden con las letras de los terminales en el termostato, consulte la tabla abajo. Cables existentes Conecte a: R • RH • 4 • V Terminal "R" [1] Cableado CT50/CT53/CT54 • Sistema de calefacción de dos cables: Conecte un cable con el terminal de R, un cable al terminal de W. CT51/CT55 Rc - Honeywell CT54K | Owner's Manual - Page 14
CT50 Serie • Manual de Uso Ajuste de funcionamiento del ventilador (CT51/CT55) Fije el interruptor para su sistema: F: Para los sistemas de calefacción a gas o aceite, deje el interruptor - Honeywell CT54K | Owner's Manual - Page 15
al otro. Si desea consultar acerca de esta garantía, escriba a Honeywell Customer Relations, 1985 Douglas Dr., Golden Valley, MN 55422 o llame a 1-800-468-1502. En Canadá, escriba a Retail Products ON15-02H Honeywell Limited/ Honeywell Limitée, 35 Dynamic Drive, Toronto, Ontario M1V4Z9. 15 69 - Honeywell CT54K | Owner's Manual - Page 16
800-468-1502 Besoin d'aide? Pour obtenir de l'aide concernant le produit, veuillez consulter le site Web http://DIYthermostats.honeywell.com ou vous adresser aux Services à la clientèle de Honeywell en composant le 1 800 468-1502 ¿Necesita ayuda? Consulte sobre este producto en http://DIYthermostats
-
 1
1 -
 2
2 -
 3
3 -
 4
4 -
 5
5 -
 6
6 -
 7
7 -
8
-
9
-
10
-
11
-
12
-
13
-
14
-
15
-
16
 |
 |
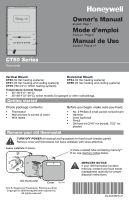
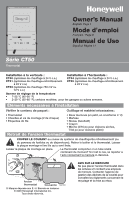
Owner’s Manual
English: Page 1
Mode d’emploi
Français : Page 6
Manual de Uso
Español: Página 11
CT50 Series
Thermostat
® U.S. Registered Trademark. Patents pending.
Copyright © 2009 Honeywell International Inc.
All rights reserved.
M23785
69-2040EFS-01
M23786
MERCURY NOTICE
If your old thermostat contains
mercury, contact your local waste
management authority for proper
disposal instructions.
TURN OFF POWER
at heating/cooling system (or fuse/circuit-breaker panel).
Remove cover and thermostat, but leave wallplate with wires attached.
Temperature Control Range
•
45°–95°F (7°–35°C)
•
35°–85°F (2°–29°C); select models; for garages or other outbuildings.
Is there a sealed tube containing mercury?
If so, see mercury notice below.
Leave wallplate in place.
Old thermostat
Cover
Check package contents:
•
Thermostat
•
Wall anchors & screws (2 each)
•
Wire labels
Before you begin, make sure you have:
•
No. 2 Phillips & small pocket screwdrivers
•
Hammer
•
Level (optional)
•
Pencil
•
Drill and bit (3/16” for drywall, 7/32” for
plaster)
Getting started
Remove your old thermostat
Vertical Mount:
CT50
(24 Vac heating systems)
CT51
(24 Vac heating and cooling systems)
CT53
(750 mV or 12Vdc heating systems)
Horizontal Mount:
CT54
(24 Vac heating systems)
CT55
(24 Vac heating and cooling systems)