Honeywell HCD95534 User Manual
Honeywell HCD95534 Manual
 |
View all Honeywell HCD95534 manuals
Add to My Manuals
Save this manual to your list of manuals |
Honeywell HCD95534 manual content summary:
- Honeywell HCD95534 | User Manual - Page 1
HCD95534 True Day/Night IR Camera NTSC PAL HCD95534 HCD95534X User Guide Document 800-01802 - Rev B - 02/09 - Honeywell HCD95534 | User Manual - Page 2
Revisions Issue A B Date 11/08 02/09 Revisions New document Corrected illumination length to 125-150 ft (40 - 46 m). 2 - Honeywell HCD95534 | User Manual - Page 3
PARTS INSIDE REFER SERVICING TO QUALIFIED SERVICE PERSONNEL THIS SYMBOL INDICATES THAT DANGEROUS VOLTAGE CONSTITUTING A RISK OF ELECTRIC SHOCK IS PRESENT WITHIN THE UNIT. THIS SYMBOL INDICATES THAT IMPORTANT OPERATING AND MAINTENANCE INSTRUCTIONS ACCOMPANY THIS UNIT. Document 800-01802 Rev - Honeywell HCD95534 | User Manual - Page 4
generates, uses, and can radiate radio frequency energy and, if not installed and used in accordance with the instruction manual, of Conformance The manufacturer declares that the equipment supplied with this guide is compliant with the essential protection requirements of the EMC directive - Honeywell HCD95534 | User Manual - Page 5
not block any ventilation openings. Install in accordance with the manufacturer's instructions. • Do not install near any heat sources such as radiators, area can support the weight of the camera. • Do not install the camera in extreme temperature conditions. Only use the camera where temperatures - Honeywell HCD95534 | User Manual - Page 6
Menu 11 SETUP Menu Functions 12 SPECIAL Menu 14 SPECIAL Menu Functions 14 Adding a Camera Title Display 15 Configuring Sync Control/Line-lock 16 Setting Up Motion Detection 17 Configuring Privacy Zones 18 Warranty and Service 19 Specifications 20 Dimensions 22 Mounting Template 23 6 - Honeywell HCD95534 | User Manual - Page 7
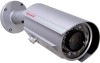
Introduction The Honeywell HCD95534 Color IR camera is designed for exceptional value and performance and is ideally suited for use in day-to-day surveillance applications. The off-the-shelf feature set is designed for high picture quality in standard applications and the HCD95534 requires little - Honeywell HCD95534 | User Manual - Page 8
this User Guide: • One HCD95534 camera • Four mounting screws • One video test cable • One allen wrench • One adapter plate for 4S mounting box If any parts are missing or damaged, contact the dealer you purchased the camera from or call Honeywell Customer Service (see the back of this manual). Note - Honeywell HCD95534 | User Manual - Page 9
of the Lens The zoom and focus adjustment is located on the underside front end of the camera housing. Use a flathead screwdriver to adjust the zoom and/or focus. Figure 2 Lens Controller Zoom adjustment screw Turn counter-clockwise for wide angle Turn clockwise for telephoto Focus adjustment screw - Honeywell HCD95534 | User Manual - Page 10
Camera Settings Camera Functions Figure 3 Camera Controller 1 4 3 VIDEO-TEST UP LEFT RIGHT DOWN SETUP (MENU) PUSH DOWN LUX LEVEL LED-LEVEL 2 turn clockwise) or lower (turn counter-clockwise) the IR LED brightness in night (B/W) mode. 4 Camera OSD control (four position plus center push) 10 - Honeywell HCD95534 | User Manual - Page 11
# Description Press this control UP, DOWN LEFT, RIGHT SETUP (MENU) To do this ... Select a new item Select a menu item Access a submenu Connecting the Camera 1. Connect the BNC video output connector to the video-in connector on your monitor or video recorder. 2. Connect the camera to a power - Honeywell HCD95534 | User Manual - Page 12
HCD95534 menu system consists of one main Setup menu (see Figure 5) for easy camera programming. Press down on the SETUP (MENU) control Functions Menu Item Option Description 1 LENS DC! VIDEO MANUAL Selects Lens type (the HCD95534 only supports DC mode at this time; choosing any other mode - Honeywell HCD95534 | User Manual - Page 13
FLK = Flickerless mode reduces on-screen flickering. This is the only option available when the camera lens is set to DC mode (recommended). ESC = Electronic Shutter Control adjusts brightness level on screen. MANUAL = Allows you to adjust the shutter speed from 1/60-1/120,000 of a second (NTSC), or - Honeywell HCD95534 | User Manual - Page 14
to video monitoring. SPECIAL Menu 1. On the Setup menu, press the menu control UP or DOWN and then select SPECIAL. 2. Press the SETUP (MENU) control to access the Special menu. Figure 6 SPECIAL Menu 1 CAMERA ID OFF 2 COLOR AUTO 3 SYNC INT 4 MOTION DET OFF 5 PRIVACY OFF - Honeywell HCD95534 | User Manual - Page 15
to either automatic color/ black and white or full-time color mode. Synchronizes the vertical interval sync pulse of your camera with other equipment to reduce the effect of picture roll on the monitor. In Line Lock (L/L) mode you can adjust the phase from 0~359°. Detects - Honeywell HCD95534 | User Manual - Page 16
to delete the entire title and start again. 3. Repeat step 2 until your camera title is complete. 4. Select POS to position where you would like the camera title to be located on screen. Select the position using the menu control, then press (SETUP) MENU to confirm the position. 5. Select END when - Honeywell HCD95534 | User Manual - Page 17
interval sync pulse of your camera with other equipment to reduce the effect of picture roll on the monitor. Note Line-lock mode is only available when using 24 VAC power. Figure 8 Sync Control Setup SYNC INT (L/L) RETURN! Menu Item Description INTERNAL When line-lock is not - Honeywell HCD95534 | User Manual - Page 18
grids top left, top right, bottom left, bottom right) you would like to modify. Activates or deactivates the selected grid. Press LEFT or RIGHT menu control to alter the dimensions of the selected grid. 18 - Honeywell HCD95534 | User Manual - Page 19
to set up to four areas of the screen for privacy mode; that is, the camera does not record video in these areas. Figure 10 Privacy Mode Setup AREA masking grids, by pressing the LEFT or RIGHT menu control. Alters the dimensions of the selected grid by pressing the LEFT or RIGHT menu - Honeywell HCD95534 | User Manual - Page 20
problem available for the technical service representative. Prior authorization must be obtained for all returns, exchanges, or credits. Items shipped to Honeywell without a clearly identified Return Merchandise Authorization (RMA) number may be refused. Specifications HCD95534 (NTSC) HCD95534X - Honeywell HCD95534 | User Manual - Page 21
HCD95534 (NTSC) HCD95534X (PAL) Lens Type: 5-50 mm Vari-focal Auto Iris, IR corrected, F1.6 Horizontal Field of View: White Balance: 51.3° - 5.5° ATW/AWC/Manual BLC: Off/On, selectable Gamma: 0.45 Line Lock Phase Adjustment: IR LEDs: Adjustable Line lock vertical phase 850 nm, 26 LEDs IR - Honeywell HCD95534 | User Manual - Page 22
Dimensions 3.94" (100.0 mm) incl. sunshield 3.46" (88 mm) 11.61" (295.0 mm) 10.94" (278.0 mm) 22 - Honeywell HCD95534 | User Manual - Page 23
Mounting Template Figure 11 Mounting Template Mounting screw holes (8/32 inch diameter) Scale 1:1 See "Attaching the Camera" on page 8 for information on using the mounting template. Note The camera enclosure should be mounted on a flat, smooth surface. Document 800-01802 Rev B 23 02/09 - Honeywell HCD95534 | User Manual - Page 24
1. 3a planta P. Ind. Las Mercedes 28022 Madrid, Spain www.honeywell.com/security/es ℡ +34.902.667.800 www.honeywellvideo.com +1.800.796.CCTV (North America only) [email protected] Document 800-01802 - Rev B - 02/09 © 2009 Honeywell International Inc. All rights reserved. No part of this
-
 1
1 -
 2
2 -
 3
3 -
 4
4 -
 5
5 -
 6
6 -
 7
7 -
8
-
9
-
10
-
11
-
12
-
13
-
14
-
15
-
16
-
17
-
18
-
19
-
20
-
21
-
22
-
23
-
24
 |
 |

User Guide
HCD95534
HCD95534X
NTSC
PAL
HCD95534
True Day/Night
IR Camera
Document 800-01802 – Rev B – 02/09