Honeywell MS9535-5 User Manual - Page 17
Full Speed USB (Powered by External Power Supply), Connect the USB A type
 |
View all Honeywell MS9535-5 manuals
Add to My Manuals
Save this manual to your list of manuals |
Page 17 highlights
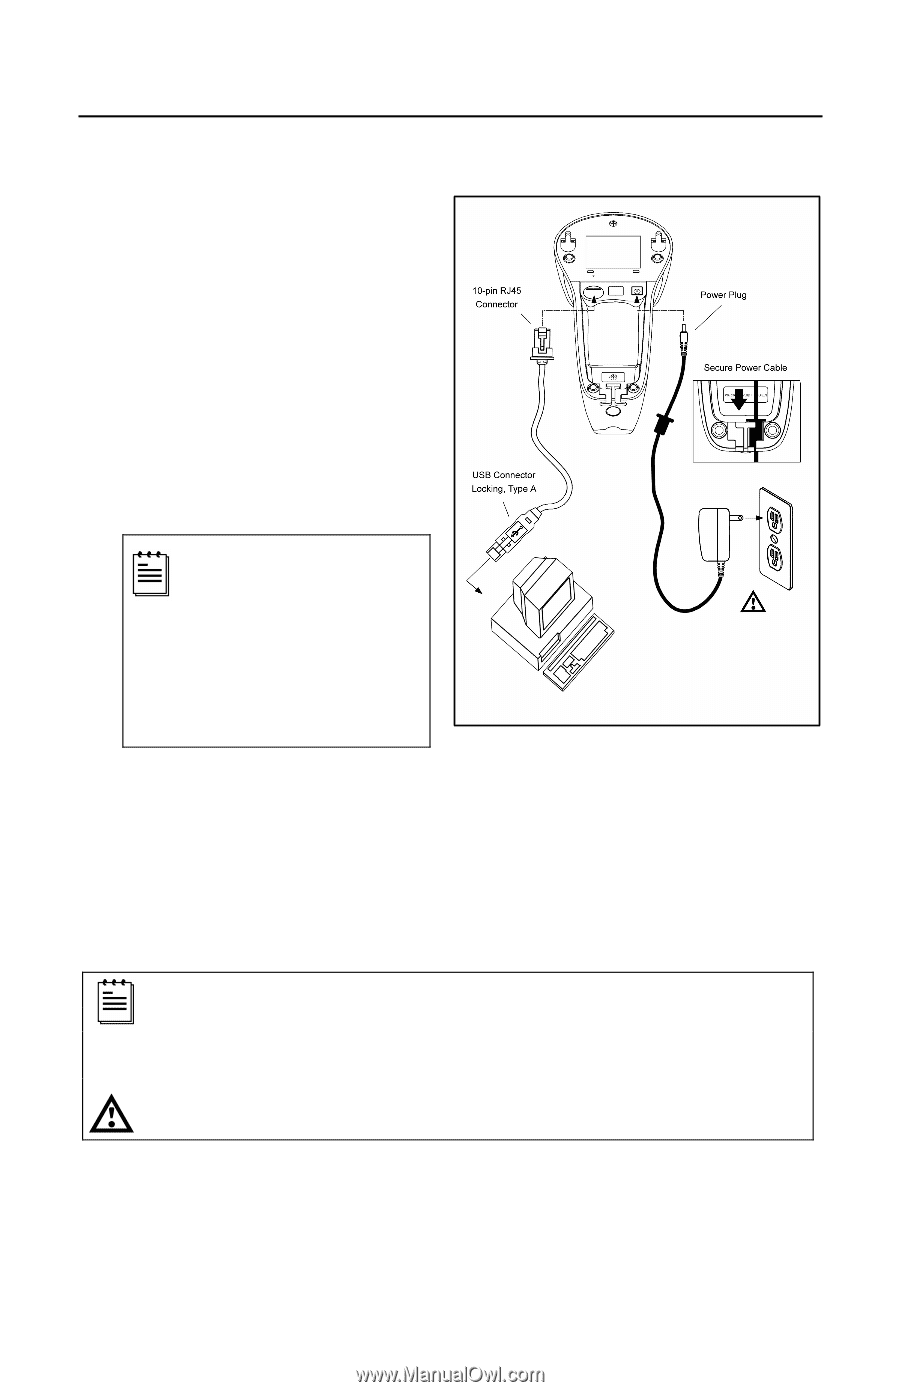
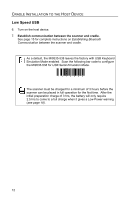
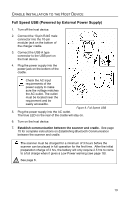
CRADLE INSTALLATION TO THE HOST DEVICE Full Speed USB (Powered by External Power Supply) 1. Turn off the host device. 2. Connect the 10-pin RJ45 male connector into the 10-pin modular jack on the bottom of the charger cradle. 3. Connect the USB A type connector to the USB port on the host device. 4. Plug the power supply into the power jack on the bottom of the cradle. Check the AC input requirements of the power supply to make sure the voltage matches the AC outlet. The outlet must be located near the requirement and be easily accessible. Figure 9. Full Speed USB 5. Plug the power supply into the AC outlet. The blue LED on the rear of the cradle will stay on. 6. Turn on the host device. 7. Establish communication between the scanner and cradle. See page 15 for complete instructions on Establishing Bluetooth Communication between the scanner and cradle. The scanner must be charged for a minimum of 3 hours before the scanner can be placed in full operation for the first time. After the initial preparation charge of 3 hrs, the battery will only require 2.5 hrs to come to a full charge when it gives a Low Power warning (see page 18). See page 6. 13
-
 1
1 -
2
-
3
-
4
-
5
-
6
-
7
-
8
-
9
-
10
-
11
-
 12
12 -
 13
13 -
 14
14 -
 15
15 -
 16
16 -
 17
17 -
 18
18 -
 19
19 -
 20
20 -
 21
21 -
 22
22 -
23
-
24
-
25
-
26
-
27
-
28
-
29
-
30
-
31
-
32
-
33
-
34
-
35
-
36
-
37
-
38
-
39
-
40
-
41
-
42
-
43
-
44
-
45
-
46
-
47
-
48
-
49
-
50
-
51
-
52
-
53
-
54
-
55
-
56
-
57
-
58
-
59
-
60
 |
 |