Hoover C2401 Manual
Hoover C2401 Manual
 |
UPC - 073502028858
View all Hoover C2401 manuals
Add to My Manuals
Save this manual to your list of manuals |
Hoover C2401 manual content summary:
- Hoover C2401 | Manual - Page 1
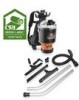
composez le : 1-800-263-6376 M-F 8am-7pm www.hoover.com OWNER'S MANUAL Operating and Servicing Instructions • Please read these instructions carefully before using your Commercial Back Pack Cleaning System. • Let us help you put your vacuum together or answer any questions, call: 1-800-263-6376 - Hoover C2401 | Manual - Page 2
, such as gasoline, or use in areas where they may be present. • Look on your vacuum cleaner and follow all label and marking instructions. • Do not use an extension cord with this cleaner. • Keep end of hose, wands and other openings away from your face and body. Keep your hands, feet, hair and - Hoover C2401 | Manual - Page 3
attachment electrician or service person if filters for any blockage. Empty the dust bag and clean filters. After approximately 30 minutes the motor will have cooled and the vacuum will be ready to use. NOTE: The cleaner must remain unplugged during the 30 minute cooling period. INSTRUCTIONS - Hoover C2401 | Manual - Page 4
sore shoulders and an aching back ...and that means increased productivity. Thank you for your support of Hoover® products. Visit our website at www.hoover.com. * Source: ISSA 'Cleaning Times'. August 2001 4 FÉLICITATIONS ! Vous êtes désormais propriétaire d'un système de nettoyage commercial style - Hoover C2401 | Manual - Page 5
Accessories Page 7 Pigtail Power Cord Page 8 Safety & Maintenance Checks Page 8 WOW Productivity System Page 9-12 'Wear Right Page 10 'Operate Right Page 11 'Work Right Page 12 Troubleshooting Guide Page 13 LIMITED WARRANTY To the consumer, Hoover, Inc. warrants this vacuum cleaner - Hoover C2401 | Manual - Page 6
6 Power Cord Screw Top Dome Lid Dust Bag Hypercone HEPA Filter Main Vacuum Canister Motor Gasket 1000W Motor Flow Thru Motor Gasket External Motor Filter Bottom Cap Noise Insulation (Motor) Screw (Plastite) Cable Clamp Cable Grommet Screw (Plastite) Motor Filter Cage CARACTÉRISTIQUES SYSTÈME - Hoover C2401 | Manual - Page 7
Armature de support Courroie d'épaule ACCESSOIRES Attache Tuyau Floor Tool Dusting Brush Cord Restraint Extension Cord *All Purpose Floor Tool Back Support Padding and Waist Straps Hose Clip Hose Cuff Wands Crevice Tool Adaptor Vacuum Hose Butée de cordon Rallonge Support de protection - Hoover C2401 | Manual - Page 8
serviceable parts filter. WEEKLY: Remove and clean external motor filter. 1. DAILY: Remove and empty dust bag. SAFETY & MAINTENANCE CHECKS or electric shock. different type or gauge may result in increased risk of fire B both ends of the cord. this cleaner ends are com- vacuuming, create a - Hoover C2401 | Manual - Page 9
back pack design in specific cleaning situations. So, the 'W.O.W!' Productivity System™ was born! 'WOW!' - it couldn't be easier. 'Wear right!' 'Operate right!!' 'Work right!!!' Say goodbye to a sore back and shoulders at the end of each shift. Get through your work easier and faster. Vacuum hard - Hoover C2401 | Manual - Page 10
hose is connected to clear dome lid, with the outlet on the same side as your 'vacuuming arm'. Loosen shoulder back, right at your waist line. 3. Tighten waist band until secure and comfortable. 4. Pull down on both remaining ends of the shoulder and shoulder.) Tighten waist band if necessary. 10 WOW - Hoover C2401 | Manual - Page 11
PRODUCTIVITY SYSTEM™ 'OPERATE RIGHT!!' How to vacuum easier, faster with less back strain: 1. Stand upright, with the handle work completed, remove back pack by sliding left strap off shoulder while raising right arm / shoulder to hold strap in place. Slowly lower right shoulder and lower unit - Hoover C2401 | Manual - Page 12
a scale of 10. PLAN THE PROCESS 1. Work away from the power outlet. 2. Work one side of the fishbone towards the tail. Then back the other side REZ L'ENVIRONNEMENT 1. Trouvez la prise la plus accessible. C'est votre point de départ...soit la « tête » du poisson. Lorsque vous faites demi-tour il s' - Hoover C2401 | Manual - Page 13
Hoover® Dealer or retailer. Always identify your cleaner by the model number and manufacturing code when requesting information or ordering replacement parts. (The model number appears on the bottom of the cleaner.) 1. Hose clogged. 2. Hose inlet clogged. 3. Dust bag full. 4. Filter clogged - Hoover C2401 | Manual - Page 14
ítanos ayudarle a ensamblar su aspiradora o a contestar sus preguntas, llame al: 1-800-263-6376 M-F 8am-7pm www.hoover.com ADVERTENCIA: El ensamble de la aspiradora puede incluir partes pequeñas. Las partes pequeñas pueden presentar riesgo de ahogamiento. Registro de Garantía • En línea en: www - Hoover C2401 | Manual - Page 15
Vacíe y reponga la bolsa de polvo - Pág. E8. 2. Quite y reemplace la bolsa de polvo - Pág. E8. 1. Vac Hoover®. Los costos de transporte hacia y desde el sitio de reparación serán pagados por el propietario. Las partes solamente como se indica en este manual. Use solamente los accesorios recomendados - Hoover C2401 | Manual - Page 16
Mantenga sus manos, pies, pelo y ropa lejos de las partes móviles; especialmente del cepillo giratorio. • No use la y los filtros por si hubiera atascos. Vacíe la bolsa de polvo y limpie los - qué tan sucio está en una escala del 1 al 10. PLANIFIQUE EL PROCESO 1. Trabaje alejándose de la toma de - Hoover C2401 | Manual - Page 17
y lejos de la toma de corriente. 3. Use movimientos suaves con la parte inferior del brazo cuando efectúe limpieza de detallado y movimientos cortos cuando efect propietario de un Sistema de Limpieza Comercial Estilo Mochila de Hoover®. Confiamos en que su nueva adquisición le ofrecerá muchos - Hoover C2401 | Manual - Page 18
centros de servicio autorizados (EE.UU. solamente). Use solamente partes de repuesto genuinas Hoover®. La garantía no incluye el desgaste anormal, daño para aspirar'. Afloje las correas de los hombros hasta que queden solamente de 10 a 12.5 cm. Levante la máquina con una mano al tiempo que desliza - Hoover C2401 | Manual - Page 19
WOW PRODUCTIVITY SYSTEM™ El WOW Productivity System™ fue desarrollado después de consultar extensa y continuamente a operadores, compradores, capacitadores y gerentes de operaciones en todo el mundo. Sin importar el tipo de mercado ni el grado de conocimiento de la tecnología estilo mochila, la - Hoover C2401 | Manual - Page 20
de la cuerda. REVISIONES DE MANTENIMIENTO Y SEGURIDAD 1. DIARIAMENTE: Quite y vacíe la bolsa del polvo. SEMANALMENTE: Quite y limpie el filtro externo del motor. 2. SEMANALMENTE: Tome el filtro de la parte superior y gírelo en sentido antihorario para destrabarlo. Golpee suavemente el
-
 1
1 -
 2
2 -
 3
3 -
 4
4 -
 5
5 -
 6
6 -
 7
7 -
8
-
9
-
10
-
11
-
12
-
13
-
14
-
15
-
16
-
17
-
18
-
19
-
20
 |
 |

Español - página E1
©2007 All rights reserved
# 1-113895-000
10/07
• Please read these
instructions carefully before
using your Commercial
Back Pack Cleaning
System.
• Let us help you put your
vacuum together or answer
any questions, call:
1-800-263-6376
M-F 8
AM
-7
PM
www.hoover.com
OWNER’S MANUAL
Operating and Servicing
Instructions
Warranty Registration
• Online at: www.hoover.com
• Mail:
Hoover, Inc.
7005 Cochran Rd.
Glenwillow, Ohio 44139
For quick reference, please record your
vacuum information below.
Model #:
Mfg. Code:
(Mfg. code located on the lower backside of cleaner)
WARNING:
Cleaner assembly may include small parts.
Small parts can present a choking hazard.
Español - página E1
©2007 Tous droits réservés
# 1-113895-000
10/07
• Veuillez lire soigneusement ces
instructions avant d’utiliser
votre système de nettoyage
commercial style sac à dos.
• Nous pouvons vous aider à
assembler votre aspirateur et à
répondre à vos questions. Pour
cela composez le :
1-800-263-6376
M-F 8
AM
-7
PM
www.hoover.com
Enregistrement en Garantie
• Sur Internet : www.hoover.com
• Adresse postale :
Hoover, Inc.
7005 Cochran Rd.
Glenwillow, Ohio 44139
Consignez les renseignements ci-dessous pour
pouvoir les consulter rapidement.
Nº de modèle : ___________________________
Code de
fabrication : _____________________
(Le code de fabrication se trouve sur la partie inférieure
arrière de l’aspirateur)
AVERTISSEMENT:
L’assemblage de l’appareil comprend des petites pièces.
Ces dernières présentent un danger d’étouffement.
MANUEL DU
PROPRIÉTAIRE
Notice d’utilisation
et d’entretien