Hoover F5810 Manual - Page 4
Carpet cleaning, machine description - model
 |
UPC - 719881157764
View all Hoover F5810 manuals
Add to My Manuals
Save this manual to your list of manuals |
Page 4 highlights
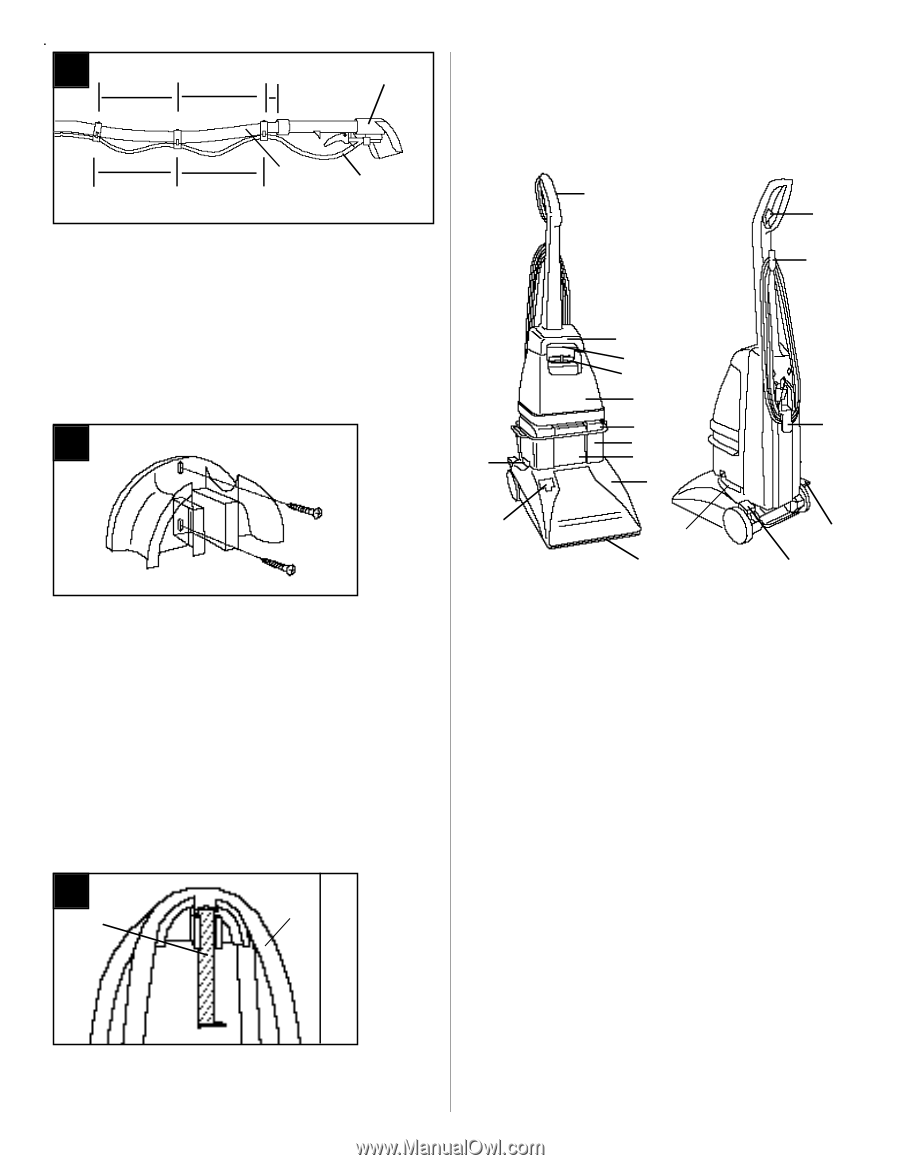
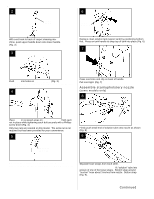
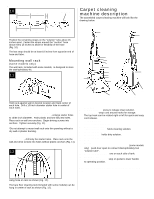
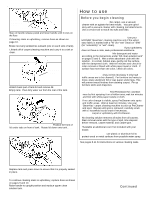
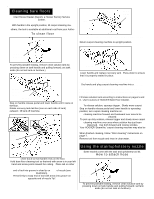
10 15" 15" 3" NOZZLE Carpet cleaning machine description The assembled carpet cleaning machine will look like the drawing below. 16" 16" HOSE SOLUTION TUBE 1 2 Position the remaining straps on the "solution" tube about 16 inches apart. Fasten the straps around the "suction" hose about every 15 inches to allow for flexibility of the hose 3 (Fig. 10). The last strap should be at least 18 inches from opposite end of hose and tube. 4 Mounting wall rack 5 (some models only) 6 The wall rack, included with some models, is designed to store 7 the stair/upholstery kit. 8 3 11 9 14 10 11 13 14 16 12 15 Hold rack against wall in desired location and mark center of each hole. Drill a 1/8-inch diameter starter hole in center of each mark. If wall rack is being mounted into dry wall, plaster, or thin paneling backed by dry wall or plaster*, enlarge starter holes to 13/64-inch diameter. Push plastic anchors fully into holes. Place rack on wall over anchors. Begin driving screws into anchors. Tighten securely (Fig. 11). *Do not attempt to mount wall rack onto thin paneling without a dry wall or plaster backing. If wall rack is being mounted onto a wall stud, solid wood, or thick paneling, drill only the starter holes. Place rack onto the wall and drive screws into holes without plastic anchors (Fig. 11). 12 BARE FLOOR TOOL HOSE 1. Hand grip 2. Solution trigger: press to release clean solution. 3. Cord hooks: wrap cord around hooks for storage. The top hook can be rotated right or left for quick and easy cord release. 4. Carrying handle 5. Clean solution tank handle 6. Clean solution tank cap/ measuring cup 7. Clean solution tank: holds cleaning solution. 8. Recovery tank lid 9. Recovery tank: holds dirty solution. 10. Recovery tank "front panel" 11. Hood 12. Nozzle 13. Upholstery and stair cleaning connection (some models only): push door open to connect stair/upholstery tool "solution tube". 14. Recovery tank latches: one on each side of tank. 15. ON/OFF pedal 16. Handle release pedal: step on pedal to lower handle to operating position. This carpet cleaning machine is intended for household use. Hang hose on rack as shown (Fig. 12). The bare floor cleaning tool (included with some models) can be hung in center of rack as shown (Fig. 12). 4 Assembly - Carpet cleaning machine description
-
 1
1 -
 2
2 -
 3
3 -
 4
4 -
 5
5 -
 6
6 -
 7
7 -
 8
8 -
 9
9 -
 10
10 -
11
-
12
 |
 |