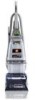
Hoover F5912 Manual
Hoover F5912 Manual
 |
UPC - 073502025543
View all Hoover F5912 manuals
Add to My Manuals
Save this manual to your list of manuals |
Hoover F5912 manual content summary:
- Hoover F5912 | Manual - Page 1
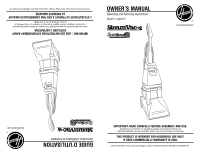
56518214 ID100261-R2 Guide d'utilisation Instructions d'utilisation et d'entretien www.hoover.com www.hoover.com IMPORTANT : LIRE CES INSTRUCTIONS ATTENTIVEMENT AVANT D' Limited. Tous droits réservés. #56518214 ID100261-R2 Owner's Manual Operating and Servicing Instructions Español - página E1 - Hoover F5912 | Manual - Page 2
of Hoover® authorized dealer locations (U.S. only) or to speak with a customer service representative; Mon- Fri 8am- 7pm EST. Please do not return this product to the store. 2 Important Safety Instructions 3 Cleaner Assembly...5 How To Use...7 Cleaner Description 7 The Tanks ...8 Brush Speed - Hoover F5912 | Manual - Page 3
carpet cleaner on stairs. • Use carpet cleaner only for its intended use as described in the instructions. • Use only attachments recommended by Hoover models). • Always disconnect cord from electrical outlet before servicing the carpet cleaner nettoyants » du présent Guide.) • N'utiliser que sur des - Hoover F5912 | Manual - Page 4
Grounding Instructions electrician or service person if carpet cleaner. They may damage the machine. • Keep hair, loose clothing, fingers, feet and all parts of body away from openings and moving parts. • Use indoors only. • Do not put any object into openings. Do not use with any opening blocked - Hoover F5912 | Manual - Page 5
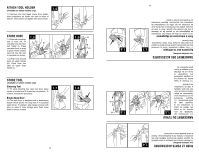
. Make sure all parts are located before disposing of packing materials. NOTE: Phillips screwdriver needed for assembly. Accessories not included with your model may be purchased separately by visiting www.hoover.com. E 1.1 A F Carpet Upholstery Cleaner Carpet Upholstery Cleaner Bare floor - Hoover F5912 | Manual - Page 6
support. Insérer les boutons saillants dans les encoches à l'arrière de la shampouineuse. Insérer la vis et resserrer avec un tournevis. 1.4 Store Tool (Available on select models support dans le support et la in place. Press solution converter firmly to snap Available on select models only) 1.4 - Hoover F5912 | Manual - Page 7
in upright and locked position tilt carpet cleaner back on wheels and push forward. The carpet cleaner may also be lifted by placing a hand under the upper Clean Water Solution Tank handle as shown. 2.2 2.3 Transporting cleaner Carrying cleaner 2. Utilisation Description de l'aspirateur - Hoover F5912 | Manual - Page 8
do not have access to the Spot and Stain Spray Cleaner, double the amount of HOOVER® Detergent (use 2 capfuls or 10 ounces per 1 gallon tank). ! CAUTION ! To reduce the risk of injury from moving parts, unplug cleaner. Place carpet cleaner handle in the upright, locked position. 2.4 To remove tank - Hoover F5912 | Manual - Page 9
carpet cleaner off and disconnect from electrical outlet. 3. Brush indicator screen dirty. 2. Solution tube connected (Fig. 4.3). 1. Brush des brosses Your SteamVac® carpet cleaner has three agitator brush settings. Votre the 2.10 Unlatch back part of tank lid and remove lid. Empty tank. Pour - Hoover F5912 | Manual - Page 10
Fill Clean Water Solution Tank (upper tank) with HOOVER® Detergent according to instructions on page 8. 3.1 3.2 Before you begin cleaning A. Vacuum thoroughly - For carpet, use a Hoover® vacuum cleaner with an agitator for best results. Vacuum upholstery with a vacuum cleaner with cleaning tool - Hoover F5912 | Manual - Page 11
for removing it. Although no cleaning solution can completely remove all spots, they can be treated by following the instructions provided by the manufacturer of the carpet, upholstery, or bare floor surface being cleaned. Do not use the SteamVac® carpet cleaner to pick up flammable or combustible - Hoover F5912 | Manual - Page 12
SteamVac® cleaner. Fill Clean Water Solution Tank with HOOVER® detergent (available at additional cost if not included with your model) according to instruction nettoyer. To clean BARE floorS To prevent possible leaking, remove Clean Water Solution Tank and Dirty Water Tank before positioning bare - Hoover F5912 | Manual - Page 13
panel (E) up one inch Unlatch back part of Dirty Water Tank and remove lid. Remove hose from storage rack. Step on handle release pedal and lower carpet cleaner handle until it rests on the floor. 4.4 4.2 To prevent possible leaking, remove Clean Water Solution Tank by pressing down on tank - Hoover F5912 | Manual - Page 14
14 Cleaning carpeted stairs Place handle in upright position. Agitator brushes will not rotate while handle is in upright position. Fill Clean Water Solution Tank with HOOVER® Detergent according to instructions on pages 8. Attach tool to end of hose. Hose length may require that machine be placed - Hoover F5912 | Manual - Page 15
HOOVER® SteamVac® carpet cleaner only on upholstery marked "W" or "W/S". Place handle in upright position. Agitator brushes will not rotate while handle Is In upright position. Fill Clean Water Solution Tank with HOOVER® Detergent according to instructions solution trigger. Vacuum up the solution - Hoover F5912 | Manual - Page 16
for cleaning, it is easier to replace if the filter is wet. Vacuum thoroughly after carpet has completely dried. This will help reduce any shading left by the carpet cleaner's brushes. Débrancher l'appareil. 4.13 Drainer le tube de solution en plaçant l'extrémité ronde du tube dans l'évier et en - Hoover F5912 | Manual - Page 17
: How to Change and Clean Your carpet cleaner is equipped with removable brushes for easy cleaning. ! CAUTION ! To reduce the risk of injury from moving parts, unplug cleaner before servicing. How to Remove To prevent possible leaking, remove Clean Water Solution Tank and Dirty Water Tank. Set - Hoover F5912 | Manual - Page 18
expel any solution remaining in the carpet cleaner's system. (Do not use carpet cleaner on wood floors.) • Empty Dirty Water Tank and rinse thoroughly with clean water. Allow brushes and underside of carpet cleaner to air dry thoroughly before storing carpet cleaner on a carpeted or wood surface - Hoover F5912 | Manual - Page 19
19 7. Service To obtain approved Hoover® service and genuine Hoover® parts, locate the nearest Authorized Hoover® Warranty Service Dealer (Depot) by: • Checking the Yellow Pages under "Vacuum Cleaners" or "Household". • Visit our website at hoover.com (U.S. Customers) or hoover.ca (Canadian - Hoover F5912 | Manual - Page 20
wipes, and spot cleaners available at Hoover.com and retailers nationwide. Hoover® FloorMate® 1 Allergens: pollen, pet dander, dirt, and dust. 2 When cleaning a hard surface, the Hoover® hard surface attachment below must be used (optional if not included): 5 Brush Hoover® part # 48417008. 3 When - Hoover F5912 | Manual - Page 21
parts, at no cost to you, to correct any such defect in products purchased in the United States, U.S. Military Exchanges and Canada. HOW TO MAKE A WARRANTY CLAIM If this product is not as warranted, take or send the product to either a Hoover® Sales and Service Center or Hoover dans le Guide de l' - Hoover F5912 | Manual - Page 22
- Hoover F5912 | Manual - Page 23
MANUAL DEL PROPIETARIO Instrucciones de Funcionamiento y Servicio www.hoover.com IMPORTANTE: LEA ATENTAMENTE ANTES DE ENSAMBLAR Y USAR. ¿Tiene alguna pregunta o inquietud? Para obtener asistencia, llame al Servicio de atención al cliente al 18009449200, de - Hoover F5912 | Manual - Page 24
y el mantenimiento de su producto HOOVER® se realicen en condiciones de uso doméstico normales y según el Manual del usuario, el producto estará en que el pro- ducto fue comprado inicialmente y reventa del producto por parte del propietario original. Esta garantía no cubre el retiro del producto, - Hoover F5912 | Manual - Page 25
Hoover P P SteamVac® Dual V® de P P P Hoover® SteamVac® Dual V® todo terreno de Hoover® P P P Gama Platinum Collection® P P P de Hoover FloorMate® de Hoover productos de limpieza Hoover® diseñados para uso con este aparato. (Vea la sección Productos de limpieza de este manual). • Use - Hoover F5912 | Manual - Page 26
ropa holgada, los dedos, los pies y todas las partes del cuerpo fuera de las aberturas y otras piezas en movimiento ón en todos los lados antes de limpiar • Vacíe el tanque de recuperación cuando esté lleno -944-9200. No envíe su aspiradora a Hoover®, Inc., Company en Glenwillow para realizar el - Hoover F5912 | Manual - Page 27
motor tiene cojinetes que cuentan con suficiente lubricación para la vida útil del motor vacío. 3. El tanque de solución está vacío. Carpet Upholstery Cleaner Bare floor cleaner D PreCleaner A Carpet Upholstery Cleaner hoover.com. Para colocar el mango 1.2 Con el gancho para el cordón en la parte - Hoover F5912 | Manual - Page 28
en un piso de madera. Aspire el agua con su limpiadora para alfombras SteamVac™. Repita todas las veces que sea necesario hasta que los residuos salgan en la boquilla y elimine los residuos como se muestra. Para limpiar la parte externa de la máquina, limpie la suciedad con un paño humedecido en - Hoover F5912 | Manual - Page 29
puede mejorar el aspecto de la superficie después de que se seque. 4.18 Vacíe los tanques, enjuague con agua limpia y deje secar al aire. Enjuague la el voltaje especificado en la placa de datos, que se encuentra en la parte inferior de la limpiadora. Esta limpiadora está diseñada para uso domé - Hoover F5912 | Manual - Page 30
parte superior de la tapa del tanque de recuperación. La limpiadora ya no aspira más líquido, y el sonido del motor se vuelve mucho más agudo. Cuando esto ocurre, apague y desenchufe la máquina. Luego, vac . Use su limpiadora para alfombras SteamVac® HOOVER® únicamente en tapizados marcados con - Hoover F5912 | Manual - Page 31
ón limpia con Detergente para alfombras/tapizados HOOVER® de acuerdo con las instrucciones incluidas parte posterior de la tapa del tanque y retire la tapa. Vacíe el tanque. Vierta el agua sucia de la parte las escobillas Su limpiadora para alfombras SteamVac® tiene tres posiciones de escobillas del - Hoover F5912 | Manual - Page 32
Use su limpiadora para alfombras SteamVac™ HOOVER® únicamente si la tela del solución limpia superior. H. Vacíe los tanques, aclare con E 4.5 G Retirer le tuyau du support de rangement. Pise el pedal para soltar apoyado en el piso. Desenganche la parte posterior del tanque de recuperación - Hoover F5912 | Manual - Page 33
la malla) en la posición que se muestra, coloque el accesorio en la parte delantera de la boquilla (B). Asegúrese de que la flecha en el extremo del para la solución. Aspiración de derrames Su limpiadora para alfombras SteamVac® HOOVER® modelos. El accesorio para pisos sin alfombra se también
-
 1
1 -
 2
2 -
 3
3 -
 4
4 -
 5
5 -
 6
6 -
 7
7 -
8
-
9
-
10
-
11
-
12
-
13
-
14
-
15
-
16
-
17
-
18
-
19
-
20
-
21
-
22
-
23
-
24
-
25
-
26
-
27
-
28
-
29
-
30
-
31
-
32
-
33
 |
 |
www.hoover.com
OWNER’S MANUAL
Operating and Servicing Instructions
©2010 Techtronic Floor Care Technology Limited. All rights reserved. #56518214 ID100261-R2
IMPORTANT: READ CAREFULLY BEFORE ASSEMBLY AND USE.
Questions or concerns? For assistance, please call Customer Service at
1-800-944-9200 Mon-Fri 8am-7pm EST before returning this product to the store.
THIS PRODUCT IS INTENDED FOR HOUSEHOLD USE ONLY.
IF USED COMMERCIALLY WARRANTY IS VOID.
IMPORTANT : LIRE CES INSTRUCTIONS ATTENTIVEMENT AVANT
D’UTILISER L’ASPIRATEUR.
Vous avez des questions ou des inquiétudes? Pour obtenir de l’aide et avant de retourner
ce produit au magasin, veuillez appeler le service à la clientèle au 1 800 9449200 du
lundi au vendredi, de 8 h à 19 h (HNE).
www.hoover.com
GUIDE D’UTILISATION
Instructions d’utilisation et d’entretien
©2010 Techtronic Floor Care Technology Limited. Tous droits réservés. #56518214 ID100261-R2
L’UTILISATION DE CE PRODUIT À DES FINS COMMERCIALES INVALIDE
LA PRÉSENTE GARANTIE.
Español - página E1