Hoover F72229RM User Guide - Page 5
Storing hose and, tools - cleaner
 |
View all Hoover F72229RM manuals
Add to My Manuals
Save this manual to your list of manuals |
Page 5 highlights
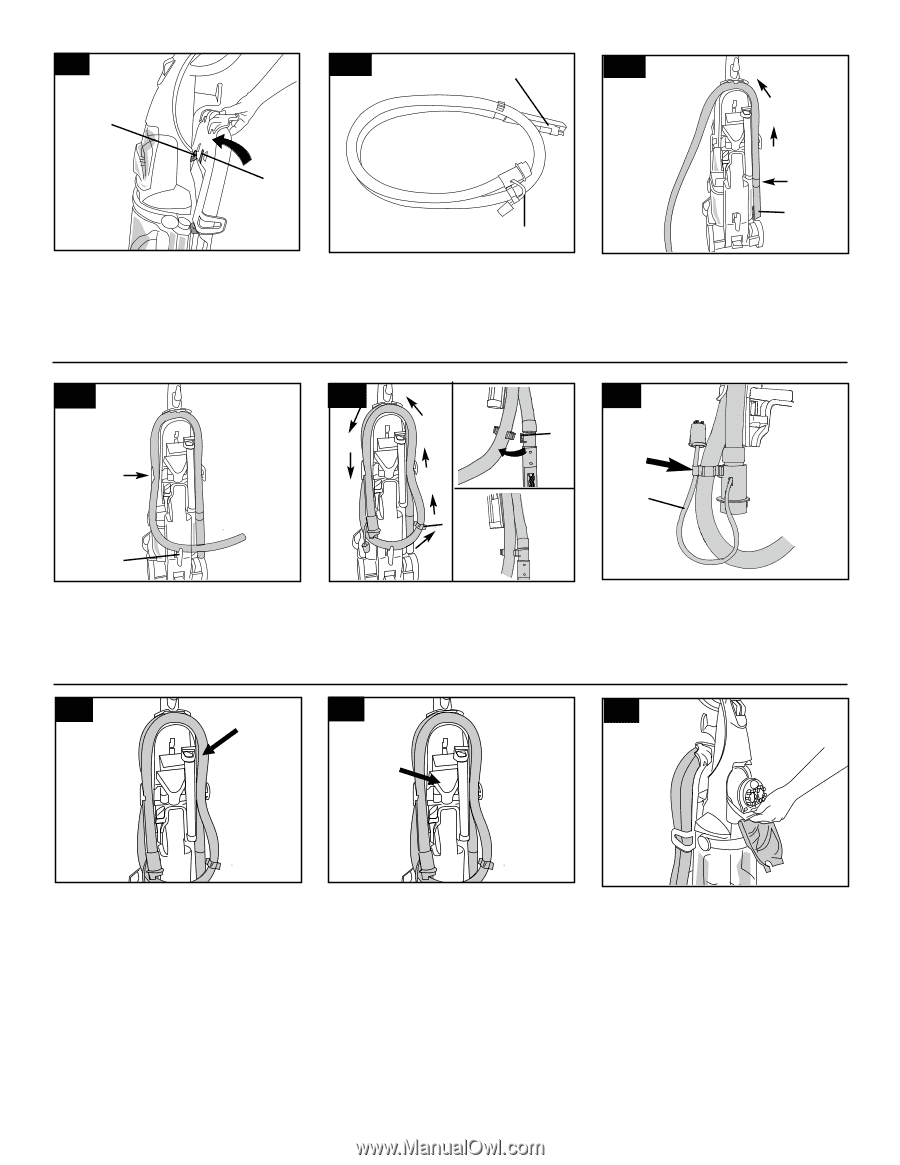
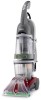
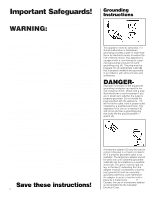
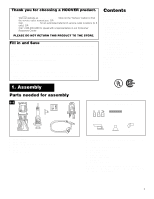
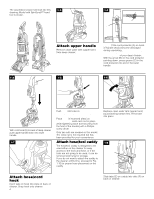
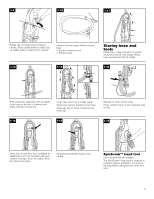
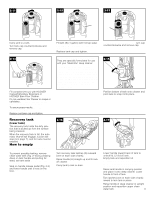
1-9 H 1-10 I 1-11 G Rotate top of caddy toward cleaner handle. Slide caddy down so notch (G) on caddy rests in hook (H) on cleaner. J Identify the hose parts before storing hose. I. Nozzle connector end J. Solution tube I Storing hose and tools Press hose, a few inches from nozzle connector end (I), into caddy. Bring hose up and over top of caddy. 1-12 1-13 1-14 M K Press hose into opposite side of caddy. Loop hose at bottom of cleaner and press into top of hook (K). L Loop hose over top of caddy again. Slide hose clip (L) toward end of hose. Snap tab (M) on hose connector into hose clip. J Repeat on other end of hose. Press solution tube (J) into opposite side of clip. 1-15 1-16 1-17 Insert top of bare floor tool (available at additional cost if not included with your cleaner) through "loop" on caddy. Slide tool down into place. Snap stair/upholstery nozzle onto caddy. SpinScrub™ hand tool (not included with all models) The SpinScrub™ hand tool is shipped in a plastic bag for protection. To remove the bag before using the tool, open tool door. 5
-
 1
1 -
 2
2 -
 3
3 -
 4
4 -
 5
5 -
 6
6 -
 7
7 -
 8
8 -
 9
9 -
 10
10 -
 11
11 -
12
-
13
-
14
-
15
-
16
-
17
 |
 |