Hoover FH40000 Owners Manual
Hoover FH40000 Manual
 |
View all Hoover FH40000 manuals
Add to My Manuals
Save this manual to your list of manuals |
Hoover FH40000 manual content summary:
- Hoover FH40000 | Owners Manual - Page 1
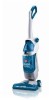
f ® ENGLISH "_ pp. 1-19 ESPANOL _ p_g. 20-31 FloorMate TM SpinScrub TM Hard Floor Cleaner - Hoover FH40000 | Owners Manual - Page 2
left outdoors, or dropped into water, take it to a Hoover Stiles and Service Center or Authorized Hoover Warranty Service Dealer. • Use cleaner only for its intended use as described ih the instructions. T• urUnnpoluffg allclceoannetrrolswhbeenforneot uinnpluusge-. grog. , Do not unplug by pulling - Hoover FH40000 | Owners Manual - Page 3
receipt and attach it to this manual. Proof of date of purchase may be required for warranty service of your cleaner. J "x Important Storage 14 Maintenance Cleaning the nozzle ....... Cleaning the brushes... Troubleshooting ............ Service 14 15-16 17 18 Warranty 19 J f A. - Hoover FH40000 | Owners Manual - Page 4
cleaner into a properly grounded outlet. 4 17 11 1 _. 13 J This user manual applies to models with either 6 or 7 brushes. F Features 1. Soft hand grip ON for wet cleaning and OFF for wet 17. pickup and dry vacuuming 18. 5. Clean solution tank cap/measuring cup 6. Clean solution tank - Hoover FH40000 | Owners Manual - Page 5
(A) up to the upright position until a snap is felt. Q lign control rod (B) on upper han- dle (C) with slot in bottom handle support (D). O ush upper handle (C) all the way down until you hear it snap in place. Install brushes and n°zz!e To install brushes, place handle in upright - Hoover FH40000 | Owners Manual - Page 6
Press brush assembly firmly to p into place. To install nozzle, make sure latches E (C) are out. Align middle section (D) of nozzle with opening (E) on cleaner. Remove cardboard packing insert from squeegee area on underside of nozzle. O While holding nozzle in place, slide latches inward to - Hoover FH40000 | Owners Manual - Page 7
H naiore o sepeaa O Step on pedal (A) to lower handle to operating position. Handle does not lock into a single position, but "floats" to allow convenient operation. 0N/OFF switch O ush switch (A) once to turn cleaner ON. Push switch again to turn cleaner OFF. Transporting 17.omove your cleaner - Hoover FH40000 | Owners Manual - Page 8
Your HOOVER FloorMate TM SpinScrub TM Cleaner can be used to both vacuum dry debris and wet clean non-carpeted floor surfaces such as vinyl, tile and sealed wood. It is not For wet pickup, turn the dial to the WET PICKUP position. Refer to "How to clean" section for complete cleaning instructions. - Hoover FH40000 | Owners Manual - Page 9
as vinyl, linoleum, marble, laminate wood, polyurethane sealed wood or other wood floors that can normally be cleaned using water, use one cup (2 oz.) HOOVER@ Floor to Floor TM Cleaner. Check for worn spots or joint separations as these conditions could lead to damaged using water to clean floor - Hoover FH40000 | Owners Manual - Page 10
DO NOT use cleaning concentrates that contain solvent based ingredients. CAUTION: HOOVER® Doing so could damage Grout Cleaner* cannot be used in Hoover your SteamVac TM Cleaner. SteamVac TM products. *Available at additional cost if not included with your model. Pour cleaning concentrate into - Hoover FH40000 | Owners Manual - Page 11
cleaner off and disconnect from electrical outlet. Although not necessary for satisfactory performance, it is recommended that the recovery tank be emptied after dry vacuuming and before wet operation. Check the solution tank also. It may need to be refilled at this time. To remove tank, press down - Hoover FH40000 | Owners Manual - Page 12
ledge (E) and pusI_ tank straight into cleaner body until it is locked in place. Recommended cleaning sequence Use your HOOVER® FloorMate TM SpinScrub TM Cleaner to: • Dry Vacuum to remove loose dirt, hair and debris. • Wet Clean the floor surface. The brushes will provide light agitation to - Hoover FH40000 | Owners Manual - Page 13
Cl eani g floo s NOTE: Your HOOVER® FloorMate TM SpinScrub TM cleaner may be used to clean sepaTM cleaner to wet clean sealed wood floors if any Set Mode selector dial to DRY VAC position and vacuum floor. Turn cleaner off and disconnect from electrical outlet. Empty recovery tank (see Figs. 24 & - Hoover FH40000 | Owners Manual - Page 14
Before storing cleaner: Turn cleaner OFF and disconnect from electrical outlet. • Empty and rinse solution and recovery tanks. Allow to air dry. Press on upper handle release button to lower handle for storage. Make sure that nothing is pressing on the nozzle squeegee. Do not store cleaner on a - Hoover FH40000 | Owners Manual - Page 15
O To replace nozzle, make sure latches (D) are out. Cleaner should be in the upright position for easier assem- bly of the nozzle. Align middle section (E) of nozzle with opening (F) on cleaner. J While holding nozzle in place, slide latches inward to lock place. J 15 - Hoover FH40000 | Owners Manual - Page 16
B E Cleaning the brushes The brush assembly can be removed for easy cleaning. Turn cleaner OFF and disconnect from electrical outlet. Place handle in the upright position. Remove tanks to prevent leaking. Set aside. Pull the two nozzle release buttons (A) out. Remove nozzle. Tilt cleaner back so - Hoover FH40000 | Owners Manual - Page 17
Use the list below to help solve minor What!s the problem? Cleaner won't run problems. Low suction Water puddling behind cleaner Won't pick up dirty solution Cleaner pushes a line of dry debris in front of it Cleaning solution won't dispense - Hoover FH40000 | Owners Manual - Page 18
. To approved HOOVER service and genuine HOOVER parts, locate the nearest Hoover Sales and Service Center or Authorized Hoover Warranty Service Dealer (Depot) by: ¢" Checldng the Service Section of Hoover on-line at hoovencom OR ¢" Checking the Yellow Pages under "Vacuum Cleaners - Household - Hoover FH40000 | Owners Manual - Page 19
(Domestic Use) Your HOOVER® appliance is warranted in normal household use, in accordance with the Owner's Manual against original defects in material calls; however, if you mailyour appliance to a Hoover Sales and Service Center for warranty service, transportation wilt be paid one way. While this
-
 1
1 -
 2
2 -
 3
3 -
 4
4 -
 5
5 -
 6
6 -
 7
7 -
8
-
9
-
10
-
11
-
12
-
13
-
14
-
15
-
16
-
17
-
18
-
19
 |
 |

f
®
ENGLISH
"_ pp.
1-19
ESPANOL
_
p_g.
20-31
FloorMate
TM
SpinScrub
TM
Hard
Floor
Cleaner