Hoover H3000 Manual - Page 11
Cleaning the Nozzle, Storage - brush block
 |
UPC - 895916001179
View all Hoover H3000 manuals
Add to My Manuals
Save this manual to your list of manuals |
Page 11 highlights
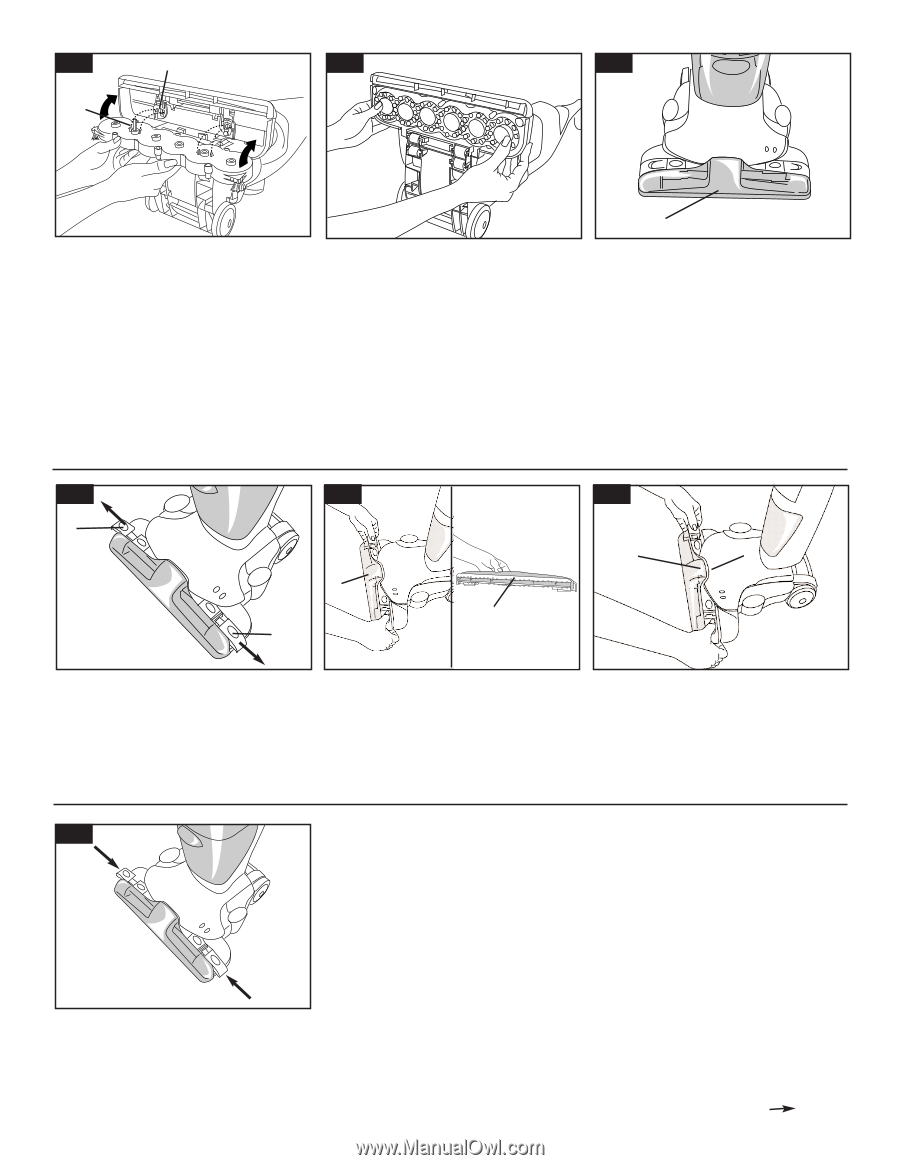
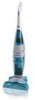
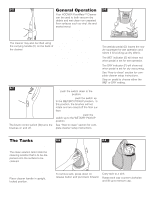
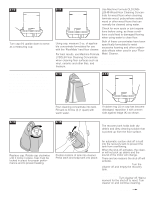
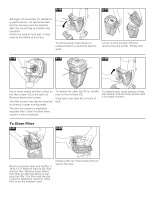
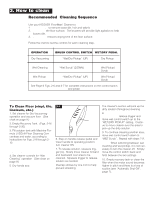
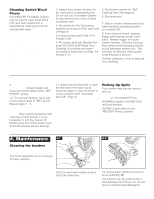
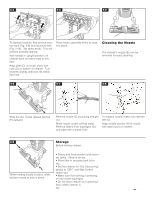
4-3 D 4-4 4-5 C PUSH TO SELECT DRY OR WET HANDLE RELEASE DRY PICKUP WET PICKUP SCRUB To replace brushes, first remove solution tank (Fig. 2-8) and recovery tank (Fig. 2-16). Set tanks aside. This will prevent possible leaking. With handle in upright position, tilt cleaner back so that it rests on the floor. Align post (C) on brush block with hole (D) on bottom of cleaner. Turn brushes slightly until post fits easily into hole. Press brush assembly firmly to snap into place. E Cleaning the Nozzle Turn cleaner OFF and disconnect from electrical outlet. The cleaner's nozzle (E) can be removed for easy cleaning. 4-6 4-7 4-8 F E H I G F Slide the two nozzle release latches (F) outward. Remove nozzle (E) by pulling straight out. Rinse nozzle under running water. Remove debris from squeegee (G) and wipe with a damp cloth. To replace nozzle, make sure latches are out. Align middle section (H) of nozzle with opening (I) on cleaner. 4-9 While holding nozzle in place, slide latches inward to lock in place. Storage Before storing cleaner: Turn cleaner OFF and disconnect from electrical outlet. • Empty and rinse solution and recovery tanks. Allow to air dry. • Allow filter in recovery tank lid to dry. • Set the cleaner for "Dry Vacuuming" (pedal to "DRY" and Wet Control switch up). • Make sure that nothing is pressing on the nozzle squeegee. • Do not store cleaner on a wood surface unless cleaner is completely dry. Continued 11
-
 1
1 -
2
-
3
-
4
-
5
-
 6
6 -
 7
7 -
 8
8 -
 9
9 -
 10
10 -
 11
11 -
 12
12 -
 13
13 -
 14
14
 |
 |