Hoover H3000 Manual - Page 4
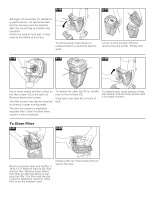
Cord clip - squeegee
 |
UPC - 895916001179
View all Hoover H3000 manuals
Add to My Manuals
Save this manual to your list of manuals |
Page 4 highlights
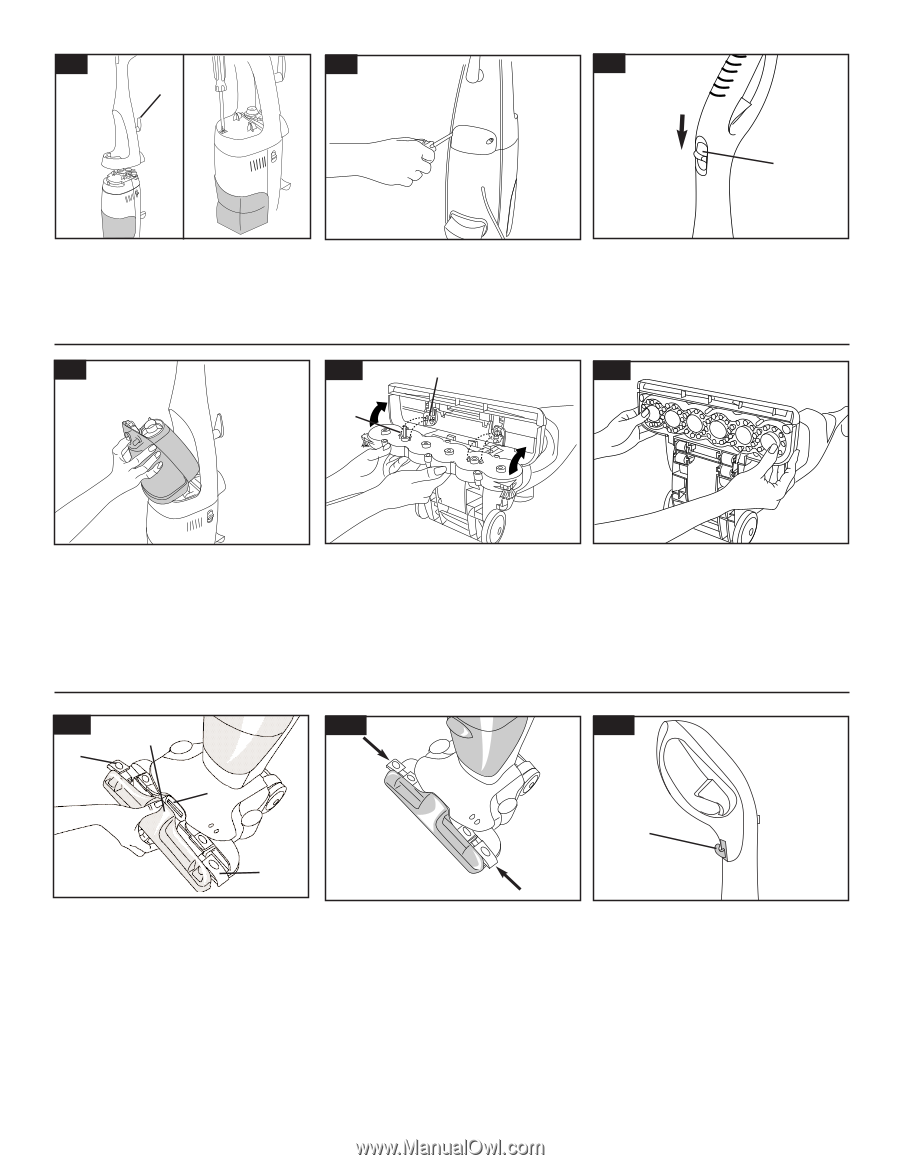
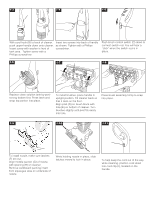
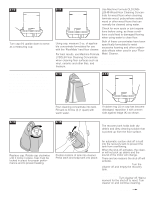
1-3 1-4 B 1-5 C With cord hook (B) to back of cleaner, Insert two screws into back of handle push upper handle down onto cleaner. as shown. Tighten with a Phillips Insert screw with washer in front of screwdriver. tank area. Tighten screw with a Phillips screwdriver. Push brush control switch (C) down to connect switch rod. You will hear a "click" when the switch rod is in place. 1-6 1-7 E 1-8 D Replace clean solution tank by positioning bottom first. Press latch and snap top portion into place. To install brushes, place handle in upright position. Tilt cleaner back so that it rests on the floor. Align post (D) on brush block with hole (E) on bottom of cleaner. Turn brushes slightly until post fits easily into hole. Press brush assembly firmly to snap into place. 1-9 G F H 1-10 F To install nozzle, make sure latches (F) are out. Align middle section (G) of nozzle with opening (H) on cleaner. Remove cardboard packing insert from squeegee area on underside of nozzle. While holding nozzle in place, slide latches inward to lock in place. 1-11 I Cord clip To help keep the cord out of the way while cleaning, position cord down into cord clip (I), located on the handle. 4
-
 1
1 -
 2
2 -
 3
3 -
 4
4 -
 5
5 -
 6
6 -
 7
7 -
 8
8 -
 9
9 -
 10
10 -
11
-
12
-
13
-
14
 |
 |