Hoover U2440900W Manual
Hoover U2440900W Manual
 |
View all Hoover U2440900W manuals
Add to My Manuals
Save this manual to your list of manuals |
Hoover U2440900W manual content summary:
- Hoover U2440900W | Manual - Page 1
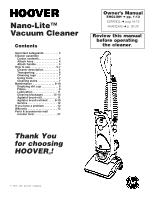
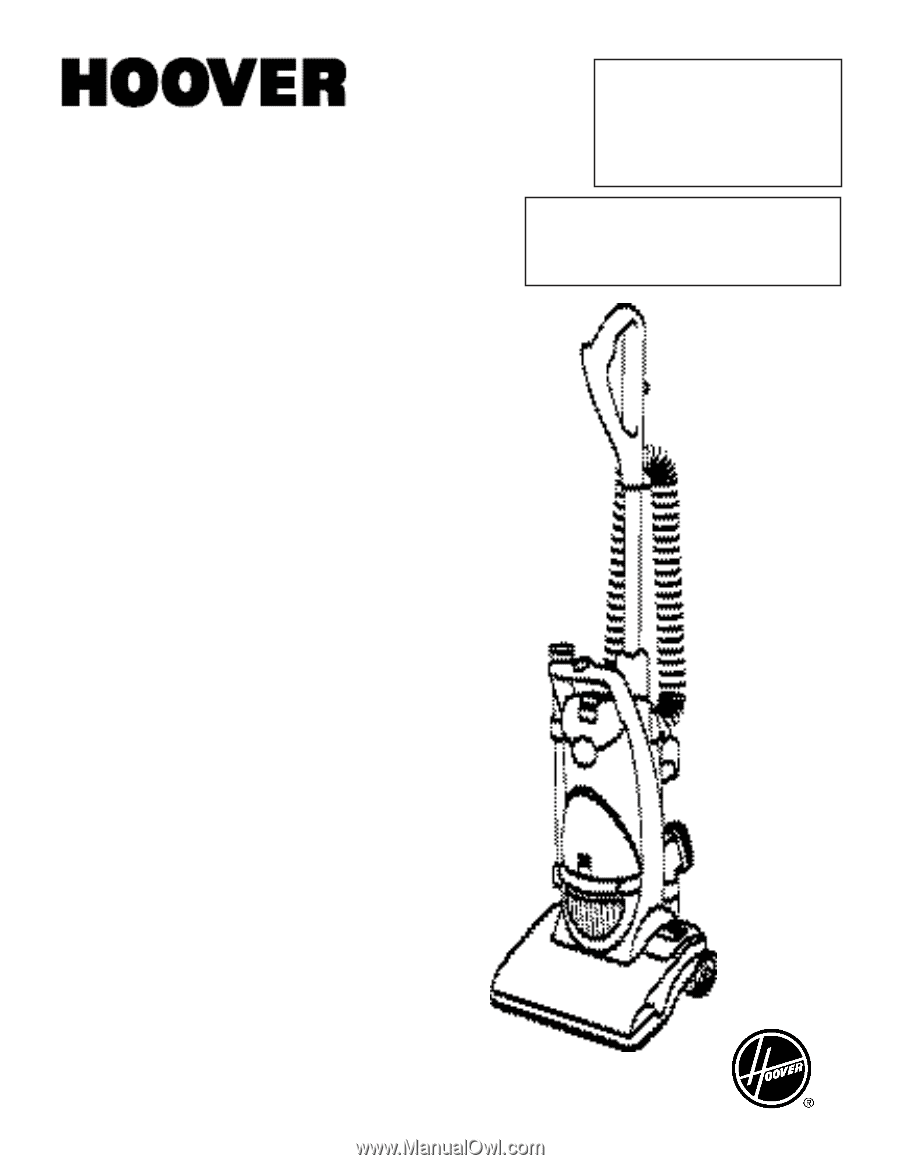
Nano-Lite™ Vacuum Cleaner Service 12 If you have a problem 12 Warranty 13 Parts & accessories mail reorder form 27 Owner's Manual ENGLISH § pp. 1-13 ESPAÑOL § pág 14-19 FRANÇAIS § p. 20-25 Review this manual before operating the cleaner. Thank You for choosing HOOVER ! ® © 2006 The Hoover - Hoover U2440900W | Manual - Page 2
HOOVER SALES & SERVICE CENTERS ALABAMA 3980B Airport Blvd. Mobile, AL 36608 (251) 341-0304 (251) 341-0395 fax ARIZONA 3434 West Bell Rd. Phoeniz, AZ 85053 (602) 439- - Hoover U2440900W | Manual - Page 3
to this owner's manual. Verification of date of purchase may be required for warranty service of your HOOVER product. Be sure to heated surfaces. • Use vacuum cleaner only for its intended use as described in the instructions. Use only attachments recommend ed by Hoover; others may cause hazards - Hoover U2440900W | Manual - Page 4
If you need any assistance: Visit our website at hoover.com. Click on the "Service" button to find the service outlet nearest you OR Call 1-800-944-9200 for an automated referral of authorized service outlet locations (U.S. only) OR Call 1-330-499-9499 to speak with a representative in our Consumer - Hoover U2440900W | Manual - Page 5
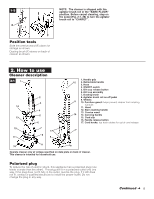
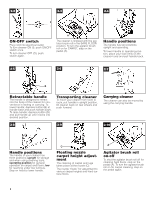
1-5 E F Position tools Slide the crevice wand (E) down for storage as shown. Dusting brush (F) stores on back of cleaner as shown. NOTE: The cleaner is shipped with the agitator brush roll in the "BARE FLOOR" position. Before carpet cleaning, step on the pedal (Fig. 2-1, #8) to turn the agitator - Hoover U2440900W | Manual - Page 6
(B) and pull handle up until it locks into desired position. Transporting cleaner To move your cleaner from room to room, put handle in upright position, tilt cleaner back on rear wheels and push forward. Carrying cleaner The cleaner can also be moved by using the carrying handle. 2-8 2-9 2-10 - Hoover U2440900W | Manual - Page 7
for reaching hard to clean areas. The cleaner is ready for tool use when handle is in upright position. 2-11 A B Removing hose When using cleaning tools, place cleaner handle in the upright position. Turn cleaner OFF before disconnecting and connecting hose to hose tube (A). Twist hose end (B) to - Hoover U2440900W | Manual - Page 8
that the dirt cup be emptied before the dirt reaches the dirt duct opening (A), or after every use if preferred. Place the cleaner in the upright position before removing the dirt cup. Disconnect cleaner from electrical outlet. Do not use cleaner without dirt cup or filters in place. CAUTION: Very - Hoover U2440900W | Manual - Page 9
filter into cleaner. Reposition filter by inserting under tabs on back of housing. What to buy When purchasing a new final filter, ask for HOOVER filter package No. 40110-013 (filter part No. 1BEB124710000). Belt replacement The belt is located under the cleaner hood and should be checked from - Hoover U2440900W | Manual - Page 10
3-12 3-13 3-14 B Remove 2 screws from bottom plate. Removing hood Lower cleaner base so it is flat on the floor. Remove 2 screws located at back of hood (A). Lift hood off. Remove 2 screws on agitator cover (B). 3-15 3-16 3-17 D Lift agitator cover off. C Grasp agitator (C) and pull up - Hoover U2440900W | Manual - Page 11
before turning it over. What to buy When purchasing a new agitator, ask for HOOVER part No. 2BEA131001900. To check condition of brushes, move edge of a card across should be lubricated periodically by a Hoover Sales and Service Center or an Authorized Hoover Warranty Service Dealer. Continued § 11 - Hoover U2440900W | Manual - Page 12
HOOVER service and genuine HOOVER parts, locate the nearest Hoover Sales and Service Center or Authorized Hoover Warranty Service Dealer (Depot) by: • checking the Yellow Pages under "Vacuum Cleaners Household" OR • checking the list of Sales and Service Problem: Cleaner/tools won't pick up Problem: - Hoover U2440900W | Manual - Page 13
Warranty (Domestic Use) Your HOOVER® appliance is warranted in normal household use, in accordance with the Owner's Manual against original defects in however, if you mail your appliance to a Hoover Sales and Service Center for warranty service, transportation will be paid one way. While this - Hoover U2440900W | Manual - Page 14
Aspiradora Nano-Lite™ Gracias por haber elegido un producto HOOVER® Anote los números COMPLETOS de modelo y serie en los espacios provistos. Modelo Número de serie Consejo: Adjunte su recibo de compra a este Manual del propietario. Para obtener el servicio de garantía de su producto HOOVER puede - Hoover U2440900W | Manual - Page 15
USE ESTAS INSTRUCCIONES EN ESPAÑOL JUNTO CON LAS FIGURAS PASO A PASO PROVISTAS EN EL MANUAL DE INGLÉS. Si necesita asistencia: Visite nuestra página en Internet hoover.com. Haga clic en el botón "Service" para encontrar el centro de servicio más cercano a usted O Llame al 1-800-944-9200 para obtener - Hoover U2440900W | Manual - Page 16
en el cuerpo de la aspiradora, a fin de almacenar o transportar la aspiradora con comodidad. Para bajar el mango: oprima el botón (B) en la base del mango y empuje el mango hacia abajo. Para levantar el mango: oprima el botón (B) y tire del mango hacia arriba hasta que se trabe en la posición - Hoover U2440900W | Manual - Page 17
las lengüetas en la parte posterior del cuerpo de la aspiradora. Qué comprar Cuando compre un nuevo filtro final, pida el paquete de filtro HOOVER No. 40110-013 (No. de pieza del filtro 1BEB124710000). Reemplazo de la correa La correa está ubicada debajo de la cubierta de la aspiradora y se - Hoover U2440900W | Manual - Page 18
la guía de teléfonos, bajo "Vacuum Cleaners-Household" ("Aspiradoras Artículos del hogar") O - • consultando la lista de Centros de ventas y servicio de Hoover provista con esta aspiradora O - • consultando la sección "Service" (Servicio) de Hoover en Internet, hoover.com O - • llamando al 1-800-944 - Hoover U2440900W | Manual - Page 19
y la cubierta de la aspiradora (figs. 3-21 a 3-23). Garantía completa de un año (Uso doméstico) Su aparato HOOVER® está garantizado para uso doméstico normal, según el Manual del propietario, contra defectos originales en el material y la fabricación por el período de un año completo a partir de la
-
 1
1 -
 2
2 -
 3
3 -
 4
4 -
 5
5 -
 6
6 -
 7
7 -
8
-
9
-
10
-
11
-
12
-
13
-
14
-
15
-
16
-
17
-
18
-
19
 |
 |
Review this manual
before operating
the cleaner
.
Owner’s Manual
ENGLISH
➜
pp. 1-13
ESPAÑOL
➜
pág 14-19
FRANÇAIS
➜
p. 20-25
Thank You
for choosing
HOOVER
®
!
Important safeguards . . . . . . . . . 3
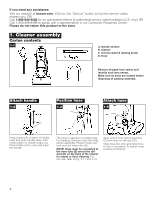
Cleaner assembly
Carton contents. . . . . . . . . . . . . 4
Attach hose . . . . . . . . . . . . . . . . 4
Attach handle. . . . . . . . . . . . . . . 4
How to use. . . . . . . . . . . . . . . . . 5-7
Cleaner description. . . . . . . . . . 5
Transporting
. . . . . . . . . . . . . . . 6
Cleaning rugs
. . . . . . . . . . . . . . 7
Using tools. . . . . . . . . . . . . . . . . 7
Cleaning stairs . . . . . . . . . . . . . 7
Maintenance
. . . . . . . . . . . . . . 8-10
Emptying dirt cup . . . . . . . . . . . 8
Filters . . . . . . . . . . . . . . . . . . . . . 9
Lubrication. . . . . . . . . . . . . . . . 11
Clearing blockages
. . . . . . 12-13
Agitator brush roll. . . . . . . . . . 11
Agitator brush roll belt
. . . . 9-10
Service . . . . . . . . . . . . . . . . . . . 12
If you have a problem
. . . . . . . . 12
Warranty . . . . . . . . . . . . . . . . . . . 13
Parts & accessories mail
reorder form. . . . . . . . . . . . . . . 27
Contents
© 2006 The Hoover Company
Nano-Lite™
Vacuum Cleaner