Hotpoint RB525DPWH Installation Instructions
Hotpoint RB525DPWH - Standard Clean Electric Range Manual
 |
UPC - 084691191759
View all Hotpoint RB525DPWH manuals
Add to My Manuals
Save this manual to your list of manuals |
Hotpoint RB525DPWH manual content summary:
- Hotpoint RB525DPWH | Installation Instructions - Page 1
Safety Information 2-6 Operating Instructions Adjust the Oven Thermostat 21 Clock and Timer 15, 16 Oven 12-14 Oven Controls 10, 11 Sabbath Cooktop 32, 33 Troubleshooting Tips 34-37 Accessories 38 Consumer Support Consumer Support Back Cover Warranty 39 Owner's Manual Coil Top and Radiant - Hotpoint RB525DPWH | Installation Instructions - Page 2
Be sure your appliance is properly installed and grounded by a qualified technician in accordance with the provided installation instructions. I Do not attempt to repair or replace any part of your range unless it is specifically recommended in this manual. All other servicing should be referred to - Hotpoint RB525DPWH | Installation Instructions - Page 3
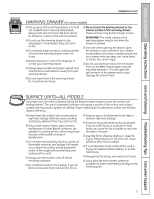
, crevices around the oven door and metal trim parts above the door. I REMEMBER: The inside surface of the oven may be hot when the door is opened. I Do not store or use combustible materials, gasoline or other flammable vapors and liquids in the vicinity of this or any other appliance. I Keep the - Hotpoint RB525DPWH | Installation Instructions - Page 4
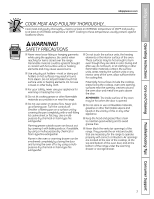
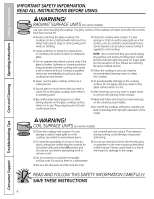
Support Troubleshooting Tips Care and Cleaning Operating Instructions Safety Instructions IMPORTANT SAFETY INFORMATION. READ ALL INSTRUCTIONS BEFORE USING. OVEN I Stand away from the range when opening the oven Clean only parts listed in this Owner's Manual. I Before self-cleaning the oven, remove - Hotpoint RB525DPWH | Installation Instructions - Page 5
Cleaning Troubleshooting Tips Consumer Support GEAppliances.com earthenware or other glazed containers are suitable for cooktop service; others may break because of the sudden change container should be turned toward the center of the range without extending over nearby surface units. I Always turn - Hotpoint RB525DPWH | Installation Instructions - Page 6
cooking could damage range parts and wiring. I Do not use aluminum foil to line the drip pans or anywhere in the oven except as described in this manual. Misuse could result in a shock, fire hazard or damage to the range. READ AND FOLLOW THIS SAFETY INFORMATION CAREFULLY. SAVE THESE INSTRUCTIONS 6 - Hotpoint RB525DPWH | Installation Instructions - Page 7
SSaaffeettyy Instrruuccttiioonnss OOppeerraattiinng Insttrruuccttioionnss Care and Cleaning Troubleshooting Tips Consumer Support Using the surface units. GEAppliances.com Throughout this manual, features and appearance may vary from your model. Be sure you turn the control knob to Off when you - Hotpoint RB525DPWH | Installation Instructions - Page 8
Support Troubleshooting Tips Care and Cleaning Operating Instructions Safety Instructions first time. It is caused by the heating of new parts and insulating materials and will disappear in a short time. It is safe to place hot cookware from the oven or surface on the glass surface when the surface - Hotpoint RB525DPWH | Installation Instructions - Page 9
OOppeerraattiinng Insttrruuccttioionnss Care and Cleaning Troubleshooting Tips Consumer Support Selecting types of cookware. GEAppliances manufacturers such as Ball® and Kerr® and the Department of Agriculture Extension Service. To prevent burns from steam or heat, use caution when canning. Pans - Hotpoint RB525DPWH | Installation Instructions - Page 10
Consumer Support Troubleshooting Tips Care and Cleaning Operating Instructions Safety Instructions Using the oven controls. (on some models) Throughout this manual, features and appearance may vary from your model. or or Oven Control, Clock and Timer Features and Settings BAKE/TEMP RECALL Pad - Hotpoint RB525DPWH | Installation Instructions - Page 11
Instrruuccttiioonnss OOppeerraattiinng Insttrruuccttioionnss Care and Cleaning Troubleshooting Tips Consumer Support GEAppliances.com Oven Control, Clock and Timer Features and Settings AUTOMATIC OVEN Light (on some models) This lights anytime the oven has been programmed using the COOKING - Hotpoint RB525DPWH | Installation Instructions - Page 12
Consumer Support Troubleshooting Tips Care and Cleaning Operating Instructions Safety Instructions CLEAN Using the oven. Appearance may vary. Clock and Kitchen Timer (on some models) KITCHEN TIMER ON/OFF Pad Touch this pad to select the timer feature. CLOCK Pad - Hotpoint RB525DPWH | Installation Instructions - Page 13
Guide. Close the oven door. Turn the Oven Temperature Knob to BROIL. When broiling is finished, turn the Oven Temperature Knob to OFF. When broiling is finished, touch the CLEAR/OFF pad. 13 SSaaffeettyy Instrruuccttiioonnss OOppeerraattiinng Insttrruuccttioionnss Care and Cleaning Troubleshooting - Hotpoint RB525DPWH | Installation Instructions - Page 14
Consumer Support Troubleshooting Tips Care and Cleaning Operating Instructions Safety Instructions Using the oven. The size, weight, thickness, starting temperature and your preference of doneness will affect broiling times. This guide is based on meats at refrigerator temperature. † The U.S. - Hotpoint RB525DPWH | Installation Instructions - Page 15
Troubleshooting Tips Consumer Support Using the clock and timer. (on some models) GEAppliances.com Not all features are on all models. To Set the Clock The clock must be set to the correct time of day for the automatic oven time of day clock display on your range. Touch the CLOCK pad once to turn - Hotpoint RB525DPWH | Installation Instructions - Page 16
Consumer Support Troubleshooting Tips Care and Cleaning Operating Instructions Safety Instructions Using the clock and timer. (on some models) Not all features are on all models. To Reset the Timer If the display is still showing - Hotpoint RB525DPWH | Installation Instructions - Page 17
SSaaffeettyy Instrruuccttiioonnss OOppeerraattiinng Insttrruuccttioionnss Care and Cleaning Troubleshooting Tips Consumer Support Using the timed baking and roasting features. (on some models) GEAppliances.com Do not lock the oven door with the latch during timed cooking. The latch is used for - Hotpoint RB525DPWH | Installation Instructions - Page 18
Consumer Support Troubleshooting Tips Care and Cleaning Operating Instructions Safety Instructions Special features of your oven control. Your new touch pad control has additional features that you may choose to use. The following are the features and how you may activate - Hotpoint RB525DPWH | Installation Instructions - Page 19
Troubleshooting Tips Consumer Support Using the Sabbath Feature. (on some models) (Designed for use on the Jewish Sabbath and Holidays) GEAppliances.com The Sabbath feature can be used for baking/roasting only. It cannot be used for broiling, self-cleaning or Delay Start cooking. NOTE: The oven - Hotpoint RB525DPWH | Installation Instructions - Page 20
Consumer Support Troubleshooting Tips Care and Cleaning Operating Instructions Safety Instructions Using the Sabbath Feature. (on some models) (Designed for use on the Jewish Sabbath and Holidays) How to Exit the Sabbath Feature Touch the CLEAR/OFF pad. If the oven is cooking, wait for a random - Hotpoint RB525DPWH | Installation Instructions - Page 21
Troubleshooting Tips Consumer Support Adjust the oven thermostat-Easy to do yourself! GEAppliances.com You may find that your new oven cooks differently than the one it replaced. Use your new oven of OVEN TEMP knob (knob appearance may vary) Pointer Pull the OVEN TEMP knob off the range and look - Hotpoint RB525DPWH | Installation Instructions - Page 22
Consumer Support Troubleshooting Tips Care and Cleaning Operating Instructions Safety Instructions Using the warming drawer. (on some models) Warming Drawer OFF LO HI MED Appearance may vary. Control Knob (on models equipped with a knob) Push and - Hotpoint RB525DPWH | Installation Instructions - Page 23
SSaaffeettyy Instrruuccttiioonnss OOppeerraattiinng Insttrruuccttioionnss Care and Cleaning Troubleshooting Tips Consumer Support Rack (on some models) I For use in the warming drawer only. Do not use in the oven. I Preheat with the rack in place. I Using the rack allows for double stacking of - Hotpoint RB525DPWH | Installation Instructions - Page 24
Support Troubleshooting Tips Care and Cleaning Operating Instructions Safety Instructions CLEAN Using the self-cleaning oven. (on some models) Never force the latch handle. Forcing the handle will damage the door lock mechanism. The oven of the oven. Soil on the front frame of the range and outside - Hotpoint RB525DPWH | Installation Instructions - Page 25
OOppeerraattiinng Insttrruuccttioionnss Care and Cleaning Troubleshooting Tips Consumer Support GEAppliances.com The oven door must be closed and all controls set correctly for the cycle to work properly. How to Delay the Start of Cleaning You can set the oven control to delay-start the - Hotpoint RB525DPWH | Installation Instructions - Page 26
Support Troubleshooting Tips Care and Cleaning Operating Instructions Safety Instructions Care and cleaning of the range. Be sure electrical power is off and all surfaces are cool before cleaning any part of the range. WARNING: If your range is removed for cleaning, servicing the oven door frame - Hotpoint RB525DPWH | Installation Instructions - Page 27
Troubleshooting Tips Consumer Support Wire cover holder Oven of the oven before you oven racks with the paper towel. Oven Light Replacement (on some models) CAUTION: Before replacing your oven light bulb, turn the oven light off and disconnect the electrical power to the range to the range. To - Hotpoint RB525DPWH | Installation Instructions - Page 28
Support Troubleshooting Tips Care and Cleaning Operating Instructions Safety Instructions Care and cleaning of the range. Clean under the range wipe the control panel after each use of the oven. Use a damp cloth to clean or rinse The knobs can be cleaned in a dishwasher or they may also be washed - Hotpoint RB525DPWH | Installation Instructions - Page 29
and Cleaning Troubleshooting Tips Consumer Support Warming Drawer before performing any adjustments, cleaning or service, disconnect the range electrical power supply at the household rail guide and slide it in slightly to hook it. Place the right drawer rail around the inner right rail guide and - Hotpoint RB525DPWH | Installation Instructions - Page 30
Support Troubleshooting Tips Care and Cleaning Operating Instructions Safety Instructions Care and cleaning of the range up and supported in the up two side supports that lock into of the range. Surface receptacle. Guide the in a dishwasher. Do not be cleaned in the dishwasher. Clean the area - Hotpoint RB525DPWH | Installation Instructions - Page 31
Troubleshooting Tips Consumer Support GEAppliances.com Oven Vent On glass cooktop models, the oven is vented through an opening at the rear of the cooktop. On coil cooktop models, the oven instructions for cleaning the stainless steel surface. To inquire about purchasing stainless steel appliance - Hotpoint RB525DPWH | Installation Instructions - Page 32
Consumer Support Troubleshooting Tips Care and Cleaning Operating Instructions Safety Instructions Cleaning the glass cooktop. (on Cooktop Scraper and all recommended supplies are available through our Parts Center. See instructions under "To Order Parts" section on next page. NOTE: Do not use a - Hotpoint RB525DPWH | Installation Instructions - Page 33
Cleaning Troubleshooting Tips Consumer Support Metal Turn off all surface units. Remove hot pans. Wearing an oven mitt: a. Use a single-edge razor blade scraper (CERAMA have to be replaced. In this case, service will be necessary. To Order Parts To order CERAMA BRYTE® Ceramic Cooktop Cleaner - Hotpoint RB525DPWH | Installation Instructions - Page 34
Consumer Support Troubleshooting Tips Care and Cleaning Operating Instructions Safety Instructions Before you call for service... Troubleshooting Tips Save time and money! Review the charts on the following pages first and you may not need to call for service. Problem Radiant Cooktops Surface - Hotpoint RB525DPWH | Installation Instructions - Page 35
Troubleshooting Tips Consumer Support GEAppliances.com Problem Possible Causes What To Do Oven-All Models Oven light does not work Light bulb is loose or defective. • Tighten or replace the bulb. Switch operating light is broken. • Call for service. Oven will not work Plug on range guide. - Hotpoint RB525DPWH | Installation Instructions - Page 36
Support Troubleshooting Tips Care and Cleaning Operating Instructions Safety Instructions Before you call for service... Troubleshooting Tips Problem Plug on range is not completely inserted in the electrical outlet. A fuse in your home may be blown or the circuit breaker tripped. Oven controls - Hotpoint RB525DPWH | Installation Instructions - Page 37
SSaaffeettyy Instrruuccttiioonnss OOppeerraattiinng Insttrruuccttioionnss Care and Cleaning Troubleshooting Tips Consumer Support GEAppliances.com Problem "Burning" or "oily" odor emitting from the oven vent Possible Causes This is normal in a new oven and will disappear in time. What To Do • To - Hotpoint RB525DPWH | Installation Instructions - Page 38
Consumer Support Troubleshooting Tips Care and Cleaning Operating Instructions Safety Instructions Accessories. Looking For oven racks? NOW AVAILABLE for your range: GE's innovative, self-cleanable porcelain-coated oven racks! • Heavy Duty • Durable • Able to be cleaned in a self-cleaning oven - Hotpoint RB525DPWH | Installation Instructions - Page 39
Troubleshooting Tips Consumer Support Electric Range Warranty. All warranty service provided by our Factory Service Centers or an authorized Customer Care® technician. To schedule service, visit us on-line at GEAppliances.com, or call 800.GE directions in the Owner's Manual. I Replacement of house - Hotpoint RB525DPWH | Installation Instructions - Page 40
Consumer Support. GE Appliances Website GEAppliances.com Have a question or need assistance with your appliance? Try the GE Appliances Website any day of the year! For greater convenience and faster service, you can now download Owner's Manuals, order parts or even schedule service on-line.
-
 1
1 -
 2
2 -
 3
3 -
 4
4 -
 5
5 -
 6
6 -
 7
7 -
8
-
9
-
10
-
11
-
12
-
13
-
14
-
15
-
16
-
17
-
18
-
19
-
20
-
21
-
22
-
23
-
24
-
25
-
26
-
27
-
28
-
29
-
30
-
31
-
32
-
33
-
34
-
35
-
36
-
37
-
38
-
39
-
40
 |
 |

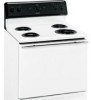
Coil Top and
Radiant Top Models
Standard
Clean Models
JBS03
JBS07
JBS15
JBS27
JBS56
RB525
RB526
RB536
RB540
Self-Clean
Models
JB600
JBP15
JBP22
JBP27
JBP60
JBP61
RB740
RB757
RB758
RB787
RB790
RB800
183D6379P057
49-88042
01-09 JR
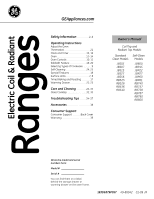
Safety Information
. . . . . . . . . . . 2–6
Operating Instructions
Adjust the Oven
Thermostat . . . . . . . . . . . . . . . . . . . . . . . . .21
Clock and Timer . . . . . . . . . . . . . . . . .15, 16
Oven . . . . . . . . . . . . . . . . . . . . . . . . . . . .12–14
Oven Controls . . . . . . . . . . . . . . . . . . .10, 11
Sabbath Feature . . . . . . . . . . . . . . . .19, 20
Selecting Types of Cookware . . . . . . . .9
Self-Cleaning . . . . . . . . . . . . . . . . . . . .24, 25
Special Features . . . . . . . . . . . . . . . . . . . .18
Surface Units . . . . . . . . . . . . . . . . . . . . . . 7, 8
Timed Baking and Roasting
. . . . . . . .17
Warming Drawer . . . . . . . . . . . . . . . 22, 23
Care and Cleaning
. . . . . . . . . 26–33
Glass Cooktop
. . . . . . . . . . . . . . . . . .32, 33
Troubleshooting Tips
. . . . . . 34–37
Accessories
. . . . . . . . . . . . . . . . . . . . . . 38
Consumer Support
Consumer Support . . . . . . . .Back Cover
Warranty
. . . . . . . . . . . . . . . . . . . . . . . . . . 39
GEAppliances.com
Write the model and serial
numbers here:
Model #
__________________
Serial #
__________________
You can find them on a label,
behind the storage drawer or
warming drawer on the oven frame.
Owner’s Manual
Ranges
Electric Coil & Radiant