Hotpoint RB758DPWW Installation Instructions
Hotpoint RB758DPWW - 30 in. Electric Range Manual
 |
UPC - 084691192152
View all Hotpoint RB758DPWW manuals
Add to My Manuals
Save this manual to your list of manuals |
Hotpoint RB758DPWW manual content summary:
- Hotpoint RB758DPWW | Installation Instructions - Page 1
&e Radiants GEAppliances.com Safety Information 2-6 Operating Instructions Adjust the Oven Thermostat 21 Clock and Timer Troubleshooting Tips 34-37 Accessories 38 Consumer Support Consumer Support Back Cover Warranty 39 Owner's Manual Coil Top and Radiant Top Models Standard Clean Models - Hotpoint RB758DPWW | Installation Instructions - Page 2
Support Troubleshooting Tips Care and Cleaning Operating Instructions Safety Instructions IMPORTANT SAFETY INFORMATION. READ ALL INSTRUCTIONS BEFORE USING. WARNING! For your safety, the information in this manual 2 I Before performing any service, disconnect the range power supply at the household - Hotpoint RB758DPWW | Installation Instructions - Page 3
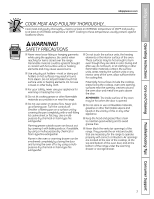
OOppeerraattiinng Insttrruuccttioionnss Care and Cleaning Troubleshooting Tips Consumer Support GEAppliances.com COOK MEAT AND careful when reaching for items stored over the range. Flammable material could be ignited if brought in contact with hot surface units or heating elements and may cause - Hotpoint RB758DPWW | Installation Instructions - Page 4
Support Troubleshooting Tips Care and Cleaning Operating Instructions Safety Instructions IMPORTANT SAFETY INFORMATION. READ ALL INSTRUCTIONS BEFORE USING. OVEN I Stand away from the range when opening the oven door. Hot this Owner's Manual. I Before -clean models. No serviced by a qualified technician - Hotpoint RB758DPWW | Installation Instructions - Page 5
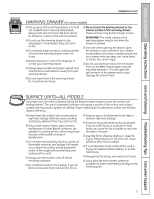
Troubleshooting Tips Consumer Support GEAppliances.com WARMING DRAWER (on some models) I The purpose of the warming drawer is to hold hot cooked foods at serving temperature. Always start with hot suitable for cooktop service; others may center of the range without extending over nearby point. 5 - Hotpoint RB758DPWW | Installation Instructions - Page 6
Consumer Support Troubleshooting Tips Care and Cleaning Operating Instructions Safety Instructions IMPORTANT SAFETY INFORMATION. READ ALL INSTRUCTIONS BEFORE USING. WARNING! RADIANT SURFACE UNITS (on some models) Use care when touching the cooktop. The glass surface of the cooktop will retain - Hotpoint RB758DPWW | Installation Instructions - Page 7
Troubleshooting Tips Consumer Support Using the surface units. GEAppliances.com Throughout this manual, features and appearance may vary from your model set. Indicator Lights (on radiant glass models only) A HOT SURFACE or HOT COOKTOP (depending on model) indicator light will glow when any - Hotpoint RB758DPWW | Installation Instructions - Page 8
Support Troubleshooting Tips Care and Cleaning Operating Instructions Safety Instructions Using the radiant surface units. (on some models on and off to maintain your selected control setting. It is safe to place hot cookware from the oven or surface on the glass surface when the surface is cool - Hotpoint RB758DPWW | Installation Instructions - Page 9
and Cleaning Troubleshooting Tips Consumer Support Selecting types removed if cleaned immediately. Because of its low melting point, thin-weight aluminum should not be used. Copper Ball® and Kerr® and the Department of Agriculture Extension Service. To prevent burns from steam or heat, use caution - Hotpoint RB758DPWW | Installation Instructions - Page 10
Support Troubleshooting Tips Care and Cleaning Operating Instructions Safety Instructions Using the oven controls. (on some models) Throughout this manual, features and appearance may vary from your model can change the set time at this point. Glows when the timer has been range and call for service. - Hotpoint RB758DPWW | Installation Instructions - Page 11
Troubleshooting Tips Consumer Support GEAppliances.com Oven Control, Clock and Timer Features and Settings AUTOMATIC OVEN Light (on some models Light Flashes while in edit mode-you can switch from HI to LO BROIL at this point. Glows when the oven is in broil mode. Indicator Lights (on some pads) - Hotpoint RB758DPWW | Installation Instructions - Page 12
Consumer Support Troubleshooting Tips Care and Cleaning Operating Instructions Safety Instructions CLEAN Using the oven. Appearance may vary. Clock and Kitchen Timer (on some models) KITCHEN TIMER ON/OFF Pad Touch this pad to select the timer feature. CLOCK Pad Touch this pad before setting the - Hotpoint RB758DPWW | Installation Instructions - Page 13
range results when baking cakes, cookies, pastry and breads. On some models, the display will show "PRE" while preheating. When the in a broiler pan. Follow suggested rack positions in the Broiling Guide. Close the oven door. Turn the Oven Temperature Knob to BROIL Troubleshooting Tips Consumer Support - Hotpoint RB758DPWW | Installation Instructions - Page 14
Consumer Support Troubleshooting Tips Care and Cleaning Operating Instructions Safety Instructions Using the oven. The size, weight, thickness, starting temperature and your preference of doneness will affect broiling times. This guide is based on meats at refrigerator temperature. † The U.S. - Hotpoint RB758DPWW | Installation Instructions - Page 15
Cleaning Troubleshooting Tips Consumer Support Using the clock and timer. (on some models) GEAppliances.com Not all features are on all models. To kitchen, you may wish to turn off the time of day clock display on your range. Touch the CLOCK pad once to turn off the time of day display. Although - Hotpoint RB758DPWW | Installation Instructions - Page 16
Consumer Support Troubleshooting Tips Care and Cleaning Operating Instructions Safety Instructions Using the clock and timer. (on some models) Not all features are on all models. To Reset the Timer If the display is still showing the time remaining, you may change it by touching the KITCHEN TIMER - Hotpoint RB758DPWW | Installation Instructions - Page 17
SSaaffeettyy Instrruuccttiioonnss OOppeerraattiinng Insttrruuccttioionnss Care and Cleaning Troubleshooting Tips Consumer Support Using the timed baking and roasting features. (on some models) GEAppliances.com Do not lock the oven door with the latch during timed cooking. The latch is used for - Hotpoint RB758DPWW | Installation Instructions - Page 18
Consumer Support Troubleshooting Tips Care and Cleaning Operating Instructions Safety Instructions Special features of your oven control. Your new touch pad control has additional features that you may choose to use. The following are the features - Hotpoint RB758DPWW | Installation Instructions - Page 19
⊃ ⊃ ⊃ ⊃ ⊃ SSaaffeettyy Instrruuccttiioonnss OOppeerraattiinng Insttrruuccttioionnss Care and Cleaning Troubleshooting Tips Consumer Support Using the Sabbath Feature. (on some models) (Designed for use on the Jewish Sabbath and Holidays) GEAppliances.com The Sabbath feature can be used for - Hotpoint RB758DPWW | Installation Instructions - Page 20
Consumer Support Troubleshooting Tips Care and Cleaning Operating Instructions Safety Instructions Using the Sabbath Feature. (on some models) (Designed for use on the Jewish Sabbath and Holidays) How to Exit the Sabbath Feature Touch the CLEAR/OFF pad. If the oven is cooking, - Hotpoint RB758DPWW | Installation Instructions - Page 21
Cleaning Troubleshooting Tips Consumer Support Adjust appearance may vary) Pointer Pull the OVEN TEMP knob off the range and look at the back side. To make an adjustment, the shaft, and check performance. To Adjust the Thermostat on Other Models Touch the BAKE and BROIL HI/LO pads at the same time - Hotpoint RB758DPWW | Installation Instructions - Page 22
Support Troubleshooting Tips Care and Cleaning Operating Instructions Safety Instructions Using the warming drawer. (on some models) Warming Drawer OFF LO HI MED Appearance may vary. Control Knob (on models them uncovered. I Food should be kept hot in its cooking container or transferred to a - Hotpoint RB758DPWW | Installation Instructions - Page 23
OOppeerraattiinng Insttrruuccttioionnss Care and Cleaning Troubleshooting Tips Consumer Support Rack (on some models) I For use in the You may warm empty serving dishes while preheating the drawer. I When holding hot, cooked foods and warming empty serving dishes at the same time, place the - Hotpoint RB758DPWW | Installation Instructions - Page 24
Consumer Support Troubleshooting Tips Care and Cleaning Operating Instructions Safety Instructions CLEAN Using the self-cleaning oven. (on some models) Never front frame of the range and outside the gasket on the door will need to be cleaned by hand. Clean these areas with hot water, soap-filled - Hotpoint RB758DPWW | Installation Instructions - Page 25
OOppeerraattiinng Insttrruuccttioionnss Care and Cleaning Troubleshooting Tips Consumer Support GEAppliances.com The oven door must Clean Cycle section. Latch the door. NOTE: Never force the latch. If the oven is too hot, you will not be able to slide the latch. Allow the oven to cool. Touch the - Hotpoint RB758DPWW | Installation Instructions - Page 26
Consumer Support Troubleshooting Tips Care and Cleaning Operating Instructions Safety Instructions Care and cleaning of the range. Be sure electrical power is off and all surfaces are cool before cleaning any part of the range. WARNING: If your range is removed for cleaning, servicing or any - Hotpoint RB758DPWW | Installation Instructions - Page 27
Insttrruuccttioionnss Care and Cleaning Troubleshooting Tips Consumer Support Wire cover holder Oven Heating Light Replacement (on some models) CAUTION: Before replacing your oven light bulb, turn the oven light off and disconnect the electrical power to the range at the main fuse or - Hotpoint RB758DPWW | Installation Instructions - Page 28
Consumer Support Troubleshooting Tips Care and Cleaning Operating Instructions Safety Instructions Care and cleaning of the range. Clean under the range. Storage Drawer Removal (on some models) To remove the storage drawer: Pull the drawer out all the way. To replace the storage drawer: Insert - Hotpoint RB758DPWW | Installation Instructions - Page 29
SSaaffeettyy Instrruuccttiioonnss OOppeerraattiinng Insttrruuccttioionnss Care and Cleaning Troubleshooting Tips Consumer Support Warming Drawer Rack (on some models) Clean the rack with detergent and water. After cleaning, rinse the rack with clean water and dry with a clean cloth. GEAppliances. - Hotpoint RB758DPWW | Installation Instructions - Page 30
Support Troubleshooting Tips Care and Cleaning Operating Instructions Safety Instructions Care and cleaning of the range. Porcelain Enamel Cooktop (on some models supports that lock into position when the cooktop is lifted up. After cleaning under the cooktop with hot receptacle. Guide the surface - Hotpoint RB758DPWW | Installation Instructions - Page 31
Instrruuccttiioonnss OOppeerraattiinng Insttrruuccttioionnss Care and Cleaning Troubleshooting Tips Consumer Support GEAppliances.com Oven Vent On glass cooktop models, the oven is vented through an opening at the rear of the cooktop. On coil cooktop models, the oven is vented through an - Hotpoint RB758DPWW | Installation Instructions - Page 32
Consumer Support Troubleshooting Tips Care and Cleaning Operating Instructions Safety Instructions Cleaning the glass cooktop. (on some models) Clean your cooktop after each spill. Use CERAMA BRYTE® Ceramic Cooktop Cleaner. Normal Daily Use Cleaning ONLY use CERAMA BRYTE® Ceramic Cooktop Cleaner - Hotpoint RB758DPWW | Installation Instructions - Page 33
and Cleaning Troubleshooting Tips Consumer Support Metal Sugary Spills and Melted Plastic Turn off all surface units. Remove hot pans. Wearing an oven mitt: a. Use a single-edge cooktop glass will have to be replaced. In this case, service will be necessary. To Order Parts To order CERAMA BRYTE® - Hotpoint RB758DPWW | Installation Instructions - Page 34
Consumer Support Troubleshooting Tips Care and Cleaning Operating Instructions Safety Instructions Before you call for service... Troubleshooting Tips Save time and money! Review the charts on the following pages first and you may not need to call for service. Problem Radiant Cooktops Surface - Hotpoint RB758DPWW | Installation Instructions - Page 35
Cleaning Troubleshooting Tips Consumer Support GEAppliances.com Problem Possible Causes What To Do Oven-All Models Oven light does not work Light bulb is loose or defective. • Tighten or replace the bulb. Switch operating light is broken. • Call for service. Oven will not work Plug on range - Hotpoint RB758DPWW | Installation Instructions - Page 36
Support Troubleshooting Tips Care and Cleaning Operating Instructions Safety Instructions Before you call for service... Troubleshooting Tips Problem hot range for at least 30 seconds and then reconnect power. If the function error code repeats, call for service. • On self-cleaning models - Hotpoint RB758DPWW | Installation Instructions - Page 37
Cleaning Troubleshooting Tips Consumer Support GEAppliances.com Problem temporary. Self-Cleaning Models Oven will not self-clean The oven temperature is too • Allow the range to cool to clean cycle. Oven door will not unlock Oven too hot. • Allow the oven to cool below locking temperature. - Hotpoint RB758DPWW | Installation Instructions - Page 38
Consumer Support Troubleshooting Tips Care and Cleaning Operating Instructions Safety Instructions Accessories. Looking For Something More? You can find these accessories and many more at GEAppliances.com, or call 800.626.2002 (during normal business hours). Have your model number ready. Surface - Hotpoint RB758DPWW | Installation Instructions - Page 39
Troubleshooting Tips Consumer Support Electric Range Warranty. All warranty service provided by our Factory Service Centers or an authorized Customer Care® technician. To schedule service not cleaned according to the directions in the Owner's Manual. I Replacement of house fuses or resetting of - Hotpoint RB758DPWW | Installation Instructions - Page 40
.com GE supports the Universal Design concept-products, services and environments Instructions contained in this manual cover procedures to be performed by any user. Other servicing generally should be referred to qualified service personnel. Caution must be exercised, since improper servicing
-
 1
1 -
 2
2 -
 3
3 -
 4
4 -
 5
5 -
 6
6 -
 7
7 -
8
-
9
-
10
-
11
-
12
-
13
-
14
-
15
-
16
-
17
-
18
-
19
-
20
-
21
-
22
-
23
-
24
-
25
-
26
-
27
-
28
-
29
-
30
-
31
-
32
-
33
-
34
-
35
-
36
-
37
-
38
-
39
-
40
 |
 |

Coil Top and
Radiant Top Models
Standard
Clean Models
JBS03
JBS07
JBS15
JBS27
JBS56
RB525
RB526
RB536
RB540
Self-Clean
Models
JB600
JBP15
JBP22
JBP27
JBP60
JBP61
RB740
RB757
RB758
RB787
RB790
RB800
183D6379P057
49-88042
01-09 JR
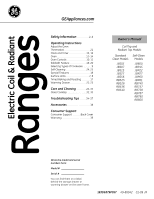
Safety Information
. . . . . . . . . . . 2–6
Operating Instructions
Adjust the Oven
Thermostat . . . . . . . . . . . . . . . . . . . . . . . . .21
Clock and Timer . . . . . . . . . . . . . . . . .15, 16
Oven . . . . . . . . . . . . . . . . . . . . . . . . . . . .12–14
Oven Controls . . . . . . . . . . . . . . . . . . .10, 11
Sabbath Feature . . . . . . . . . . . . . . . .19, 20
Selecting Types of Cookware . . . . . . . .9
Self-Cleaning . . . . . . . . . . . . . . . . . . . .24, 25
Special Features . . . . . . . . . . . . . . . . . . . .18
Surface Units . . . . . . . . . . . . . . . . . . . . . . 7, 8
Timed Baking and Roasting
. . . . . . . .17
Warming Drawer . . . . . . . . . . . . . . . 22, 23
Care and Cleaning
. . . . . . . . . 26–33
Glass Cooktop
. . . . . . . . . . . . . . . . . .32, 33
Troubleshooting Tips
. . . . . . 34–37
Accessories
. . . . . . . . . . . . . . . . . . . . . . 38
Consumer Support
Consumer Support . . . . . . . .Back Cover
Warranty
. . . . . . . . . . . . . . . . . . . . . . . . . . 39
GEAppliances.com
Write the model and serial
numbers here:
Model #
__________________
Serial #
__________________
You can find them on a label,
behind the storage drawer or
warming drawer on the oven frame.
Owner’s Manual
Ranges
Electric Coil & Radiant