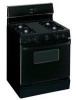
Hotpoint RGB528PENBB Owners Manual - Page 18
Care and cleaning of the range.
 |
View all Hotpoint RGB528PENBB manuals
Add to My Manuals
Save this manual to your list of manuals |
Page 18 highlights
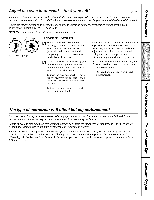
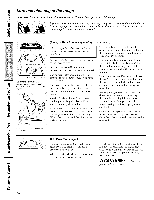
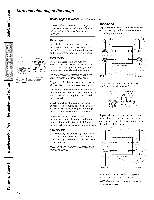
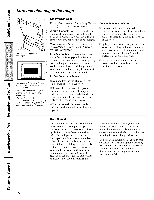
Care and cleaning of the range. Usea sewing needle or twist-tie to unclog the small hole h7ttTe burner head. Burner Caps and Heads (on sealed burners only) NOTE: Before removing the burner caps and heads, remember their ske and location. Replace them in the same location after cleaning. Replacement ]_epla('e burner heads over the electrodes on the cooktop, in the correct htcafions according to flmir size. Burner caps I Jfl off when cool. _Vash burner caps in hot, soapy water and i_inse with clean watei: ¥(/u mat scour with a I)lasfic sc(/m_ing pad to remoxe burned-on food pm-ticles. Burner heads For proper ignition, make sure the small hole in the section that fits oxer the electrode is kept open. A sewing needle or wire twist-tie worLs well to unclog it. The slits in the burner heads must be kept dean at aft times for an even, unhampered flame. (:logged or (lirD' burner pails or electrodes lJll not allow the burner to operate properly, AIV spill on or around an electrode m ust be carefilllv cleaned. Take care to not hit an electrode with an}_hing hard or it could be damaged. Y})u should clean the burner caps and burner heads routinely, especially alter bad spilloveI_, which could clog the openings in the burner heads, i.ifl offwhen cool. To remove burned-on fl)od, soak the burner heads in a solution of mild liquid detergent and hot water fin" 20-30 minutes, For more stubborn stains, use a toothbrush. Medium head Sma!I head r Medium head l Large head Make sure the shit in the burner head is positioned over fl_e elecu'ode. Replace the matching size caps onto the heads. There is one small, two medium and one large cap. Sizes are stamped into the bottom of fl_e caps. After cleaning Before putting the burner caps and heads back, shake ()tit excess water and then (lr) them thoroughl_ l)_ setting in a wam_ oxen fi)r 30 minutes. NOTE: Do not use steel wool or scouring powders to dean the burners. tMedi•]in cap Sma,,cap Medium cap Large cap Make sure that the heads and caps are replaced in the correct locations, NOTE: On some models, the burners are a// the same sizeand poweg /8
-
 1
1 -
2
-
3
-
4
-
5
-
6
-
7
-
8
-
9
-
10
-
11
-
12
-
 13
13 -
 14
14 -
 15
15 -
 16
16 -
 17
17 -
 18
18 -
 19
19 -
 20
20 -
 21
21 -
 22
22 -
 23
23 -
24
-
25
-
26
-
27
-
28
-
29
-
30
-
31
-
32
-
33
-
34
-
35
-
36
-
37
-
38
-
39
-
40
-
41
-
42
-
43
-
44
-
45
-
46
-
47
-
48
 |
 |
