Hotpoint RGB528PENBB Owners Manual - Page 36
°F. After
 |
View all Hotpoint RGB528PENBB manuals
Add to My Manuals
Save this manual to your list of manuals |
Page 36 highlights
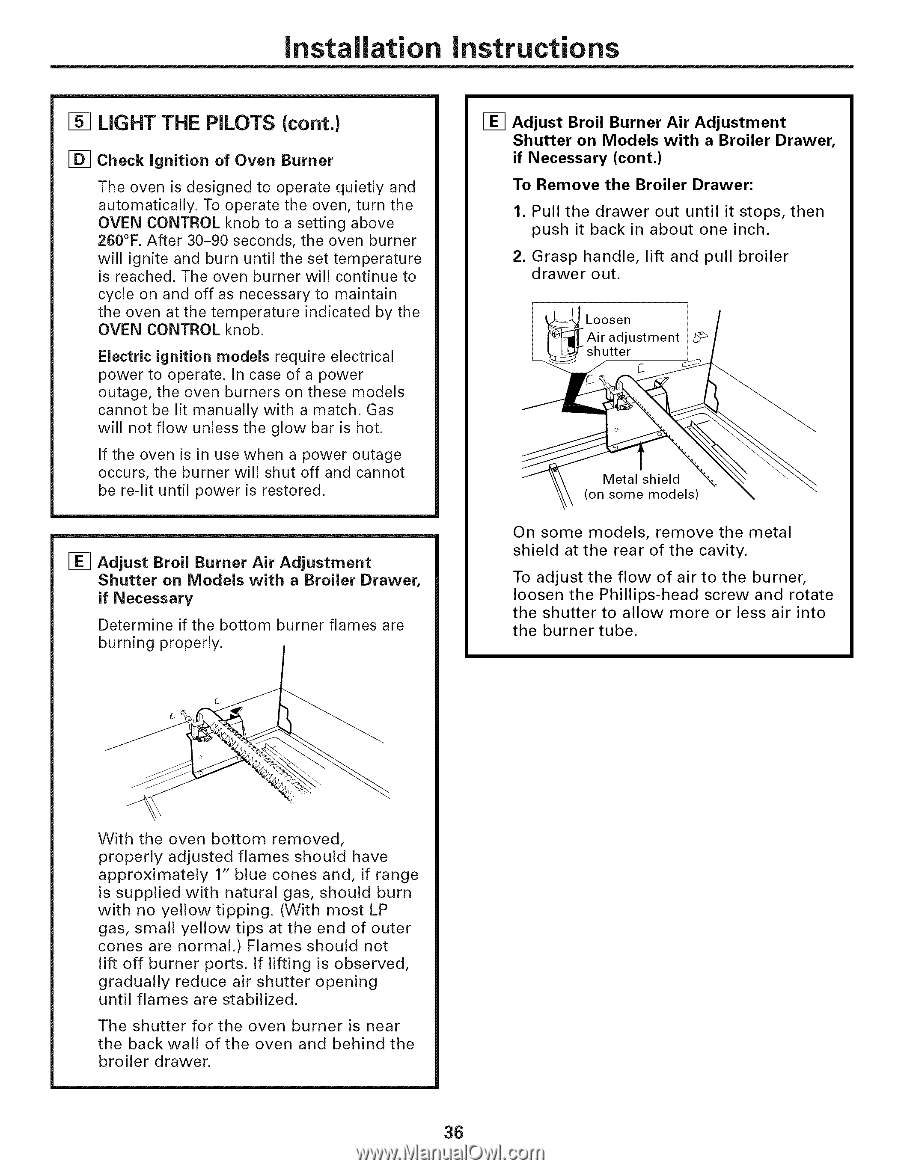
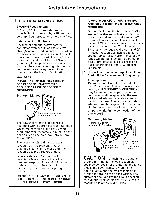
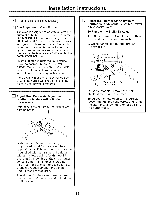
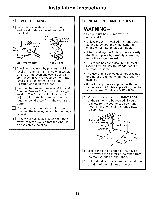
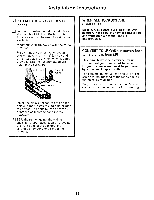
Installation instructions [] LIGHT THE PILOTS (cont.) [] Check ignition of Oven Burner The oven is designed to operate quietly and automatically. To operate the oven, turn the OVEN CONTROL knob to a setting above 260°F. After 30-90 seconds, the oven burner will ignite and burn until the set temperature is reached. The oven burner will continue to cycle on and off as necessary to maintain the oven at the temperature indicated by the OVEN CONTROL knob. Electric ignition models require electrical power to operate. In case of a power outage, the oven burners on these models cannot be lit manually with a match. Gas will not flow unless the glow bar is hot. If the oven is in use when a power outage occurs, the burner will shut off and cannot be re-lit until power is restored. [] Adjust Broil Burner Air Adjustment Shutter on Models with a Broiler Drawer, if Necessary Determine if the bottom burner flames are burning properly. [] Adjust Broil Burner Air Adjustment Shutter on Models with a Broiler Drawer, if Necessary (cont.) To Remove the Broiler Drawer: 1. Pull the drawer out until it stops, then push it back in about one inch. 2. Grasp handle, lift and pull broiler drawer out. Loosen ustment Metal shield (on some models) On some models, remove the metal shield at the rear of the cavity. To adjust the flow of air to the burner, loosen the Phillips-head screw and rotate the shutter to allow more or less air into the burner tube. With the oven bottom removed, properly adjusted flames should have approximately 1" blue cones and, if range is supplied with natural gas, should burn with no yellow tipping. (With most LP gas, small yellow tips at the end of outer cones are normal.) Flames should not lift off burner ports. If lifting is observed, gradually reduce air shutter opening until flames are stabilized. The shutter for the oven burner is near the back wall of the oven and behind the broiler drawer. 36
-
 1
1 -
2
-
3
-
4
-
5
-
6
-
7
-
8
-
9
-
10
-
11
-
12
-
13
-
14
-
15
-
16
-
17
-
18
-
19
-
20
-
21
-
22
-
23
-
24
-
25
-
26
-
27
-
28
-
29
-
30
-
 31
31 -
 32
32 -
 33
33 -
 34
34 -
 35
35 -
 36
36 -
 37
37 -
 38
38 -
 39
39 -
 40
40 -
 41
41 -
42
-
43
-
44
-
45
-
46
-
47
-
48
 |
 |