Hotpoint RGB745DEP Installation Instructions
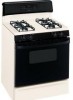
Hotpoint RGB745DEP - 30 in. Gas Range Manual
 |
View all Hotpoint RGB745DEP manuals
Add to My Manuals
Save this manual to your list of manuals |
Hotpoint RGB745DEP manual content summary:
- Hotpoint RGB745DEP | Installation Instructions - Page 1
Connecting the Range JGBP86 to Gas 38-40 JGBP87 Dimensions and Clearances . .36 Electrical Connections . . . . .41, 42 Leveling the Range 44 Location 37 LP 45 RGB735 RGB740 RGB745 RGB746 RGB790 Troubleshooting Tips 46-49 Accessories 50 Consumer Support Consumer Support Back Cover - Hotpoint RGB745DEP | Installation Instructions - Page 2
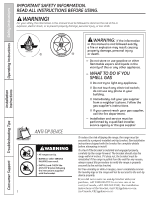
. Follow the gas supplier's instructions. ■ If you cannot reach your gas supplier, call the fire department. - Installation and service must be performed by a qualified installer, service agency or the gas supplier. ANTI-TIP DEVICE To reduce the risk of tipping the range, the range must be secured - Hotpoint RGB745DEP | Installation Instructions - Page 3
with the Installation Instructions. Any adjustment and service should be performed only by qualified gas range installers or service technicians. ■ Do not attempt to repair or replace any part of your range unless it is specifically recommended in this manual. All other service should be referred - Hotpoint RGB745DEP | Installation Instructions - Page 4
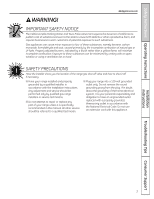
the vicinity of this or any other appliance. ■ WARNING: These adjustments must be made by a qualified service ■ Do not let cooking grease or other flammable materials accumulate in or near the range. technician in accordance with the manufacturer's instructions and all codes and requirements of - Hotpoint RGB745DEP | Installation Instructions - Page 5
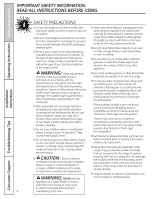
Instructions Operating Instructions GEAppliances.com WARNING! Installation Instructions and create a fire hazard. ■ If you smell gas, turn off the gas to the range and call a qualified service technician. Never use an open flame to locate the range. 5 Troubleshooting Tips Consumer Support - Hotpoint RGB745DEP | Installation Instructions - Page 6
should have a grease fire in a broiler pan, touch the Clear/Off pad, and keep the oven door closed to contain fire until it burns out. ■ For safety and proper cooking performance, always bake and broil with the oven door closed. Installation Instructions Consumer Support Troubleshooting Tips 6 - Hotpoint RGB745DEP | Installation Instructions - Page 7
any kind should be used in or around any part of the oven. Residue from oven cleaners will damage the inside of the oven when the self-clean cycle is used. READ AND FOLLOW THIS SAFETY INFORMATION CAREFULLY. SAVE THESE INSTRUCTIONS Installation Instructions Troubleshooting Tips Consumer Support 7 - Hotpoint RGB745DEP | Installation Instructions - Page 8
down from Hi to Lo to suit a wide range of cooking needs. Extra-large burner only On some models The center oval burner (on some models) is for large pots/pans or for use with the griddle. Installation Instructions Consumer Support Troubleshooting Tips Medium 8 Large How to Select Flame Size - Hotpoint RGB745DEP | Installation Instructions - Page 9
are two types of glass cookware-those for oven use only and those for top-of-range cooking (saucepans, coffee and teapots). Glass conducts Instructions Troubleshooting Tips Consumer Support In Case of Power Failure In case of a power failure, you can light the gas surface burners on your range - Hotpoint RGB745DEP | Installation Instructions - Page 10
Operating Instructions Safety Instructions Using the griddle. (on some models) Your non-stick coated griddle provides an extra-large center burner. To insert the griddle, remove the center grate and replace with the griddle. Installation Instructions Consumer Support Troubleshooting Tips 10 - Hotpoint RGB745DEP | Installation Instructions - Page 11
Safety Instructions Operating Instructions GEAppliances.com Using the Griddle Most griddled foods require cooking on a preheated surface. Preheat griddle according to the guide below, if the griddle is used for an extended time. Installation Instructions Troubleshooting Tips Consumer Support 11 - Hotpoint RGB745DEP | Installation Instructions - Page 12
Operating Instructions Safety Instructions Using the oven controls. Throughout this manual, features and appearance may vary from your model. Installation Instructions Consumer Support Troubleshooting Tips Oven Control, Clock and Timer Features and Settings (on some models) Bake/Temp Recall Pad - Hotpoint RGB745DEP | Installation Instructions - Page 13
go and open the door. If your range does not have a latch, the door will unlock automatically. Clear/Off Pad Touch this pad to cancel ALL oven operations except the clock and timer. Broil /Temp Recall pad light will light up). Installation Instructions Troubleshooting Tips Consumer Support 13 - Hotpoint RGB745DEP | Installation Instructions - Page 14
the flow of gas is automatically stopped and will not resume when power is restored until the glow bar has reached operating temperature. Oven Light Touch the Oven Light pad on the upper control panel to turn the light on or off. Installation Instructions Consumer Support Troubleshooting Tips 14 - Hotpoint RGB745DEP | Installation Instructions - Page 15
when baking is finished and then remove the food from the oven. Installation Instructions Troubleshooting Tips Consumer Support Preheating and Pan Placement Preheat the oven if the recipe calls for it. To preheat, set the oven at the correct temperature. Preheating is necessary for good results - Hotpoint RGB745DEP | Installation Instructions - Page 16
refrigerator temperature. †The U.S. Department of Agriculture says "Rare beef is popular, but you should know that cooking it to only 140°F means some food poisoning organisms may survive." (Source: Safe Food Book, Your Kitchen Guide, USDA Rev. June 1985.) The oven Support Troubleshooting Tips 16 - Hotpoint RGB745DEP | Installation Instructions - Page 17
to turn off the time of day clock display on your range. Touch the Clock pad once to turn off the time not affect the timer. To Set the Timer The timer does not control oven operations. The maximum setting on the timer is 9 hours and 59 minutes Instructions Troubleshooting Tips Consumer Support 17 - Hotpoint RGB745DEP | Installation Instructions - Page 18
Operating Instructions Safety Instructions Using the clock and timer. (on some models) Not all features are on all models. To Reset Clock pad. Enter the correct time of day by touching the + or - pads. Touch the Start/On pad. Installation Instructions Consumer Support Troubleshooting Tips 18 - Hotpoint RGB745DEP | Installation Instructions - Page 19
the food from the oven. Remember, even though the oven shuts off automatically, foods continue cooking after controls are off. Touch the Start/On pad. NOTE: An attention tone will sound if you are using timed baking and do not touch the Start/On pad. Troubleshooting Tips Consumer Support 19 - Hotpoint RGB745DEP | Installation Instructions - Page 20
Hour Shut-Off With this feature, should you forget and leave the oven on, the control will automatically turn off the oven after 12 hours during baking functions or after 3 hours during a control set in this special features mode. Installation Instructions Consumer Support Troubleshooting Tips 20 - Hotpoint RGB745DEP | Installation Instructions - Page 21
Cooking Time pads are active during the Sabbath feature. Installation Instructions When the display shows ⊃ the oven is set in Sabbath. When the display shows ⊃ the oven is baking/roasting. Troubleshooting Tips Consumer Support How to Set for Timed Baking/Roasting-Immediate Start and Automatic - Hotpoint RGB745DEP | Installation Instructions - Page 22
the 12 Hour Shut-Off feature. Touch the Start/On pad. NOTE: If a power outage occurred while the oven was in Sabbath, the oven will automatically turn off and stay off even when the power returns. The oven control must be reset. Installation Instructions Consumer Support Troubleshooting Tips 22 - Hotpoint RGB745DEP | Installation Instructions - Page 23
until the display shows SF. Touch the Bake pad. A two digit number shows in the display. The oven temperature can be adjusted up to (+) 35°F hotter or (-) 35°F cooler. Touch the + pad to increase at least 70% vegetable oil. Installation Instructions Troubleshooting Tips Consumer Support 23 - Hotpoint RGB745DEP | Installation Instructions - Page 24
extremely sensitive to the fumes given off during the self-cleaning cycle of any range. Move birds to another well-ventilated room. Installation Instructions Consumer Support Troubleshooting Tips How to Set the Oven for Cleaning Follow the directions in the Before a Clean Cycle section. If your - Hotpoint RGB745DEP | Installation Instructions - Page 25
latch handle to the left as far as it will go and open the door. If your range does not have a latch, the door will unlock automatically. Installation Instructions Troubleshooting Tips Consumer Support To Stop a Clean Cycle Touch the Clear/Off pad. When the Self Clean light goes off indicating - Hotpoint RGB745DEP | Installation Instructions - Page 26
Instructions Safety Instructions Care and cleaning of the range. Be sure electrical power is off and all surfaces are cool before cleaning any part of the range. WARNING: If your range is removed for cleaning, servicing griddle. Installation Instructions Consumer Support Troubleshooting Tips 26 - Hotpoint RGB745DEP | Installation Instructions - Page 27
to clean. The electrodes are not removable. CAUTION: Do not operate the cooktop without all burner parts and grates in place. The oval center burner head and cap assembly (on some models) can you to knock over hot cookware. Installation Instructions Troubleshooting Tips Consumer Support 27 - Hotpoint RGB745DEP | Installation Instructions - Page 28
burner head and cap Front of range Large burner head and cap Make sure the slot in the burner head is positioned over the electrode. Slot Slot Electrode Make sure that the heads and caps are replaced in the correct locations. Installation Instructions Consumer Support Troubleshooting Tips 28 - Hotpoint RGB745DEP | Installation Instructions - Page 29
purchasing stainless steel appliance cleaner or polish, or to find the location of a dealer nearest you, please call our toll-free number: National Parts Center 800.626.2002 (U.S.) 800.661.1616 (Canada) GEAppliances.com (U.S.) www.GEAppliances.ca (Canada) Troubleshooting Tips Consumer Support 29 - Hotpoint RGB745DEP | Installation Instructions - Page 30
can concentrate heat at the bottom of the oven, resulting in poor baking performance. To clean up spillovers, use soap and water, an abrasive cleaner or soap-filled scouring pad. Rinse well to remove any soap before self-cleaning. Installation Instructions Consumer Support Troubleshooting Tips 30 - Hotpoint RGB745DEP | Installation Instructions - Page 31
the front of the drawer up and free of the range. To replace storage drawer: Set the stops on the back of the drawer over the stops in the range. Slide drawer evenly and straight back, so that the rails in the range are engaged. Installation Instructions Troubleshooting Tips Consumer Support 31 - Hotpoint RGB745DEP | Installation Instructions - Page 32
oven door and at the bottom of the range damage the gas valve shaft. in a dishwasher or they parts can be cleaned with soap and water. Do not use steel wool, abrasives, ammonia, acids or commercial oven cleaners. Dry with a soft cloth. Installation Instructions Consumer Support Troubleshooting - Hotpoint RGB745DEP | Installation Instructions - Page 33
, the wire holds the cover firmly. Be certain the wire is in the depression in the center of the cover. Connect electrical power to the range. Installation Instructions Troubleshooting Tips Consumer Service 33 - Hotpoint RGB745DEP | Installation Instructions - Page 34
Be sure to leave these instructions with the Consumer. • Note to Consumer - Keep these instructions for future reference. • Note - This appliance must be properly grounded. • Servicer - The electrical diagram is in an envelope attached to the back of the range. • Skill level - Installation of this - Hotpoint RGB745DEP | Installation Instructions - Page 35
BE LESS THAN 24 INCHES. EXCEPTION: Installation of a listed microwave oven or cooking appliance over the cooktop shall conform to the installation instructions packed with that appliance. ■ If cabinets are placed above the range, allow a minimum clearance of 30" between the cooking surface and - Hotpoint RGB745DEP | Installation Instructions - Page 36
Installation Instructions DIMENSIONS AND CLEARANCES Provide adequate clearances between the range and adjacent combustible surfaces. These dimensions must be met for safe use of your range. The location of the electrical outlet and pipe opening (see Gas Pipe and Electric Outlet Locations) may be - Hotpoint RGB745DEP | Installation Instructions - Page 37
(up to 200°F) by the range. (See the Installation Safety Instructions section.) IMPORTANT! Remove all tape and packaging. Make sure the burners are properly seated and level. Take the accessory pack out of the oven and/or drawer. Check to be sure that no range parts have come loose during shipping - Hotpoint RGB745DEP | Installation Instructions - Page 38
manifold must remain in the supply line regardless of whether natural or LP gas is being used. A flexible metal appliance connector used to connect the range to the gas supply line should have an I.D. of 1/2" and be 5 feet in length for ease of installation. In Canada, flexible connectors must be - Hotpoint RGB745DEP | Installation Instructions - Page 39
Installation Instructions GAS PIPE AND ELECTRICAL OUTLET LOCATIONS This area allows for flush range installation with through-the-wall connection of pipe stub/shut-off valve and rear wall 120V outlet. Shortest connection from hard pipe stub location to range hookup. This area allows for flush range - Hotpoint RGB745DEP | Installation Instructions - Page 40
Installation Instructions FLEXIBLE CONNECTOR HOOKUP Pressure regulator Adapter Installer: Inform the consumer of the location of the gas shut-off valve. 1/2" or 3/4"" Gas pipe Gas Flow into Range Flex connector (6 ft. max.) Adapter Gas shut-off valve RIGID PIPE HOOKUP OPTIONS 45° Elbow Gas - Hotpoint RGB745DEP | Installation Instructions - Page 41
Instructions , 3-wire grounding-type appliance extension cord and that or recommended for gas range receptacles. Ground Fault manually reset by the consumer. The National Electrical Code requires the use of GFCI's in kitchen receptacles installed to serve countertop surfaces. Performance of the range - Hotpoint RGB745DEP | Installation Instructions - Page 42
Installation Instructions 3 ELECTRICAL CONNECTIONS (CONT.) B. Usage Situations where Appliance Power Cord will be the wall behind the range and in the floor under the range when hookups are completed. 5 ASSEMBLE SURFACE BURNERS CAUTION: Do not operate the burner without all burner parts in place. A - Hotpoint RGB745DEP | Installation Instructions - Page 43
Instructions 6 CHECK IGNITION OF SURFACE BURNERS Operation of all cooktop and oven burners should be checked after the range and gas Yellow flames- Call for service 7 CHECK IGNITION OF OVEN BURNER The oven is designed to operate quietly and automatically. To operate the oven, press the Bake - Hotpoint RGB745DEP | Installation Instructions - Page 44
Installation Instructions 8 ADJUST BROIL AND OVEN BURNER AIR ADJUSTMENT SHUTTERS IF NECESSARY Air properly, remove the oven bottom. Flames should have approximately 1" blue cones and, if range is supplied with natural gas, should burn with no yellow tipping. (With most LP gas, small yellow tips - Hotpoint RGB745DEP | Installation Instructions - Page 45
is unobstructed. CONVERTING TO LP GAS (or converting back to natural gas from LP) This range leaves the factory set for use with natural gas. If you want to convert to LP gas, the conversion must be performed by a qualified LP gas installer. The conversion instructions and LP orifices can be found - Hotpoint RGB745DEP | Installation Instructions - Page 46
Instructions Before you call for service... Troubleshooting Tips Save time and money! Review the charts on the following pages first and you may not need to call for service. Problem Top burners do not light or do not burn evenly Burner flames very large or yellow Surface burners light but oven - Hotpoint RGB745DEP | Installation Instructions - Page 47
Safety Instructions Operating Instructions GEAppliances.com Installation Instructions Problem Food does not bake or roast properly Possible Causes Oven controls improperly set. Rack position is incorrect. Incorrect cookware or cookware of improper size being used. Oven thermostat needs - Hotpoint RGB745DEP | Installation Instructions - Page 48
. • Touch the Clear/Off pad. Allow the oven to cool for one hour. Put the oven back into operation. • Disconnect all power to the range for 5 minutes and then reconnect power. If the function error code repeats, call for service. Installation Instructions Consumer Support Troubleshooting Tips 48 - Hotpoint RGB745DEP | Installation Instructions - Page 49
is over-loaded or load is unbalanced. • Fully extend the drawer and push it all the way in. See the Care and cleaning of the range section. • Reduce weight. Redistribute drawer contents. Installation Instructions Troubleshooting Tips Consumer Support 49 - Hotpoint RGB745DEP | Installation Instructions - Page 50
ready. Installation Instructions Consumer Support Troubleshooting Tips Grates Surface Burners & Caps Oven Racks Broiler Pan oven racks? NOW AVAILABLE for your range: GE's innovative, self-cleanable porcelain-coated oven racks! • Heavy Duty • Durable • Able to be cleaned in a self-cleaning oven - Hotpoint RGB745DEP | Installation Instructions - Page 51
Please place in envelope and mail to: Veuillez mettre dans une enveloppe et envoyez à : OWNERSHIP REGISTRATION P.O. BOX 1780 MISSISSAUGA, ONTARIO L4Y 4G1 (FOR CANADIAN CONSUMERS ONLY) 51 - Hotpoint RGB745DEP | Installation Instructions - Page 52
52 - Hotpoint RGB745DEP | Installation Instructions - Page 53
Notes. GEAppliances.com Safety Instructions Operating Instructions Installation Instructions Troubleshooting Tips Consumer Support 53 - Hotpoint RGB745DEP | Installation Instructions - Page 54
Instructions Safety Instructions GE Gas Range Warranty. (For customers in the United States) All warranty service provided by our Factory Service Centers or an authorized Customer Care® technician. To schedule service , KY 40225 Installation Instructions Consumer Support Troubleshooting Tips 54 - Hotpoint RGB745DEP | Installation Instructions - Page 55
Instructions Operating Instructions GE Gas Range Warranty. (For customers in Canada) All warranty service provided by our Factory Service Centres or an authorized Customer Care® technician. To schedule service Burlington, Ontario Installation Instructions Troubleshooting Tips Consumer Support 55 - Hotpoint RGB745DEP | Installation Instructions - Page 56
Consumer Support. GE Appliances Website In the U.S.: GEAppliances.com Have a question or need assistance with your appliance? Try the GE Appliances Website 24 hours a day, any day of the year! For greater convenience and faster service, you can now download Owner's Manuals, order parts or even
-
 1
1 -
 2
2 -
 3
3 -
 4
4 -
 5
5 -
 6
6 -
 7
7 -
8
-
9
-
10
-
11
-
12
-
13
-
14
-
15
-
16
-
17
-
18
-
19
-
20
-
21
-
22
-
23
-
24
-
25
-
26
-
27
-
28
-
29
-
30
-
31
-
32
-
33
-
34
-
35
-
36
-
37
-
38
-
39
-
40
-
41
-
42
-
43
-
44
-
45
-
46
-
47
-
48
-
49
-
50
-
51
-
52
-
53
-
54
-
55
-
56
 |
 |

183D5580P243
49-85161
01-09 JR
GEAppliances.com
Write the model and serial
numbers here:
Model #
____________________
Serial #______________________
You can find them on a label on
the front of the range behind the
storage drawer or kick panel.
Safety Instructions
. . . . . .2–7
Operating Instructions
Aluminum Foil
. . . . . . . . . . . . . . . .15
Clock and Timer . . . . . . . . . . .17, 18
Oven . . . . . . . . . . . . . . . . . . . . . .12–25
Baking and Roasting
. . . . . . . .15
Broiling, Broiling Guide . . . . . . .16
Oven Control . . . . . . . . . . . . .12, 13
Power Outage
. . . . . . . . . . .14, 18
Preheating . . . . . . . . . . . . . . . . . . .15
Sabbath Feature . . . . . . . . .21, 22
Self-Cleaning . . . . . . . . . . . . .24, 25
Special Features . . . . . . . . . . . . .20
Thermostat Adjustment
. . . . .23
Timed Baking
and Roasting . . . . . . . . . . . . . . . .19
Surface Cooking . . . . . . . . . . . . .8, 9
Griddle . . . . . . . . . . . . . . . . . . .10, 11
Care and Cleaning
Burner Assembly . . . . . . . . . .27–29
Burner Grates . . . . . . . . . . . . . . . . .29
Control Panel and Knobs
. . . . .32
Cooktop Surface . . . . . . . . . . . . . .29
Door Removal . . . . . . . . . . . . . . . . .30
Griddle . . . . . . . . . . . . . . . . . . . . . . . .26
Kick Panel . . . . . . . . . . . . . . . . . . . . .31
Oven Bottom
. . . . . . . . . . . . . . . . .30
Oven Light Replacement . . . . . .33
Oven Vents
. . . . . . . . . . . . . . . . . . .32
Self-Cleaning . . . . . . . . . . . . . .24, 25
Racks . . . . . . . . . . . . . . . . . . . . . . . . .33
Stainless Steel Surfaces . . . . . . .29
Storage Drawer . . . . . . . . . . . . . . .31
Installation
Instructions
. . . . . . . . . . . .34–45
Air Adjustment . . . . . . . . . . . . . . . .44
Anti-Tip Device . . . . . . . . . . . .37, 45
Checking Burner Ignition . . . . . .43
Connecting the Range
to Gas
. . . . . . . . . . . . . . . . . . . .38–40
Dimensions and Clearances . .36
Electrical Connections . . . . .41, 42
Leveling the Range
. . . . . . . . . . .44
Location
. . . . . . . . . . . . . . . . . . . . . .37
LP . . . . . . . . . . . . . . . . . . . . . . . . . . . . .45
Troubleshooting
Tips
. . . . . . . . . . . . . . . . . . . . . .46–49
Accessories
. . . . . . . . . . . . . . . .50
Consumer Support
Consumer
Support . . . . . . . . . . . . . .Back Cover
Ownership Registration
for Customers in
Canada only
. . . . . . . . . . .51, 52
Warranty for Customers
in Canada . . . . . . . . . . . . . . . . . . . . .55
Warranty for Customers
in the U.S.A.
. . . . . . . . . . . . . . . . . .54
Ranges
JGBP36
JGBP86
JGBP87
RGB735
RGB740
RGB745
RGB746
RGB790
Owner’s Manual
& Installation
Instructions
Self-Cleaning Gas
In Canada contact us at:
www.GEAppliances.ca