Hunter 20772 Owner's Manual
Hunter 20772 Manual
 |
View all Hunter 20772 manuals
Add to My Manuals
Save this manual to your list of manuals |
Hunter 20772 manual content summary:
- Hunter 20772 | Owner's Manual - Page 1
For Your Records and Warranty Assistance For reference, also attach your receipt or a copy of your receipt to the manual. Model Name Model No. Date Purchased Where Purchased Type 2A Models Owner's Guide and Installation Manual English Español Form# 42823-01 20100217 ©2010 Hunter Fan Co. - Hunter 20772 | Owner's Manual - Page 2
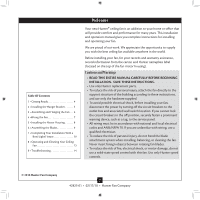
and Cleaning Your Ceiling Fan 13 9 • Troubleshooting 14 Welcome Your new Hunter® ceiling fan is an addition to your home or office that will provide comfort and performance for many years. This installation and operation manual gives you complete instructions for installing and operating your fan - Hunter 20772 | Owner's Manual - Page 3
each product. For quiet and optimum performance of your Hunter fan, use only Hunter speed controls. CAUTION: To reduce the risk of personal injury, attach the fan directly to the support structure of the building according to these instructions, and use only the hardware supplied. 3 42823-01 - Hunter 20772 | Owner's Manual - Page 4
included Parts Guide. Check for any shipping damage to the motor or fan blades. If any parts are missing or damaged, contact your Hunter dealer or call Hunter Technical Support Department at 888-830-1326. Preparing the Fan Site Before you begin installing the fan, follow all the instructions in the - Hunter 20772 | Owner's Manual - Page 5
fasten a prominent warning device, such as a tag, to the service panel. 2-1. Drill two pilot holes into the wood support structure through the outermost holes in the outlet box. The pilot Washer 3" Wood Screw 5 42823-01 • 02/17/10 • Hunter Fan Company Step 2-2 Canopy Screw Step 2-3 Steps 2-4 - 2-6 - Hunter 20772 | Owner's Manual - Page 6
of the metal bracket to secure the square hanger. Green Ground Wire Step 3-3 Green Ground Wire #8-32 x 1" Screw Locking Screw 6 42823-01 • 02/17/10 • Hunter Fan Company - Hunter 20772 | Owner's Manual - Page 7
4 •Wiring the Fan All wiring must be in accordance with national and local electrical codes and ANSI/NFPA 70. If you are unfamiliar with wiring, use a qualified electrician. 4-1. Disconnect ceiling plate hole into the outlet box. Step 4-3 Wire Connector 7 42823-01 • 02/17/10 • Hunter Fan Company - Hunter 20772 | Owner's Manual - Page 8
in the fan housing and into the hanger bracket. Securely tighten all screws. Step 5-1 Motor Fan Housing Step 5-3 Canopy Screw 8 42823-01 • 02/17/10 • Hunter Fan Company - Hunter 20772 | Owner's Manual - Page 9
6 • Assembling the Blades Hunter fans use several styles of fan blade irons (brackets that hold the blade to the fan). 6-1. Your fan may Grommet Use with grommet Blade Assembly Screws Steps 6-1 - 6-2 Use without grommet Blade Mounting Screw Step 6-4 9 42823-01 • 02/17/10 • Hunter Fan Company - Hunter 20772 | Owner's Manual - Page 10
7 • Completing Your Installation With a Bowl Light Fixture Your Hunter fan comes with an integrated light fixture assembly. WARNING: Use only the light fixture supplied with this falling. Steps 7-1 - 7-3 Housing Assembly Screw Upper Switch Housing 10 42823-01 • 02/17/10 • Hunter Fan Company - Hunter 20772 | Owner's Manual - Page 11
switch housing with three housing assembly screws. Steps 7-5 - 7-6 Lower Switch Housing Plug Connector Plug Connector Detail Housing Assembly Screw 11 42823-01 • 02/17/10 • Hunter Fan Company - Hunter 20772 | Owner's Manual - Page 12
.) Light Bulbs (B10 Candelabra Base 60 Watt Maximum) Metal Rod Metal Disk Breakaway Connector Glass Bowl Cover Plate Finial 12 42823-01 • 02/17/10 • Hunter Fan Company - Hunter 20772 | Owner's Manual - Page 13
, use downward air flow pattern In cold weather, use upward air flow pattern To Change Airflow Direction Turn the fan off and let it come to a complete stop. Slide the reversing switch on the fan to the opposite position. Restart fan. Reversing Switch 13 42823-01 • 02/17/10 • Hunter Fan Company - Hunter 20772 | Owner's Manual - Page 14
• Troubleshooting Problem: enclosed balancing kit and instructions to balance the fan. 2. Tighten all blade and/or blade iron screws. Problem: Lights dim when turned parts or service assistance, please call 888‑830‑1326 or visit us at our Web site at http://www.hunterfan.com. Hunter Fan Company
-
 1
1 -
 2
2 -
 3
3 -
 4
4 -
 5
5 -
 6
6 -
 7
7 -
8
-
9
-
10
-
11
-
12
-
13
-
14
 |
 |

Type 2A Models
Type 2A Models
Type 2A Models
Form# 42823-01
20100217
©2010 Hunter Fan Co.
For Your Records and
Warranty Assistance
For reference, also attach your receipt or a copy
of your receipt to the manual.
__________________________________________
Model Name
__________________________________________
Model No.
__________________________________________
Date Purchased
__________________________________________
Where Purchased
English
Owner’s Guide and Installation Manual
Español