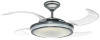
Hunter 21425 Owner's Manual
Hunter 21425 Manual
 |
View all Hunter 21425 manuals
Add to My Manuals
Save this manual to your list of manuals |
Hunter 21425 manual content summary:
- Hunter 21425 | Owner's Manual - Page 1
For Your Records and Warranty Assistance For reference, also attach your receipt or a copy of your receipt to the manual. Model Name Model No. Date Purchased Where Purchased Type 3 Models Owner's Guide and Installation Manual English Español Form# 45062-01 20090701 ©2009 Hunter Fan Co. - Hunter 21425 | Owner's Manual - Page 2
and Cleaning Your Ceiling Fan 13 10 • Troubleshooting 14 Welcome Your new Hunter® ceiling fan is an addition to your home or office that will provide comfort and performance for many years. This installation and operation manual gives you complete instructions for installing and operating - Hunter 21425 | Owner's Manual - Page 3
the instructions included with each product. For quiet and optimum performance of your Hunter fan, use only Hunter speed controls. Support Brace Angled Mounting Style Ceiling Outlet Box 8 12 For ceilings higher than 8 feet, you can purchase Hunter extension downrods. All Hunter fans use sturdy - Hunter 21425 | Owner's Manual - Page 4
, contact your Hunter dealer or call Hunter Technical Support Department at 888-830-1326. (In Canada, call 866-268-1936). Preparing the Fan Site Before you begin installing the fan, follow all the instructions in the pullout sheet called "Preparing the Fan Site." Proper ceiling fan location and - Hunter 21425 | Owner's Manual - Page 5
wood support structure. For proper alignment use slotted holes directly across from each other. If you are installing the fan on an ANGLED ceiling, be Ceiling Peak Large Opening OR Steps 2-2 - 2-4 Ceiling Peak Large Opening LEFT Step 2-3 (Angled Ceiling Only) 5 45062-01 • 07/01/09 • Hunter Fan - Hunter 21425 | Owner's Manual - Page 6
the fan until you hear the notch pop into place.) Go to 4 • Setting the Remote Transmitter and Receiver. WARNING: Fan may fall if not assembled as directed in these installation instructions. Steps 3-4 - 3-5 Downrod Canopy Canopy Trim Ring Setscrew Indent 6 45062-01 • 07/01/09 • Hunter Fan - Hunter 21425 | Owner's Manual - Page 7
interference that may cause undesired operation. WARNING: Use only the Hunter Fan speed control supplied with this fan. 4-4. Raise the fan and align the slots in the canopy with the hooks on the ceiling plate. Note: To hang the fan, you must tilt the canopy to an almost vertical position so - Hunter 21425 | Owner's Manual - Page 8
ceiling to the • Receiver Black: "LIVE IN" C • Ceiling White • Receiver White: "NEUTRAL IN" black wire (ungrounded) from the receiver (marked on red tag "LIVE IN") Step 5-5 5-5. Using the small wire connectors, connect the wires from the fan as D • Fan the fan to the ceiling plate into - Hunter 21425 | Owner's Manual - Page 9
canopy trim ring counter clockwise until it releases from canopy. Hanger Bracket Canopy Trim Ring Step 6-4 Step 6-3 Step 6-5 Canopy Screw 9 45062-01 • 07/01/09 • Hunter Fan Company - Hunter 21425 | Owner's Manual - Page 10
7 • Completing Your Installation With a Light Fixture Your Hunter fan comes with an integrated light fixture assembly. Light Kit Mounting WARNING: Use only the light fixture supplied with this fan model. Plate 7-1. To attach the light kit top housing, partially install two housing assembly - Hunter 21425 | Owner's Manual - Page 11
light kit top housing. 7-8. Rotate the globe clockwise until tight. Spring Clamp Steps 7-5 - 7-6 Circline Bulb Slot Bolt Steps 7-7 - 7-8 Globe 11 45062-01 • 07/01/09 • Hunter Fan Company Detail - Hunter 21425 | Owner's Manual - Page 12
holder to any toggle switch plate with the screws already in the switch plate. Or, you can simply mount the remote holder on the wall. Fan Speed Medium Fan Off Fan Light Steps 8-1 - 8-2 12 45062-01 • 07/01/09 • Hunter Fan Company Step 8-4 - Hunter 21425 | Owner's Manual - Page 13
9 • Operating and Cleaning Your Ceiling Fan 9-1. Turn on electrical power to the fan. 9-2. The remote controls power to the fan. The fan has four settings in sequence: High, Medium, Low and Off. 9-3. high-gloss blades in the same manner as the fan finish. 13 45062-01 • 07/01/09 • Hunter Fan Company - Hunter 21425 | Owner's Manual - Page 14
off, support fan very carefully, and check that the hanger ball is properly seated. Problem: Lights dim when turned on or do not turn on 1. Check to make sure the wattage and type of light bulbs installed match the specifications on the light socket. If you need parts or service assistance, please
-
 1
1 -
 2
2 -
 3
3 -
 4
4 -
 5
5 -
 6
6 -
 7
7 -
8
-
9
-
10
-
11
-
12
-
13
-
14
 |
 |

Type 3 Models
Type 3 Models
Type 3 Models
Form# 45062-01
20090701
©2009 Hunter Fan Co.
For Your Records and
Warranty Assistance
For reference, also attach your receipt or a copy
of your receipt to the manual.
__________________________________________
Model Name
__________________________________________
Model No.
__________________________________________
Date Purchased
__________________________________________
Where Purchased
English
Español
Owner’s Guide and Installation Manual